

Send Email
The Send Email action delivers email from a generic email address (i.e. notifications@appuser.io). There is currently a limit of 10,000 emails per month, per team.
The Send Email action can be used as an action in the components of your app (like Buttons, Collections, and much more), or it can be triggered along with other actions as part of a Workflow.
The Send Email action supports markdown for text in the body of the message.
A paid plan is required to use this feature. Check out our pricing to find the right plan for you.
Setting up the Send Email Action
Layout Editor
Workflow Editor
In the General tab on the right side of the Layout Editor, navigate to the Actions section and select Send email.
Choose the values to add to the draft email. Each field can be filled in with a custom static value, or with dynamic values from a column in your data. You can leave a field blank if you don’t wish to use it. The To, CC, and BCC fields can all support multiple email addresses as a comma-separated list. The fields you can add values to are:
- To: The email address or addresses you want to send the message to.
- Subject: The subject of the email message. Markdown is supported.
- Body: The body text of the email message.
- CC: Send a copy of the email to someone who is not the recipient listed in the To field.
- BCC: Send a copy of the email to someone who is not the recipient listed in the To field. When using BCC, the recipients cannot view the other recipients who may be included in the BCC field, but they can view the email addresses that are included in the To and CC fields.
- Reply to: The email address that the recipient will reply to if they reply to the email they receive.
If you select the contact component, Glide will automatically display options to dial a phone number, compose SMS, and compose email. To delete any of these options that you don’t need, click on the action and then click on the delete icon. Change the compose email option to send email and configure as above.
Check the Introduction to Actions page for a full list of components that can be used to trigger actions.
Send Email Use Case
Send Email to Attendees
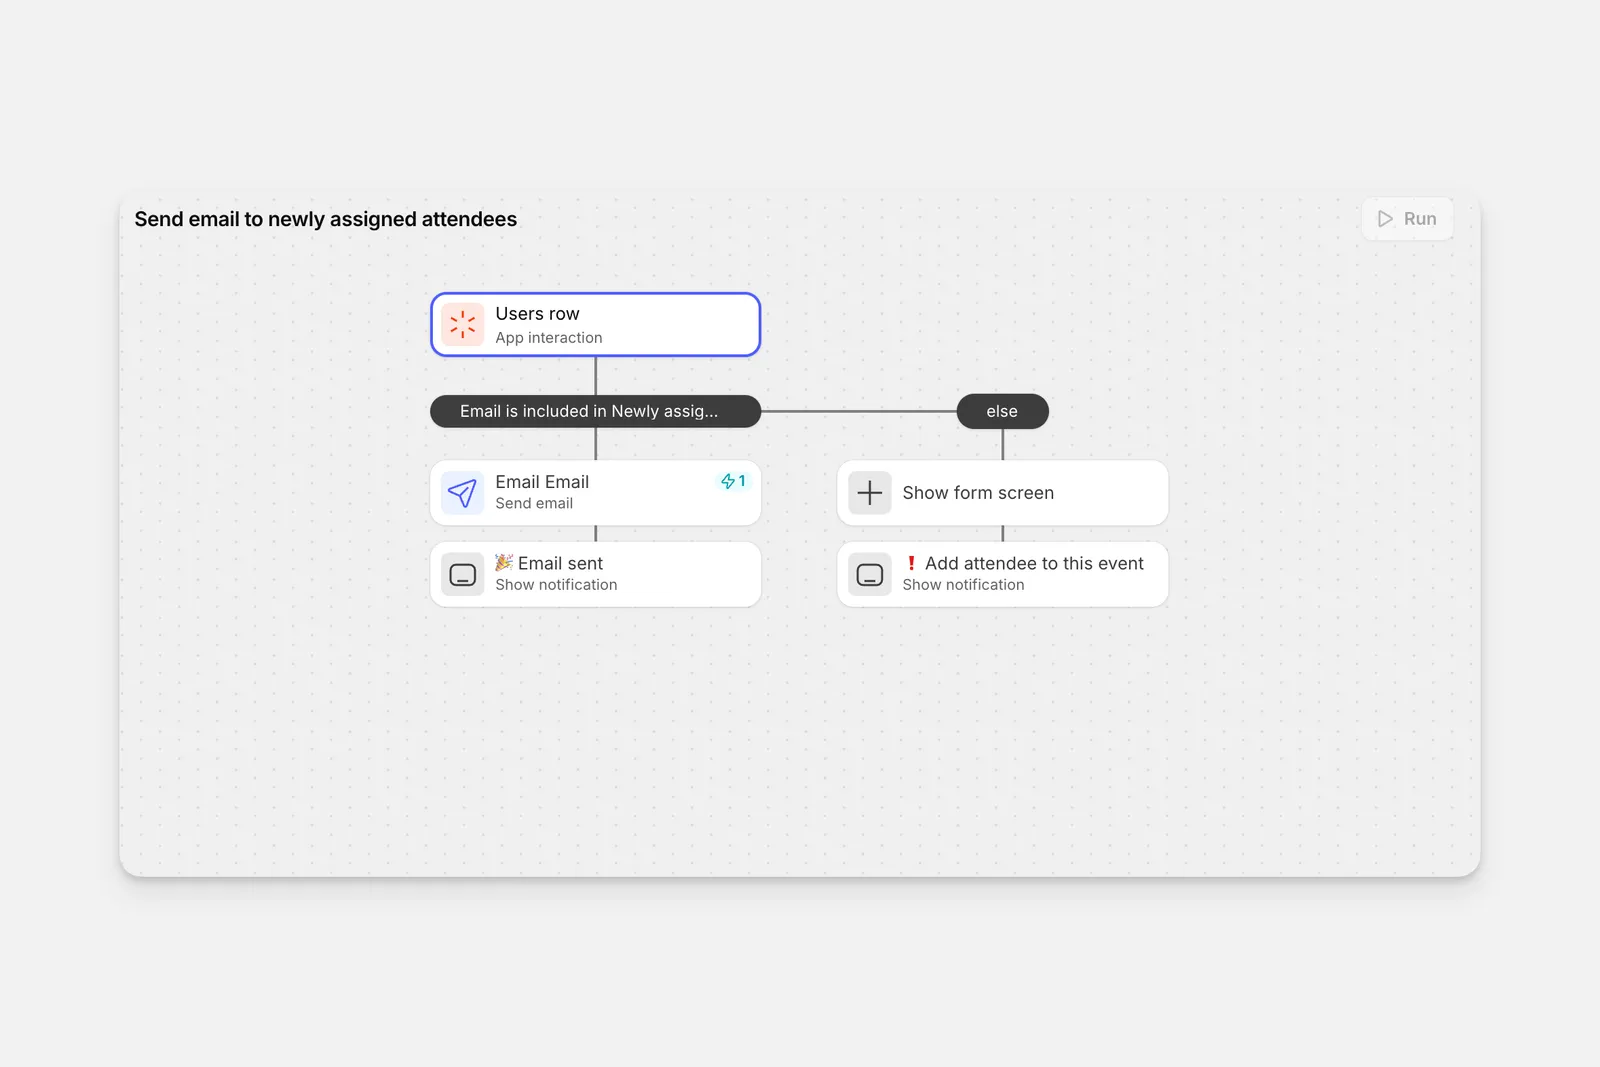
The Send Email action can be used as an action in the components of your app (like Buttons, Collections, and much more), or it can be triggered along with other actions as part of a Workflow. One thing you could do is add an action that sends an email to users that have signed up for an event. The custom action below checks if a user’s email is included in a list of event attendees. If they have signed up, they’ll receive an email when the button is pressed. If they haven’t signed up, they’ll be presented with a sign-up form for the event.
Dynamic Email
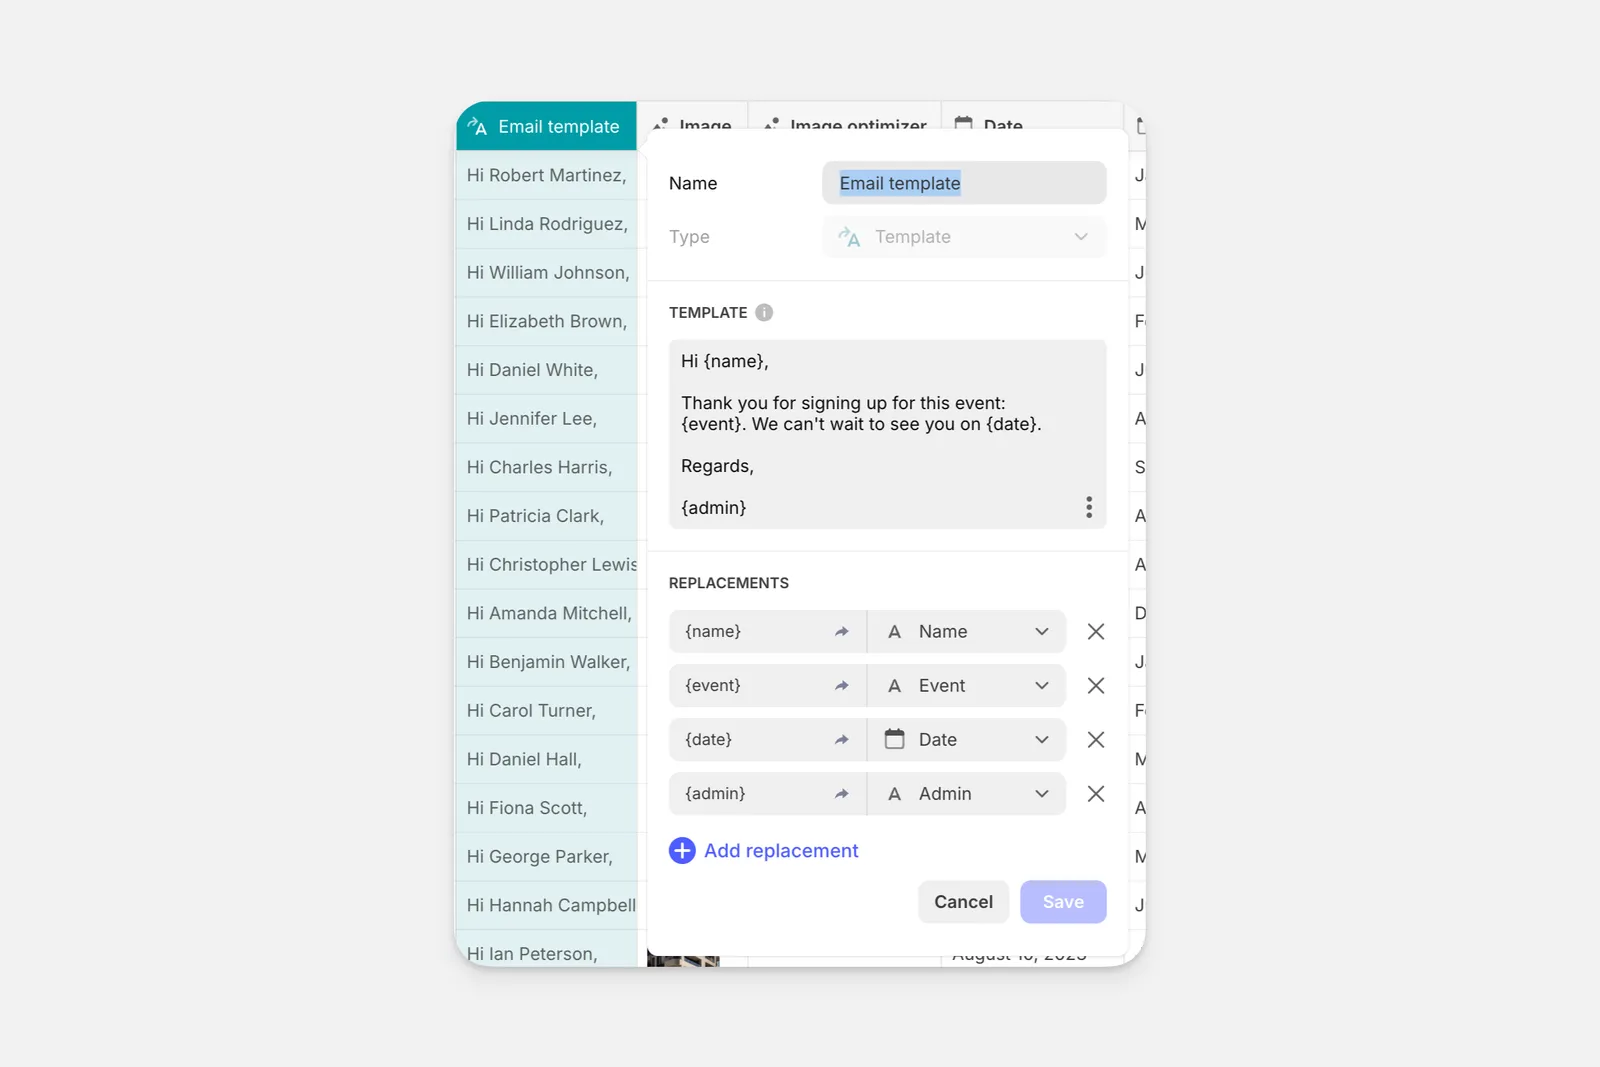
You can create a dynamic email by first creating a Template Column in the Data Editor. By using a Template Column for something like the body of an email, you can personalize the message to each user, and the values will update as your data changes. Once you’ve created a template column, you can select it as the source for the fields in your Send Email action.
Frequently Asked Questions
I am on free trial. Can I use the Send Email action?
To prevent spam and email abuse, only customers with active subscriptions can use the Send Email action. This excludes trial accounts. Customers with overdue payments are also unable to use the Send Email action.