

Slack
Slack is an instant messaging platform for business collaboration. With the Slack integration, you can send messages to channels in your workspace from a Glide app.
You may need to upgrade your plan. Browse Glide’s plans and find the right fit for you.
Adding and Configuring the Action
Find the Integrations section and then select Slack.
Sign into your Slack workspace and select Allow to approve the integration. Make sure that you are connecting the correct Slack workspace by checking the name of the workspace in the upper-right corner.
To send messages to a Slack channel, you need to first add the Glide integration to your workspace.
Send Message to Channel
The Send message to channel action is used to post a message in a channel in your Slack workspace. Just tell Glide which channel to post in and what the text of the message should be.
The action can be added to a component that supports actions (e.g., a button), added to a workflow in the Workflow Editor, or triggered after a form is submitted.
Click on the plus (+) sign in the Components panel and select the Component you want to trigger the action.
In the General tab on the right side of the Layout Editor, navigate to the Actions section and search for Send message to channel.
Slack Blocks
Slack blocks allow you to create visually structured messages that include interactive elements like text, images, and buttons. Each block type offers different content options that you can mix and match to build messages according to your needs.
This feature can be used within the “Send message to channel” action. Build the blocks you need from the Slack’s Block Kit Builder, copy the block code, and paste it into the Block field in Glide.
You can use a Template Column to create customized Slack notifications for different users.
Use Cases
Slack notifications can give your team real-time updates to what’s going on in your Glide app. Here are a few examples of businesses are leveraging Slack.
- Customer Feedback: Alert the customer service team when there is new customer feedback.
- Order Updates: Notify the operations team when an order is placed, shipped, or delivered.
- New Hire Onboarding: Send a welcome message when a new employee starts working.
- Task Assignments: Send notifications to development team when new tasks are created.
Accelerating Order Processing with Slack Notifications
StickerStar, a custom sticker design company, has seen rapid growth recently. With this expansion, they’ve faced some criticisms regarding order processing times. To address this, they’ve created a Glide app for workflow management to start automating some routine tasks.
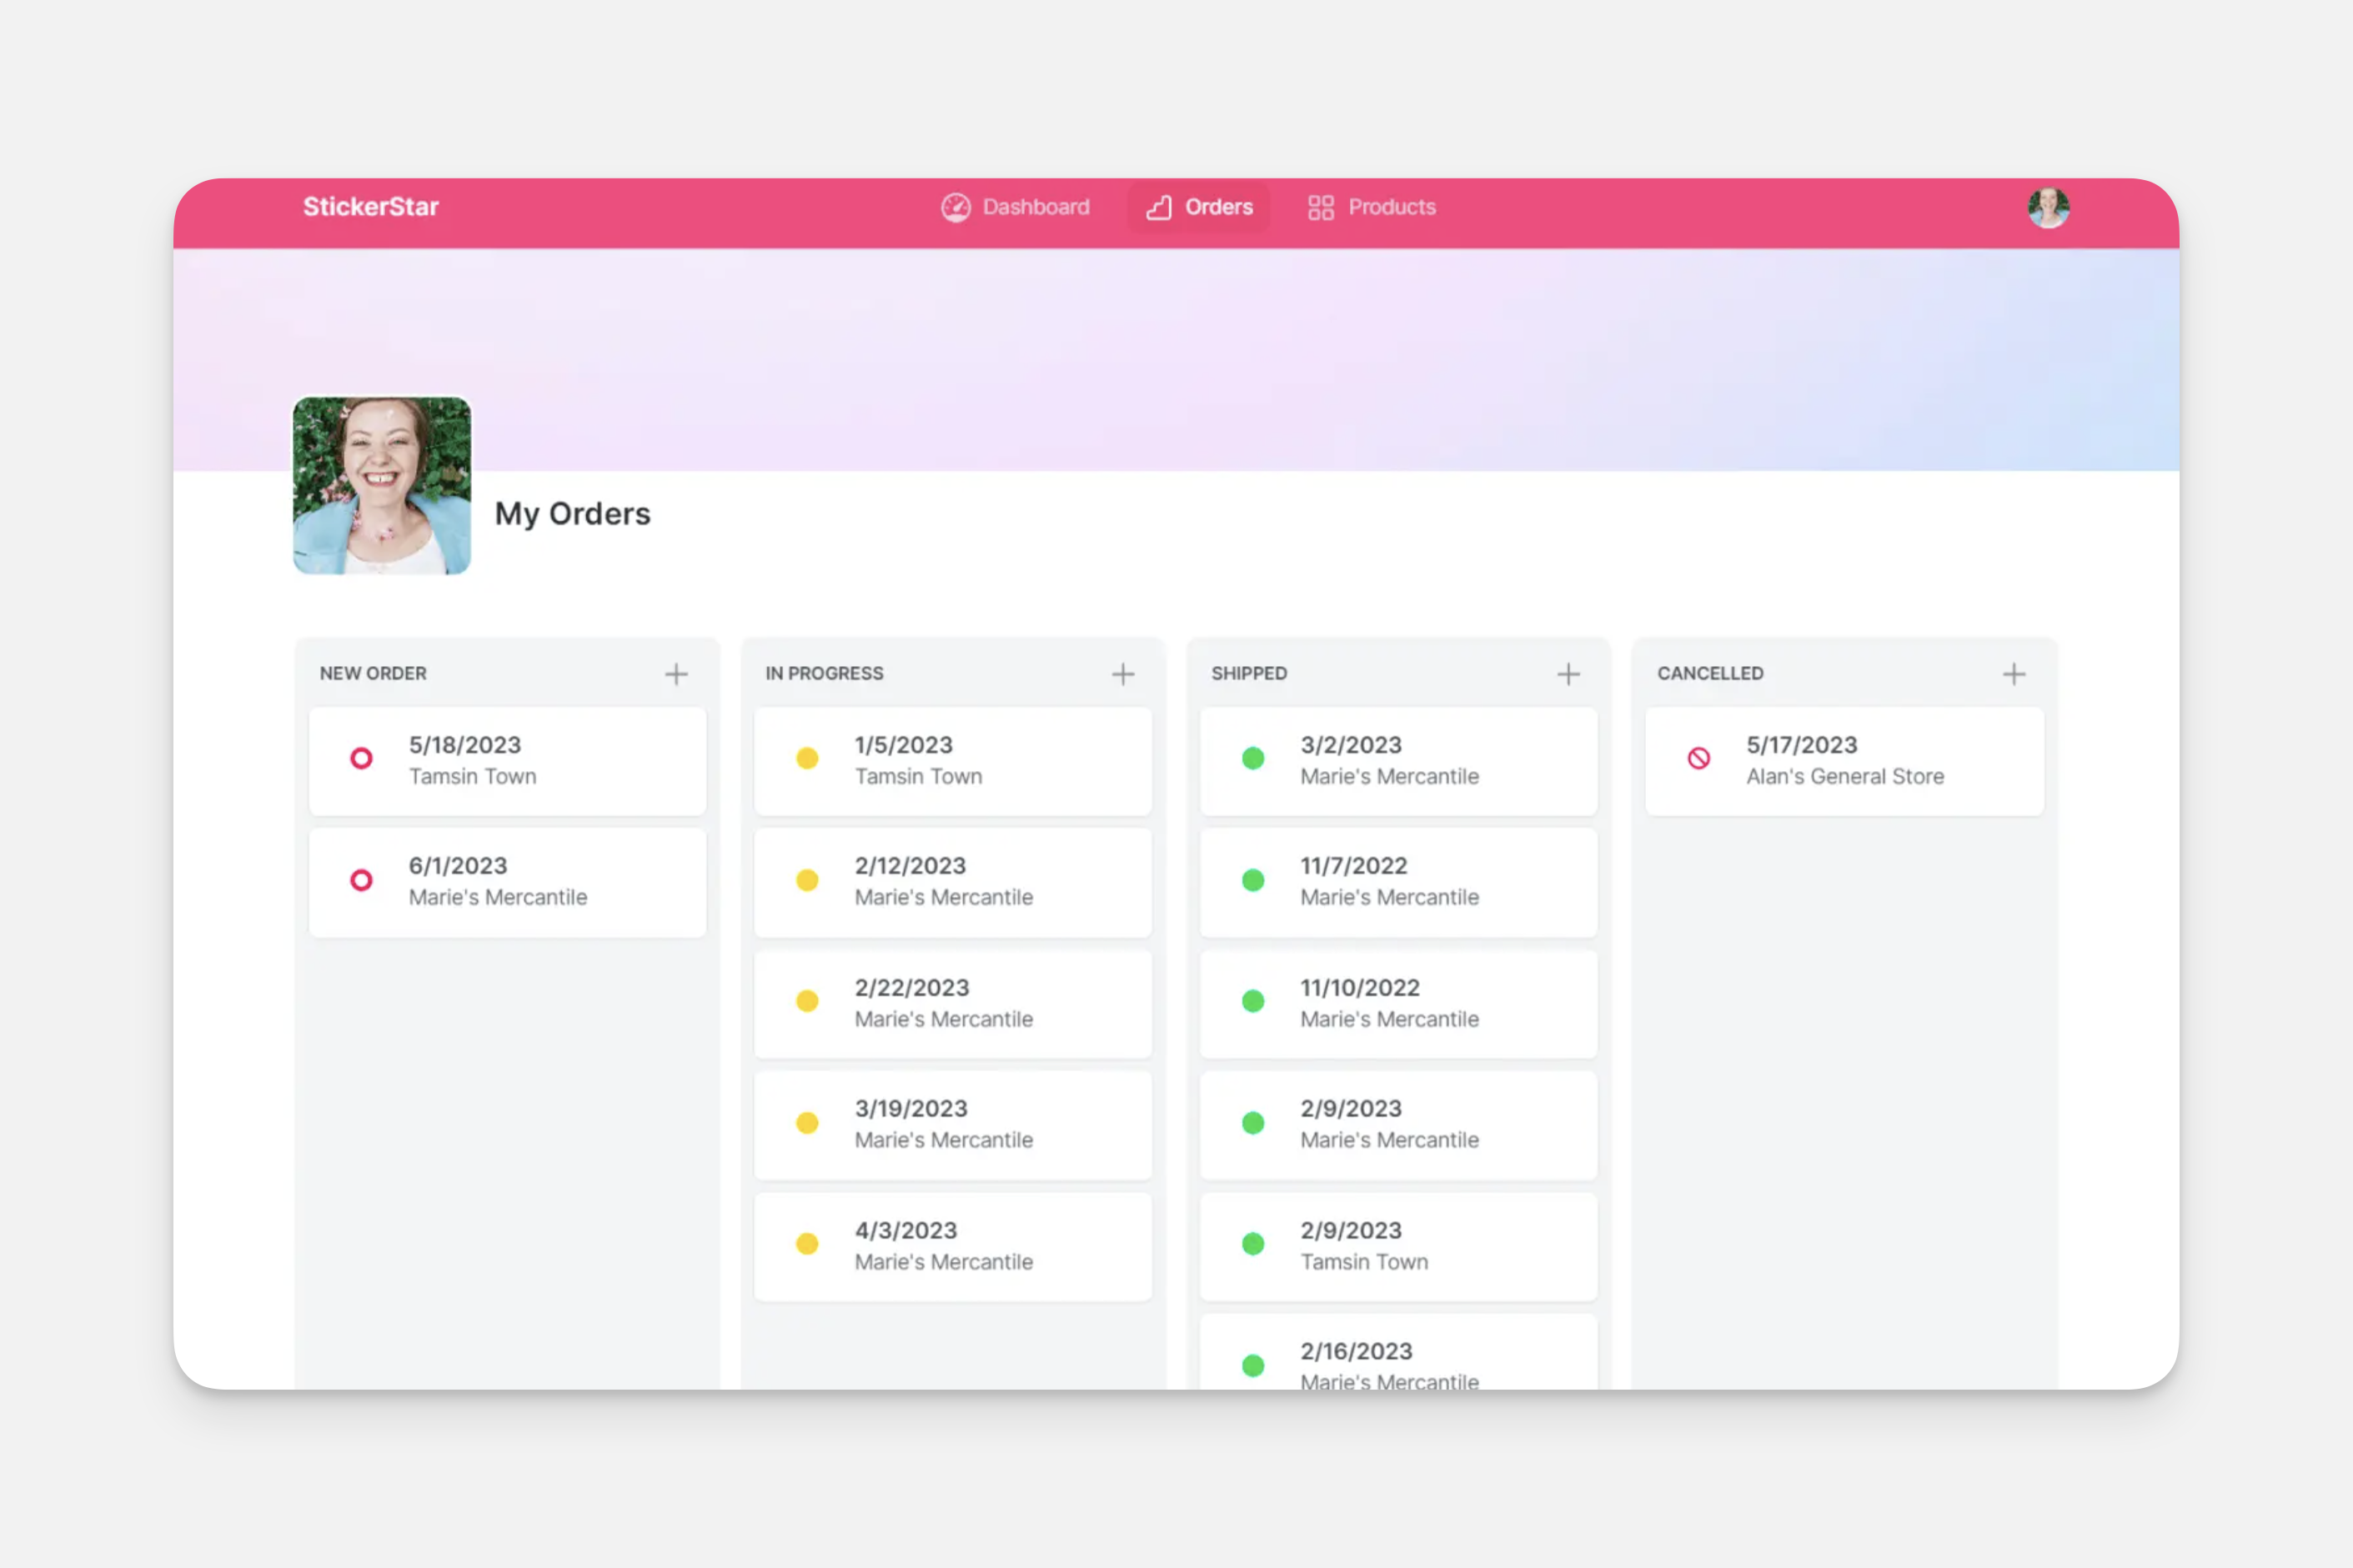
However, StickerStar wanted to further shrink the gap between an order being placed and it being processed.
Given that their team operates remotely and uses Slack for communication, it was a natural move to leverage Glide’s Slack integration. This way, they could receive an instant notification every time a new order was placed through Glide, reducing bottlenecks in communication. They’ve also used the Slack workflow builder to create workflows and add steps after messages are sent. Admins set up these custom workflows so Slack users could trigger more steps with simple actions, like emoji reactions, directly in the Slack app.
Setting Up the Slack Notification
After linking their Slack workspace with their Glide app, the next step was to get a custom action added to the sticker order form.
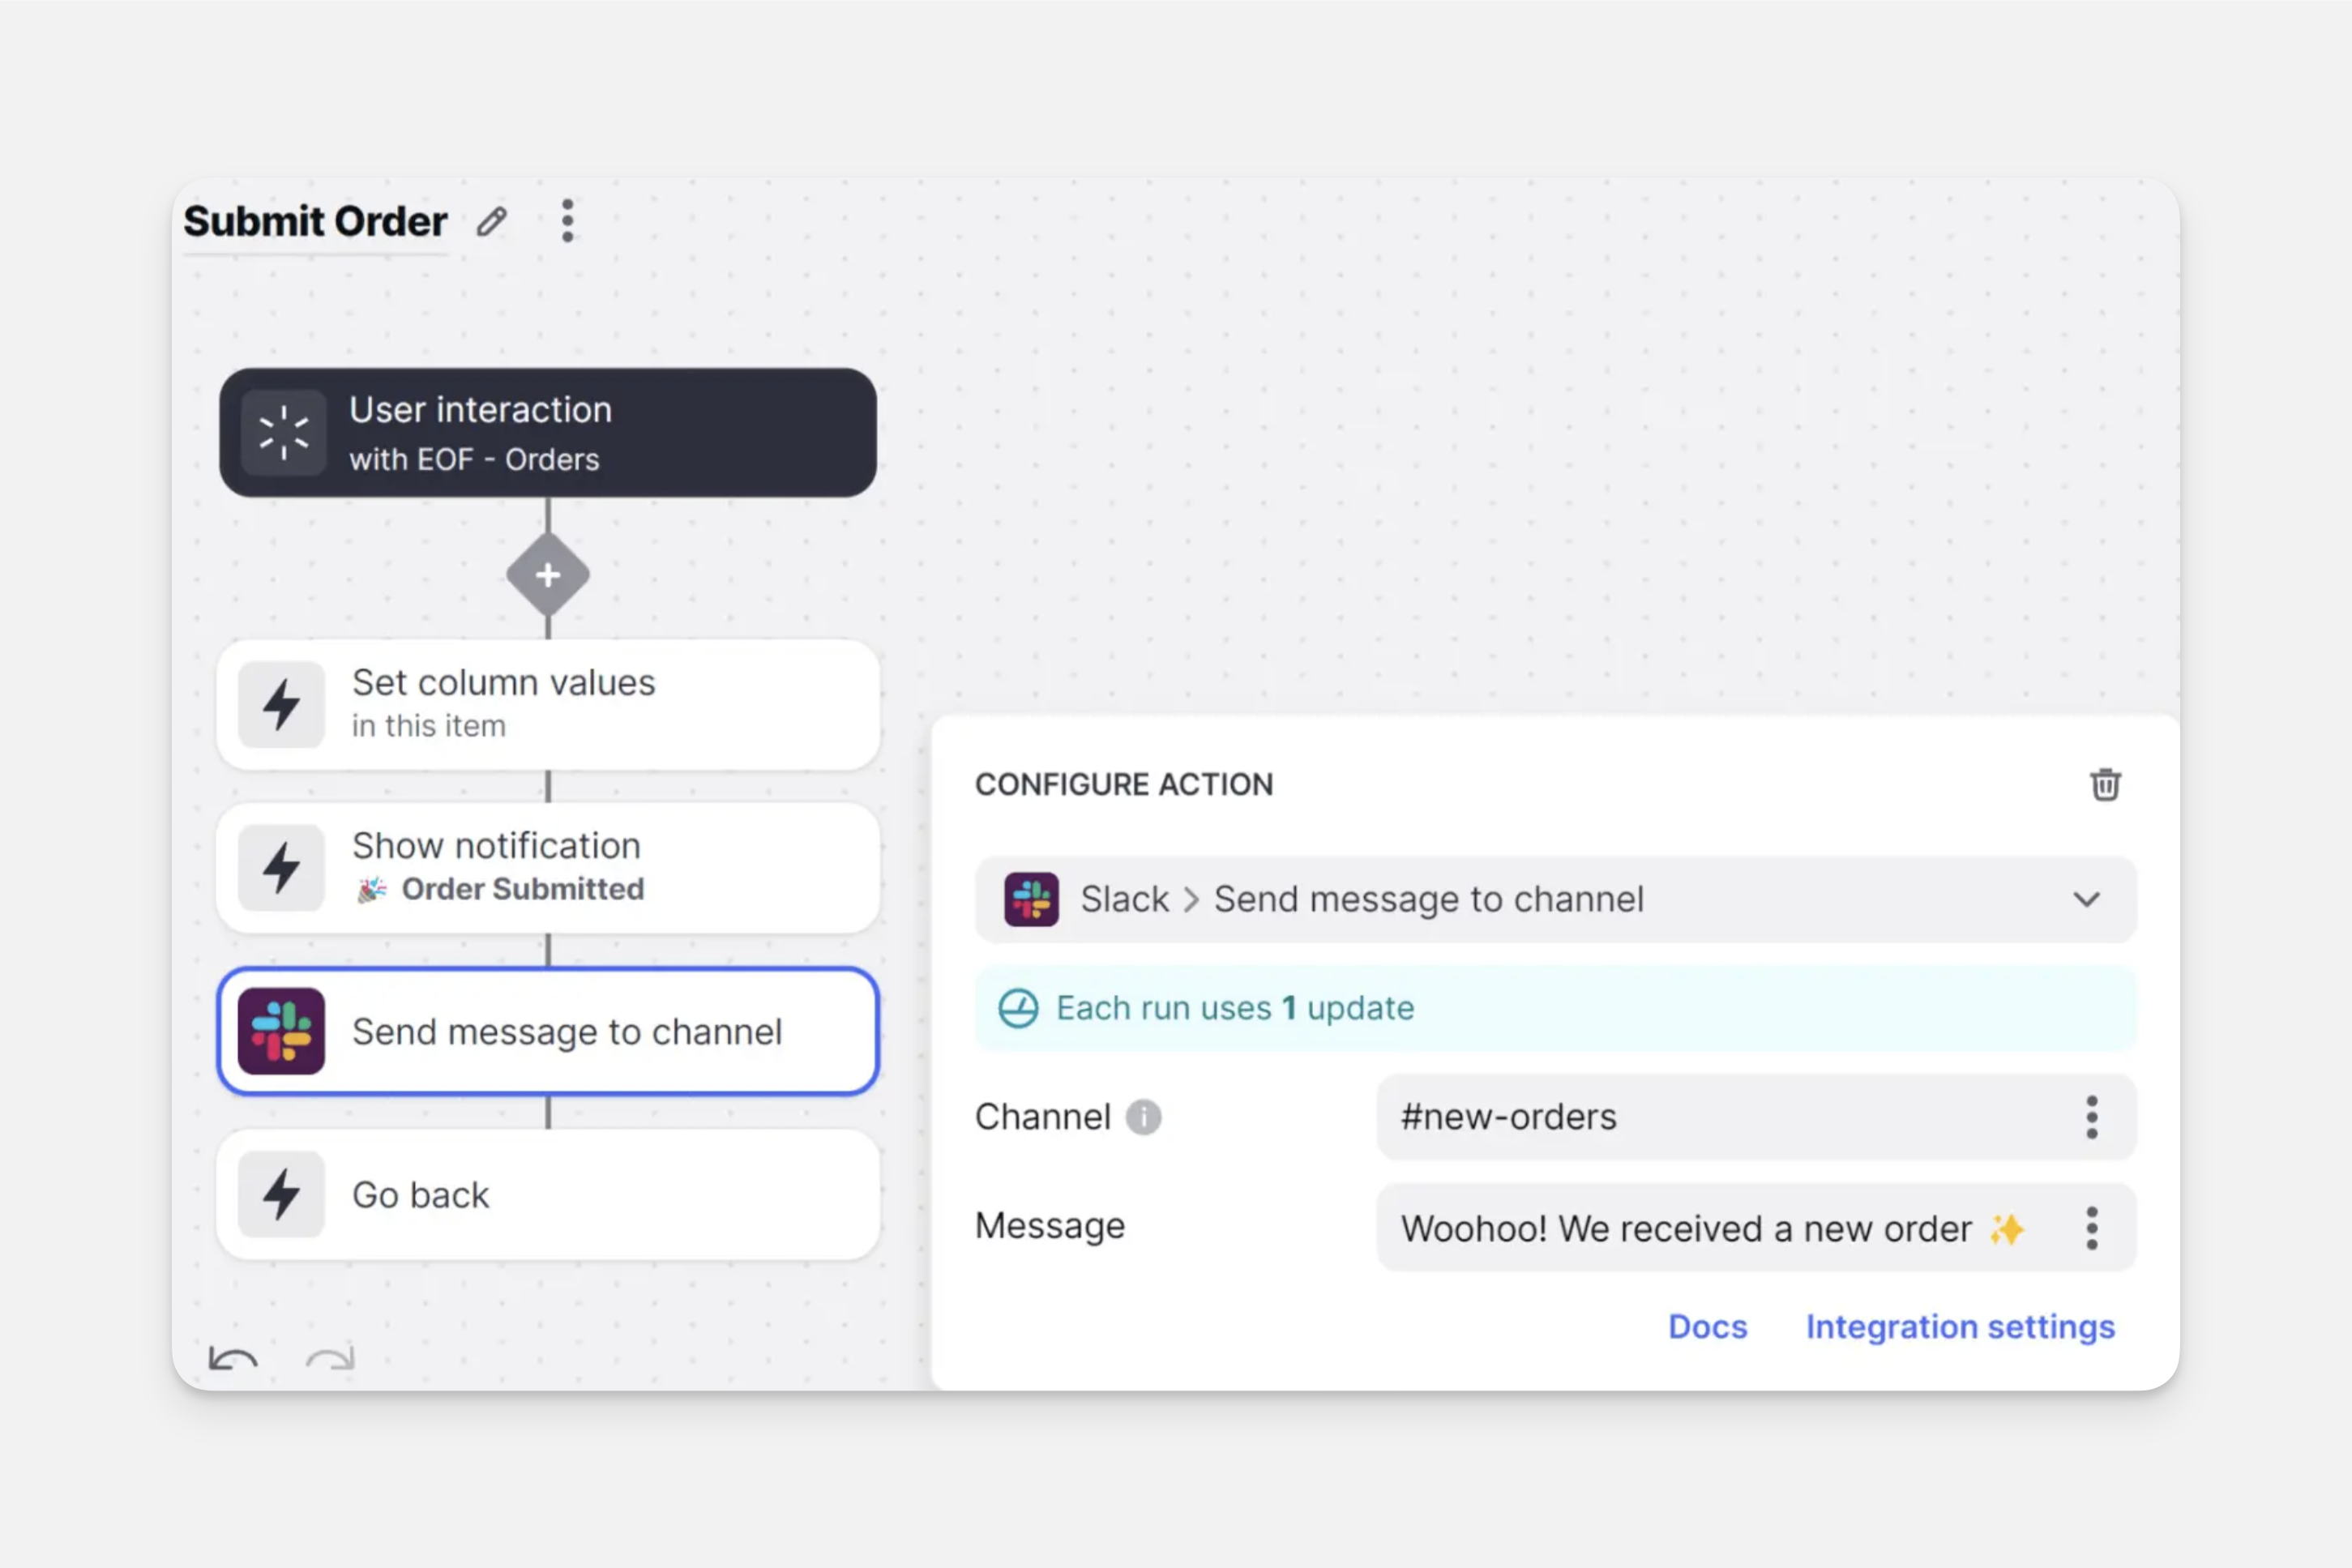
Now, with each new order placed in Glide, a corresponding notification is sent to StickerStar’s Slack channel. This message could also be used to request approval, allowing admins with permission to react with an emoji and let the order fulfillment proceed.
Adding Order Details to the Notification
But why stop there? Let’s enhance these notifications by including specific order details.
So, in the Orders table, we’ll add a new template column that includes:
- The name of the person who placed the order
- A description of the order
- Pricing for the order
- The shipping destination
- A link to the order in Glide
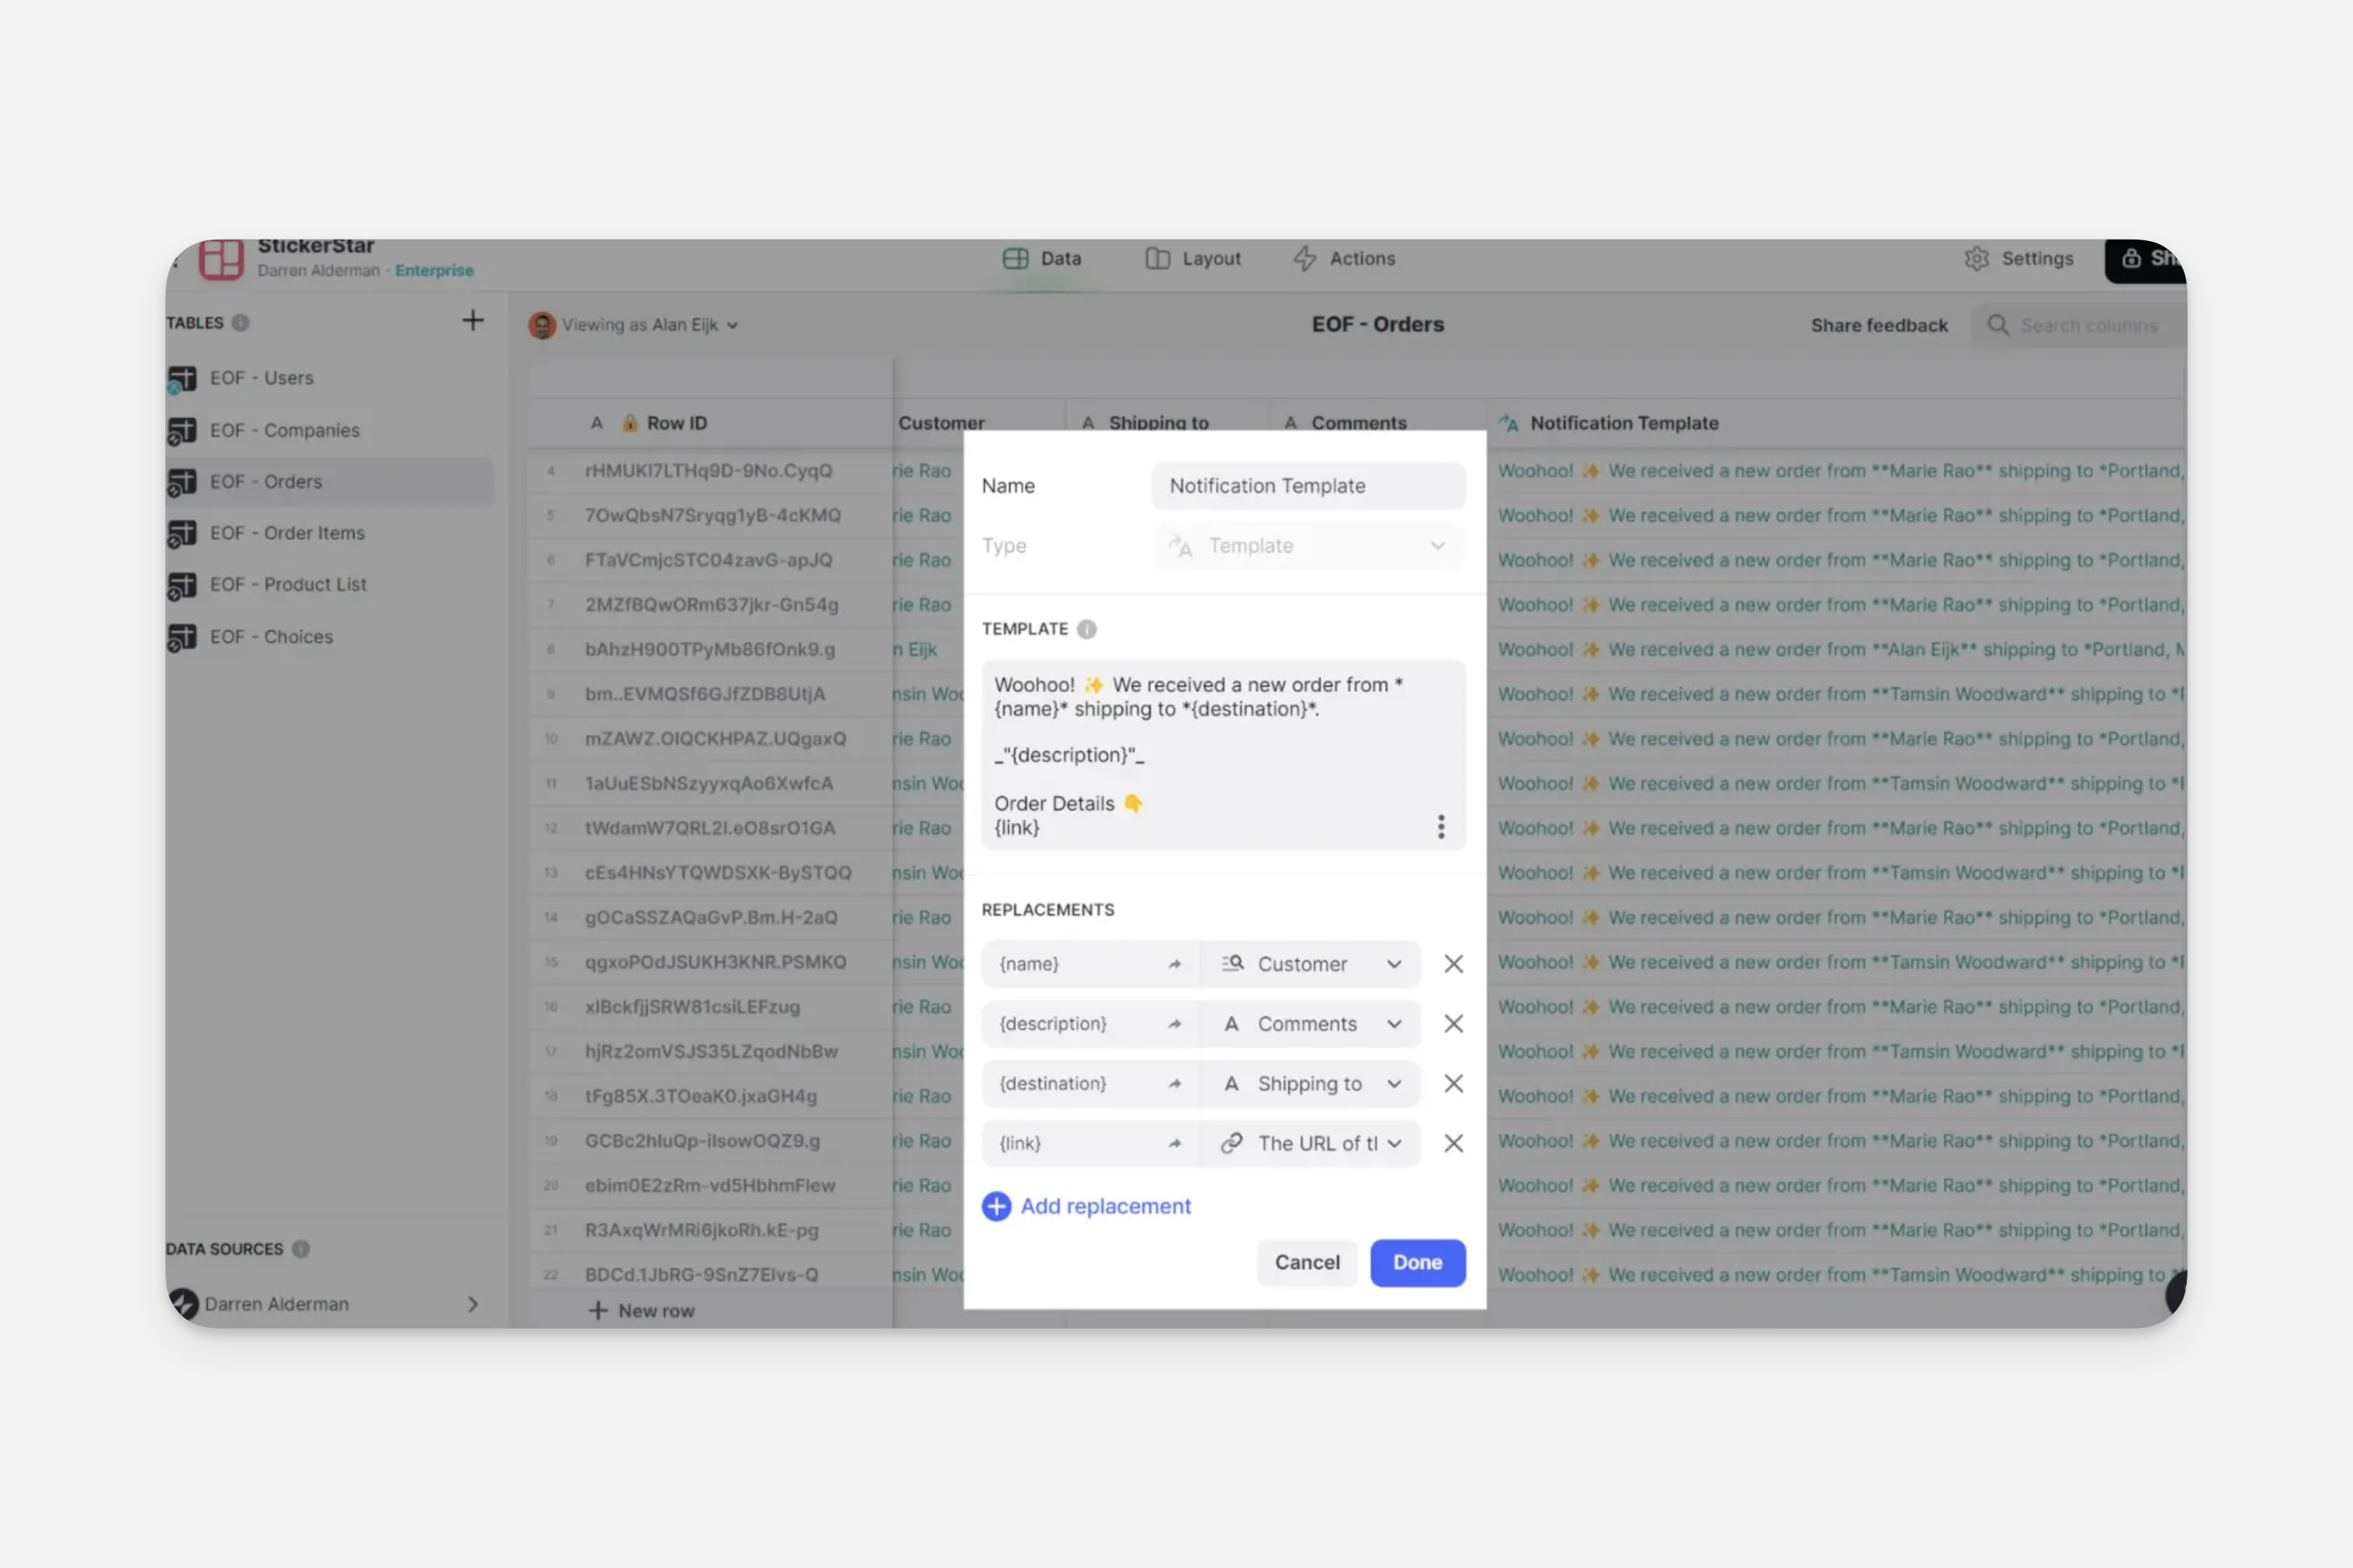
Following this, we just need to update the Slack notification action to use this template column.
Now, each time a new order comes through Glide, StickerStar team members get a detailed Slack notification, allowing them to process orders faster and more efficiently. This workflow automation can be enhanced by Slack’s workflow builder, with connectors to tools like Salesforce. To learn more generally about Integrations in Glide, including how they affect your app’s usage, check out our Introduction to Integrations.
Frequently Asked Questions
Don't see the Slack integration?
You may need to upgrade your plan. Browse Glide’s plans and find the right fit for you.
Why is my message not being sent to my Slack channel?
Make sure the Glide bot is added to the Slack channel you would like to send messages to. (See Setting up Slack integration.)
How can I format my messages?
You can find Slack’s text formatting documentation here.
Can I connect more than one Slack workspace to my app?
No, each Glide app can connect to only one Slack workspace. However, different apps in your team can connect to different Slack workspaces.
How can I connect my app to a different Slack workspace?
You can connect a different Slack workspace to your app by first disconnecting the connected Slack workspace. To do that, navigate to the Slack integration in your app’s settings. Click Remove from app to your connected workspace. Next, click Add to app to connect a different Slack workspace.