

Most of us use an overwhelming number of software applications at work — 9.4 apps on average, according to one survey. IT teams have enough to worry about without having to keep track of the licenses, access, and costs of all that software, plus the devices their teams use to run it.
You could buy a pre-built solution to help keep track of your assets, but that would just be another piece of software to manage. Not to mention most of the options out there are pricey and come with a lot of bloatware that can overcomplicate your work.
Instead, you can build your own tailor-made solution, beginning with this Glide template. When you build your tools yourself, you can be sure they will fit your specific workflows and needs. Once you’re comfortable creating apps with Glide, you can build additional tools to further simplify your business’s software infrastructure.
“It only took a few minutes of using Glide to realize I’ll never go back to our old way of managing internal tools by hacking together processes in Google Sheets with App Scripts.” Shani Nowlin, CTO, Westland Real Estate Group
Your custom IT asset management software will help you simplify access management, control software, and equipment costs, keep track of all your team’s devices, and ensure efficient tool allocation. You’ll spend less time tracking tools, checking licenses, and answering access requests, and be able to focus more on the big projects you want to tackle.
Follow along with this guide to begin customizing your new app.
Begin with this IT asset management software template
Start by opening this pre-built IT asset management software template on your desktop browser, smartphone, or tablet.
- Preview on your desktop: From the template page click preview to open the app in your desktop browser. The “Try Template” button at the top toggles between the desktop and mobile views. Follow along to see the app in action.
- Preview on your mobile device: Scan the QR code below from your tablet or smartphone to use the app on a mobile device.
All apps built with Glide are automatically adaptive, so you can deploy your app for users on any device. By previewing this template, you can see what your app will look like on a smartphone, tablet, or computer. You can also open up a clone of the template in your Glide workspace to see how it’s built and begin customizing.
Navigating the template screens
This template has your six most important features in the main nav. You can add more later, but this gives you a solid starting point. Each screen gives you a different view of your data and lets you and your users perform different tasks.
Dashboard
The dashboard gives you big-picture visibility into your company’s asset use. You can track software spending, usage, and licenses from this panel. Include whatever information is most important to you in this view by adding charts as components and linking them to your data. With all this data visible at a glance, you’ll be able to identify problems quickly and make better resource allocation decisions.
Software
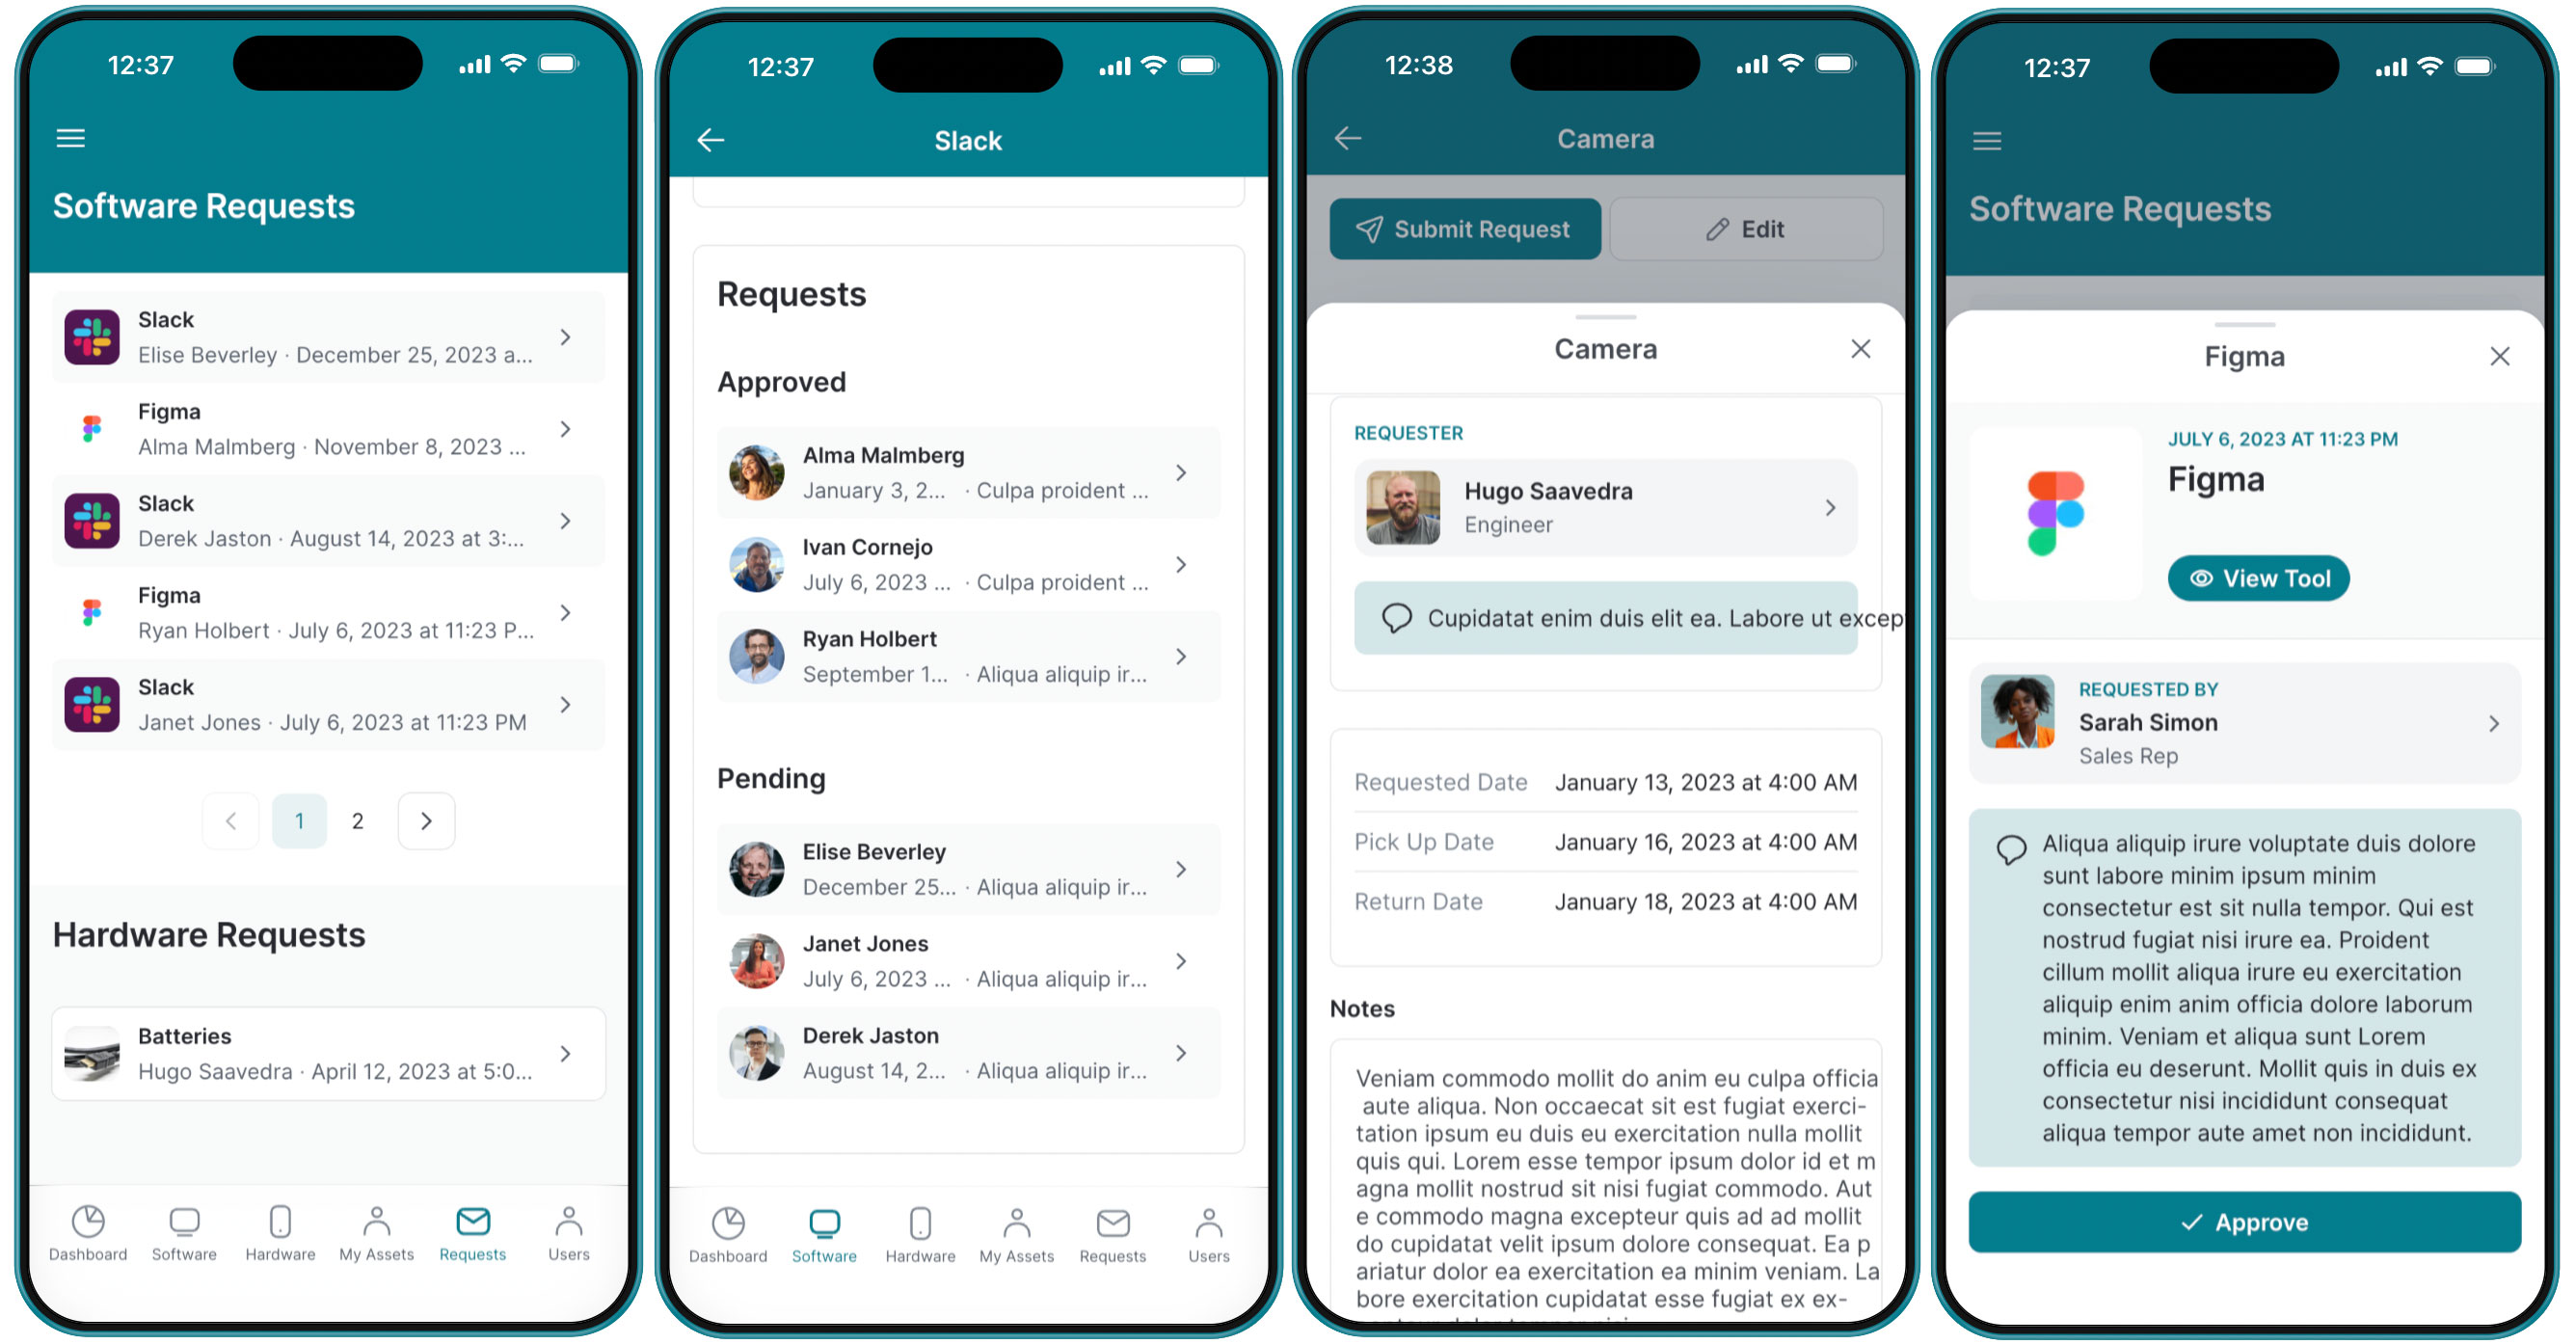
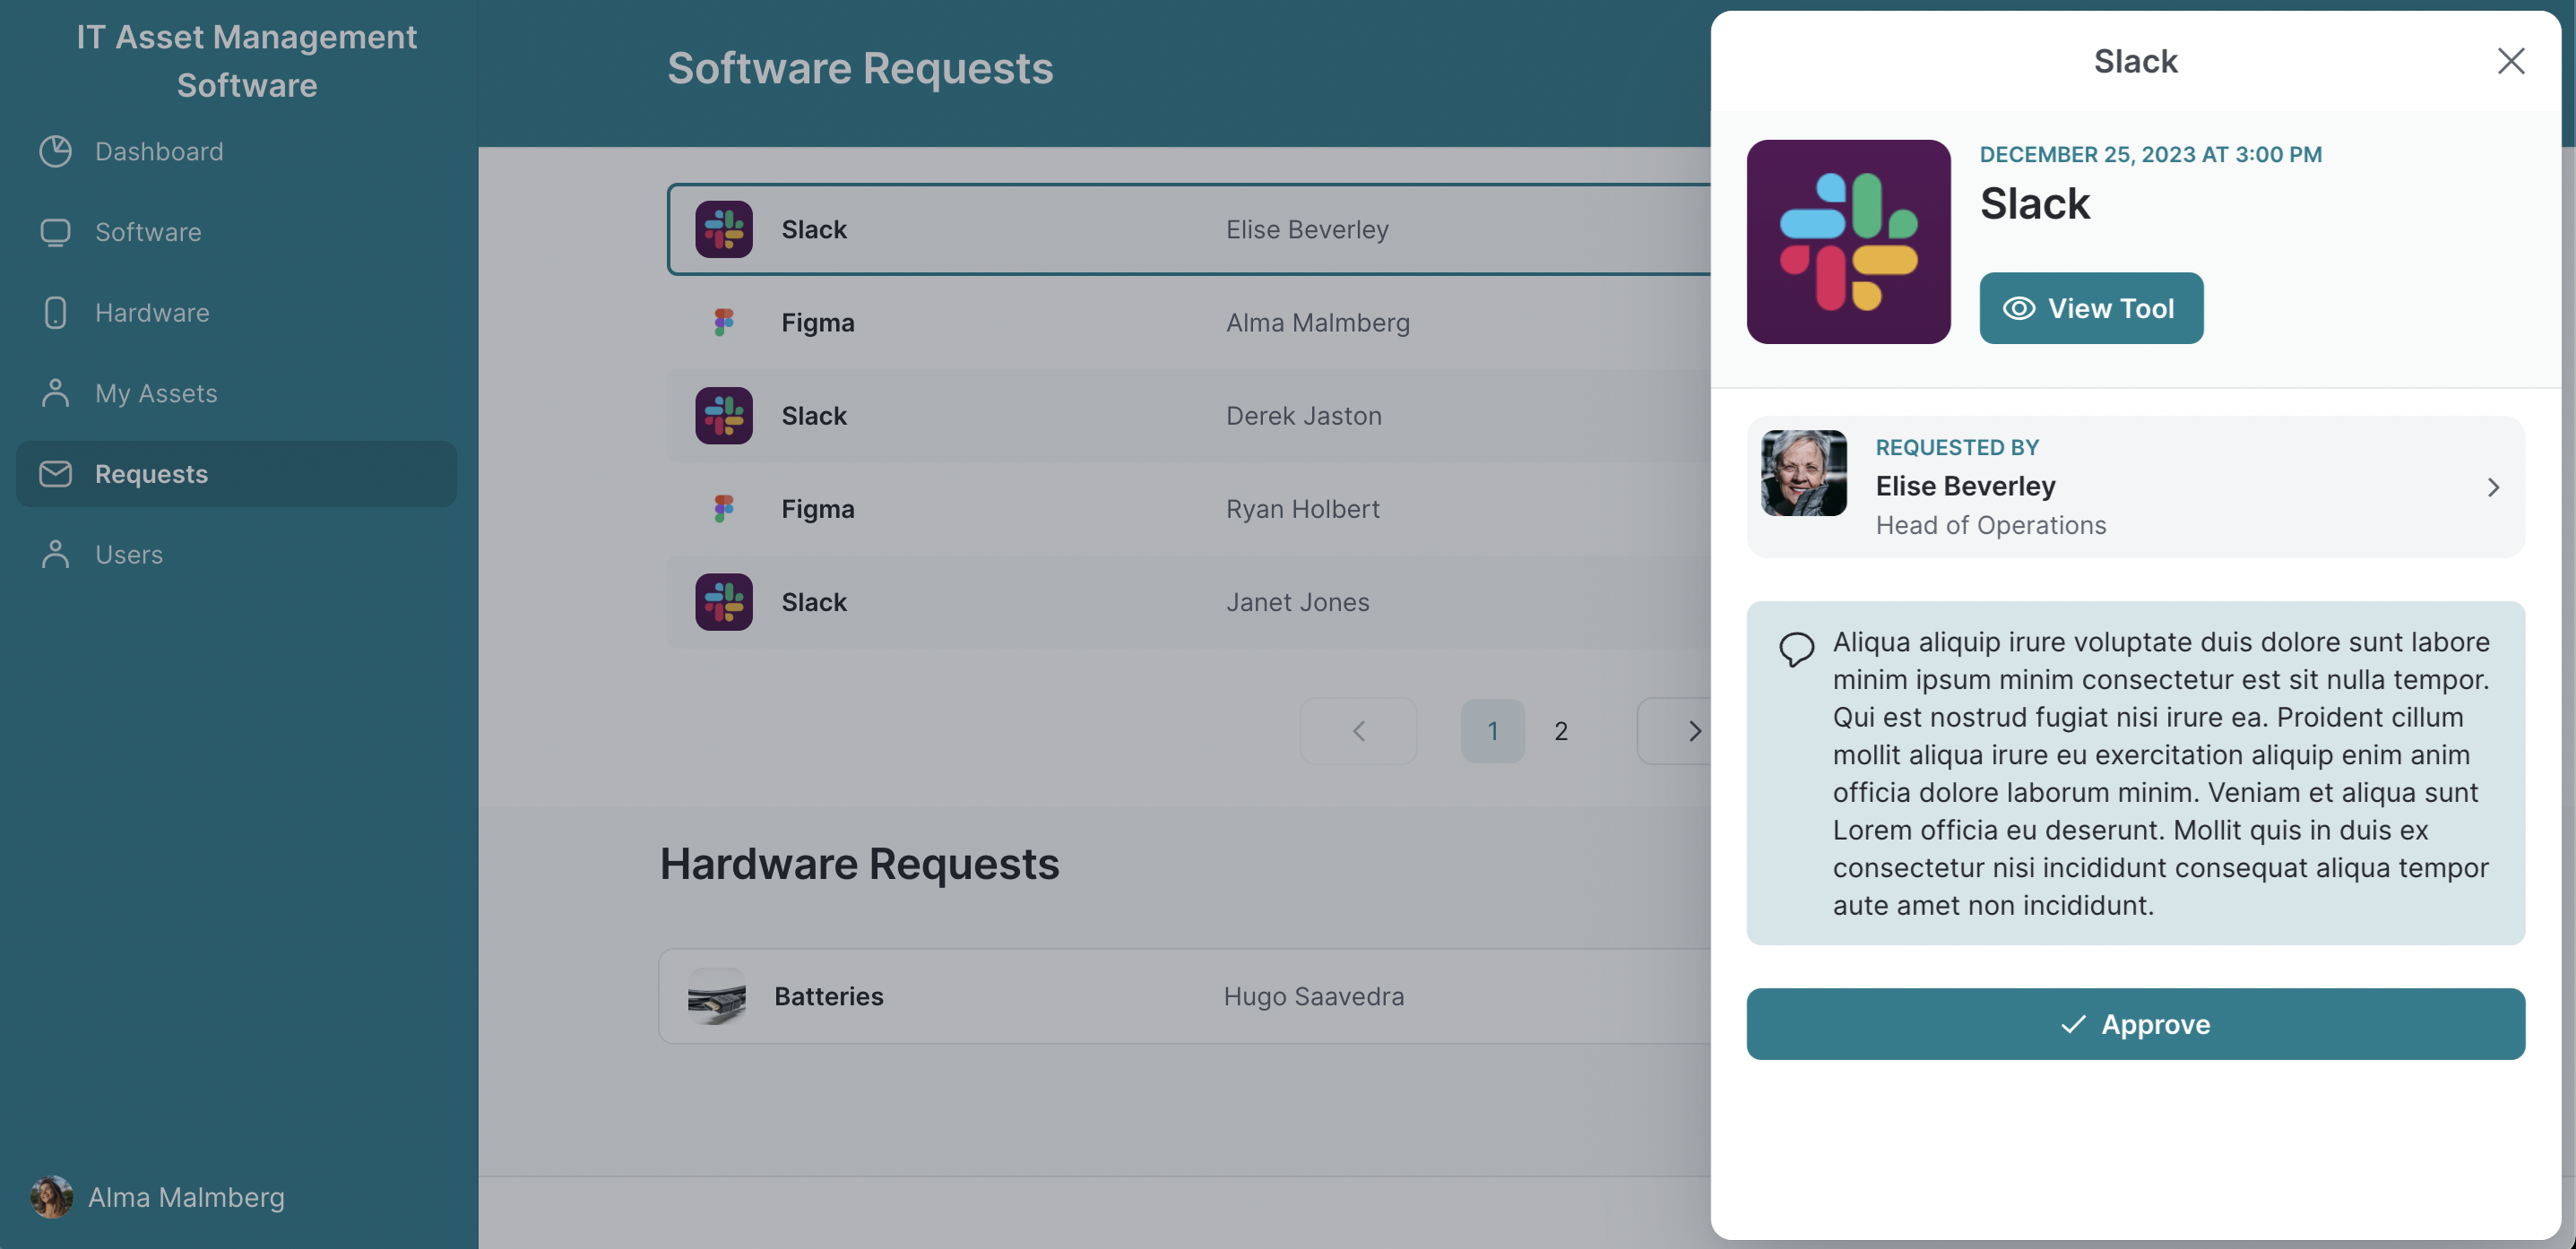
This page lists all the software your company is currently using. There is a search function already included. Clicking on a tool opens up a detailed view of that tool and its users. That page shows you costs, licensing information, utilization, and open seats.
At the bottom is a list of all approved and pending access requests. Clicking on an active request triggers a pop-up that lets you quickly approve and grant access to that user. You can even open up the program directly from the tool’s dedicated page within your app.
Hardware
This page shows you all the devices and hardware your team has and where they are allocated. You can use it to keep track of anything from company laptops used by remote employees to tablets used on the sales floor to high-quality microphones shared between members of the marketing team. Use this to arrange the return of equipment when an employee leaves or help a team member track down a tool for a specific task.
Requests
The requests page gives you a central view of all current access requests for both hardware and software. From this page, you can quickly grant access, arrange for checkout of shared tools, or order new equipment for your teammates who need it.
My Tools
This page is designed for the people using your app. You can securely gate your app’s features by assigning permissions to different types of users. You and the rest of your IT team can be assigned admin status so you can see full user information and approve requests, while the employees on your team can have a more limited account that just lets them see their own info and a full list of tools your company uses. They can use this page to launch their apps or request access to new ones.
Users
This page contains a full list of users of your app, including IT team members. You can see who has access to what software and which devices and hardware that team member has in their possession. You can reach out to them directly from their profile page by phone, email, or any other communication tool you want to integrate with your app.
Customize your software to suit your unique needs
It’s time to clone the template over to your own Glide account and begin customizing it for your company. You can change as much or as little of it as you need or add more features as your business needs grow.
Import your business data
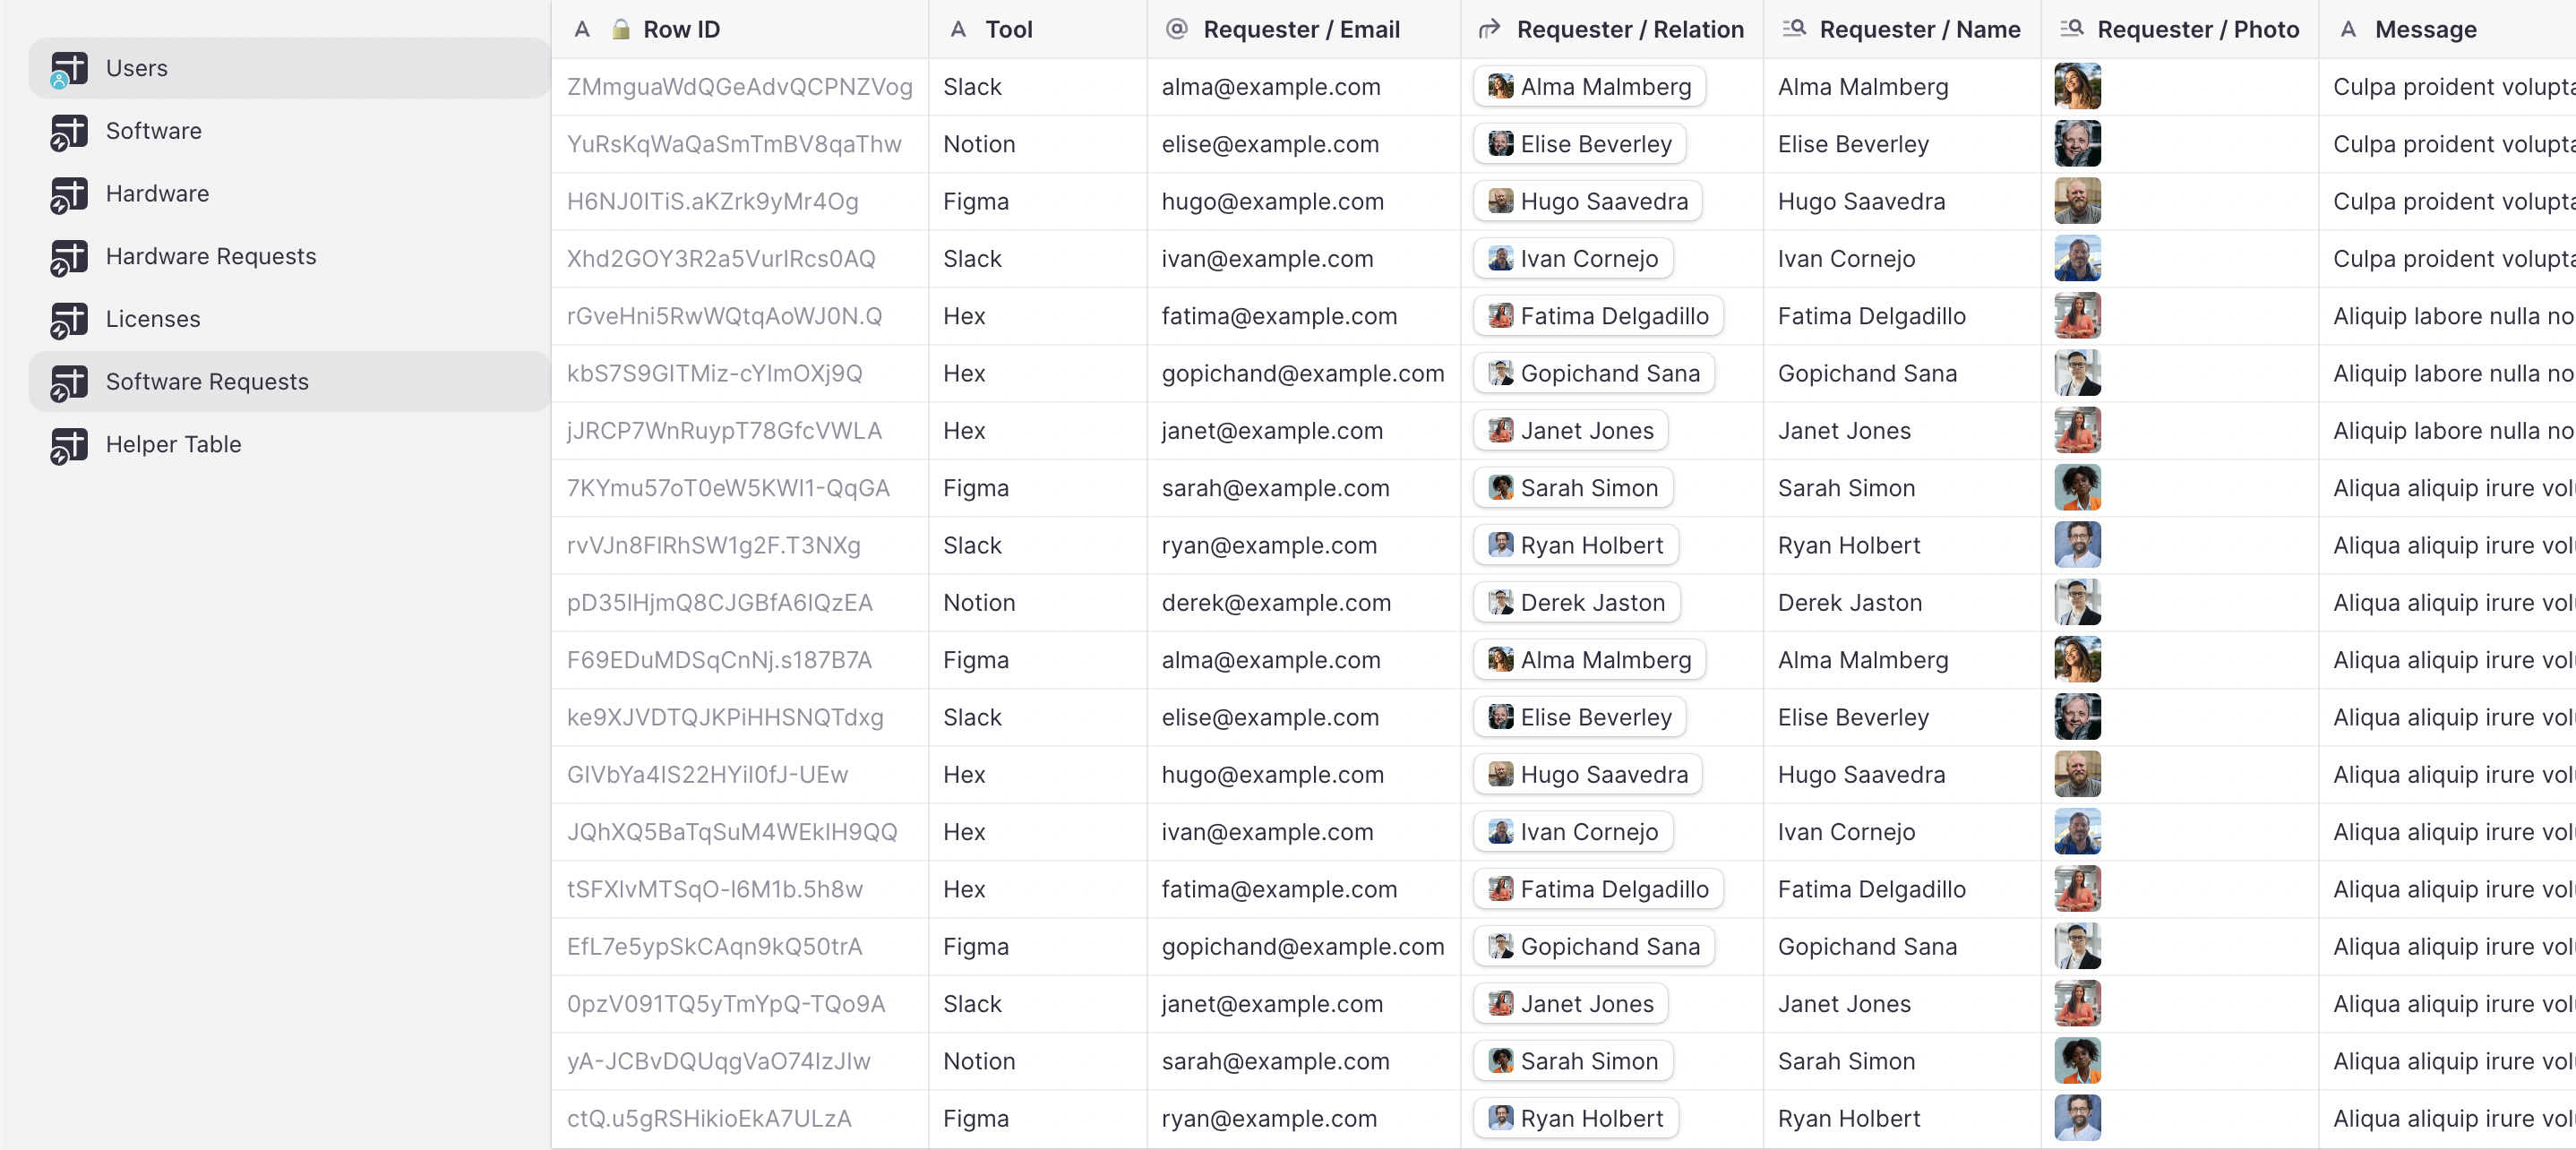
First, add your business data to populate your app with your own information. Glide can work from a variety of different data sources, including Excel, Google Sheets, and Airtable (or even high-scale data sources like SQL and BigQuery on our Enterprise plans if you’re building more data-intensive apps).
If you’re already tracking your assets in a spreadsheet, it’s easy to connect it to your app and import all that data. If you’d prefer to store data directly in Glide's native data source, you can enter your data into Glide Tables. If you tab over to the “data” view of this app template, you can see how your app cleanly translates large amounts of data into an easy to navigate interface.
Add a maintenance tracker
If you have hardware that needs maintenance servicing or software that you need to ensure is updated regularly for security reasons, you can add a maintenance tracker to your app. Include a calendar that sends reminders regularly, or create a form with notes or a simple checkbox that team members can use to track when maintenance or updates have been completed.
This is a great place to add links or upload any manuals, instructions, or FAQs for the tools you manage through your app. You can also choose to add those details to an entirely new tab of your app if that makes more sense for your workflows.
Create a new asset request form
Build a form that lets employees at your company request tools or software you don’t yet have. Creating an asset request form integrates tool requests into your existing workflow. This will help you quickly assess additional costs and judge whether you already have an existing tool that does a similar task. Maybe your teammate simply needs access to that tool, or maybe your company should consider switching software to one that better suits people’s needs.
Add a barcode scanner
If you are trying to manage a large number of physical assets, like tablets for use in the field or keyboards at a large office, adding a barcode and QR code scanner to your app can be a huge help. Print barcode labels for all the tools you need to track, and then you can quickly check them out to anyone who needs them by scanning the barcode with your phone camera and instantly recording that data in your app.
Use AI to transform your workflows
Glide includes a range of AI workflows that can make your app more powerful and reduce labor for everyone using it. For example, you might use AI to extract text data from images like manuals so it can be accessed more quickly within your app.
Integrate your app with the rest of your software
Create efficient workflows with integrations that connect your IT asset management software to the other tools your team uses at work. You can integrate with an email program so you can reach out to the users requesting access to tools to let them know their device is ready. To smooth your IT team’s workflow, you could connect your app to Slack so all new software access requests automatically alert them in Slack.
Build the rest of the software your business needs
With Glide in the hands of your IT team, you have the ability to reduce IT workload while simultaneously providing the rest of your company with important business tools. Our research found that most IT leaders received at least one internal tool request a month, some as many as nine! Using Glide helps you build those tools faster and reduce your backlog. You could even create your own IT help desk.
There are many creative ways you can use this technology. This exact app template you just created can be repurposed to track other assets, like managing a vehicle fleet or organizing company contracts. Or you could help your team adopt AI safely and successfully by building app interfaces for your team to use.
It’s easy to get a hang of creating software with Glide, especially with the help of Glide University, Docs, and Community. Once you’ve published one app, you can confidently begin to build an interconnected ecosystem of tools for your IT team and your company that are under your control and built to your exact specifications.


