

Construction businesses are rarely running a single project. At any given time, teams are spread across multiple sites, each with its own timeline, subcontractors, materials orders, and milestones. Most of the coordination holding it together happens across emails, phone calls, and text threads that nobody can fully track.
Behind the scenes, operations often run on spreadsheets and tools that don’t talk to each other. Project updates live in one place, financials in another. Off-the-shelf software is supposed to solve this, but most platforms are built for a generic version of construction management. They’re expensive and hard to adapt to how your business actually works.
With information spread across disconnected systems, customer communication inevitably suffers. And when communication breaks down on a construction project, your business ends up redoing work, missing deadlines, or losing a client.
A customer portal built around how your construction business actually runs addresses this directly. Glide is a no-code platform that lets you build a custom construction customer portal app, giving clients the visibility and communication tools they need. And you can do it without hiring engineers or waiting on your IT team. Here’s how.

What do you need from a customer portal for your construction business?
A well-built construction customer portal gives your customers a clear, secure view of their project and a direct line to your team throughout the work. Project dashboards, a shared document library, and role-based access controls are just a few of the features that make that possible. Here are the essential things your customer portal needs:
- Up-to-date project dashboards: Customers should be able to check project status, timelines, and budget and cost tracking in one place. This gives them an accurate picture of where things stand at all times.
- Centralized communication: Updates, questions, and decisions should all live in one place so customers can follow the full conversation around their project without chasing anyone down.
- Document management: Contracts, drawings, and site photos should be easy to upload, search for, and access. A shared document library means your team and your customers are on the same page about which is the latest version of a document.
- Mobile accessibility: Construction customers check in on their projects on the go. Your app needs to work well on a phone or tablet so customers can review updates, access documents, and communicate with your team from anywhere.
- Privacy and security controls: Granular access controls let you keep customer and project information safe and limit visibility to approved users. Customers only see what’s relevant to their project, while your team sees all projects they are working on.
- Integrations: Your team works across multiple tools, including project management apps, spreadsheets, finance software, and customer relationship management (CRM) apps. Your portal needs to connect to those systems so that updates made in one place are reflected where your customers can see them, without manual data entry.

BW: Workplace Experts runs a 9-figure construction company on a suite of 24 Glide apps
Read their storyHow to build a construction customer portal in Glide
You can build a functional construction customer portal in Glide without writing a single line of code. This guide walks you through the steps to create your app, including adding advanced features such as automated workflows and AI abilities. For more detailed tutorials on how to use Glide’s interface and features, visit Glide University.
Step 1: Connect your data or spreadsheet
First, create a new app in Glide and connect your data source. Glide supports a range of data sources, including Google Sheets, Microsoft Excel, Glide Tables, BigQuery, Airtable, and SQL databases.
Glide works best with well-structured data, so make sure your spreadsheet is clean and organized. That means using clear column labels, removing duplicate columns or blank rows, and unmerging any merged cells.
Your app can store and display data in multiple formats, from plain text to rich media. Each column in Glide should be set to the type of data within it. For example, use image columns to display photos directly in the app, file columns to display PDFs properly rather than showing a raw URL, and email or phone number columns for contact information.
When you create your app, Glide automatically generates a starter layout based on your data and column types. This gives you a fully customizable starting point to build on rather than a blank screen.
Step 2: Design your interface
Next, you’ll design your app. Start by customizing the layout Glide generated from your data. Glide apps use adaptive design, so you only need to design once. Your app automatically adjusts to any device. Customers can use it just as easily on desktop devices, tablets, or mobile phones.
Use the drag-and-drop editor to add components to the screen and arrange them to match how you want customers to experience the portal. The WYSIWYG interface lets you see exactly how customers will view the app as you build it.
The components you add will depend on how you’d like your customers to see and interact with data. Here are a few components you can use for a construction customer portal:
- Progress bars show customers how much of each project or phase has been completed.
- Text and number components display budget, costs to date, and remaining balance.
- Image components let customers view site photos directly in the app without downloading files or leaving the portal.
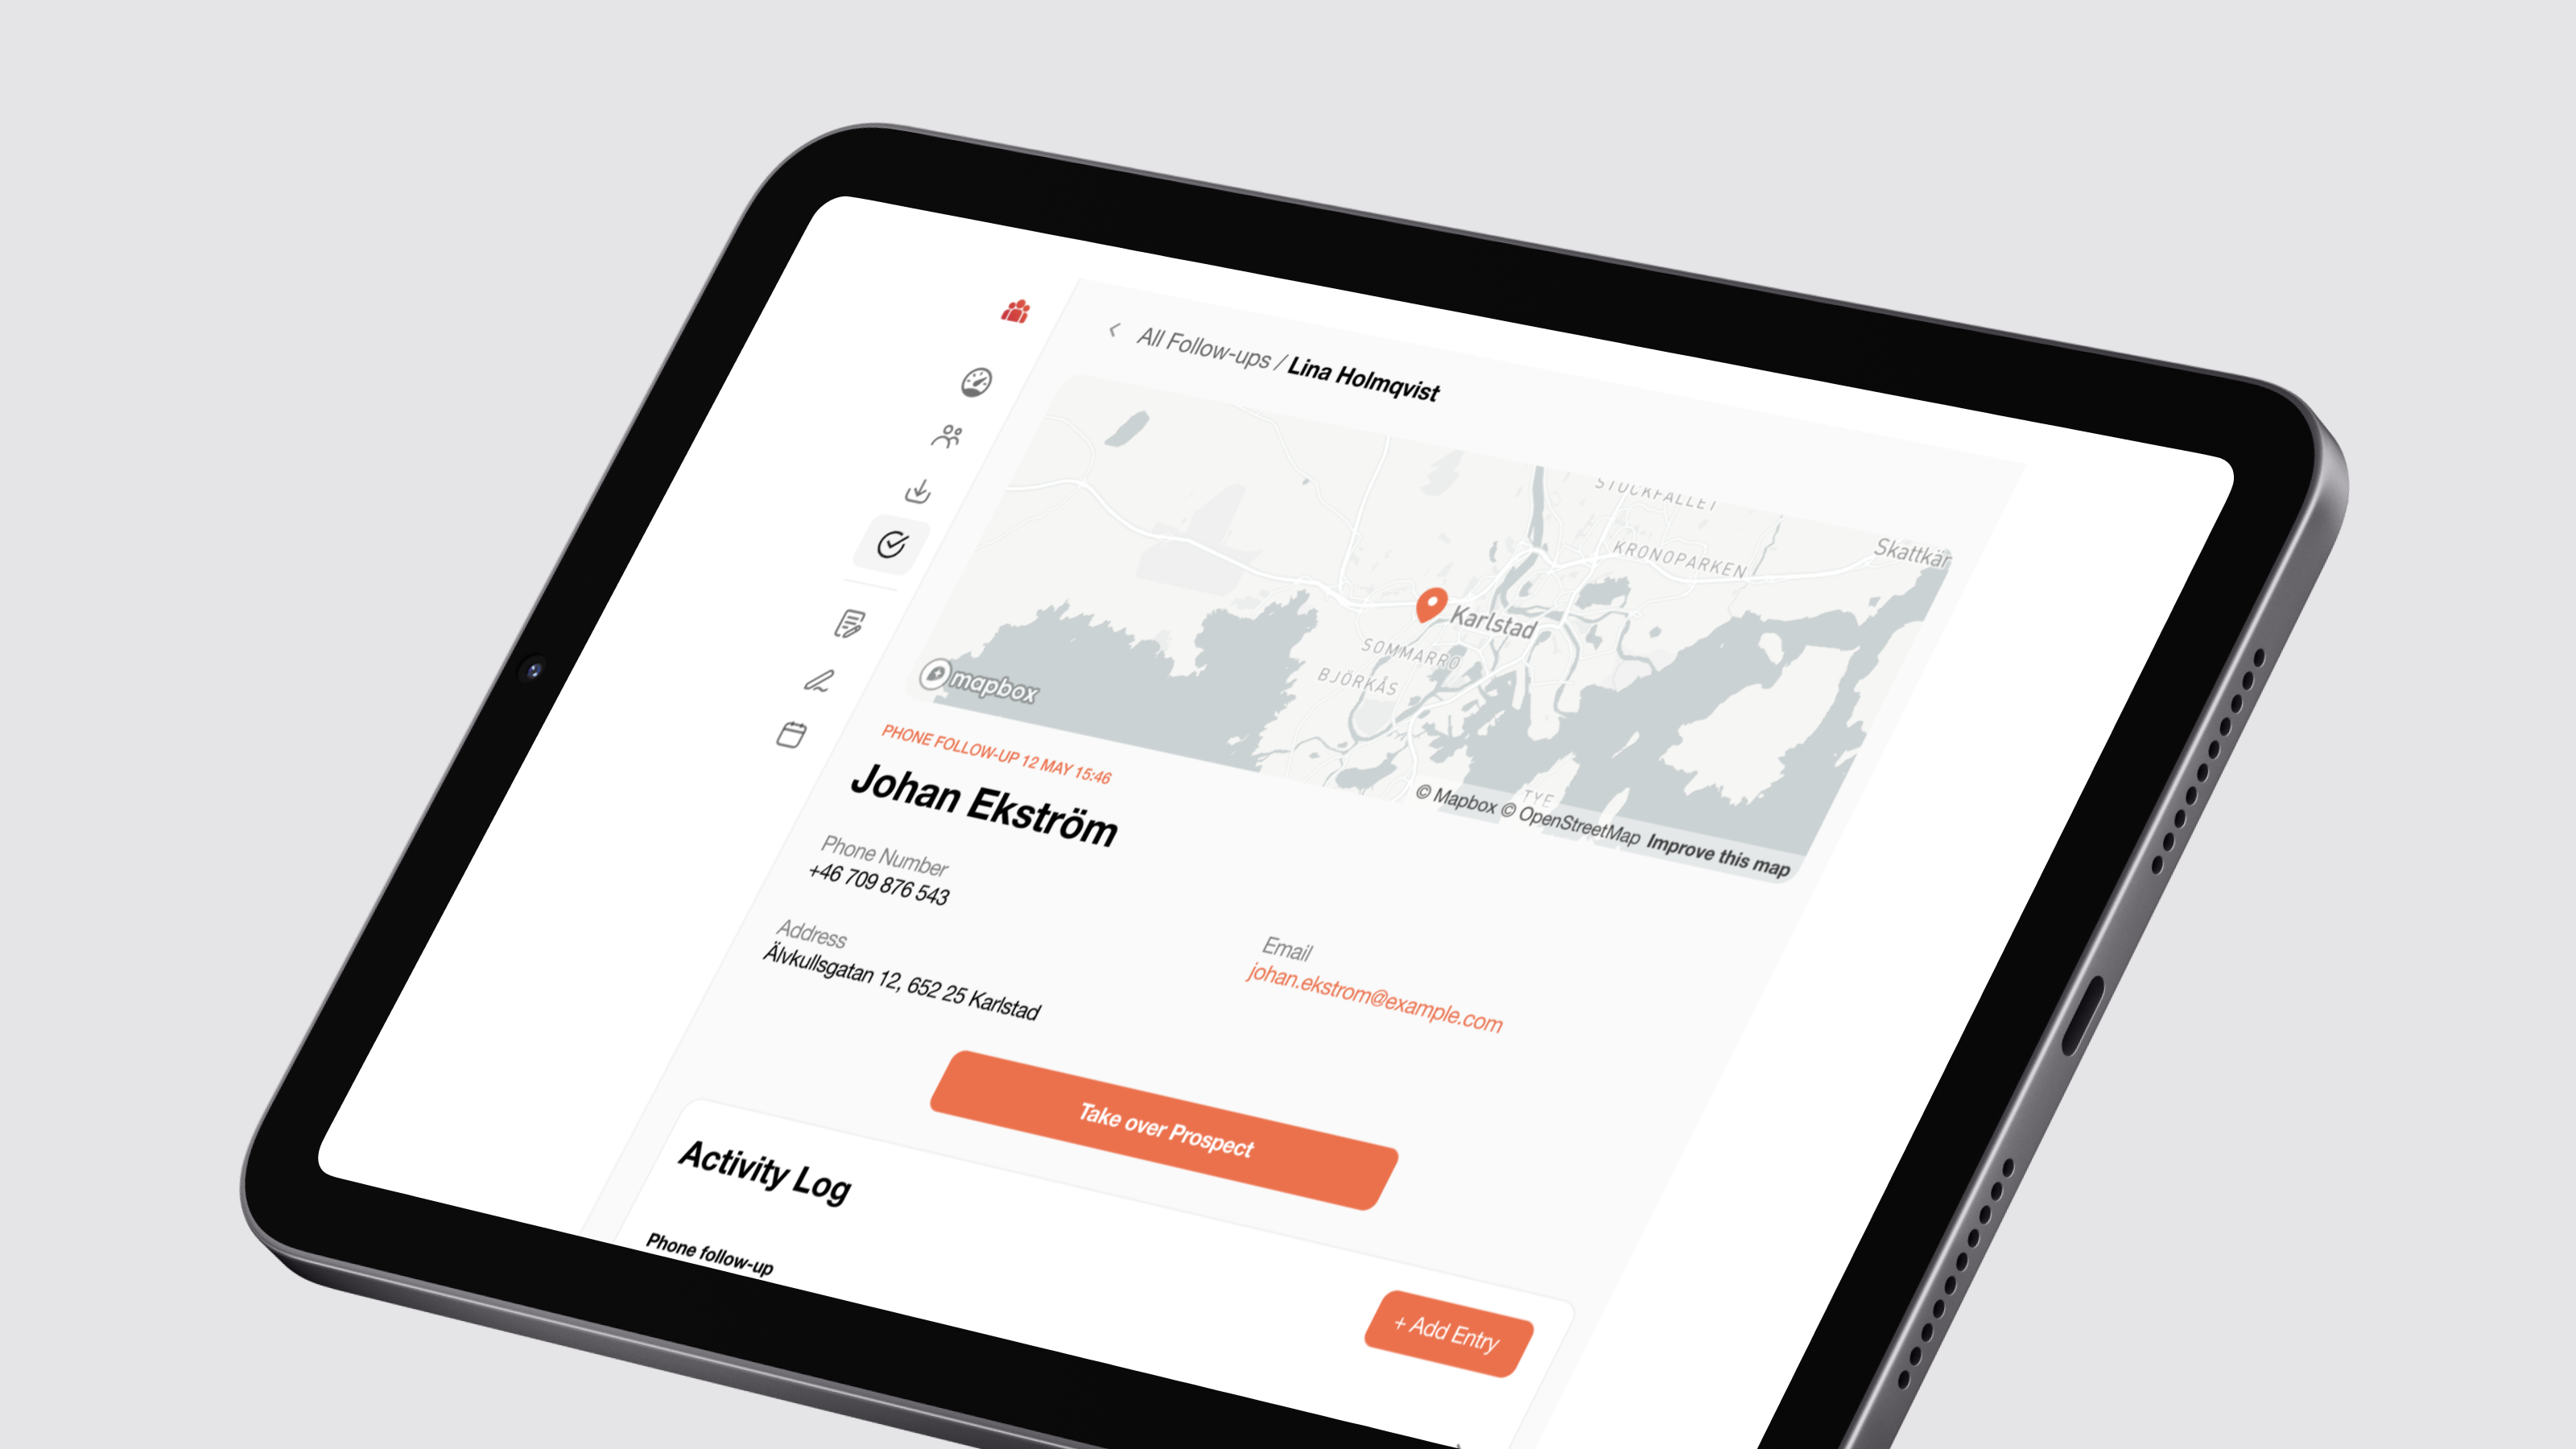
- Maps show customers where their construction site is located, mark delivery and materials drop-off points, or display multiple site locations for customers with more than one active project.
- Email and phone number components allow customers to get in touch with the site manager directly from the mobile app.
- Buttons let customers take action directly from the portal, such as approving a change order or exporting project data.
- Comments keep conversation threaded and tied to a specific project.
- Audio recorder lets customers leave a comment, flag a concern, or respond to a question from the project team without having to type it out.
You now have a working app with basic functionality. A big benefit of custom software is that you can extend it with advanced features: connect your app to other tools, create workflows to automate tasks, add AI features, and set access controls to keep project information secure.
The following steps walk through each of these.
Step 3: Add integrations
Connect your construction customer portal to the other apps your business runs on. Start with the apps that feed data into your portal:
- A project management app keeps project status and timelines in sync.
- A finance app supplies the budget, cost, and payments data behind the financial dashboard.
Updates made in a connected app reflect in the customer portal automatically. Customers always see current data, and your team doesn’t have to manually enter the same data in two different places.
Also add integrations that power specific features in your app:
- Calendar integrations show customers upcoming project deadlines, inspections, and site visits.
- Google Maps integration pins each construction site on the maps component.
- Slack or Microsoft Teams integrations send a message to a specific channel when a customer sends a message in the portal.
The Call API integration extends your app’s functionality, letting you connect any tool that doesn’t have a direct integration with Glide.
Step 4: Add automations and AI-powered features
Next, set up automated workflows and AI capabilities that turn your customer portal from a place that displays data into one that generates insights, creates updates, and responds to activity.
Workflows direct your app to take specific actions based on certain triggers: at a specific time, when customers perform a specific action, or when it receives data through integrated tools.
For example, when a customer hasn’t approved next steps on a project phase within five days after the initial request, they receive a reminder via SMS. Once they complete it, your team is notified via the Slack or Microsoft Teams integration, SMS or email, or a notification in a connected project management app.
You can also build intelligent automations using Glide AI. For a construction customer portal, that could look like:
- Generating a weekly project status summary from live project data, which your team reviews and approves before it goes out to the customer.
- Analyzing budget, cost, and milestone data to determine whether the project is on track, ahead of schedule, or running behind.
Step 5: Set access and permissions
Before publishing your app, set controls for who can access it and what each person can see or edit.
Start by setting your app to private to keep your business data secure. To give both your team and customers access, add their email addresses to a Users Table and restrict access to those emails only.
From there, set visibility rules so each user only sees data relevant to them. Customers see only their own project data, site managers see all projects they are responsible for, and admins have access to everything. You can also require users to log in with a PIN or magic link for additional security.
Step 6: Publish and share
Your app is now ready to publish and share with your customers. Publish your app, and Glide generates a shareable URL you can send directly, display as a scannable QR code, or include in an email. Customers can access it from their desktop, tablets, or mobile devices. They can even install a shortcut to their smartphone home screen so
Once the app is published, you can continue to update and make changes at any time. Updates push instantly, so customers will always see the latest version without needing to manually update the app.
Key features to add to your construction customer portal
The components and features you add to your portal shape how customers experience their project data. Here are the ones worth including in a construction customer portal.
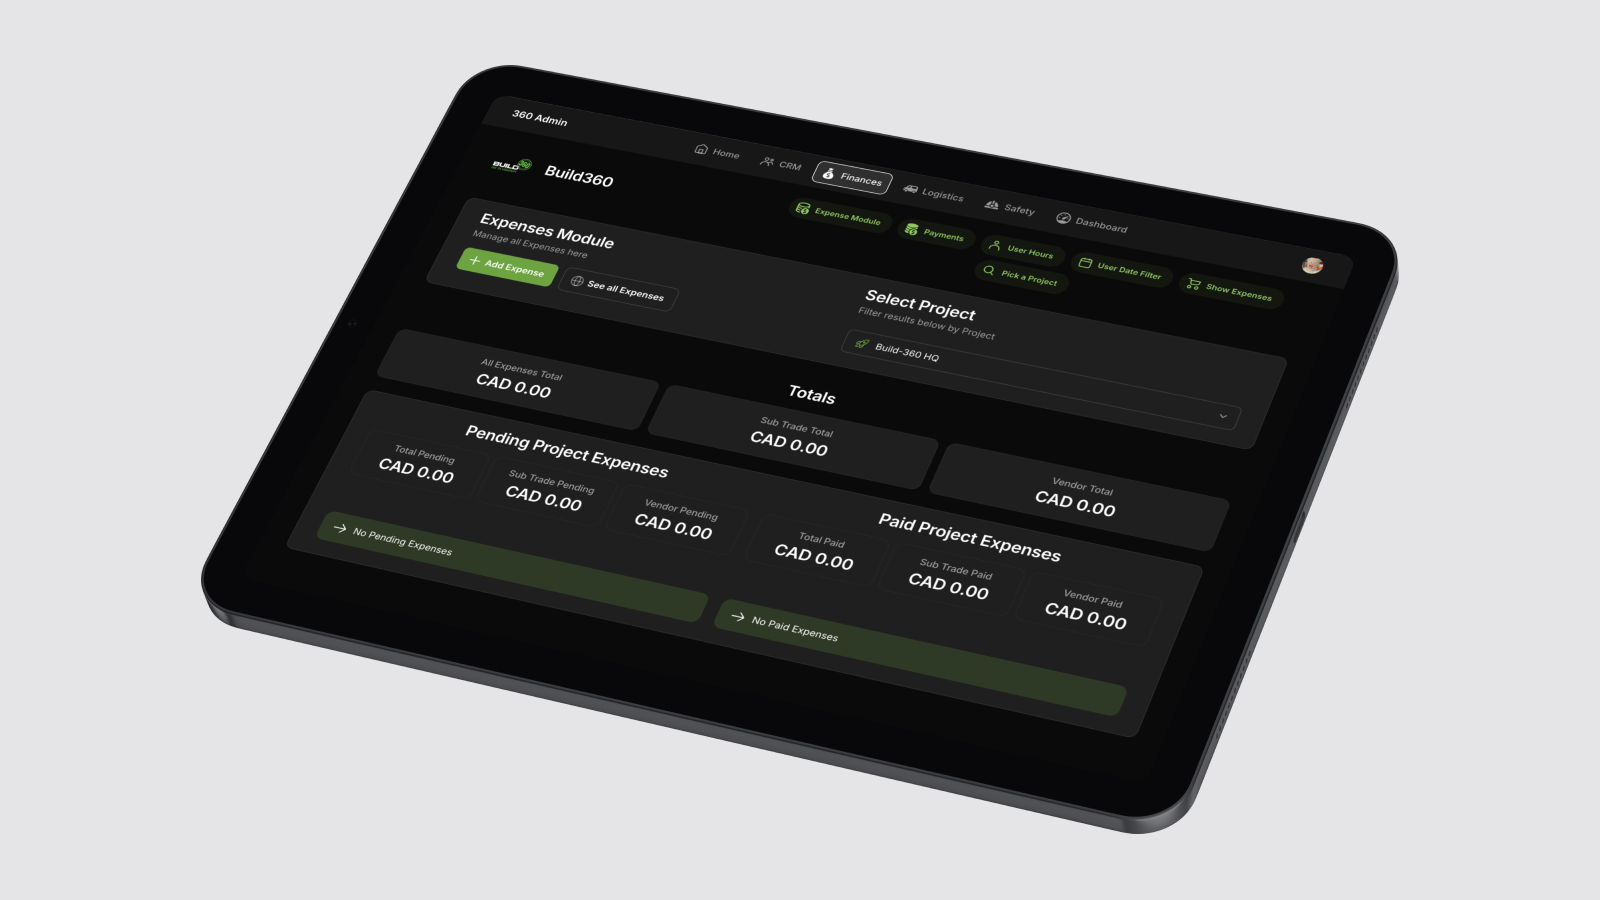
Dashboard
A dashboard gives customers a single screen overview of their project. It pulls data from your connected project management and financial apps to show where the project stands and how the budget is tracking
You can display that data using different components:
- bar charts, line charts, or pie charts
- big number components for top-level metrics like percentage complete, budget remaining, or days left to complete a project phase
- rich text that uses color coded icons to display whether the project is progressing as planned, at risk, or falling behind
Your dashboard can also include checklists or to-do lists that pull from in-app chat. Customers can see outstanding items or decisions as soon as they log in, and mark them complete from the dashboard when they’re done.
Chat
A dedicated chat screen keeps all communication tied to a specific construction project. Use the comments component to build a chat-like experience directly in your portal. You can also add the comments component to individual photos and documents. That way, feedback on a site photo or a question about a contract lives right next to the relevant item, not in a separate conversation somewhere else.
Project contacts
A personnel screen gives customers information about key contacts on their project, with a call component tied to each person’s phone number. Customers can click on the component from their mobile app and call the site manager or other key personnel directly, without having to search for a number.
After the call, the team member can log call notes in their connected project management app. That summary syncs back to the project in your construction customer portal, so the conversation stays on record alongside everything else tied to the project.
AI-powered features
Glide AI can generate text from the data, documents, and photos in your app. Here’s what this could look like for a construction customer portal.
- Generating a weekly project update from synced project data. The AI agent compiles a summary of current project status, outstanding items, and upcoming deadlines. The site manager reviews it, adds any notes, and sends it to the customer via email with a button directly in the app.
- When a contract, drawing, or permit is uploaded to the portal, the document-to-text feature extracts the key information and summarizes it in plain language. Customers get the information they need from a document without having to read through the whole thing.
- When site photos are uploaded, the photo-to-text feature generates a caption or description automatically. Customers see a clear, readable description of what each photo shows without the team having to write it manually.
“The last thing I want our client to have to worry about on Monday morning is us. I want them to know that we are the closest thing to being an employee to their company without being an employee. And that's not easy. This technology helps us close that loop every day.”
Robin Hahn
Business Owner, Build-360
Row Owners
A construction business running multiple active projects needs tight control over who can see what information. Row Owners lets you assign each row of data (which contains an individual project), to specific users. This means access is determined by who owns that project record, not just who has access to the app.
You can add more than one Row Owner to a row of data. This way, you can assign a row to both the customer and the site manager so they can see the data relevant to that project. Customers get full visibility into their projects, and your business data stays secure across every project.
Data export
When a construction project wraps up, customers can export their project data as a CSV file directly from the portal. This makes it easy for customers to take their project data with them when construction is complete and the building moves into operation.
The export feature is also worth considering earlier in the customer relationship. Offering a portal that gives customers full access to their project data is a strong selling point when pitching to new customers, before a project has even begun.
What are the benefits of building a customer portal with Glide?
Building custom software in Glide allows you to address the specific needs of your business and your customers, rather than working around the limitations of a generic tool. Here are the benefits.
- Build exactly what your business needs: Generic platforms have clunky interfaces, rigid features, and are hard to adapt when your needs don’t fit their model. They also come bundled with features your team may never use, while the ones you actually need are often missing. With Glide, you build only what you need, without hiring engineers or an IT team to do it.
- Mobile accessibility: Glide apps adapt to any screen. Every feature you build works just as well on mobile as it does on desktop, without additional cost or configuration. Glide’s built-in design system means your mobile app looks polished and professional from the start. Customers get an experience that’s optimized for their phone, not just compatible with it.
- Integrations keep your data in sync: Glide connects natively to a wide range of data sources, including Microsoft Excel, Google Sheets, and SQL databases. For tools without a native integration, the Call API integration lets you build a custom connection. As a result, project status, financials, and communications stay current in the customer portal without anyone having to manually copy information across systems.
- Rich media and document viewing: A custom portal lets customers view site photos full size, open contracts and drawings as readable PDFs, and play videos directly in the app. A spreadsheet can technically store files and images, but the experience of opening and viewing them is clunky and limited.

Build-360 cut time spent on customer updates by 90% with an AI agent
Read their storyBuild your construction customer portal with Glide
Start by connecting your data and building the core screens in Glide. A construction customer portal is one of many custom tools you can build, and it works best alongside others like a project management app or CRM, so data flows across your systems without manual entry. You can have a working app ready and in your customers’ hands in hours, not days or months.
Glide University has courses covering a wide range of features and functionality to help you build. If you have questions along the way, the Glide Community is an active forum where you can get answers from other builders. And if you'd rather work with someone directly, a Glide Expert or no-code agency can help you build exactly what you need.


