In this step-by-step tutorial, you’ll learn how to build an AI-powered feedback management app using Glide and Google Sheets, with the help of Google Forms.
With this app, you’ll be able to:
- Collect customer feedback with Google Forms
- Categorize and summarize messages with AI
- Analyze sentiment (Positive, Neutral, Negative)
- Detect when follow-up is required
- Generate action items for your team
- Draft personalized email responses
- Send thank-you or follow-up emails automatically
This AI customer feedback analysis system has four essential parts. Google Forms and Sheets collect and store feedback in a secure format. A Glide Admin App manages responses for you in a private dashboard. Glide AI and automated Workflows automatically summarize, classify, and generate replies in real time. Integrations with your other tools let you create tasks and alert your team so they can take action, and even automatically send customers email replies.
This is the perfect starter project for teams that want to close the loop on customer feedback, without drowning in spreadsheets or manual email replies.
If you prefer to follow along with a video, check out the full tutorial on YouTube.
Step 1: Google Form and Sheets Setup
First, we need a place to collect feedback. For that, we are going to use Google Forms. Create a new Google Form and add three fields: name, email, and feedback.

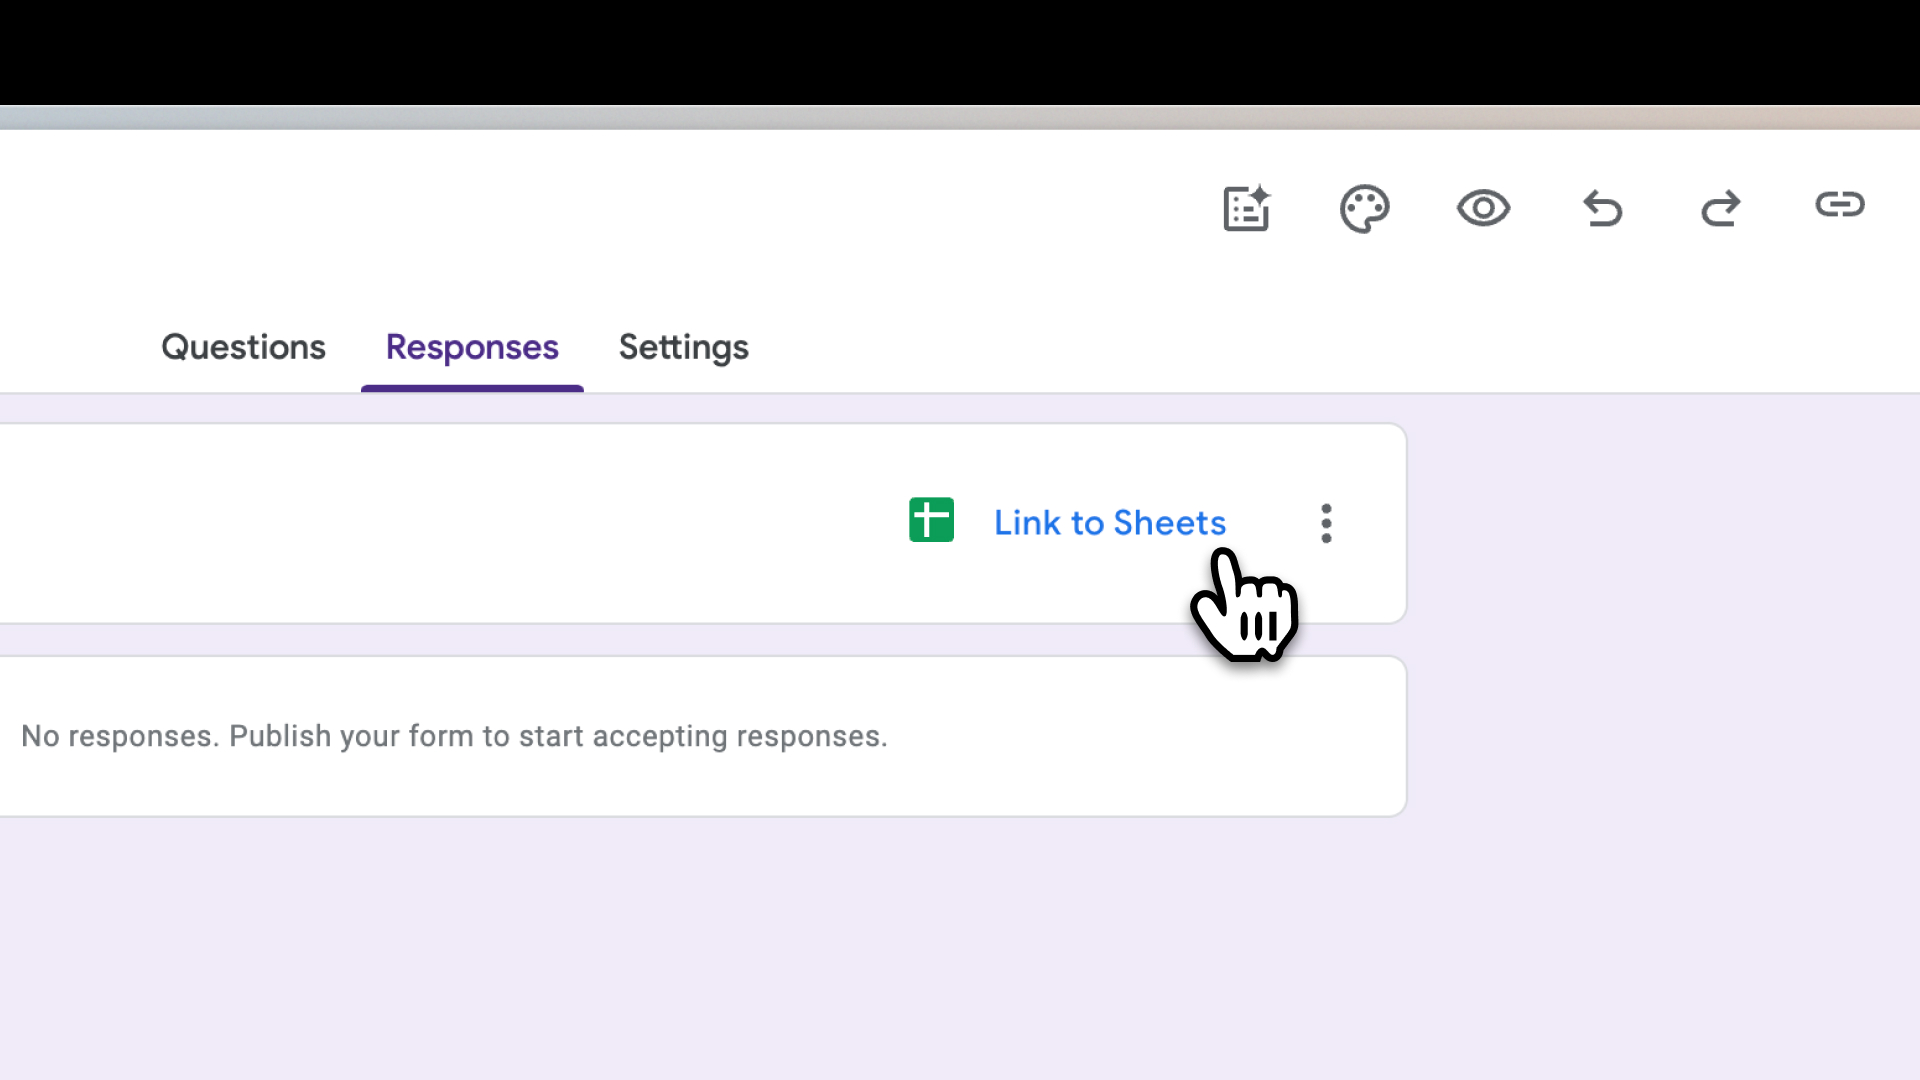
Once you're done, click on the responses tab and connect it to a Google Sheet. This will ensure that every submission automatically lands in a spreadsheet that you can use inside Glide. It’s helpful to rename the sheet tab “Feedback” so it's nice and clean when connecting it to our app.
Step 2: Set up the Data
Create a new app in Glide and connect it to the Google Sheet you just set up. You will see the existing columns (Timestamp, Name, Email, and Feedback) populate automatically from the Google Form.
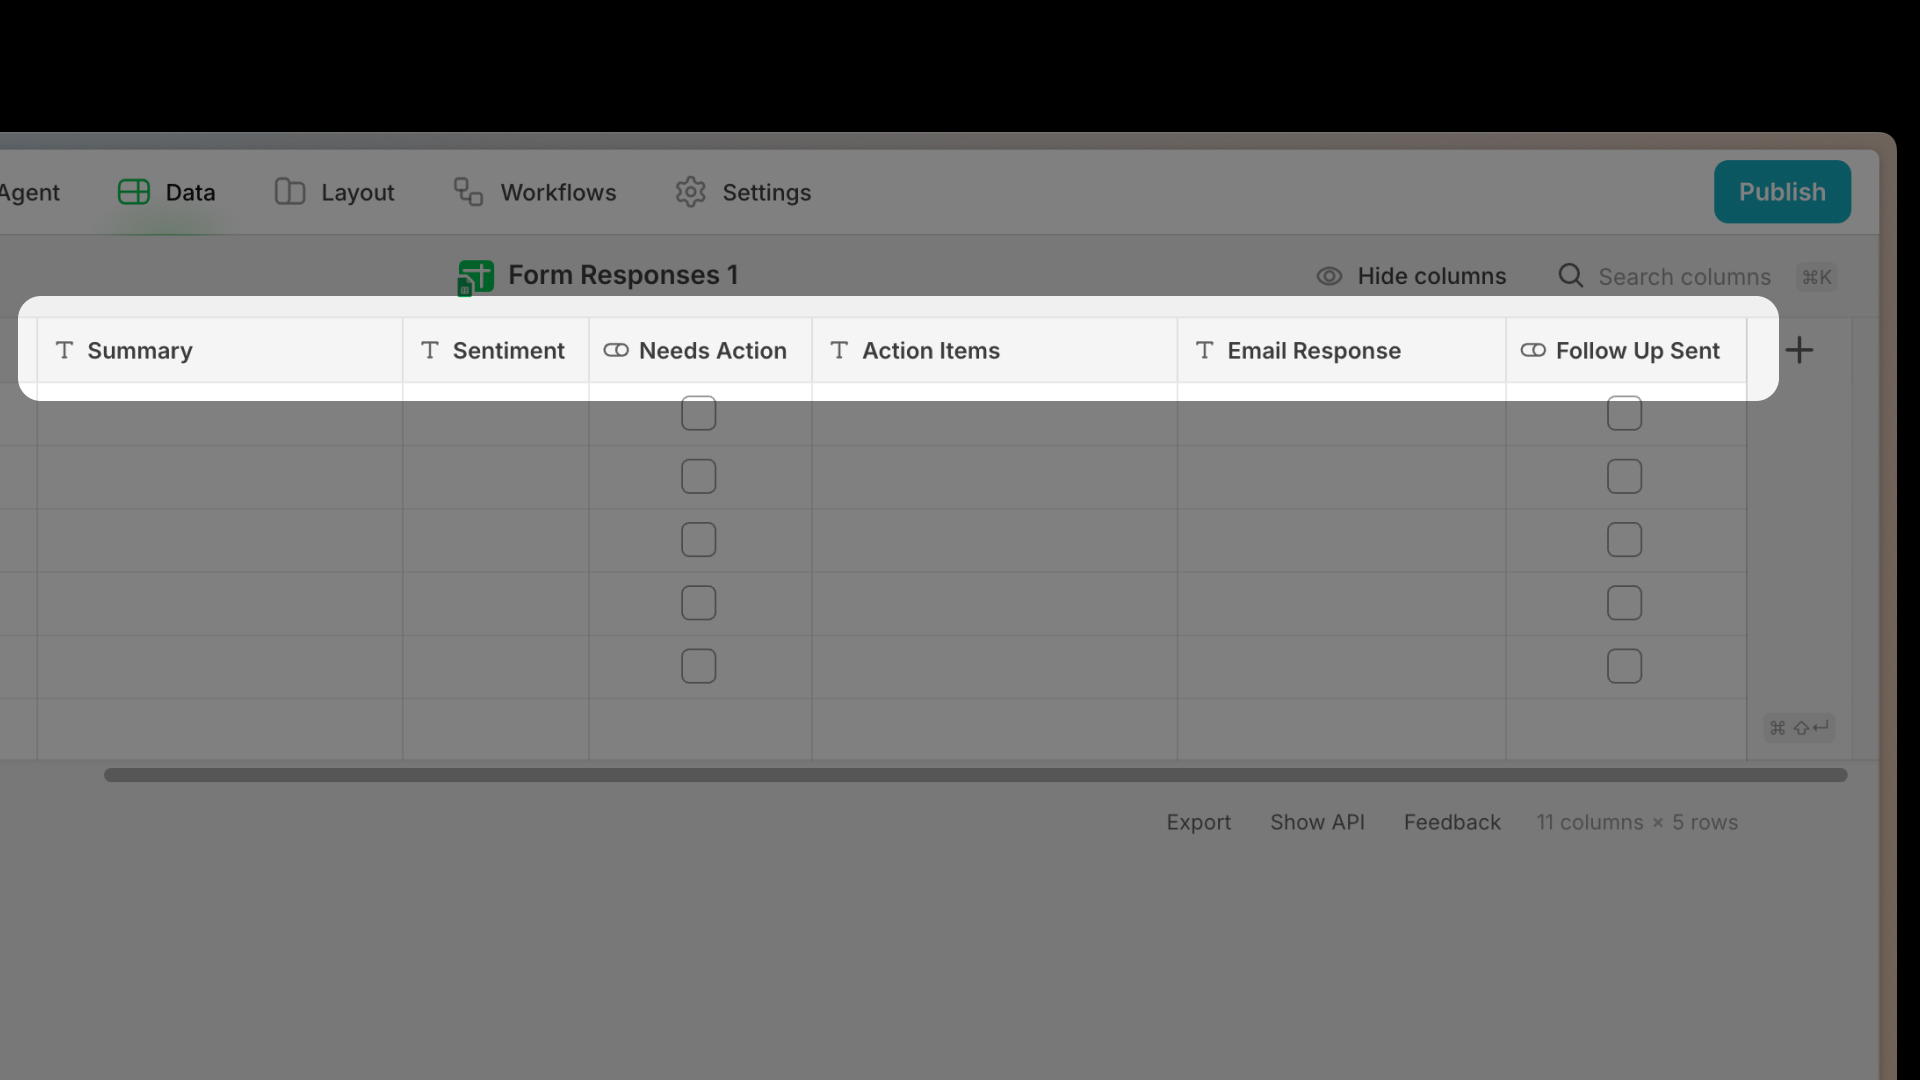
Next, add the following columns that the AI workflow will fill in automatically:
- Summary - A text column to store a short AI-generated version of the feedback so you can understand it at a glance.
- Sentiment - A text column to show whether the feedback is positive, neutral, or negative.
- Needs action - A boolean column. This will be a simple yes or no flag telling you if a follow-up is required.
- Action Items - A text column to hold a list of specific tasks or steps extracted from the feedback.
- Email Response - A text column to store a ready-to-send reply to the customer.
- Follow-up Sent - A boolean column that will mark whether a follow-up email has been sent for this feedback.
Step 3: Create a Scheduled Workflow
Next, it's time to make the columns you just created come to life with a Scheduled AI Workflow.
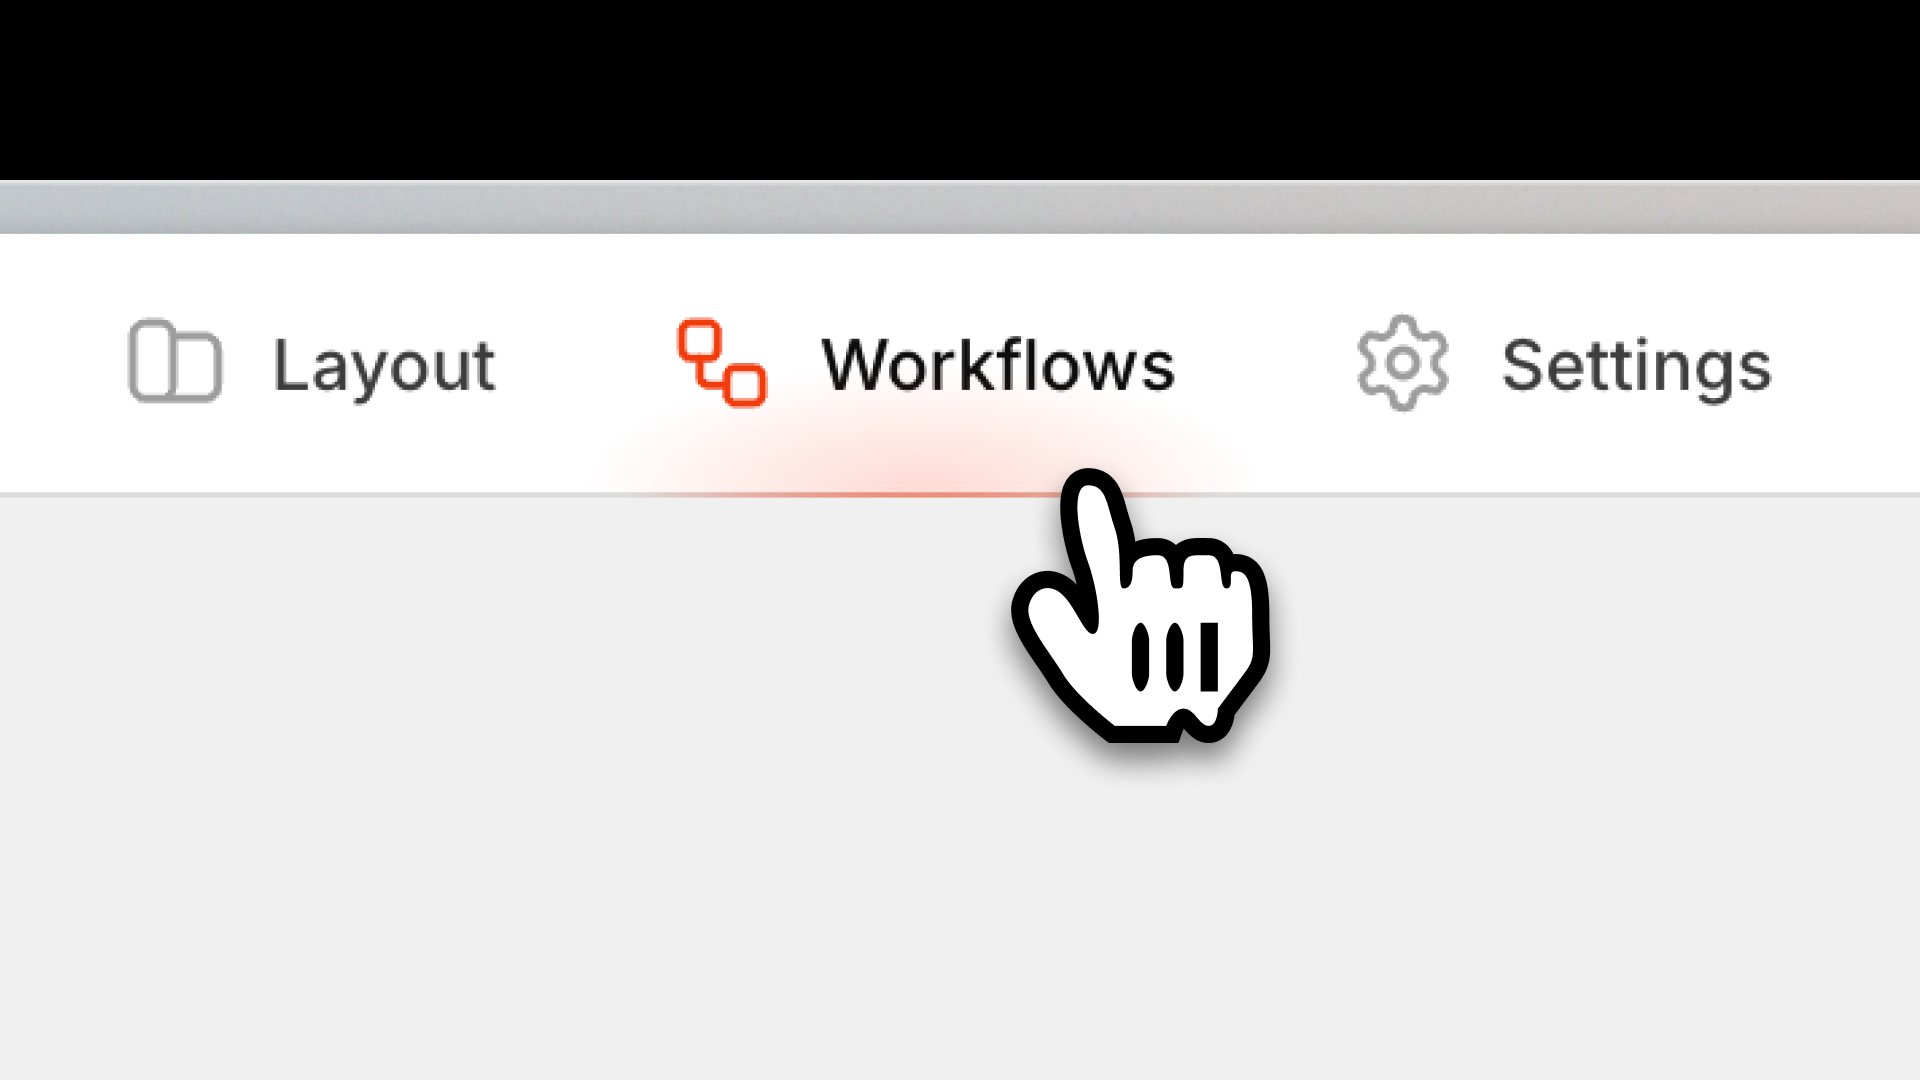
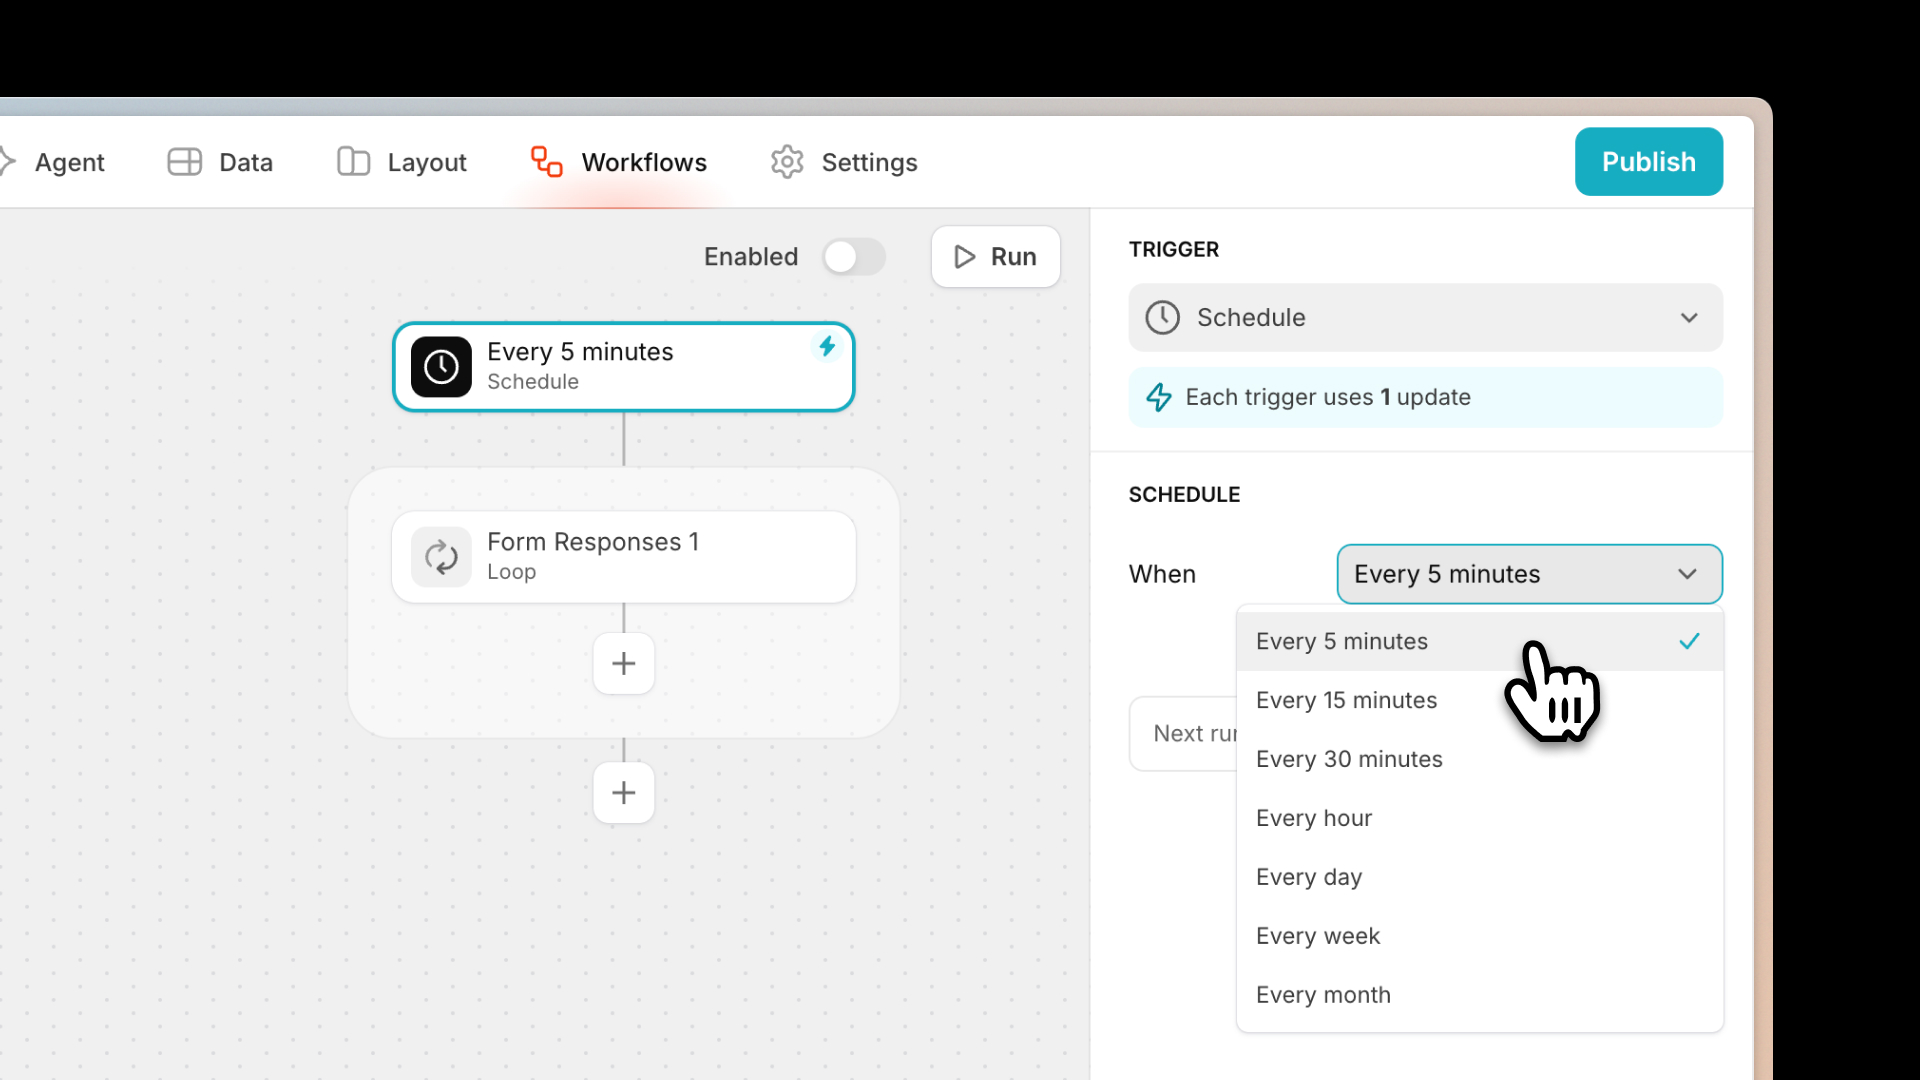
Go to the Workflows tab and click New Workflow. Set the trigger to schedule and run it every 5 minutes on the feedback table. Now add a condition so it only runs on rows where the summary column is empty. That way, we don't reprocess feedback that we have already handled. Here's how the workflow will work, action by action.
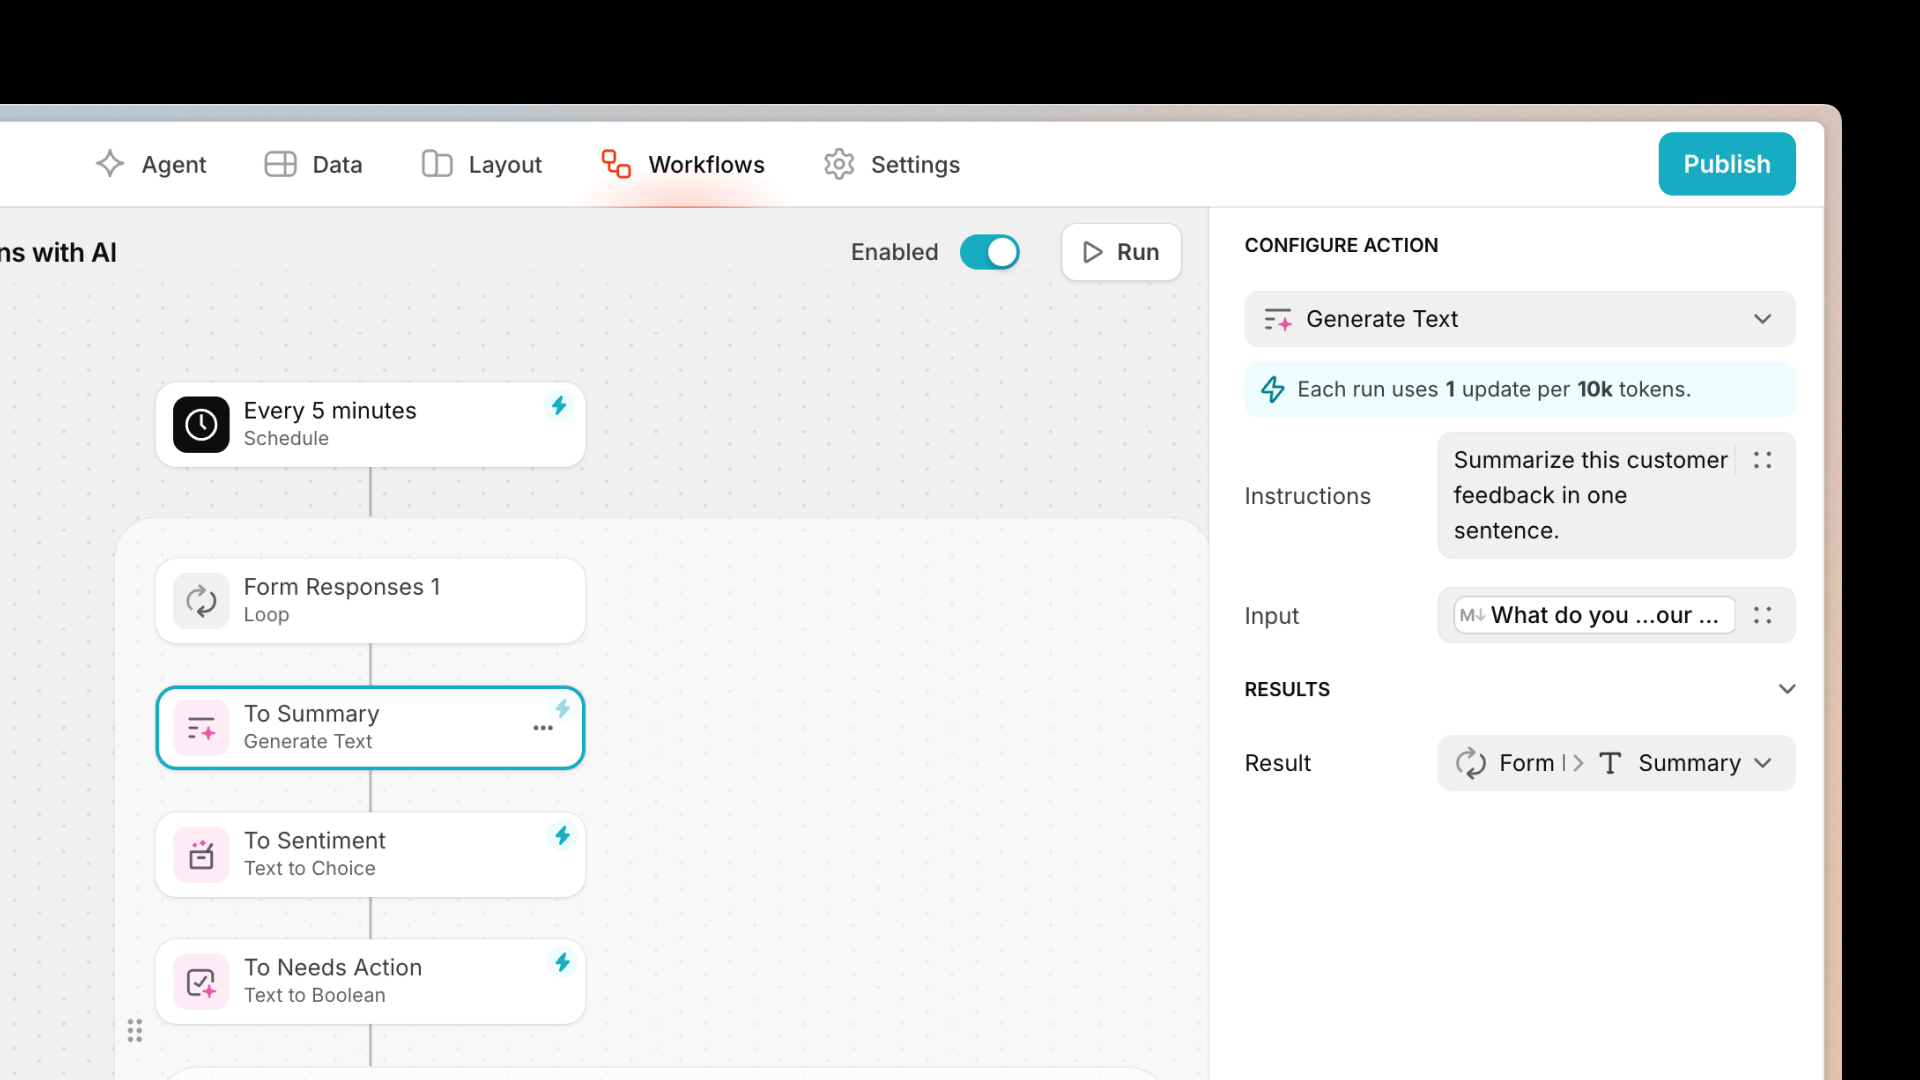
First, use AI to summarize the feedback. This will be a generate text action in Glide AI. It creates a short one-sentence summary of the customer's message. You will feed it the feedback column as the input, store the result in a summary, and use an AI prompt to summarize this customer feedback in one sentence.
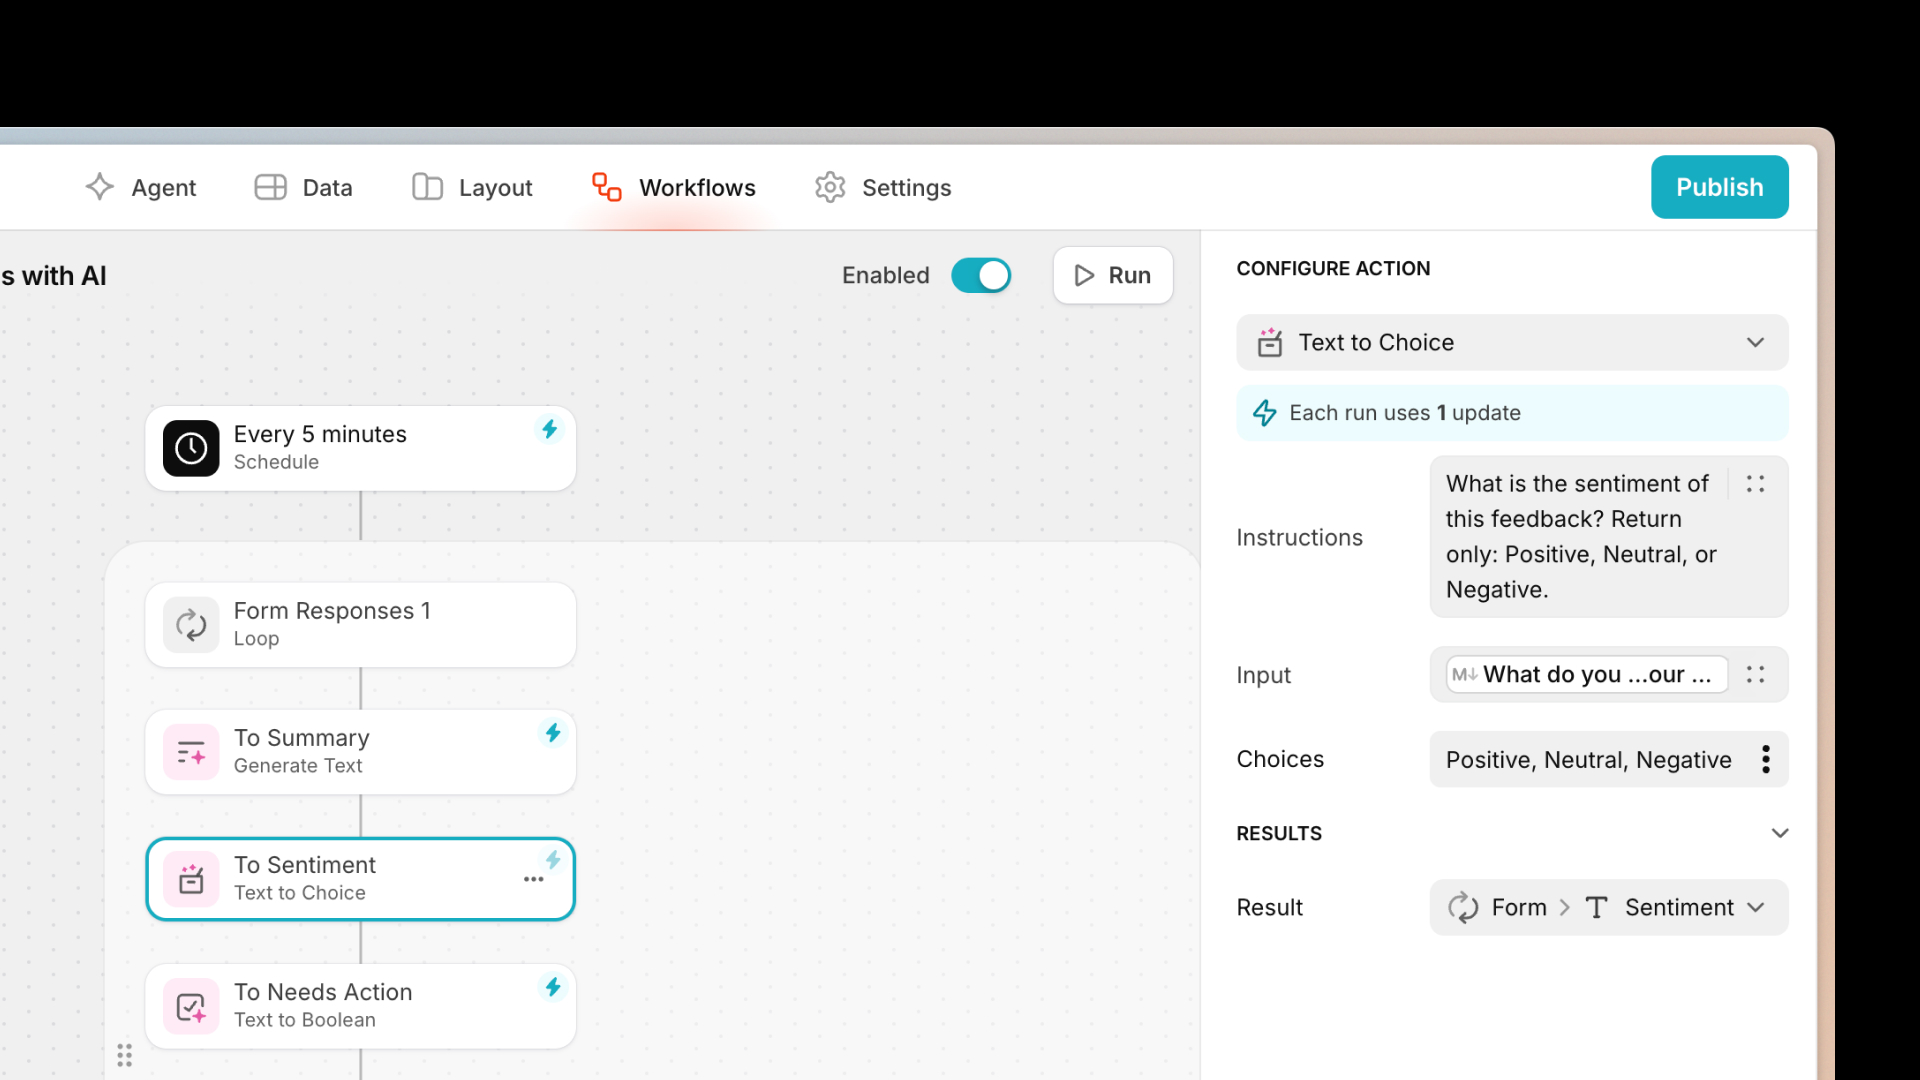
Next, analyze the sentiment. This will be a text-to-choice action in Glide. It classifies the tone of the message as positive, neutral, or negative. Input is feedback, output is sentiment, and the choices will be positive, neutral, and negative. Use the following prompt: “Analyze the sentiment of this feedback. Return only positive, neutral, or negative.”
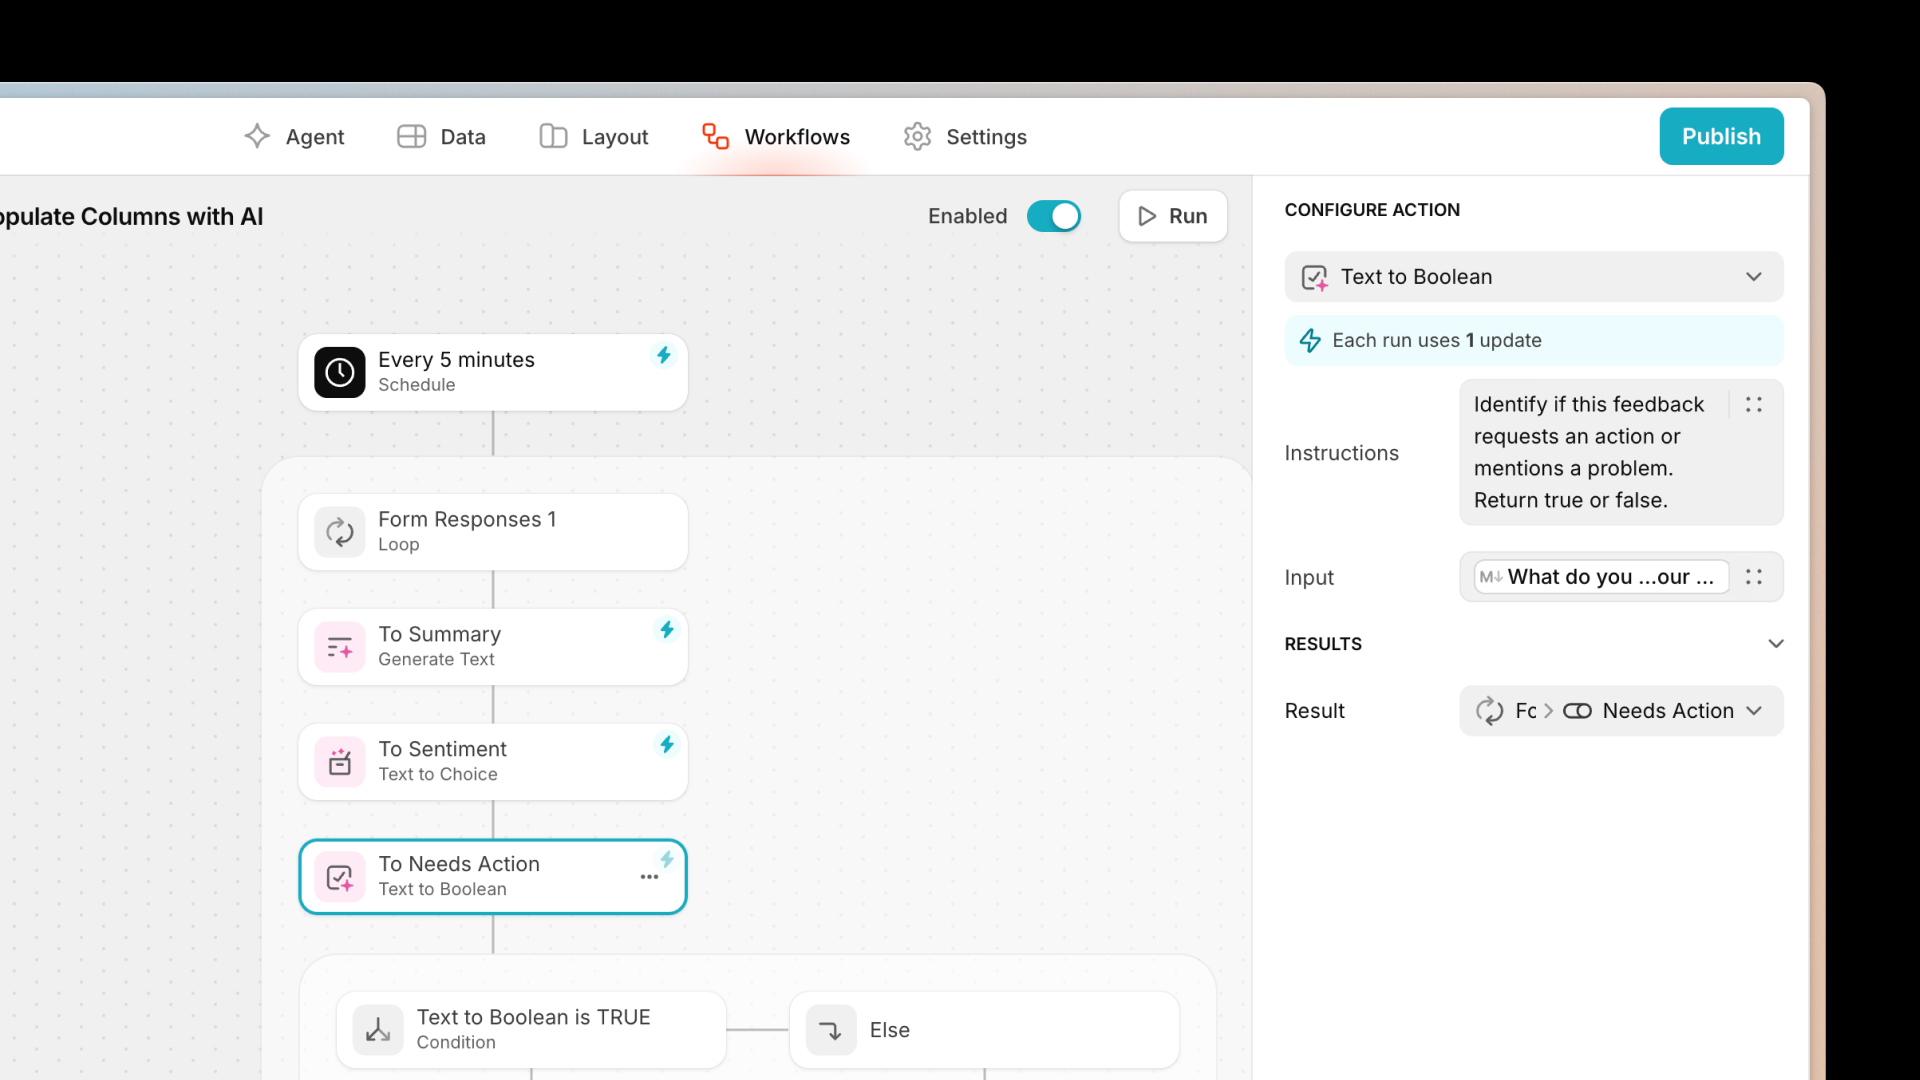
Then, instruct AI to detect if any action is needed. For this, you’ll use the text-to-boolean-action in Glide AI. It checks if the feedback contains a request, complaint, or issue that requires follow-up. Input is feedback, output is “need action”, and the prompt is: “Identify if this feedback requests an action or mentions a problem. Return true or false.”
Now, the workflow splits into two paths. If "need action" is true, the app will generate action items and a personalized reply for the customer. If “action item” is false, the app will mark it as no action items and still send a thank you email to acknowledge their message. To do so, you’ll add some conditional branching.
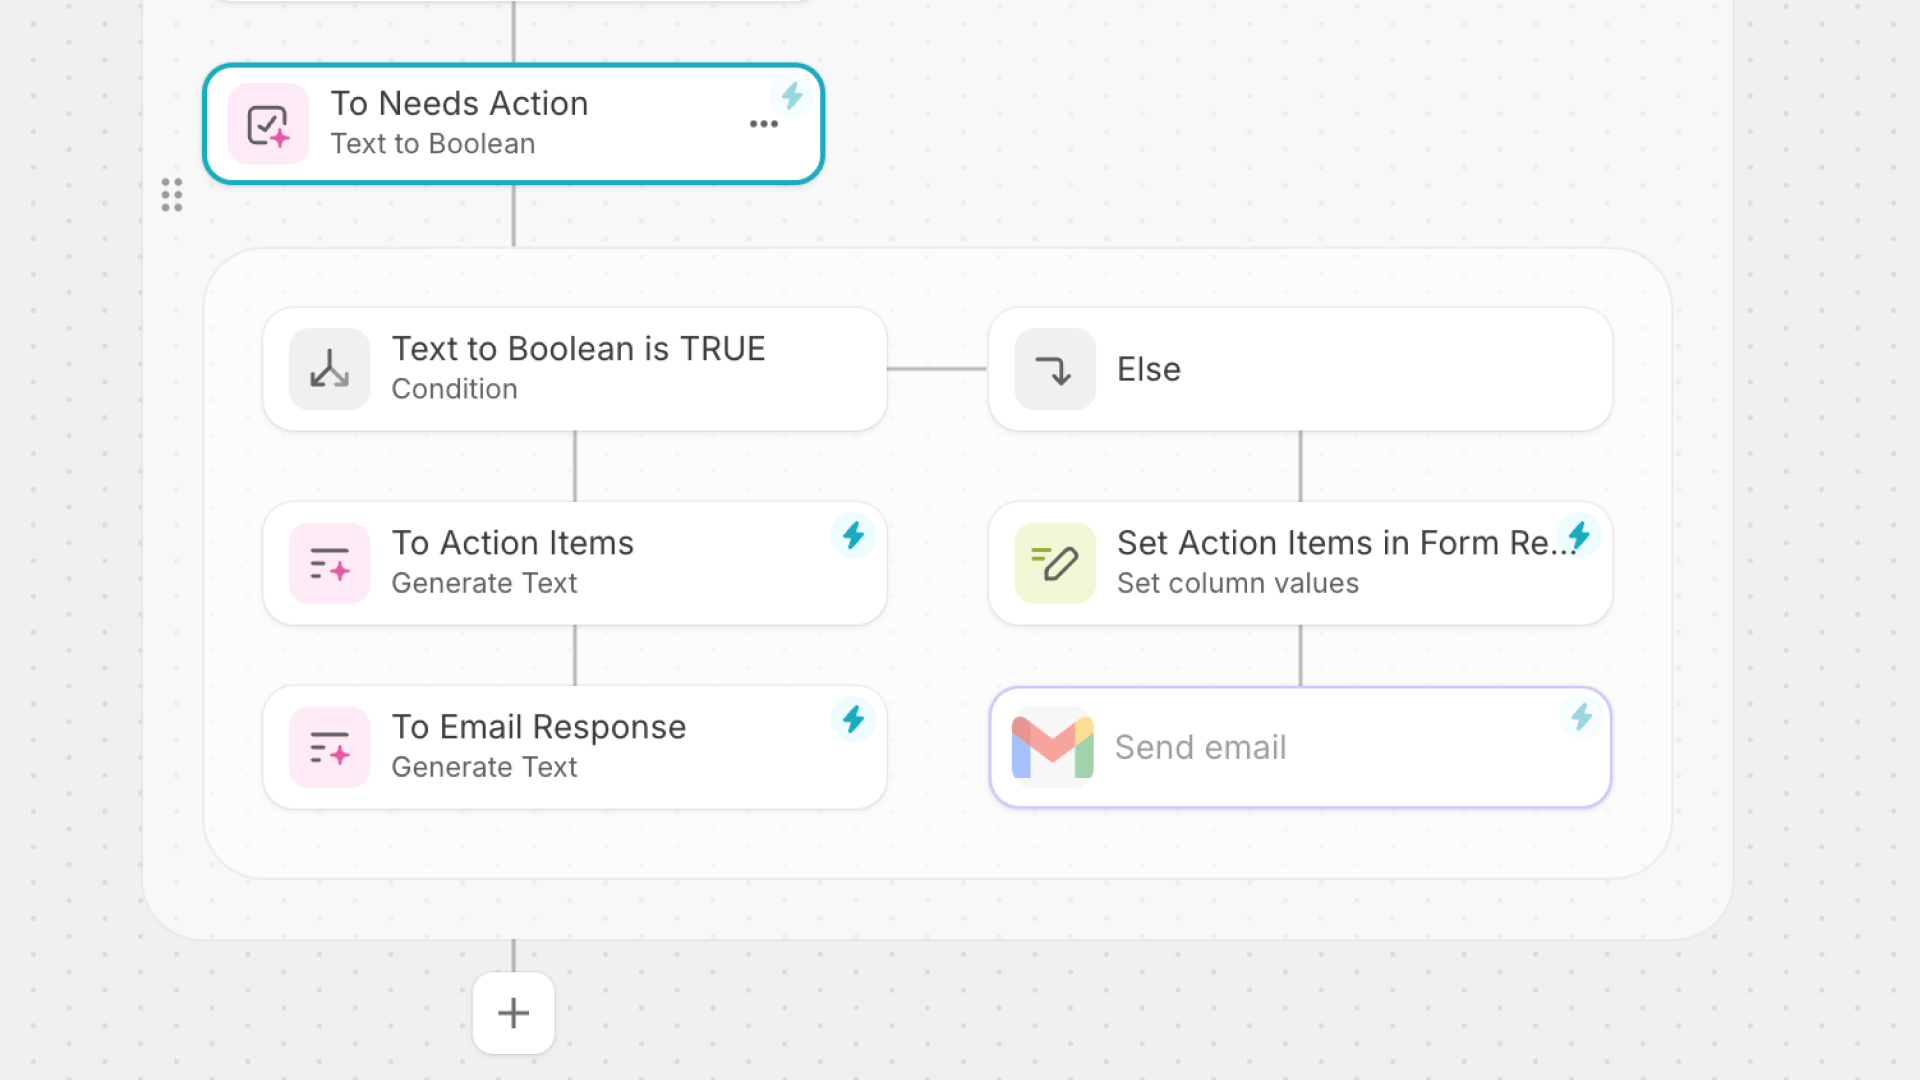
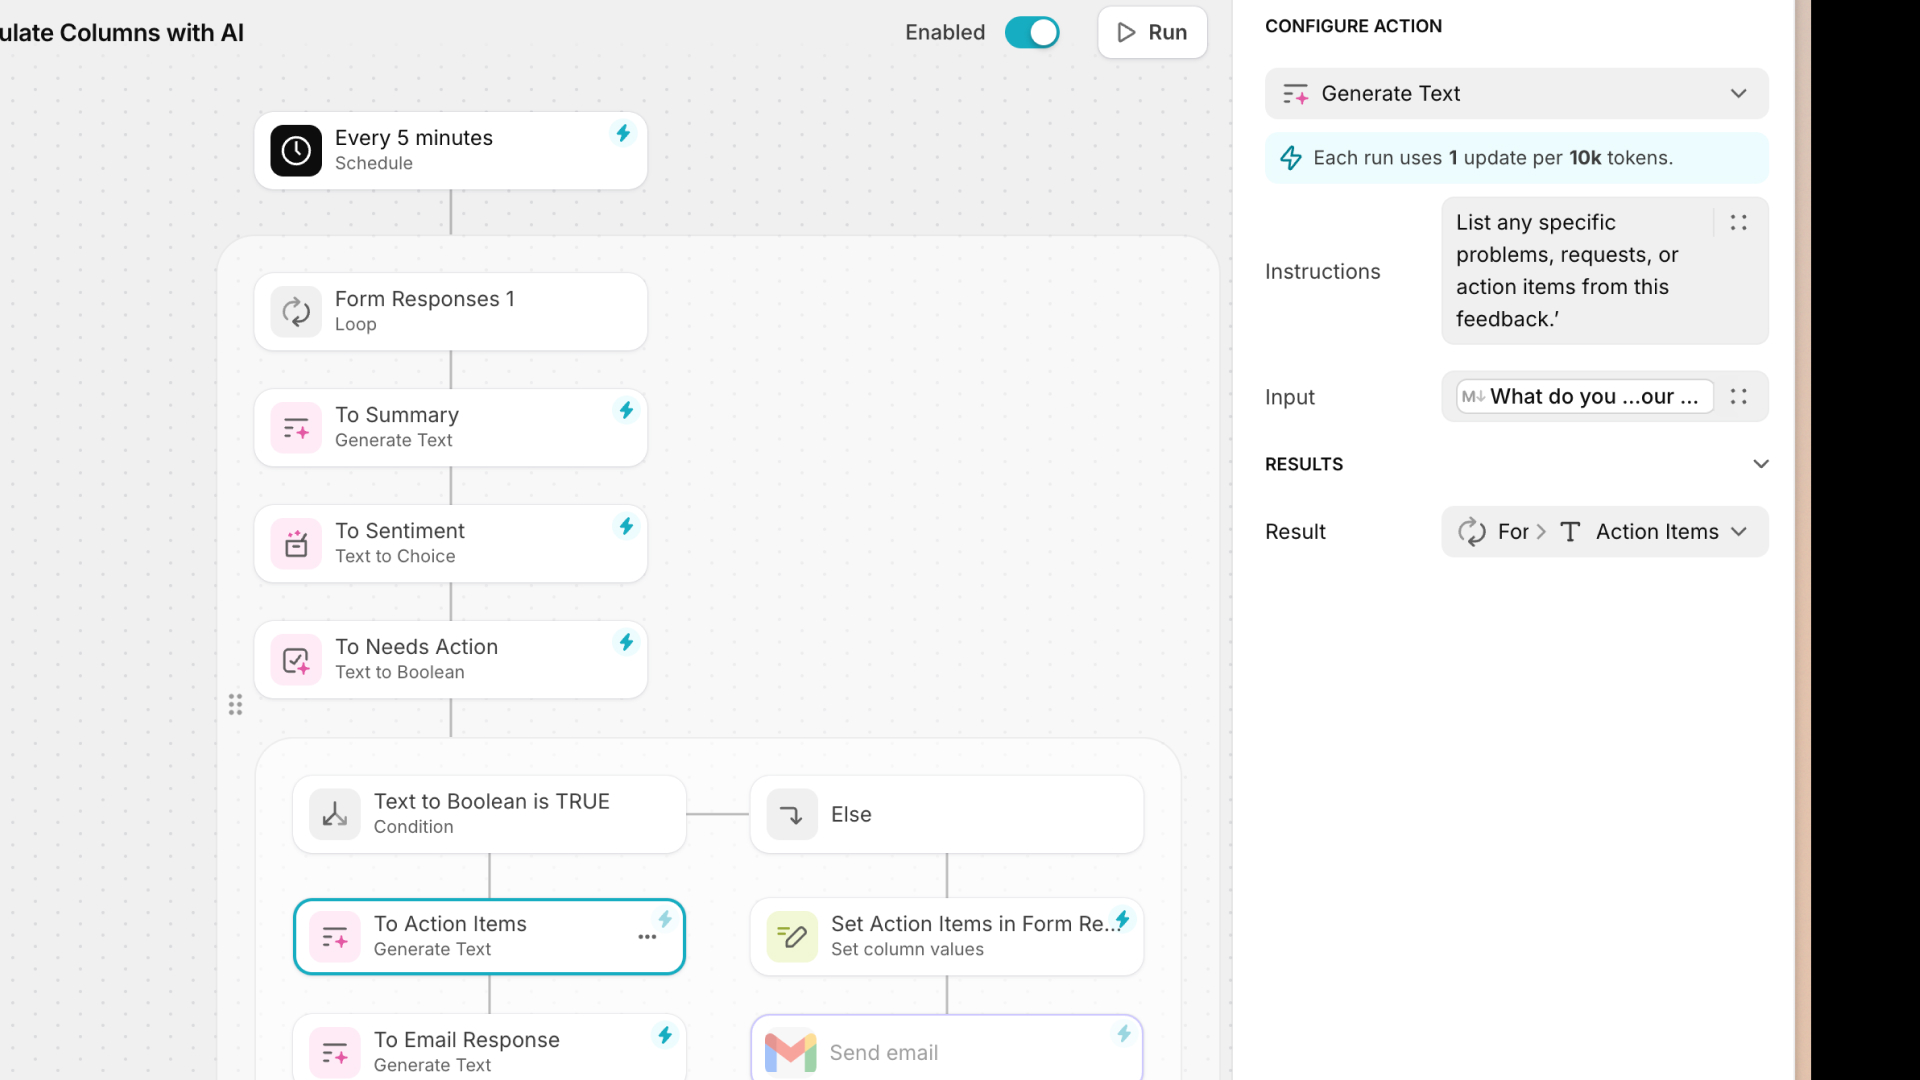
Set the actions for the if true path. The first one will be to generate action items. This will be a generate text action in Glide AI. It extracts a specific task or next steps from the feedback. Input is feedback, output is action items, and the prompt is: “List any specific problems, requests, or action items from this feedback.”
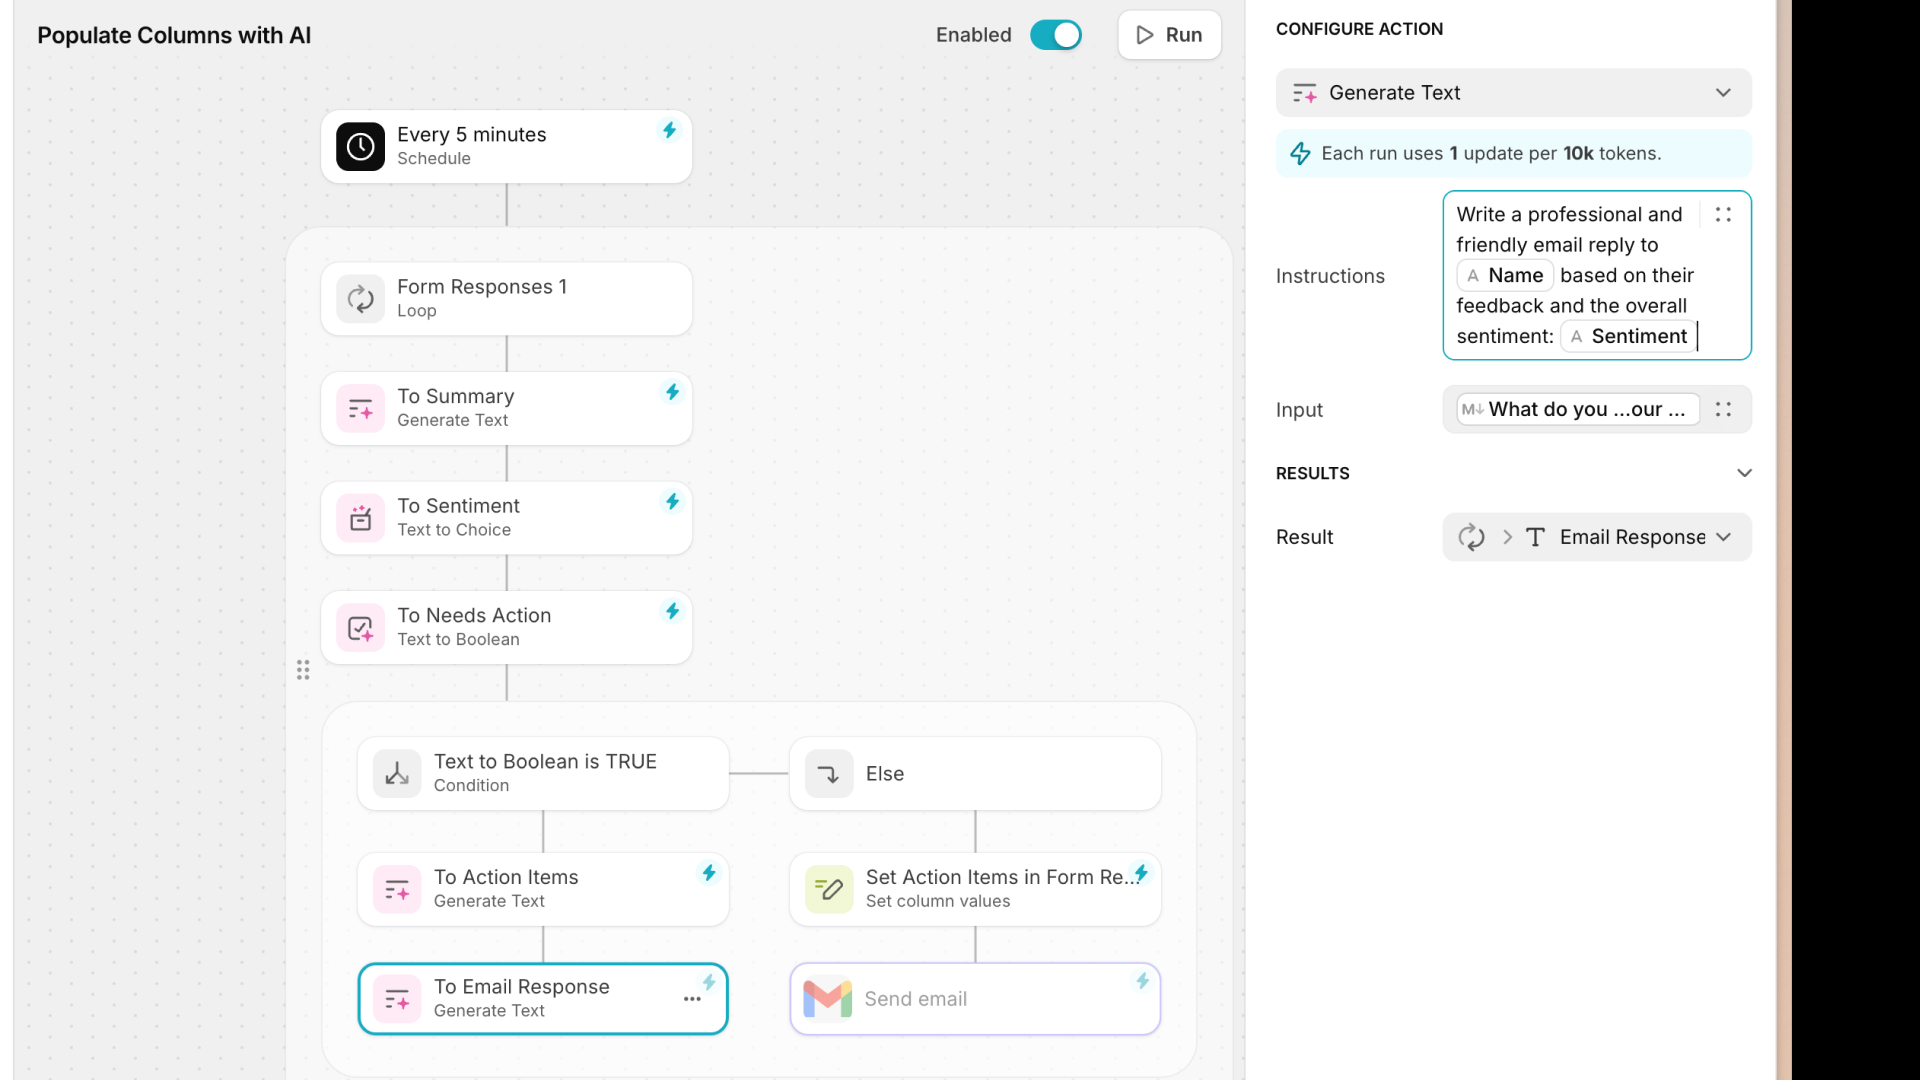
After that, you’ll set it to generate an email response. This will also be a generate text action in Glide AI. It drafts a ready-to-send professional and personalized reply to the customer. Use feedback, sentiment, and name as the inputs. Store it in an email response and use this prompt: “Write a professional and friendly email to the user's name based on the feedback and the overall sentiments.”
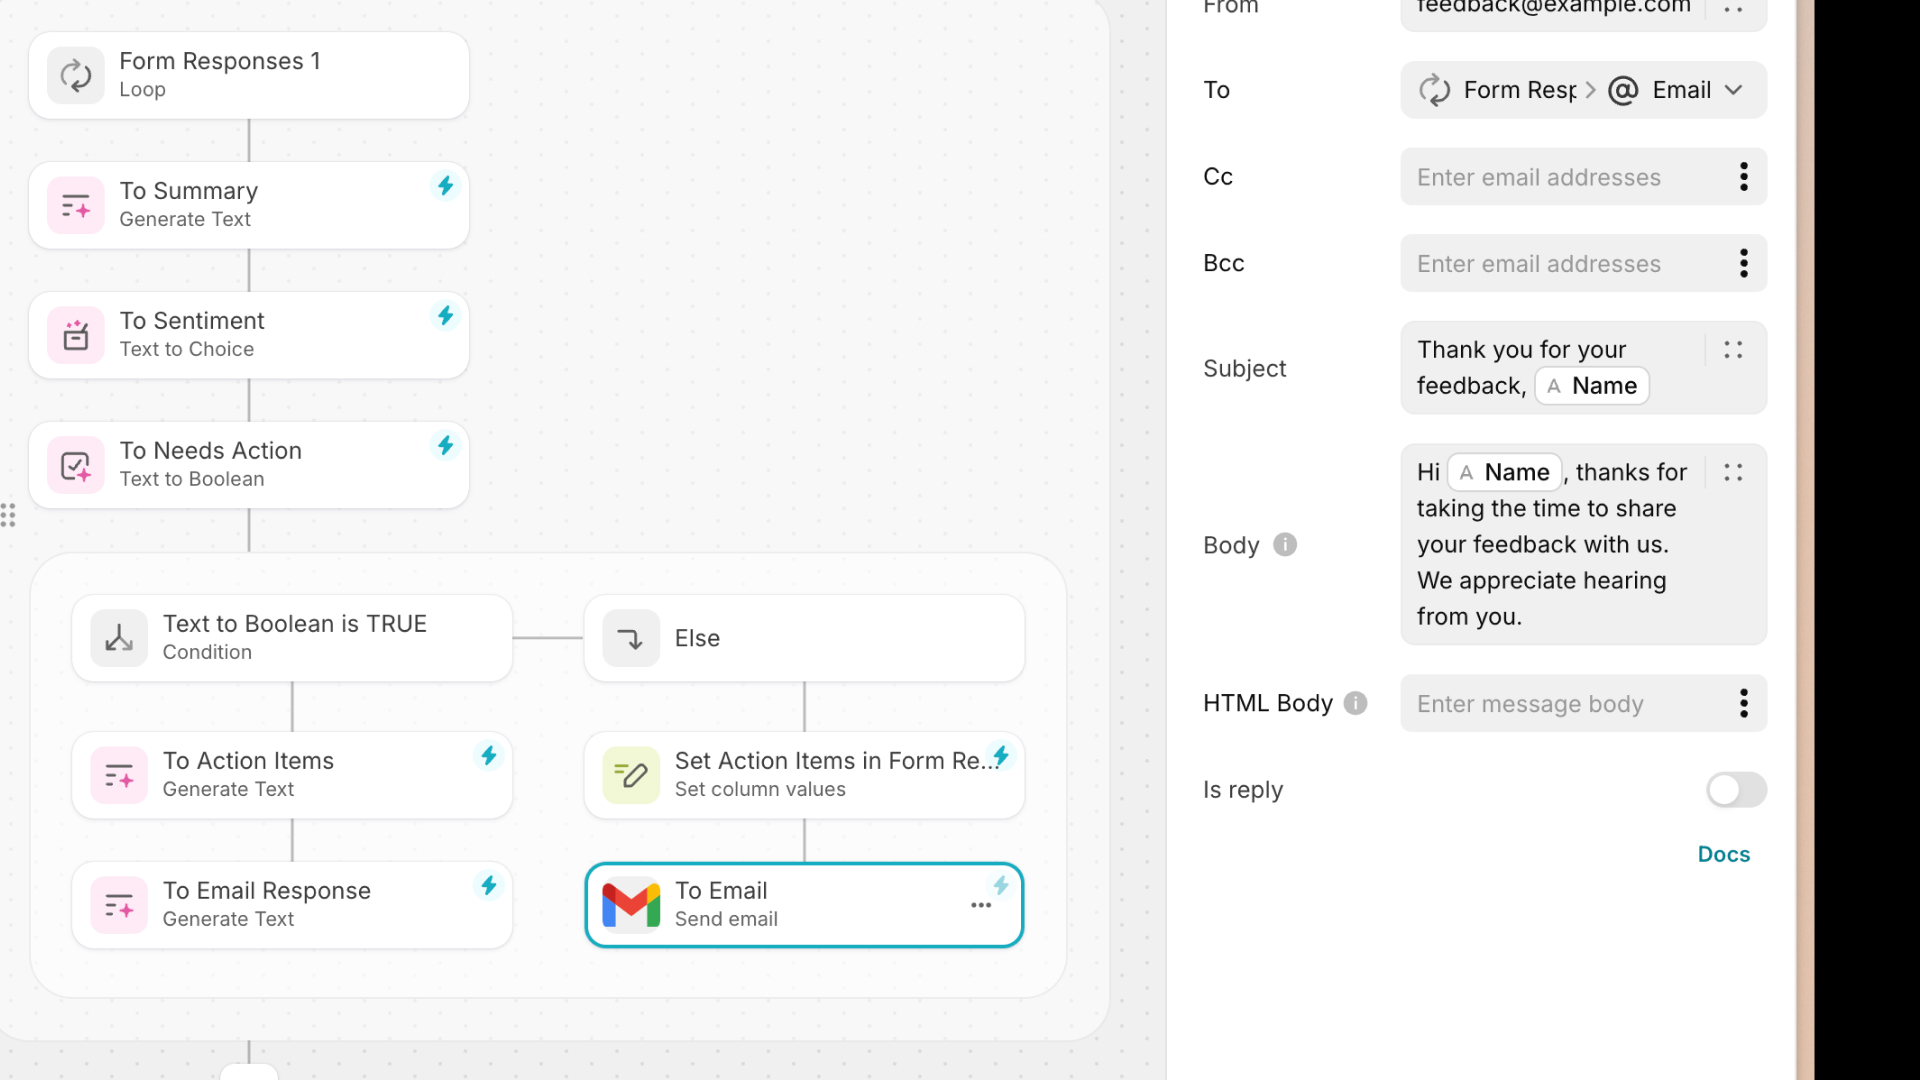
Now, set the actions for the if false path. The first one is to mark that there are no action items. This will be a set column value action. It sets the action items column to say “no action items” so you know it's being reviewed. And finally, set it up to send the thank you email using the Gmail integration (you can also use the send email action). We will send it to the user's email. Use a subject like “Thank you for your feedback” and add the user's name. The body can contain whatever personalized thank you text you like, such as “Hey (user's name). Thank you for taking the time to share your feedback with us. We appreciate hearing from you.”
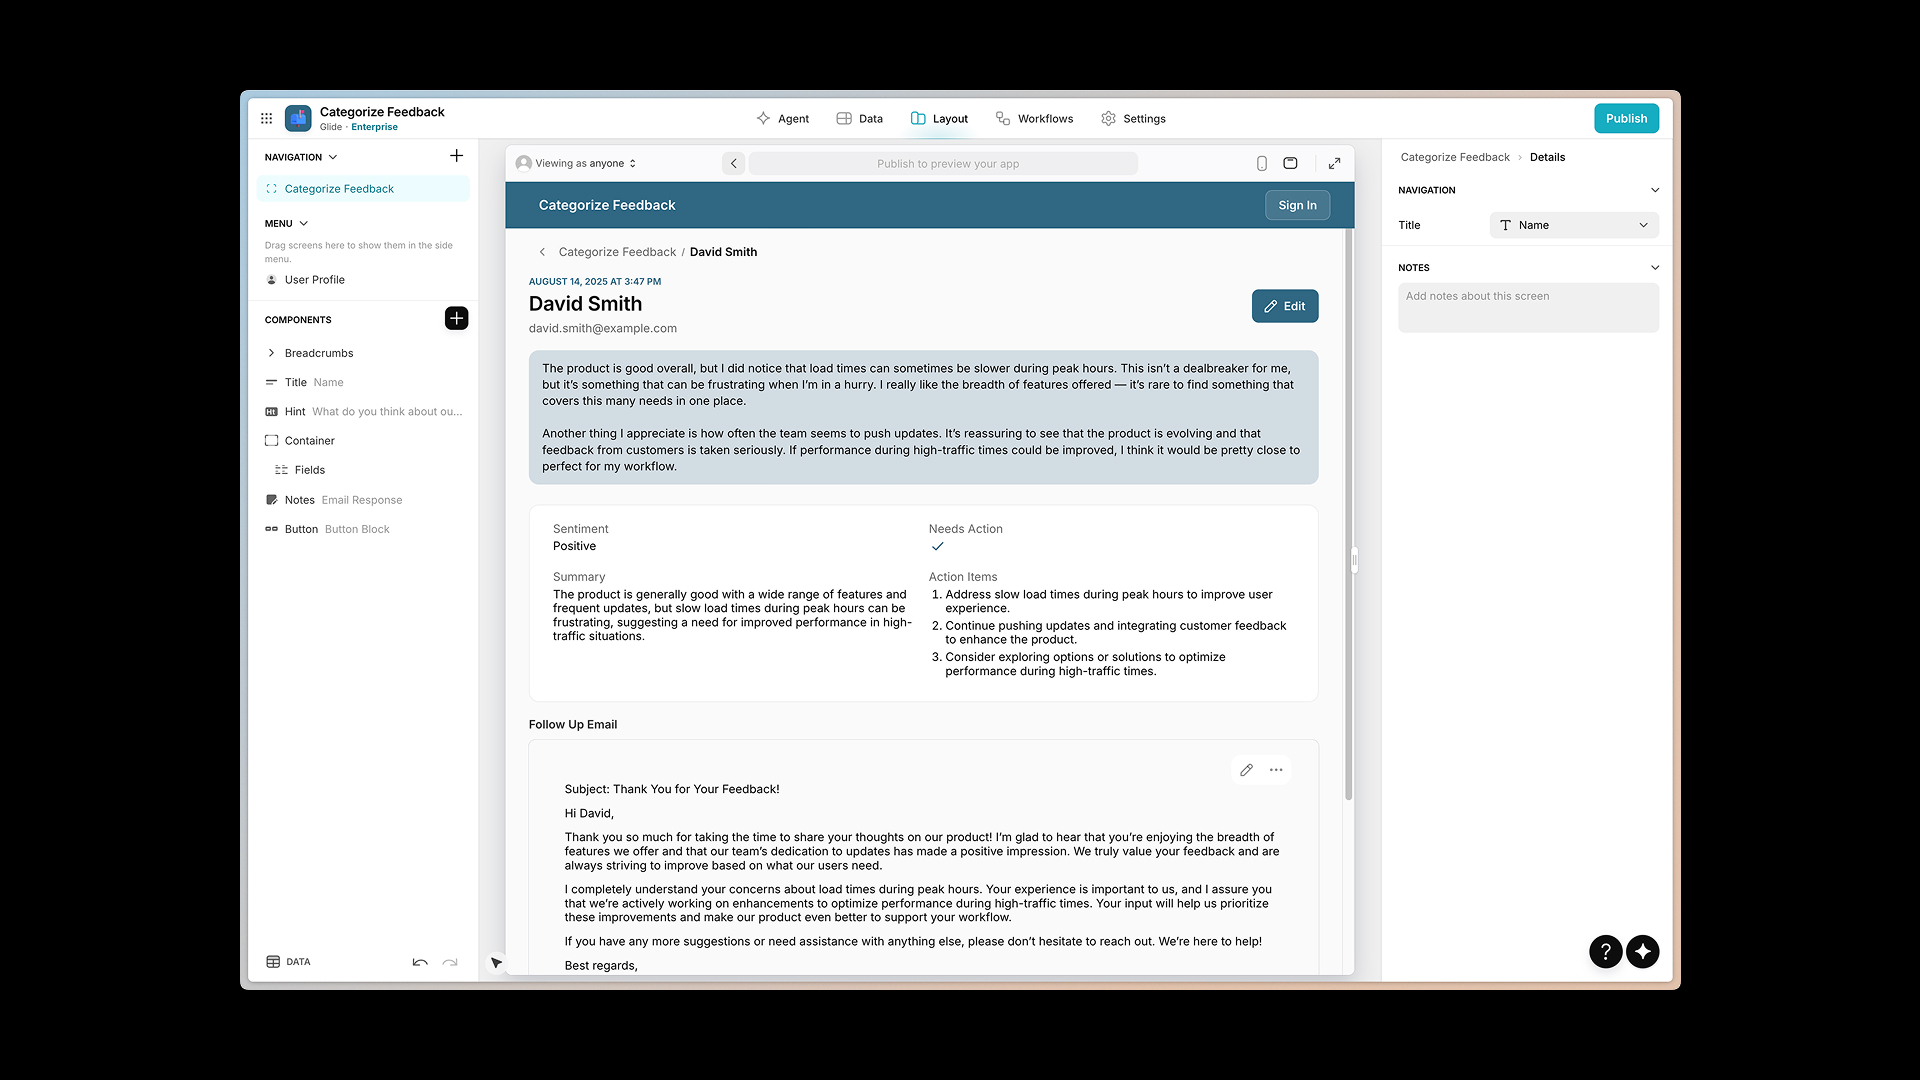
Step 4: Build the Admin UI
Now that the workflow is ready, it’s time to design the admin dashboard. Create a new custom screen and add a list component bound to the feedback table. Show the feedback summary, the customer name, and the timestamp. You can add filter options based on the sentiment and in action columns to quickly focus on important feedback. Now, click on a record to visualize the detail screen and add components to show the information of each row.
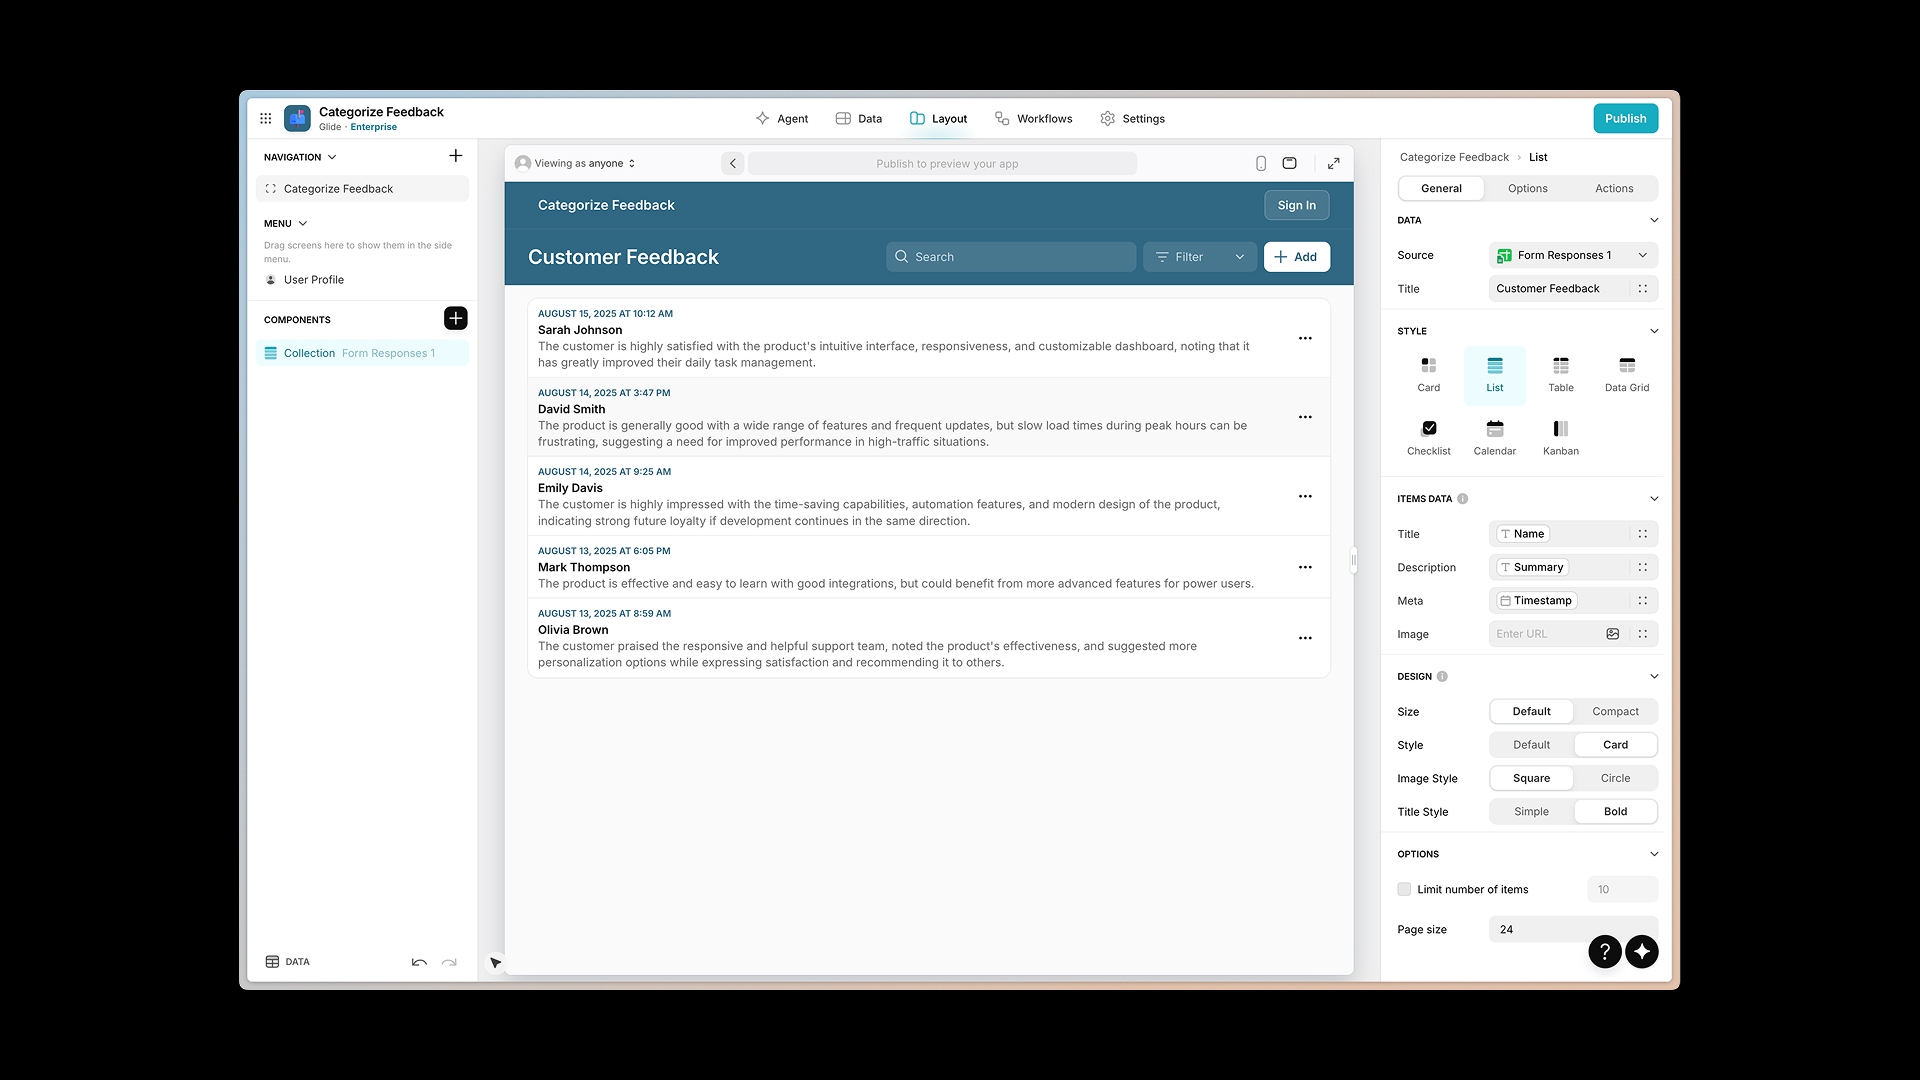
You can add components like a title component to show the name, email, and time stamp, a hint to show the original feedback, a fields component to show the sentiment summary if "needs action", and the action items. Then you can also add a notes component to show the follow-up email. This way, app users can modify the AI-generated email before they send it.
Step 5: Send a Follow-up Email from the App
Your app is nearly complete, but you will still need to implement an action to send follow-up emails to users whose feedback has been flagged as "need action”. It can be helpful to set your app to have a human review the feedback before sending these follow-up emails. Therefore, instead of integrating an automated email action within the workflow, add a button that allows users to manually confirm the email delivery.
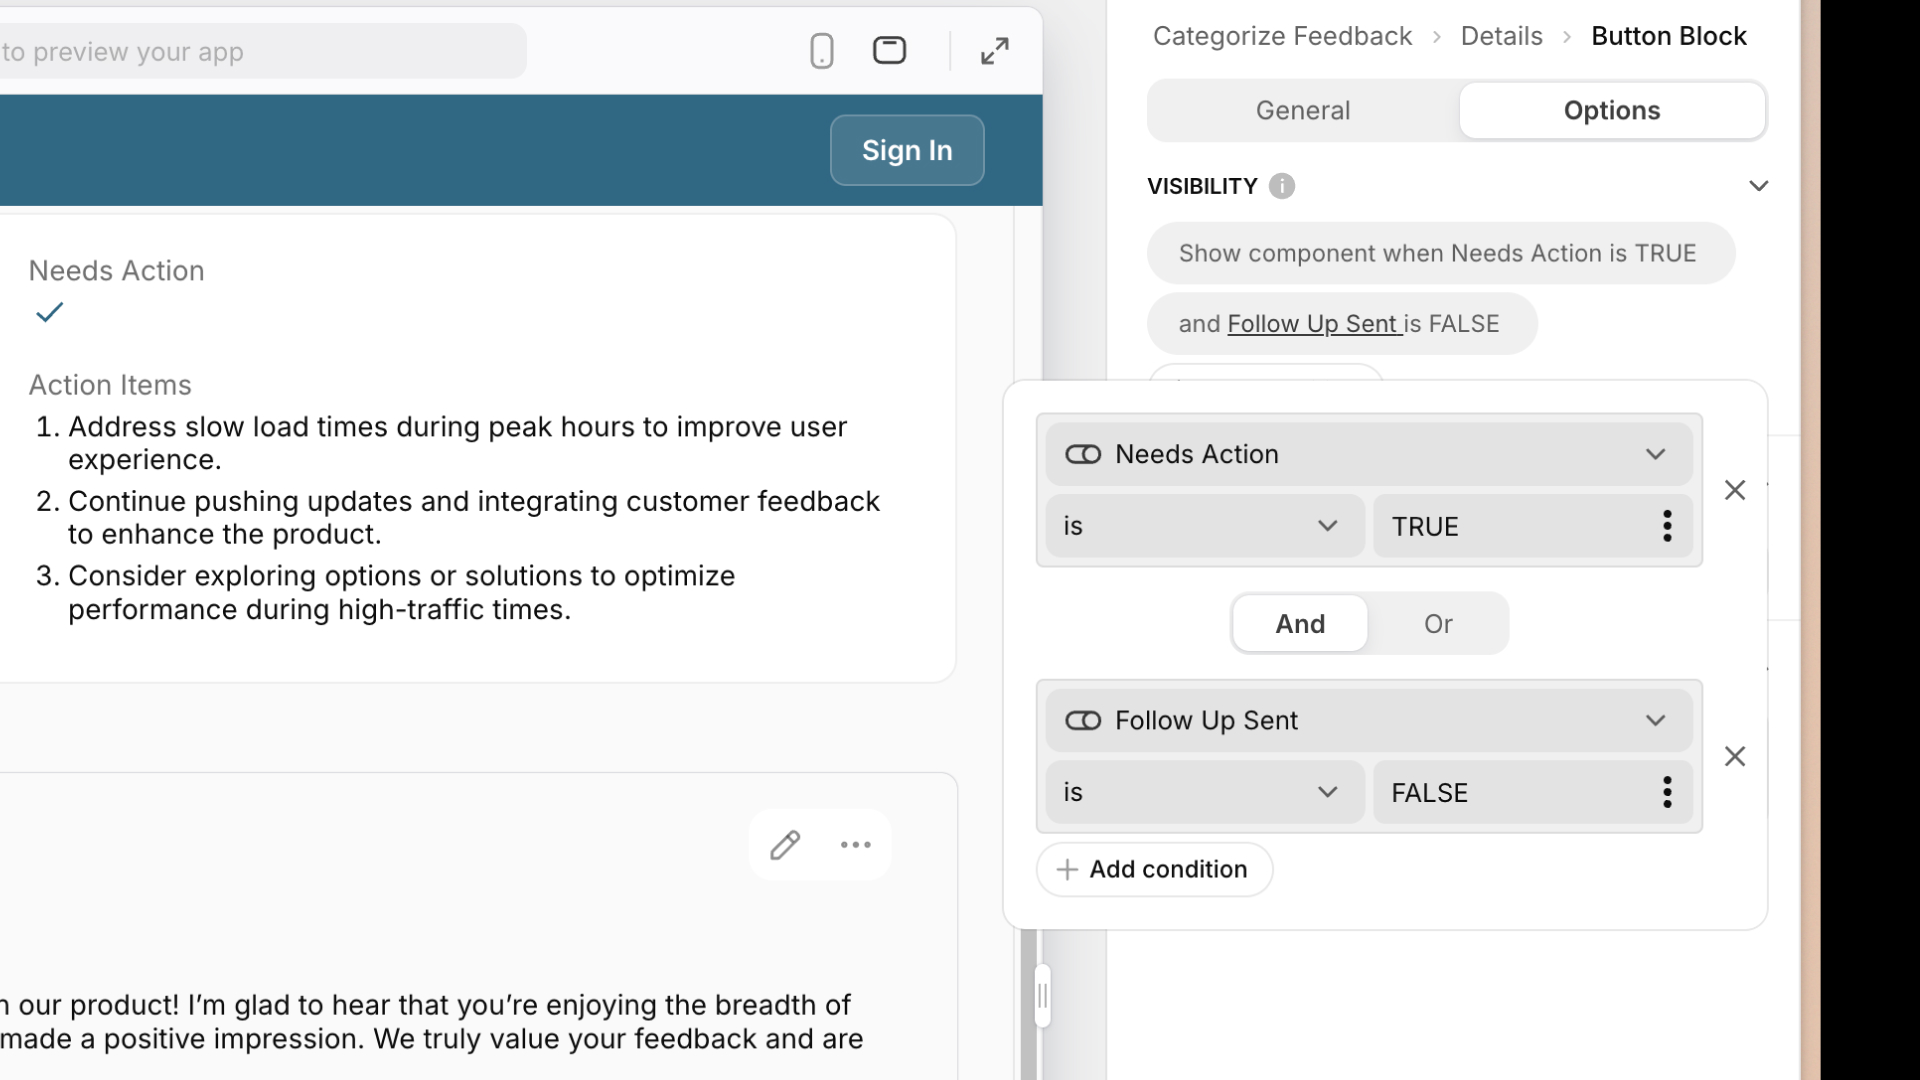
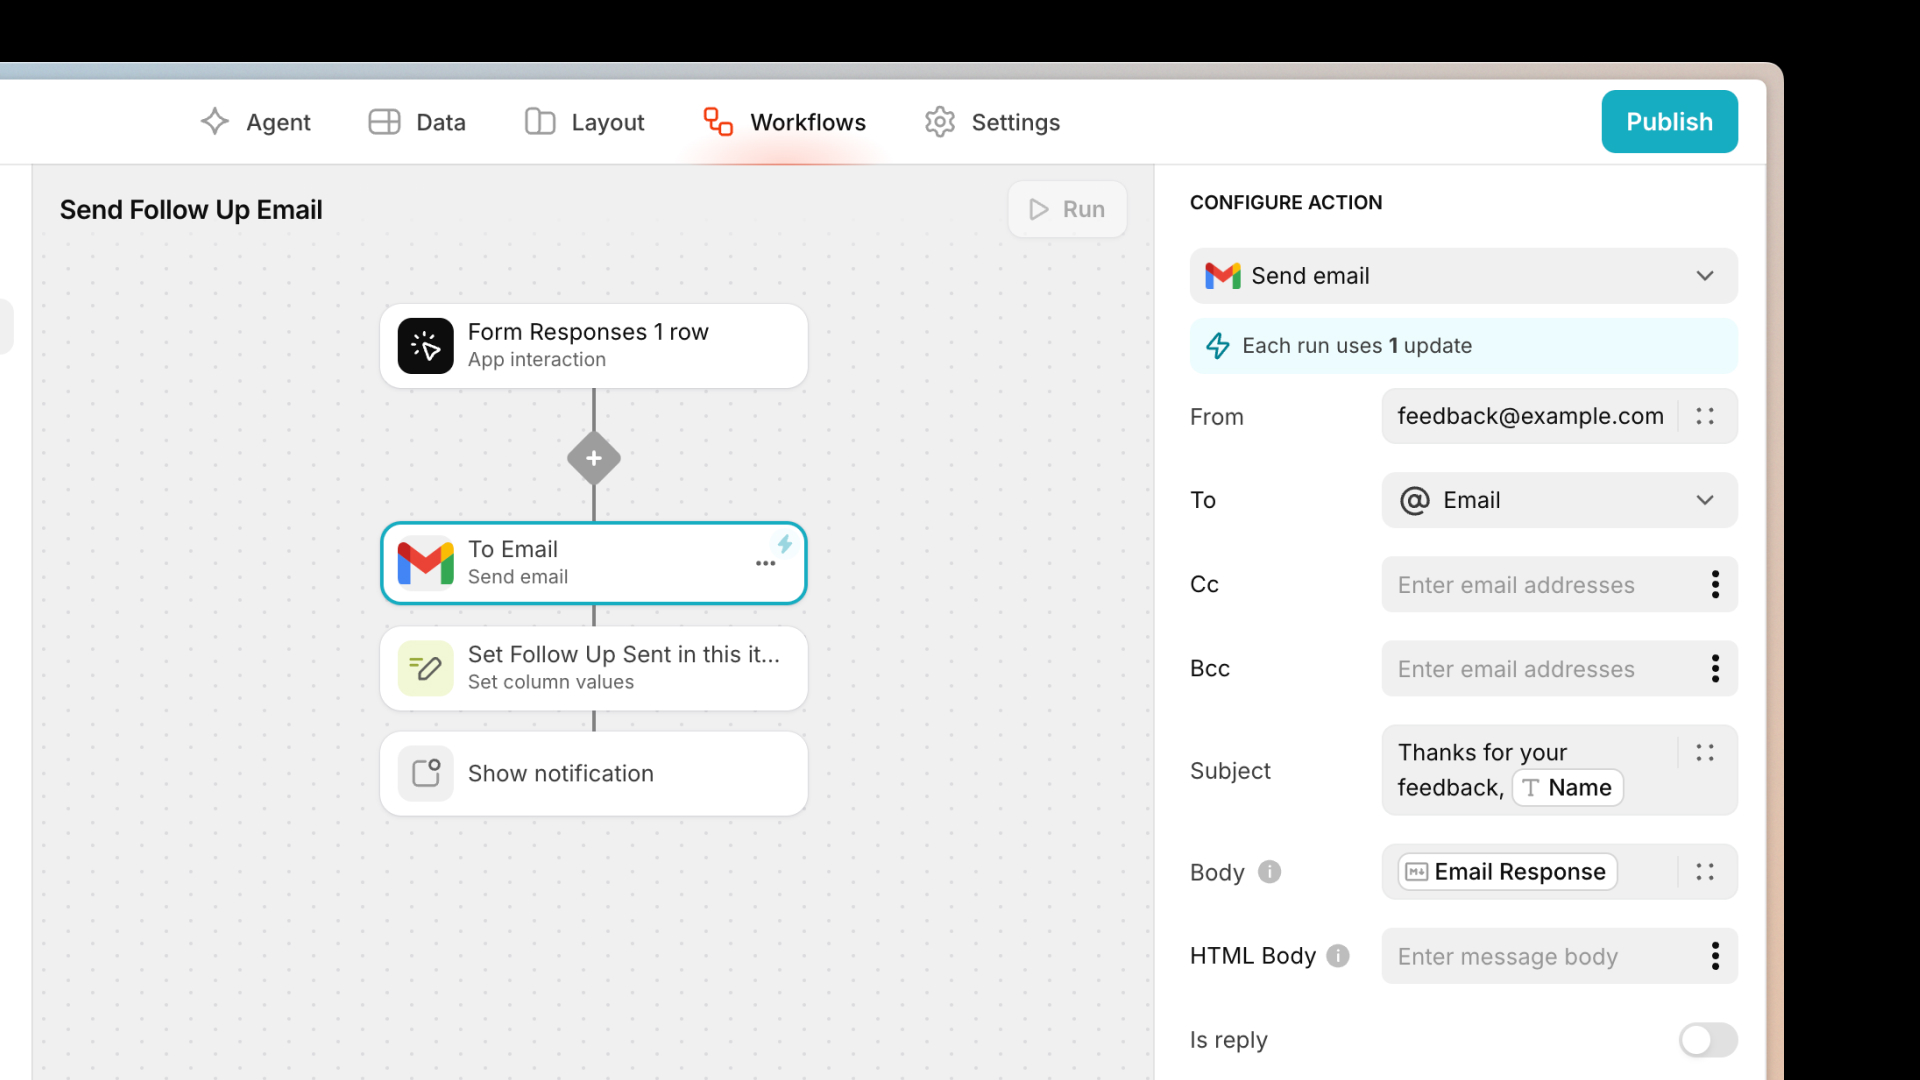
Add a button labeled “send follow-up email”. Make it visible only when "need action" is true and “follow-up sent” is false. That way, you can avoid confusion or incorrectly sending multiple emails. Now, create a new workflow attached to this button; send an email via the Gmail integration to the customer's email. Add something in the subject like “Thank you for your feedback, (customer name)”. For the body, you can use the email response column that was populated with your workflow.
Next, set an action to set the follow-up sent to true so your users can easily recognize what feedback has been addressed. Finally, show a notification saying email sent.
Optional Enhancements
With these essential elements set up, you can now customize your AI feedback app in any way you like, adding features or integrating with more of your team's tools.
You could create a create task button to escalate feedback internally, add a chart to see sentiment breakdowns, or even send Slack alerts for any negative feedback that needs urgent action. This is just the starting point. The idea is to make the app adapt to your specific workflows and the unique needs of your business.
Build AI automation into your business
You have now built a complete feedback management system that will save your team time. This technique can be used to create a number of different tools for different industries. It could automatically process maintenance requests, help your customer success team respond to complaints faster, or stay on top of reviews from your ecommerce operations.
Oscar Brooks of Glide Agency V88 used this technique to not just prioritize the most urgent repair tickets for a property management firm, but also create automated cost estimates and route repairs to the right contractor. “What we have here, without any human intervention, is the same process a human would typically carry out, except the AI does 80% to 90% of the work,” says Oscar. “It just requires a human to check over and make sure that things are accurate.”
This is just one example of the way Glide AI and Workflows can combine to help your business implement intelligent automation, saving time, increasing accuracy, and improving client experience across the board. You just have to decide what you’d like to build next.