

Many of us spend a significant amount of time at work using Microsoft Excel and Google Sheets. In fact, the average Excel user spends over a third of their time in spreadsheets.
While Excel sheets and the like are incredibly important, they have their limitations. They’re challenging to collaborate on, annoying to use on mobile, and difficult to apply selective visibility or security controls to if you want to share them more widely. The best way to overcome these challenges is to convert those spreadsheets into functional apps.
These days, you don’t need to choose between a spreadsheet and an app. You can have both. With a no-code development platform, you can turn any of your data sets into a user-friendly mobile app quickly, all without needing to know any coding. Glide is a no-code platform specifically designed to convert spreadsheet data into powerful apps quickly.
In this beginner’s guide, we’ll show you how to use Glide to turn spreadsheets into powerful web apps that can be used across any desktop or mobile device. All you need is a well-formatted spreadsheet and a Glide account.

How to turn an Excel spreadsheet into an app
Learn howStep 1. Plan your spreadsheet app
To create an effective app from your spreadsheet, you first need to understand the type of software required.
Review your spreadsheet and the processes it is involved in. Then ask yourself these three questions:
- Why does this spreadsheet exist?
- Who uses this spreadsheet?
- How do they use it?
As an example, let’s compare two different spreadsheets: a sales team’s customer tracker and an internal resources list. These two spreadsheets serve distinct purposes and are used in different ways by different individuals. Their corresponding apps will need to address these factors with the appropriate functionality and features.
Spreadsheet 1: Sales team customer tracker
This spreadsheet contains data about customers and prospects. The reason this spreadsheet exists is to enable your sales team to manage leads, engage customers, move deals down the pipeline, and everything else associated with the sales process. Outside of the sales team, C-suite employees use and view this spreadsheet regularly to monitor sales efforts.
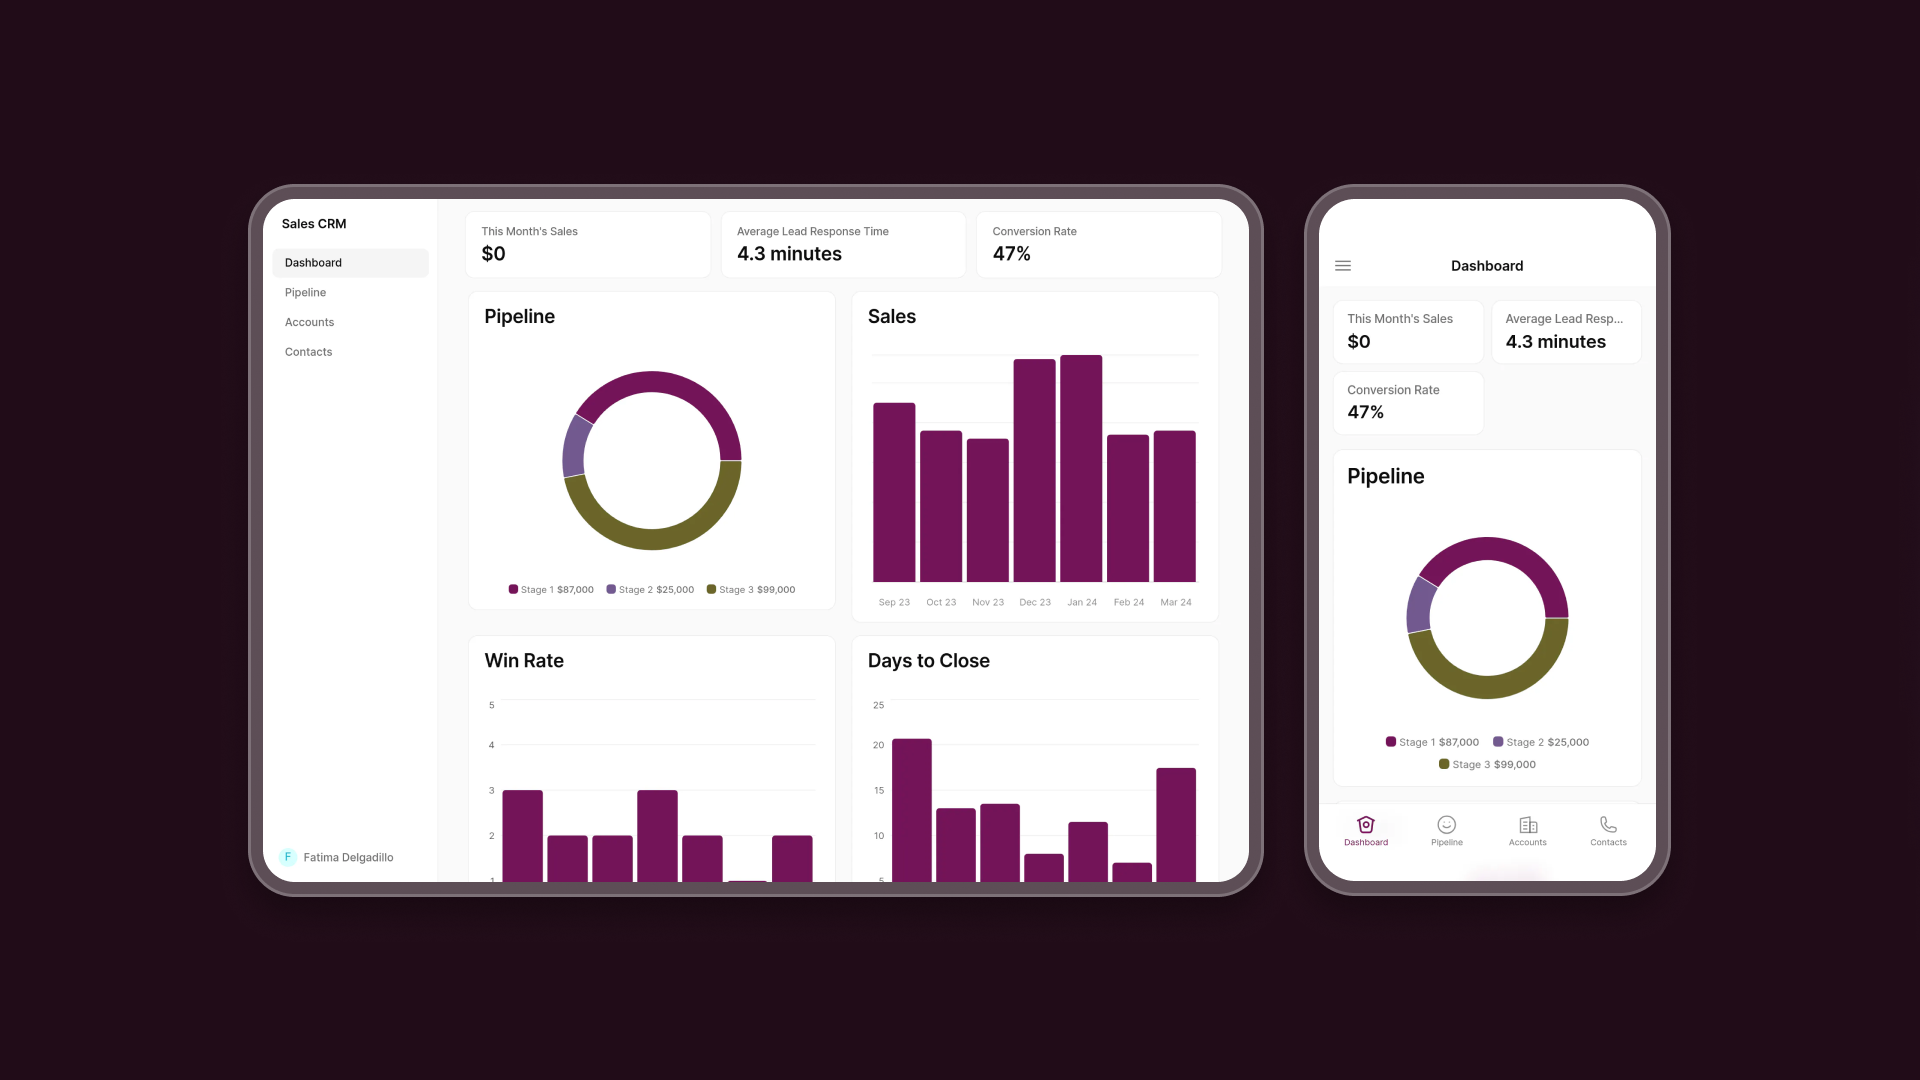
Spreadsheet 1 can be transformed into a CRM app with a leadership dashboard. This sheet requires regular data entry and management. Your sales team is always adding leads, leaving notes, moving deals down the pipeline, updating statuses, and more. When generating an app from this spreadsheet, it will be necessary to include forms to add new leads, detail screens where users can leave notes and update statuses, and possibly a Kanban board where associated deals can be managed.
Instead of interacting with this spreadsheet, your sales team will have a user-friendly interface, and your C-suite will have a dashboard where they can view relevant information at a glance.
Spreadsheet 2: Internal resource list
This spreadsheet contains a list of important internal knowledge. The reason this spreadsheet exists is to enable employees to quickly locate SOPs, onboarding guides, and other internal documentation. The IT department occasionally updates this spreadsheet, while everyone else in the company simply views it when they need information.
Spreadsheet 2 can be transformed into a Knowledge Management app. This sheet requires very little data entry from most users. In fact, you probably want to restrict who can edit info in your app so that important documents can’t get deleted or changed accidentally by the wrong person.
For the most part, your app will serve as a reference for workers within your organization when they need information. That means when you generate an app from this spreadsheet, you’ll want to give users the ability to easily search and filter items based on categories, and include a simple form for IT to add resources. This way, employees can access the resources they need more quickly than by scrolling through hundreds of rows and columns in a sheet.
Step 2. Prepare your spreadsheet data
Before you connect your spreadsheet to Glide to start creating your app, you’ll need to ensure your data set is correctly formatted.
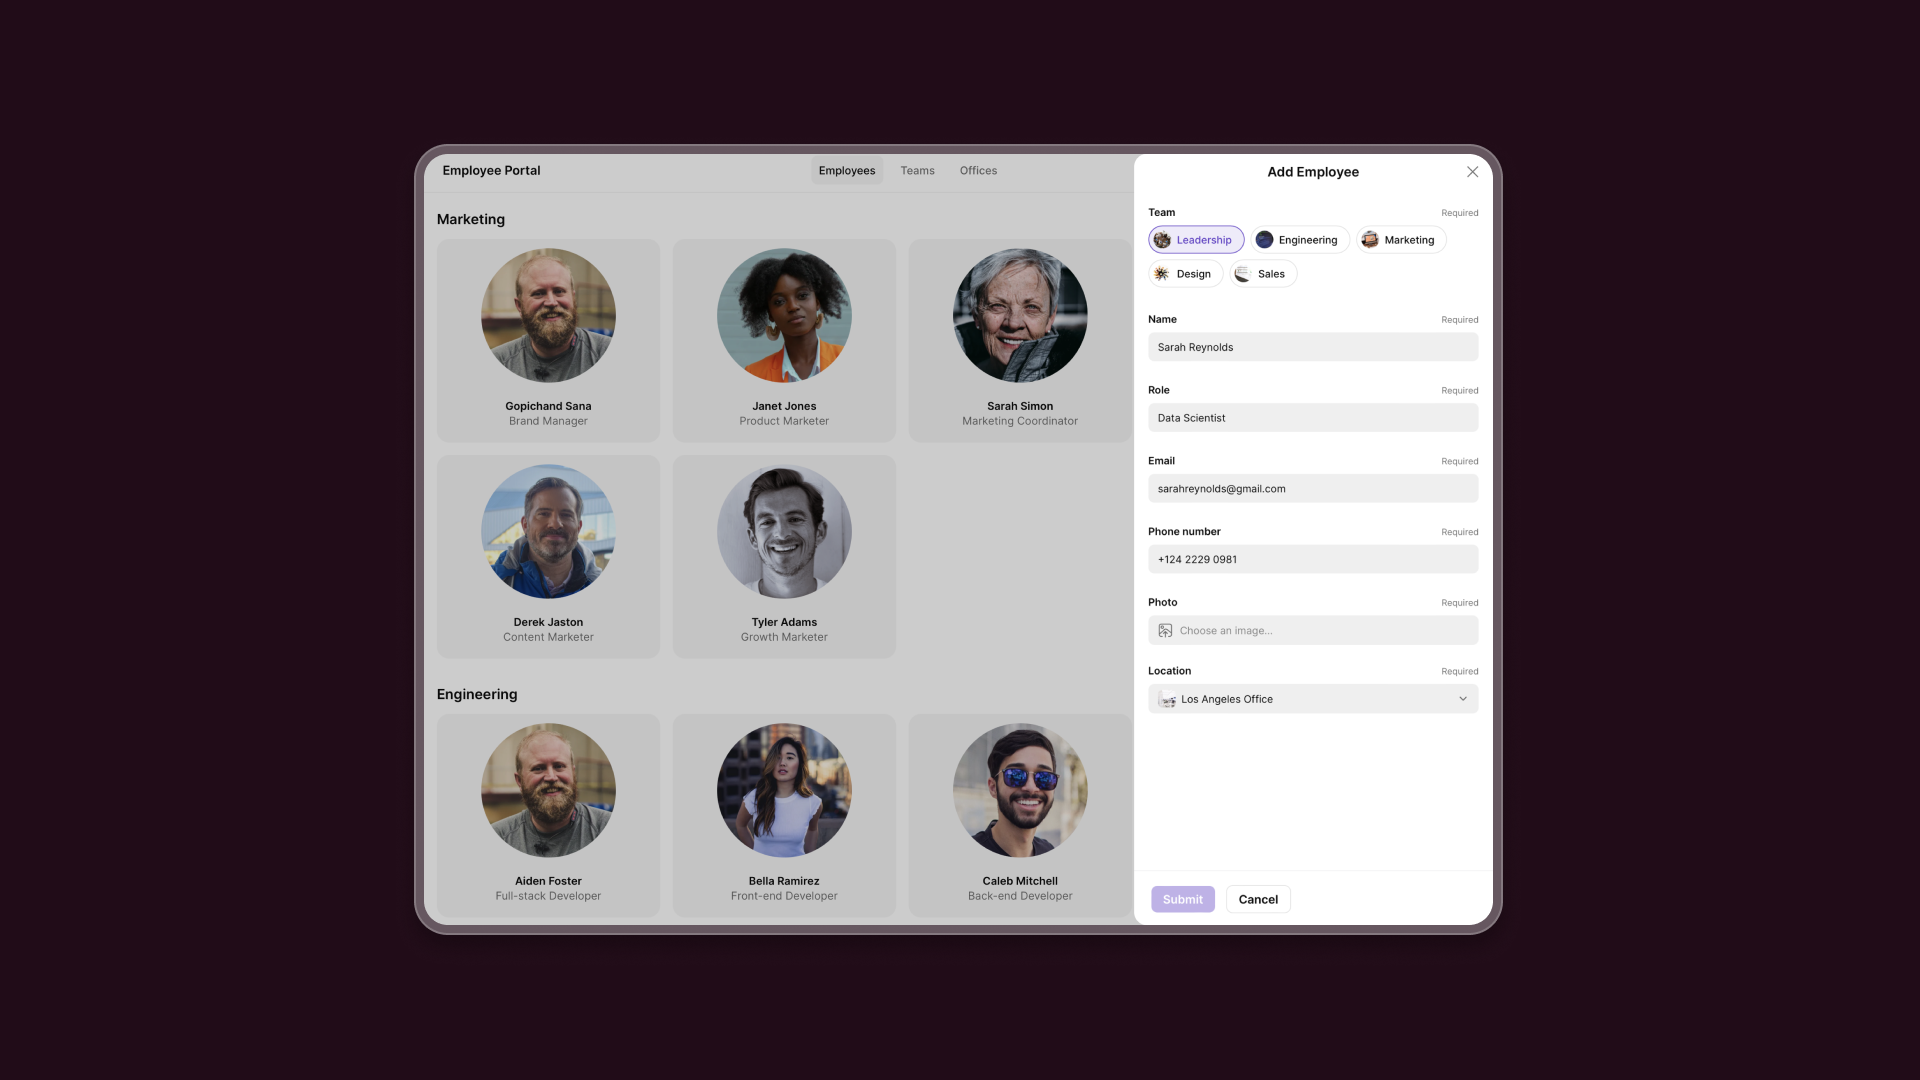
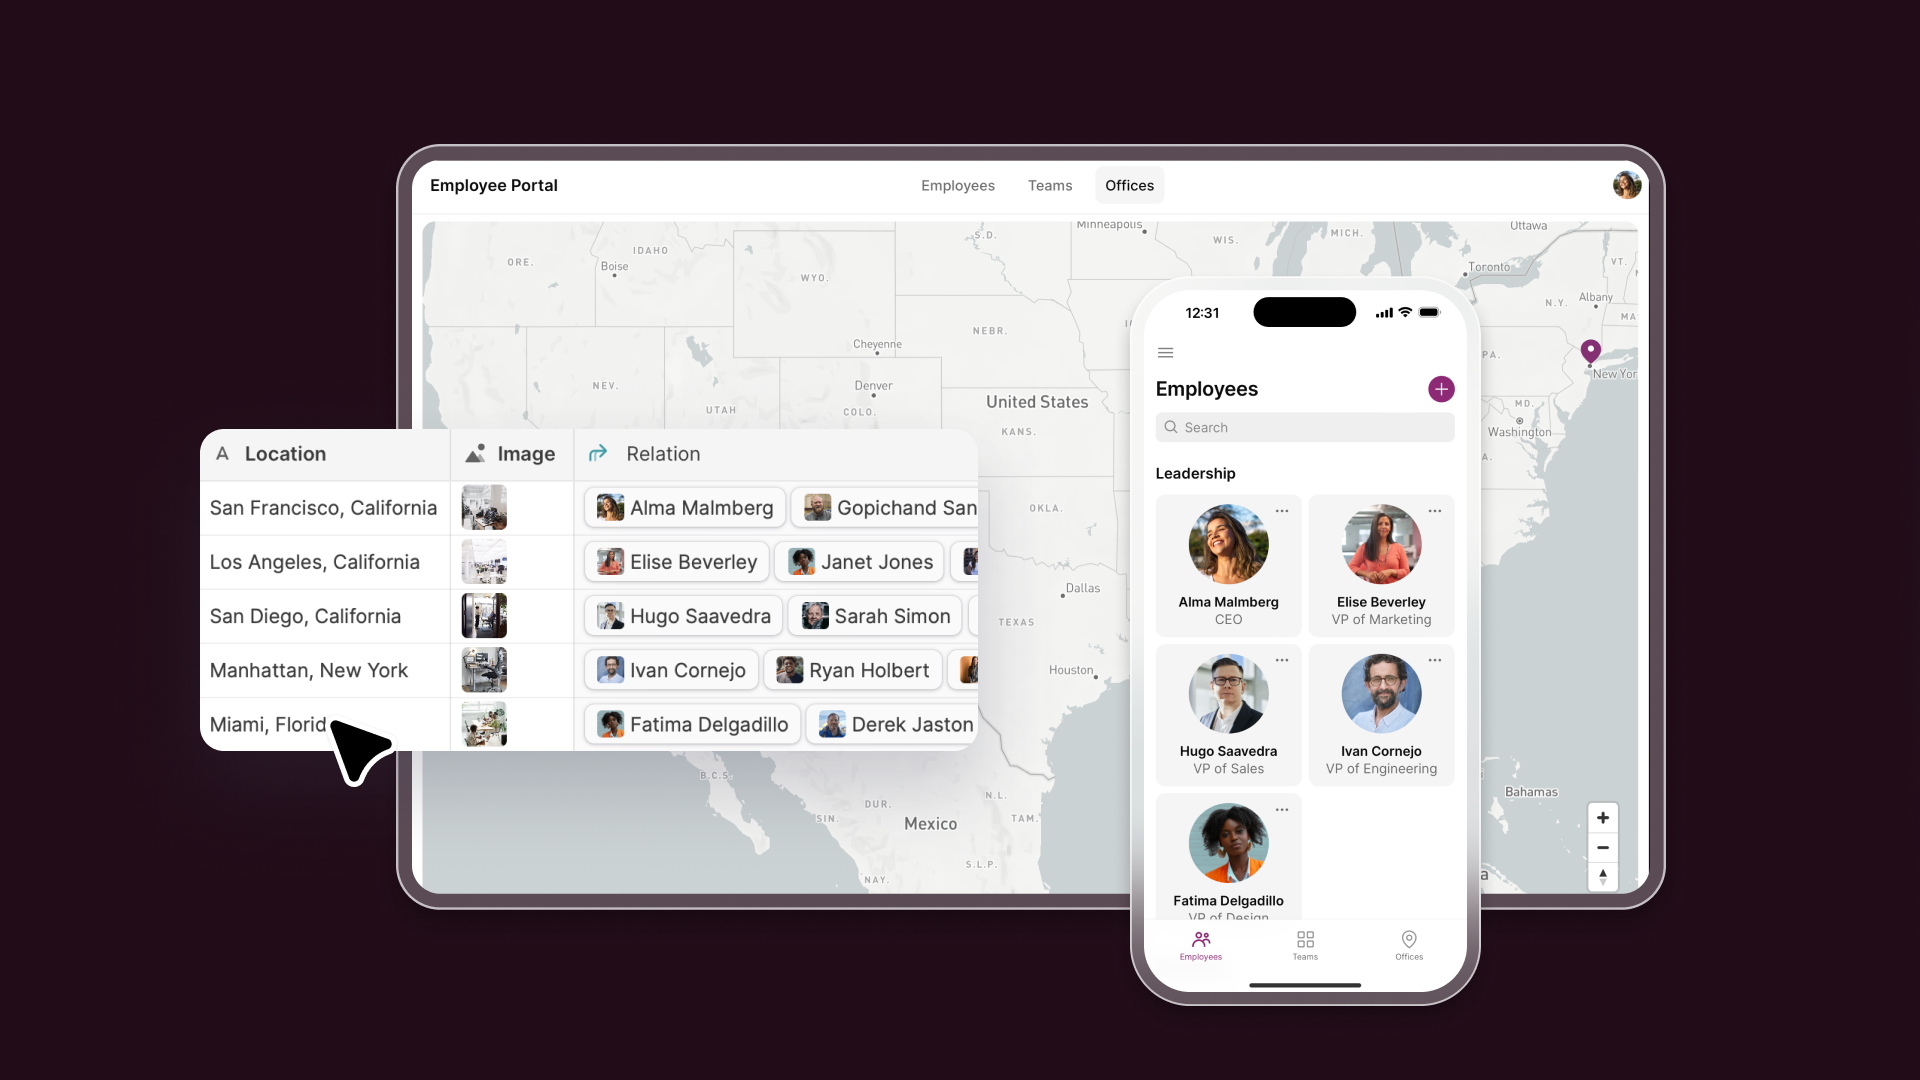
Every column in your spreadsheet needs to be given a descriptive name that accurately indicates what data that column contains. For example, if you’re taking a spreadsheet containing employee information, and creating an Employee Portal, your column names might include:
- First Name
- Last Name
- Pronouns
- Phone Number
- Photo
- Role
- Manager
- Location
Check out these data organization tips for more info on how to prepare your sheets to be transformed into web applications.
Step 3. Start your new app in Glide
Now you’ll open a Glide account. Click the “Sign Up” button in the top corner of the website, and follow the on-screen instructions to create your account. It won’t take more than a minute or two.
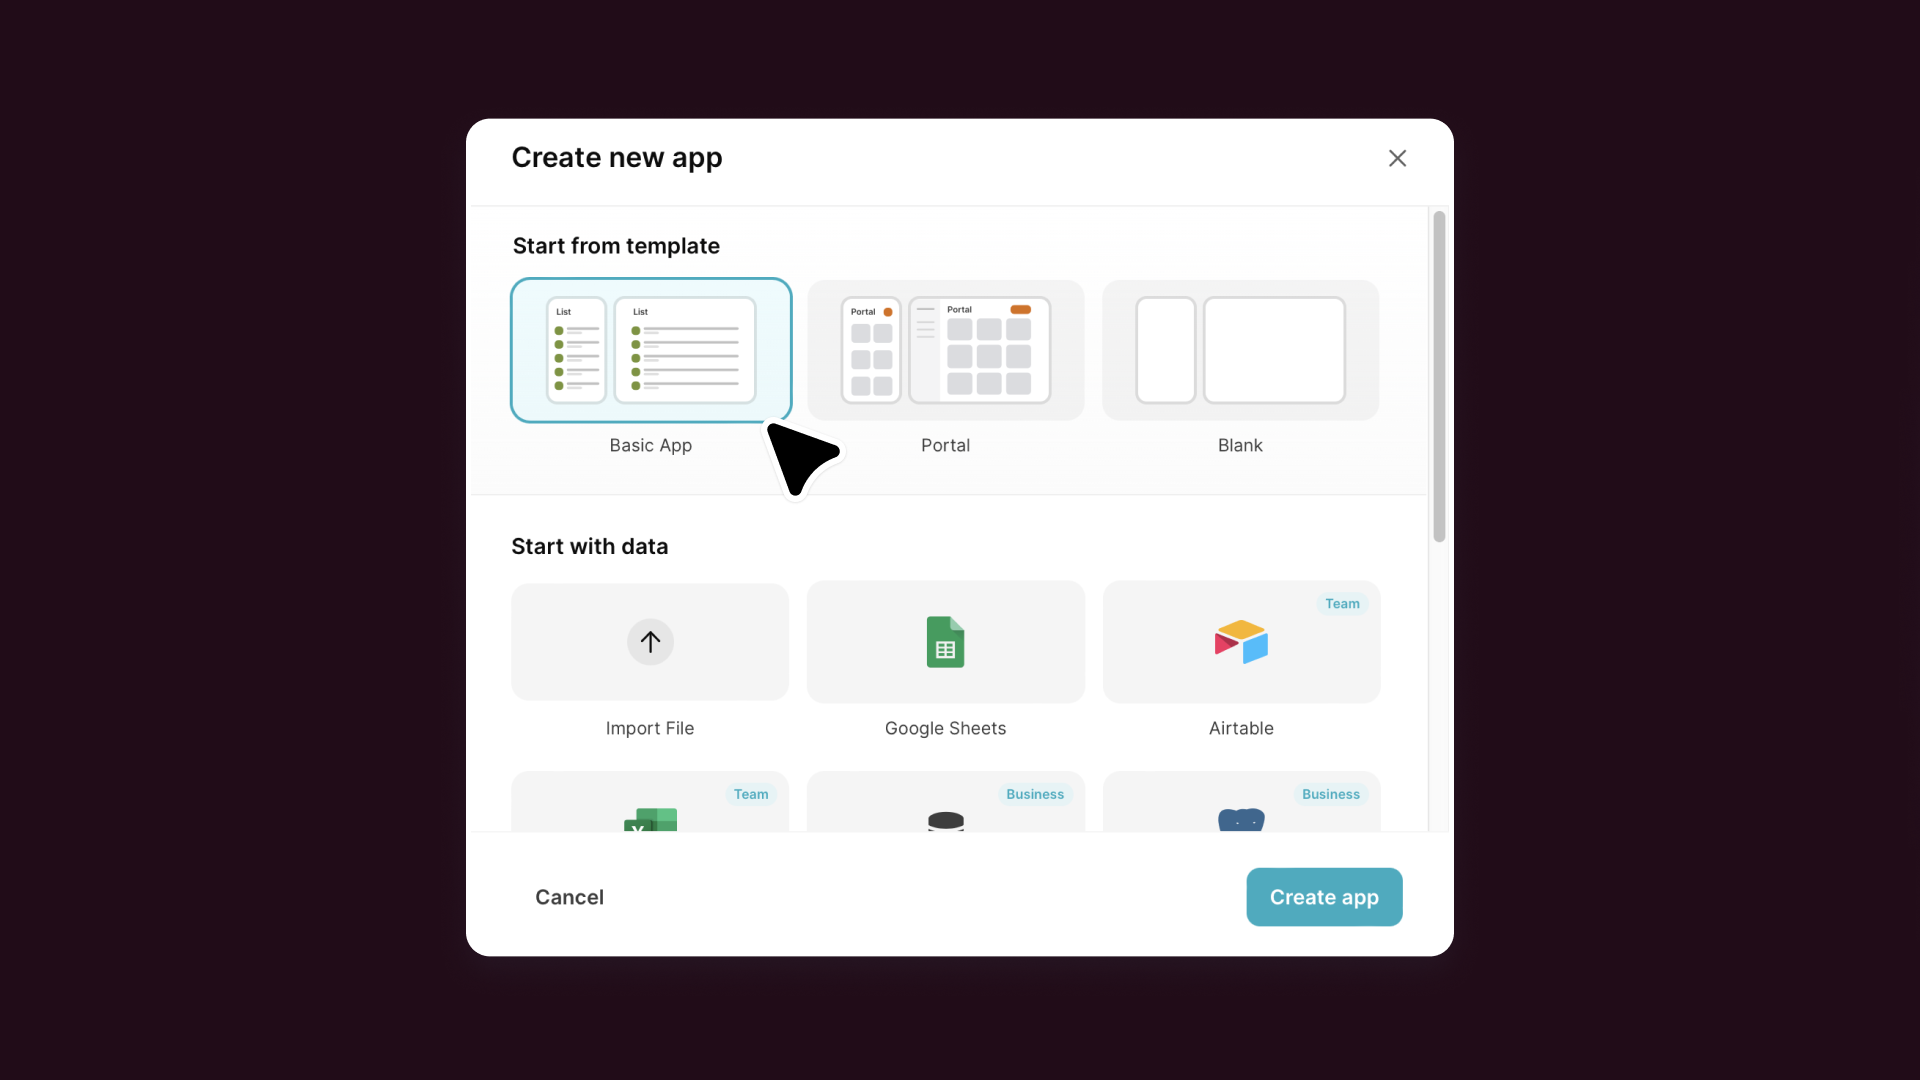
Click on “New App” to get started. You’ll then select what data source you want to connect. Glide has native data integrations with Microsoft Excel (via OneDrive or SharePoint), Google Sheets, Airtable, and various databases like BigQuery, PostgreSQL, Google Cloud SQL, MySQL, and SQL Server. You can also import data from a CSV file.
You have two options for how you want to connect your spreadsheet data to your new app:
- Import your spreadsheet for free: You can migrate your spreadsheet into Glide’s native database, Big Tables, and build your app completely for free.
- Sync your spreadsheet live: If you want to keep the original spreadsheet and sync it in real time with your new app, you’ll sign up for one of Glide’s paid plans. Data will then automatically update in your original spreadsheet whenever changes are made in the app, keeping all your data up to date.
If you already have an idea of what type of app you want to build and want a head start, you can also pick an existing template as a starting point.
Step 4. Convert your spreadsheet into an app without code
Once you’ve linked or imported your spreadsheet, Glide will generate a basic screen for your new app based on the structure of your spreadsheet. You’ll already see some of the data populating your new app, including components, tabs, and data displays such as lists, tables, or galleries. Every Glide app is built with adaptive design, ensuring it looks and functions well on any device without requiring any extra work on your part.
From here, it’s helpful to think back to Step 1, where you identified your spreadsheet’s purpose, users, and functionality. Based on that plan, you’ll now add the layouts, components, screens, integrations, and advanced features to your app.
Customize your layout
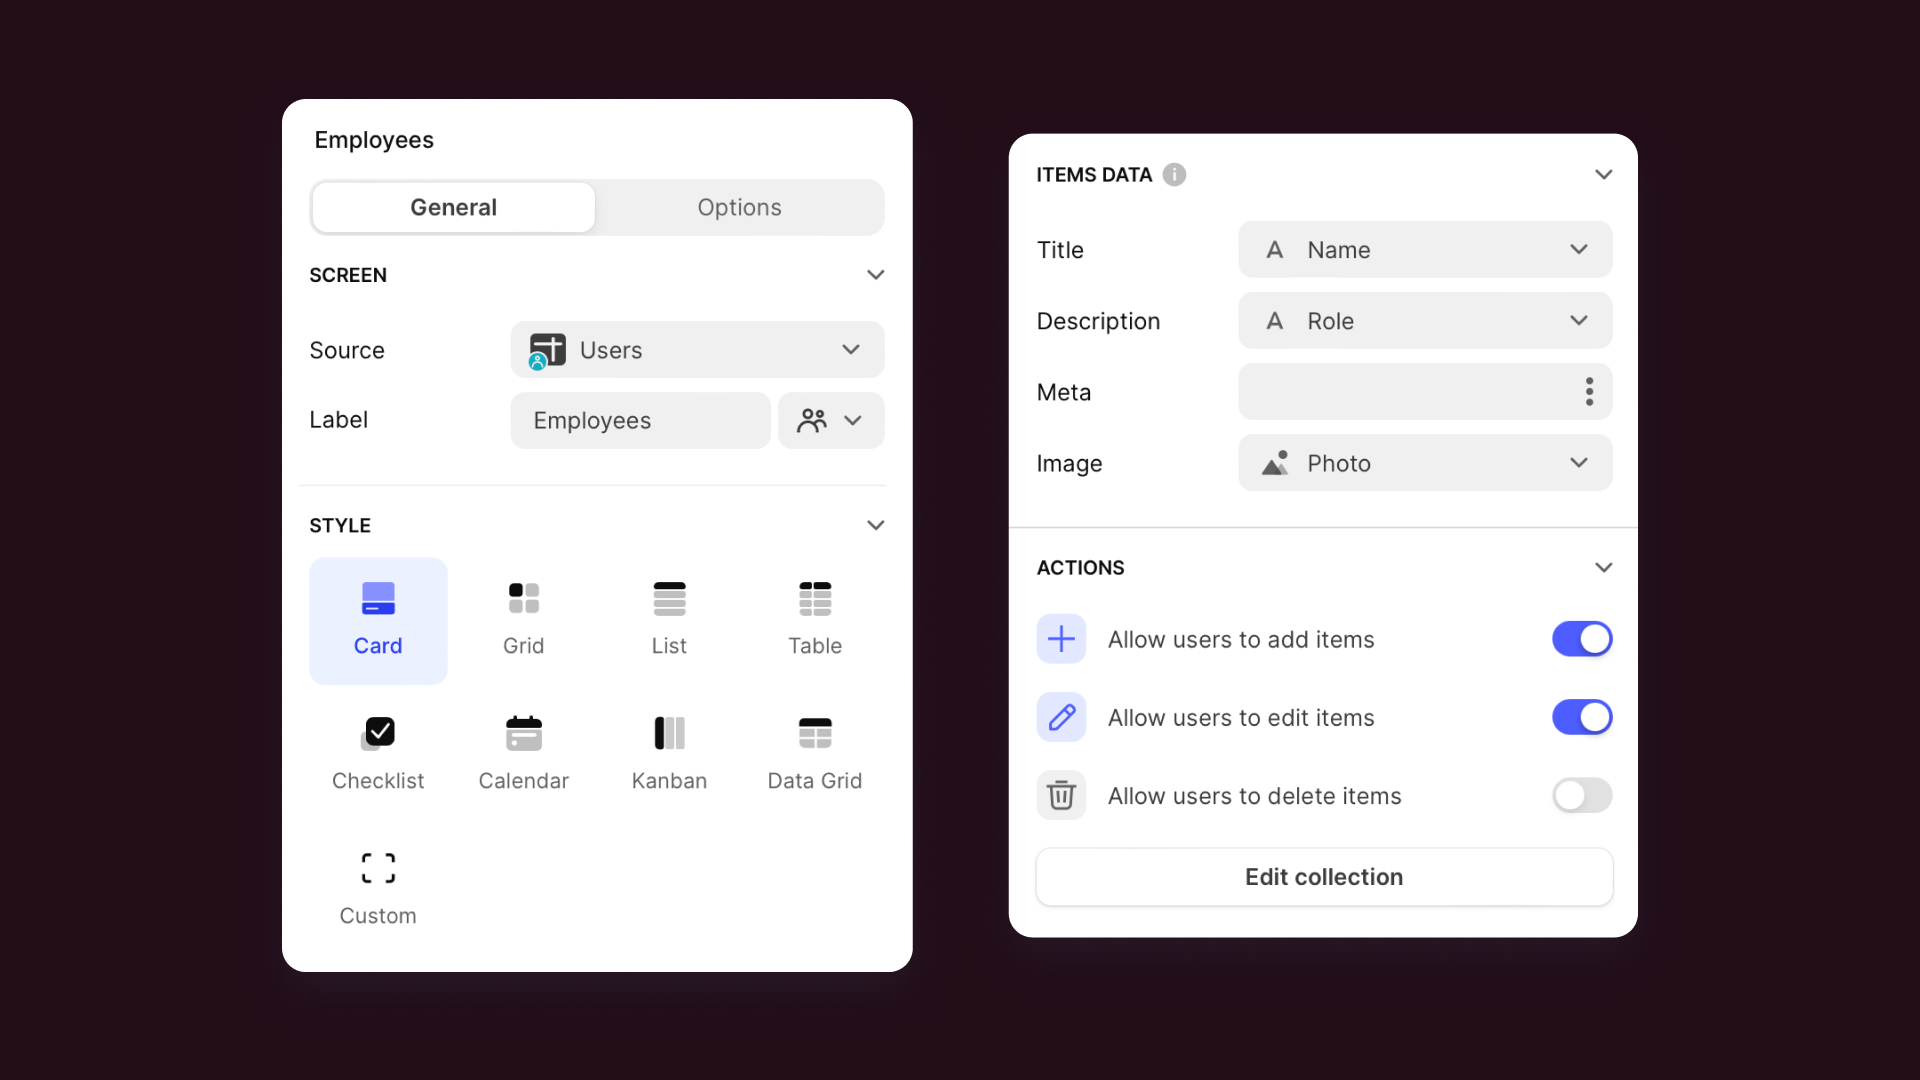
Customize the initial interface and layout of your app by dragging and dropping elements in the Layout tab of our builder. You’ll have a variety of visual design options at your fingertips.
You can also edit the spreadsheet itself to alter your app data or switch to the Data tab and make edits to your spreadsheet data natively in Glide. The Data tab allows you to add new types of columns to your spreadsheet that compute data from your existing columns. Process complex if > then > else equations, mathematical calculations, database queries, and much more, all from the Data tab in Glide.
Add components and screens
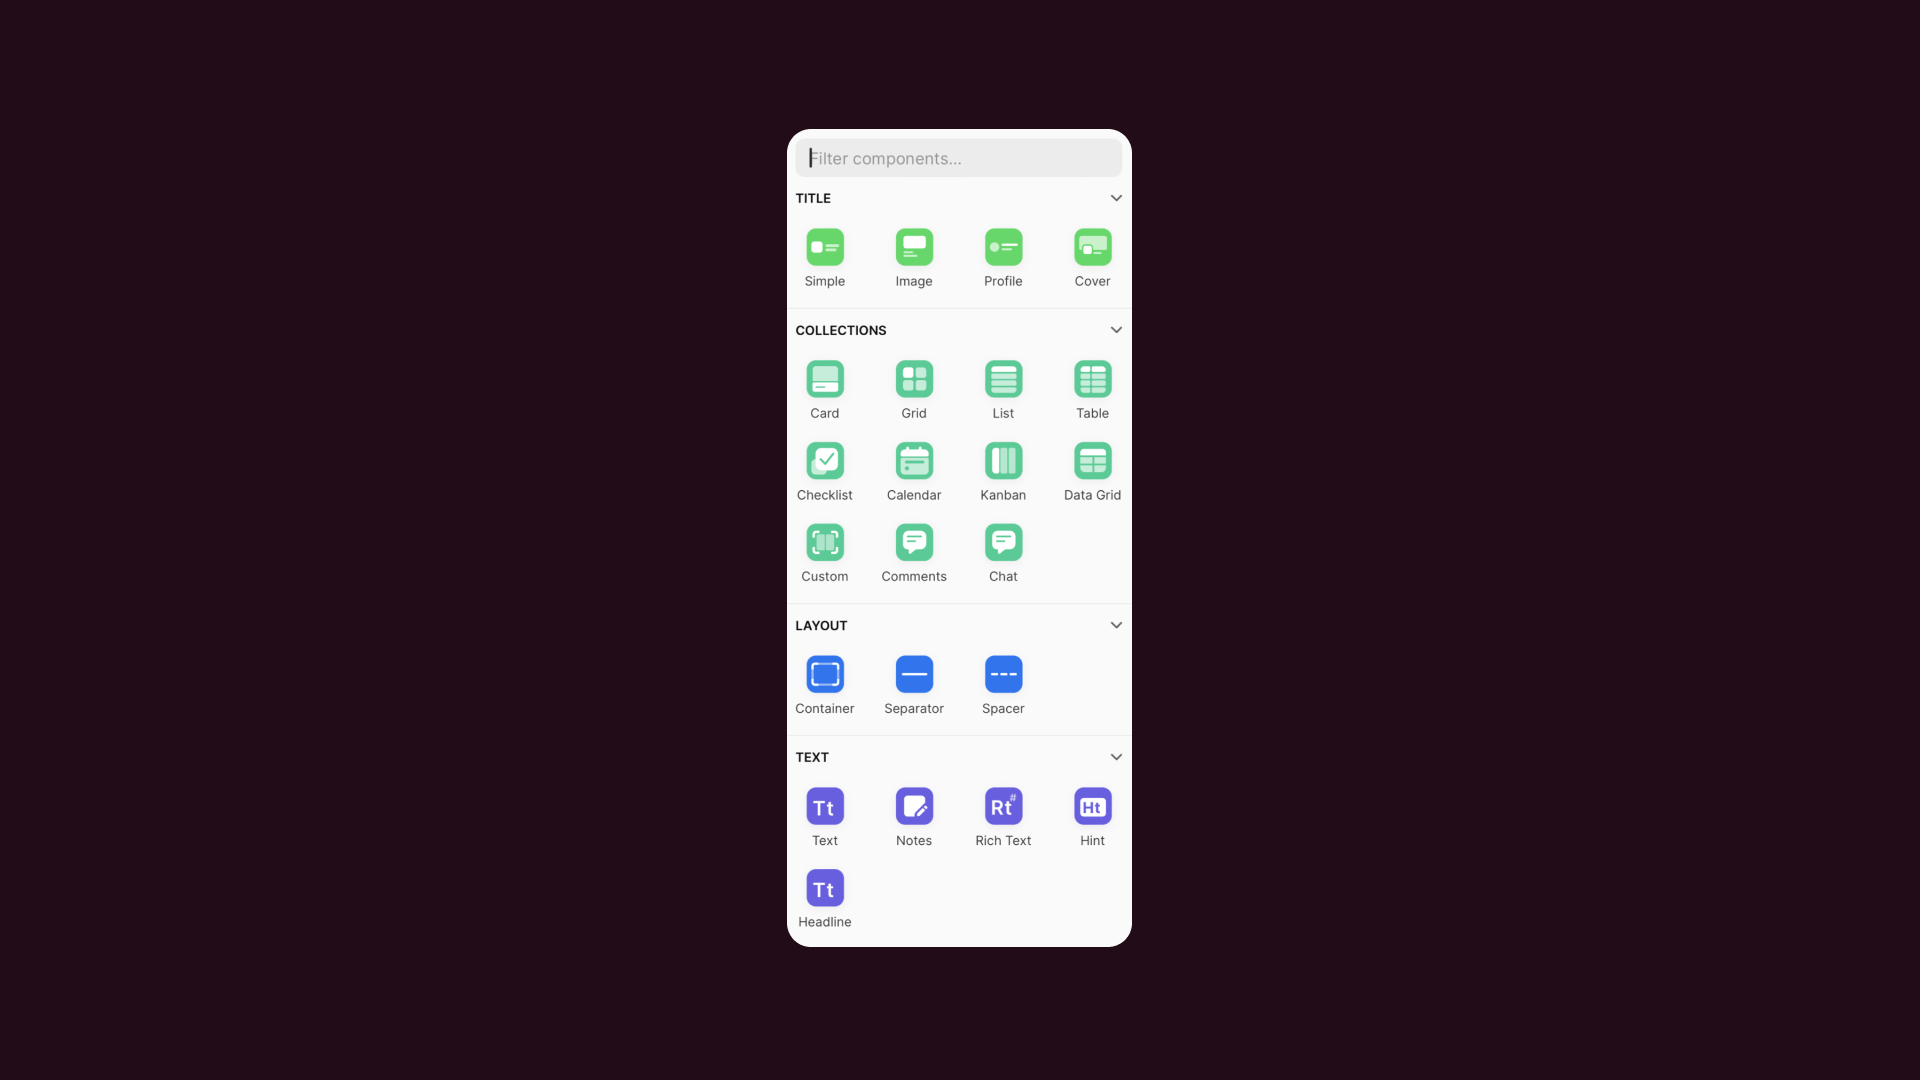
It’s time to add various components to different screens within your app, all from within the Layout tab in the Glide editor.
Going back to our earlier example, let’s say you’re creating a CRM app from a spreadsheet. You’ll probably want to provide users with an “Add contact” button, which would open up a form to collect details about the new contact.
Once a contact has been added, you should be able to click into that contact to view and modify their details on a separate screen. The detail screen should include a field for adding notes and a button to send an email or SMS to that contact.
You may also want a dashboard screen that displays charts on sales, new count numbers, boards depicting closed deals, and more to provide leadership visibility.
Set custom privacy and security controls
With your interface in place, it’s time to set privacy and security controls in your app.
First, you can set privacy levels and secure access for your entire app. You can make an app Public (anyone with the link can view it) or Private (requires users to sign in). If it’s private, you decide who gets in. For example, allow only people with your company’s email domain or use an “invited users only” list of specific email addresses. This means you could have a customer-facing app open to anyone for general info, while keeping an internal tool locked down so only employees can sign in. You can even create a semi-private portal for clients or vendors where only invited users have access. Enterprise plans also give you the ability to use SSO as an add-on.
Once people are inside your app, you can set visibility controls in Glide to ensure each person only sees what they should. You can assign user roles, such as “Admin”, “Manager”, or “Employee”, to your users and then tailor the app’s content accordingly.
A manager with an Admin role may see additional dashboards or editing options, while a regular staff member sees only the basic interface where their work gets done. Glide also supports row-level visibility: if each data row is tagged with an owner (usually the user’s email), that row will automatically be hidden from any other user. By combining role-based access and row-level controls, you can confidently share certain data without exposing your entire spreadsheet.
Connect integrations and add advanced features
The next step is to integrate your app with the other tools you rely on for work. Glide offers numerous native integrations with tools such as Salesforce, QuickBooks, Stripe, Asana, and more. If you’re trying to connect legacy software or a proprietary tool, you can also use the Glide API to create your own custom integrations.
Some native integrations also add more specific, advanced functionality that may be helpful for people using your app.
If you’re making an app for your sales team, add the DocuSign integration to populate a DocuSign contract template with prospect data from your spreadsheet and have it sent with one click of the mouse. If your app is used to receive inventory at a warehouse, add a Barcode Scanner component so employees can use their phone camera or a Zebra scanner to capture and store the data from each item into the spreadsheet, updating the inventory counts in the app instantly.
Incorporate automation and AI
One of the biggest benefits of converting your spreadsheet into an app is that it allows you to extend the power of your data with things like workflow automation and artificial intelligence. Glide’s native Workflows feature makes it easy to trigger automations within your app, scheduling tasks, automating notifications, and building workflows that get work done behind the scenes instead of doing everything manually. You can also use third-party automation tools like Make and Zapier to connect other platforms to your app or build your own automated workflows.
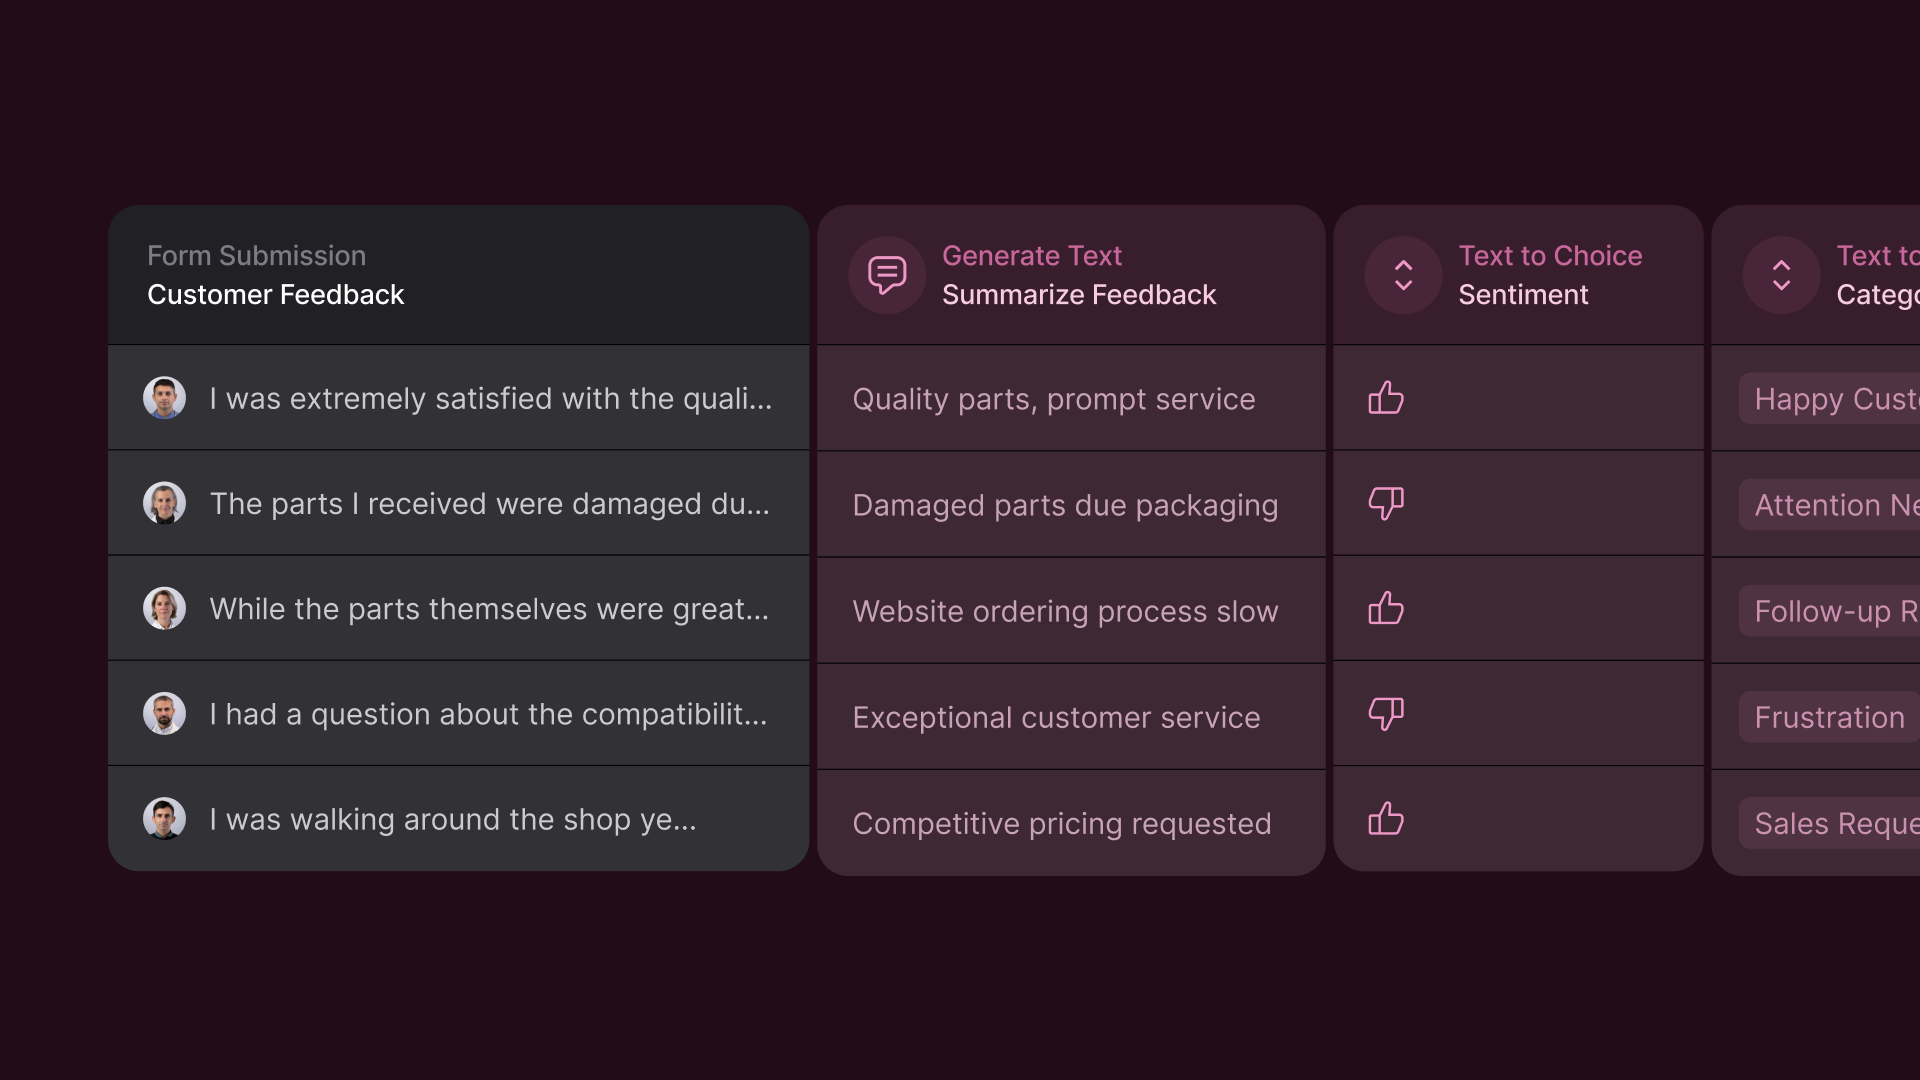
Next, you can add transformative Glide AI capabilities to your app that work directly with your spreadsheet data. Add AI features that summarize the information on a knowledge base article, parse the sentiment of a customer support email, translate a podcast episode into text, or extract specific details from a 10-page PDF document and categorize them.
Glide uses managed AI, selecting the ideal AI models for your use case and giving you access to Enterprise-level plans by default so your data is never used for training purposes and your security is never compromised.
Customize your app’s appearance
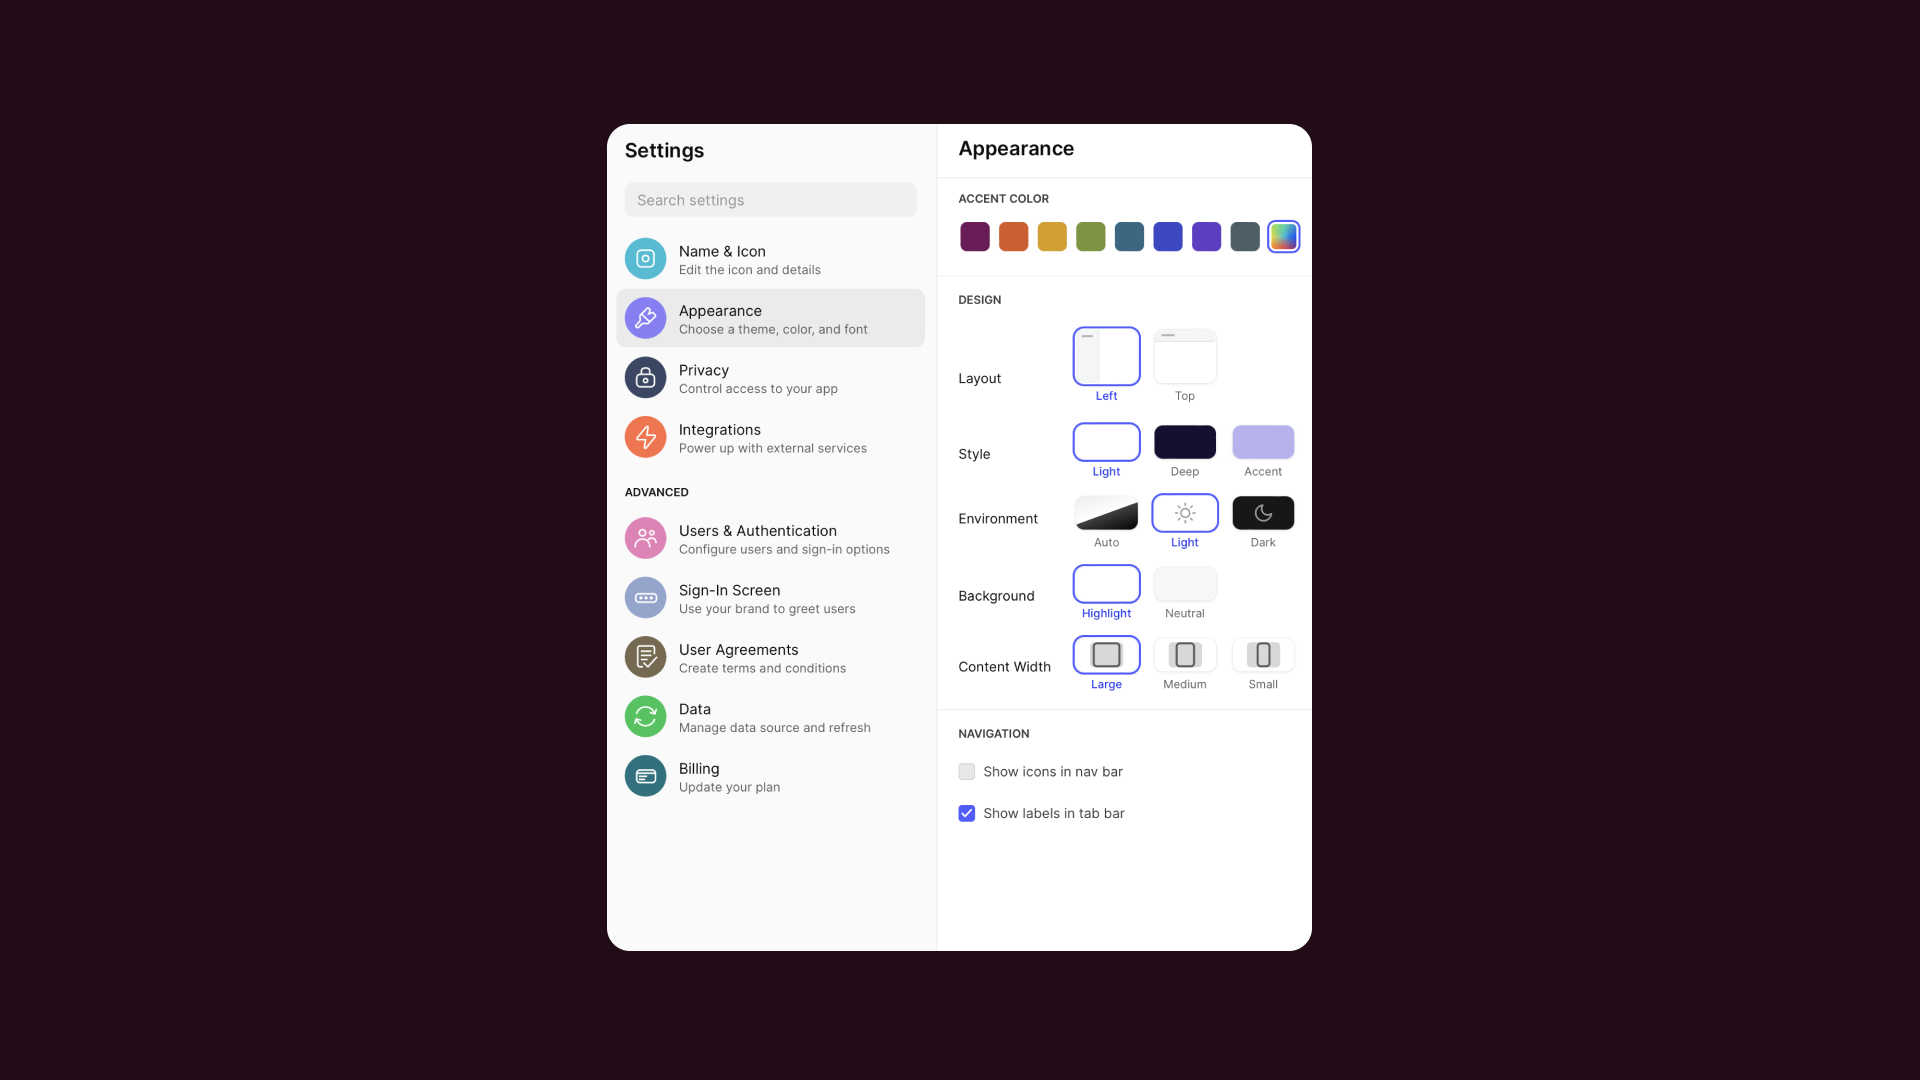
Once you’ve added features to your Glide app, your final step will be to adjust the settings and appearance. You can choose colors, enable dark mode, name your app, insert your own logo, and more to make your app feel more personalized and aligned with your brand.
Step 5: Publish your spreadsheet-powered app
There are many ways to share your Glide apps with your colleagues, as well as external customers and stakeholders. You can share your app by sending email or SMS invitations, providing users with a QR code to scan, or simply by sending them a direct link.
When you’re ready to begin sharing your Glide app with users, just hit Publish in the top right corner, and you’ll be presented with all the ways you can share the app.
Turn your Google Sheets and Excel files into business apps with Glide
When pivot tables and macros aren’t enough, it helps to have the ability to quickly and easily convert your company’s spreadsheets into rich and intuitive applications.
Using Glide’s no-code app builder, you can quickly turn any spreadsheet into effective software that makes your team more effective. Your app interfaces are designed to put the user experience front and center, all built on the solid foundation of the spreadsheets you rely on.
When you’re ready to begin, there are numerous resources available to you to learn Glide and tutorials to kickstart the process of building specific apps. In Glide University, you can find courses for all levels of experience. There, you can grow your knowledge and even earn your Glide Certification when you’re ready.


