
When you create an app or add a new tab to an existing app, Glide will build a basic layout based on the data that it finds. As you navigate and build new screens and forms, it can sometimes be a little unclear how your data maps to the interface.
In this guide, you'll learn how to structure your data well and understand how your data appears in Glide.
Structuring your data
There are many different data sources that you can use with Glide. Some are databases and some are more flexible, like spreadsheets. Spreadsheets allow you to organize your cells however you want, but for your data to work in Glide, it must be tabular (with neat rows and columns).
Within each table, every column should have a name. These column names describe the properties or attributes of your items. Some data sources like Airtable automatically have column names, but in spreadsheets, you'll need to make sure the first row is reserved for this.
For example, if you are making a Team Directory, you might have two tables; one for Staff and another for Locations. In the Staff table, you would have columns for Name, Email, Photo, Phone Number, Role, Manager, and Location. In the Location table, you would have columns for Name, Address, and Image.
If your data is not in the right format for Glide but needs to stay in that format for other reasons, you might want to read our guides on Changing Horizontal Data to Vertical, IMPORTRANGE, and ARRAYFORMULA.
Understanding how Glide displays your data
When you first import your data source, Glide will create a basic app as a starting point. You'll see some screens with components in the Layout Editor. If you click on one of these items, you'll see more data about that item.
Let's break down how your data relates to the layout view in Glide:
Tables become tabs
Rows become Collection Items
A single row becomes a Details Screen
Column values (a single cell in a row) are displayed in Components
Tables → Tabs
When you create an app from a data source, Glide will try to make a tab for every table it finds. You can create new tabs whenever you like, but they must have a table as a source. You can create multiple Tabs from the same Data Source.
Rows → Collection Items
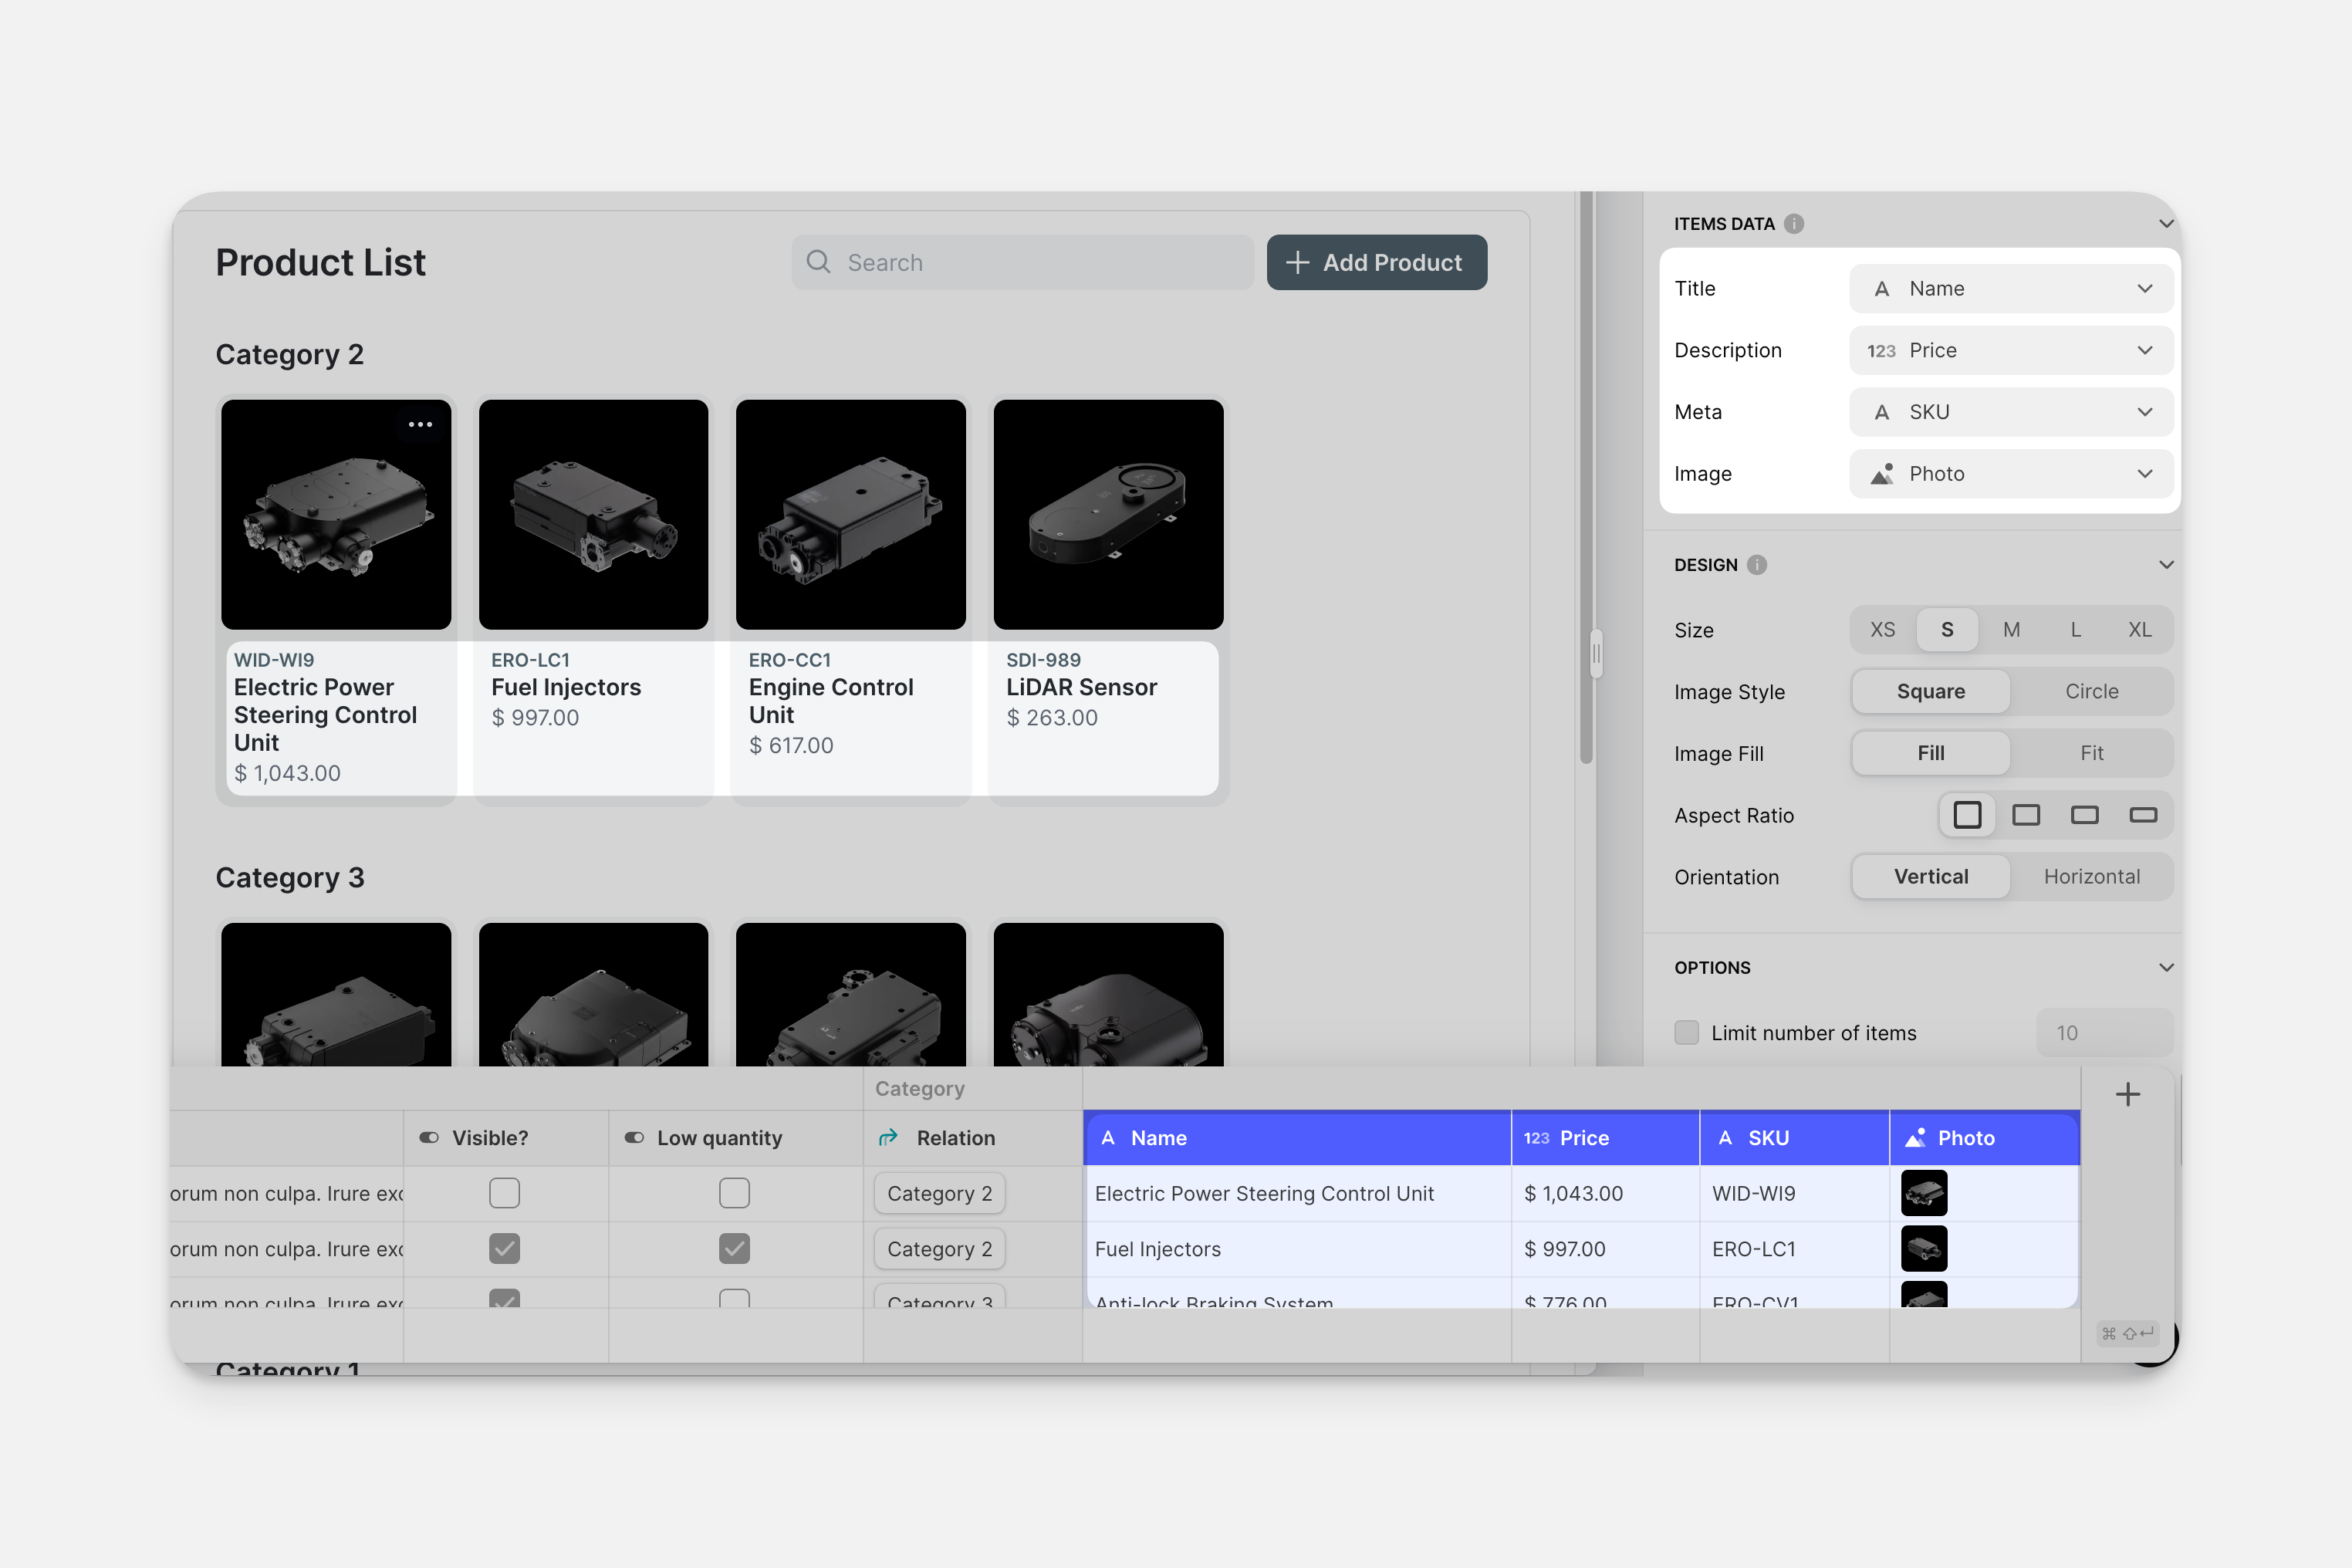
If your data source has multiple rows, you'll see those items in a Collection.
When you click on the collection in the components panel, you'll be able to configure its settings in the configuration panel on the right and select which columns to show from that table. Modifying your Collection Layouts is one of the first ways you start designing your app in Glide.
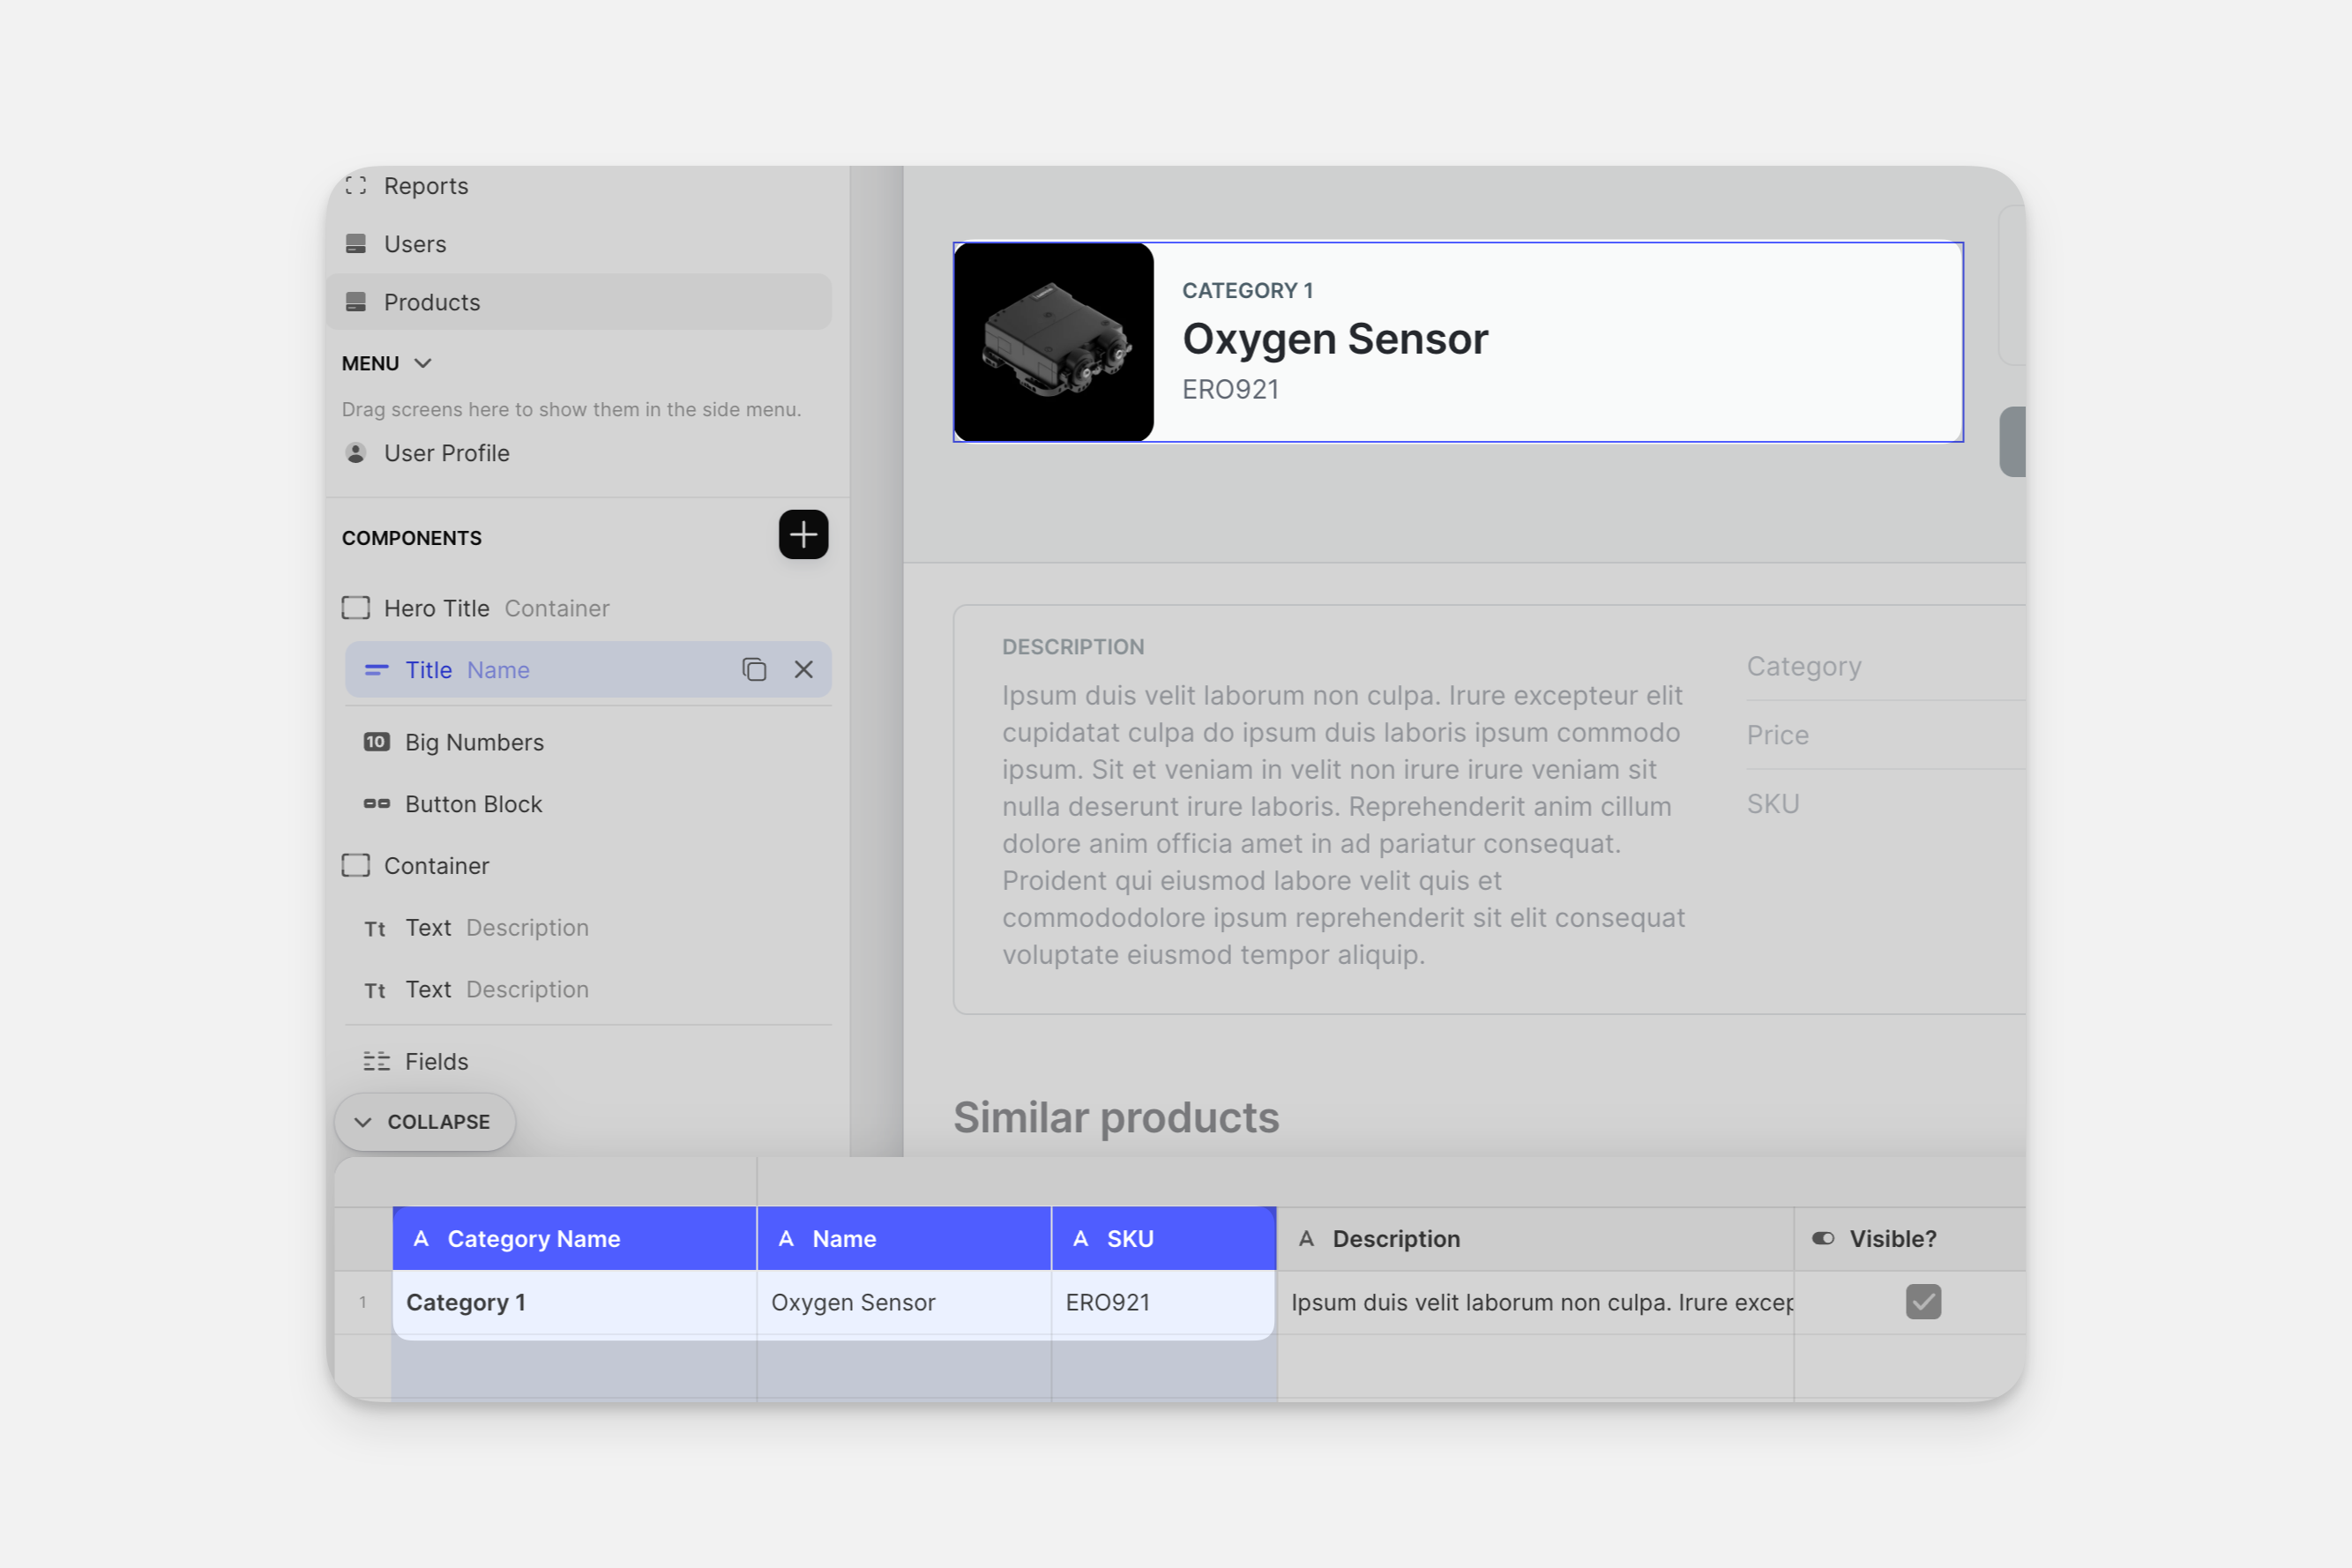
Row → Details Screen
When you click on one of the items in a collection, Glide's default action is to take you to a details screen that represents all the information available in that row. Glide adds Components for each column it finds in your table. So if you added a table with team member info, your Details Screens might look like this:
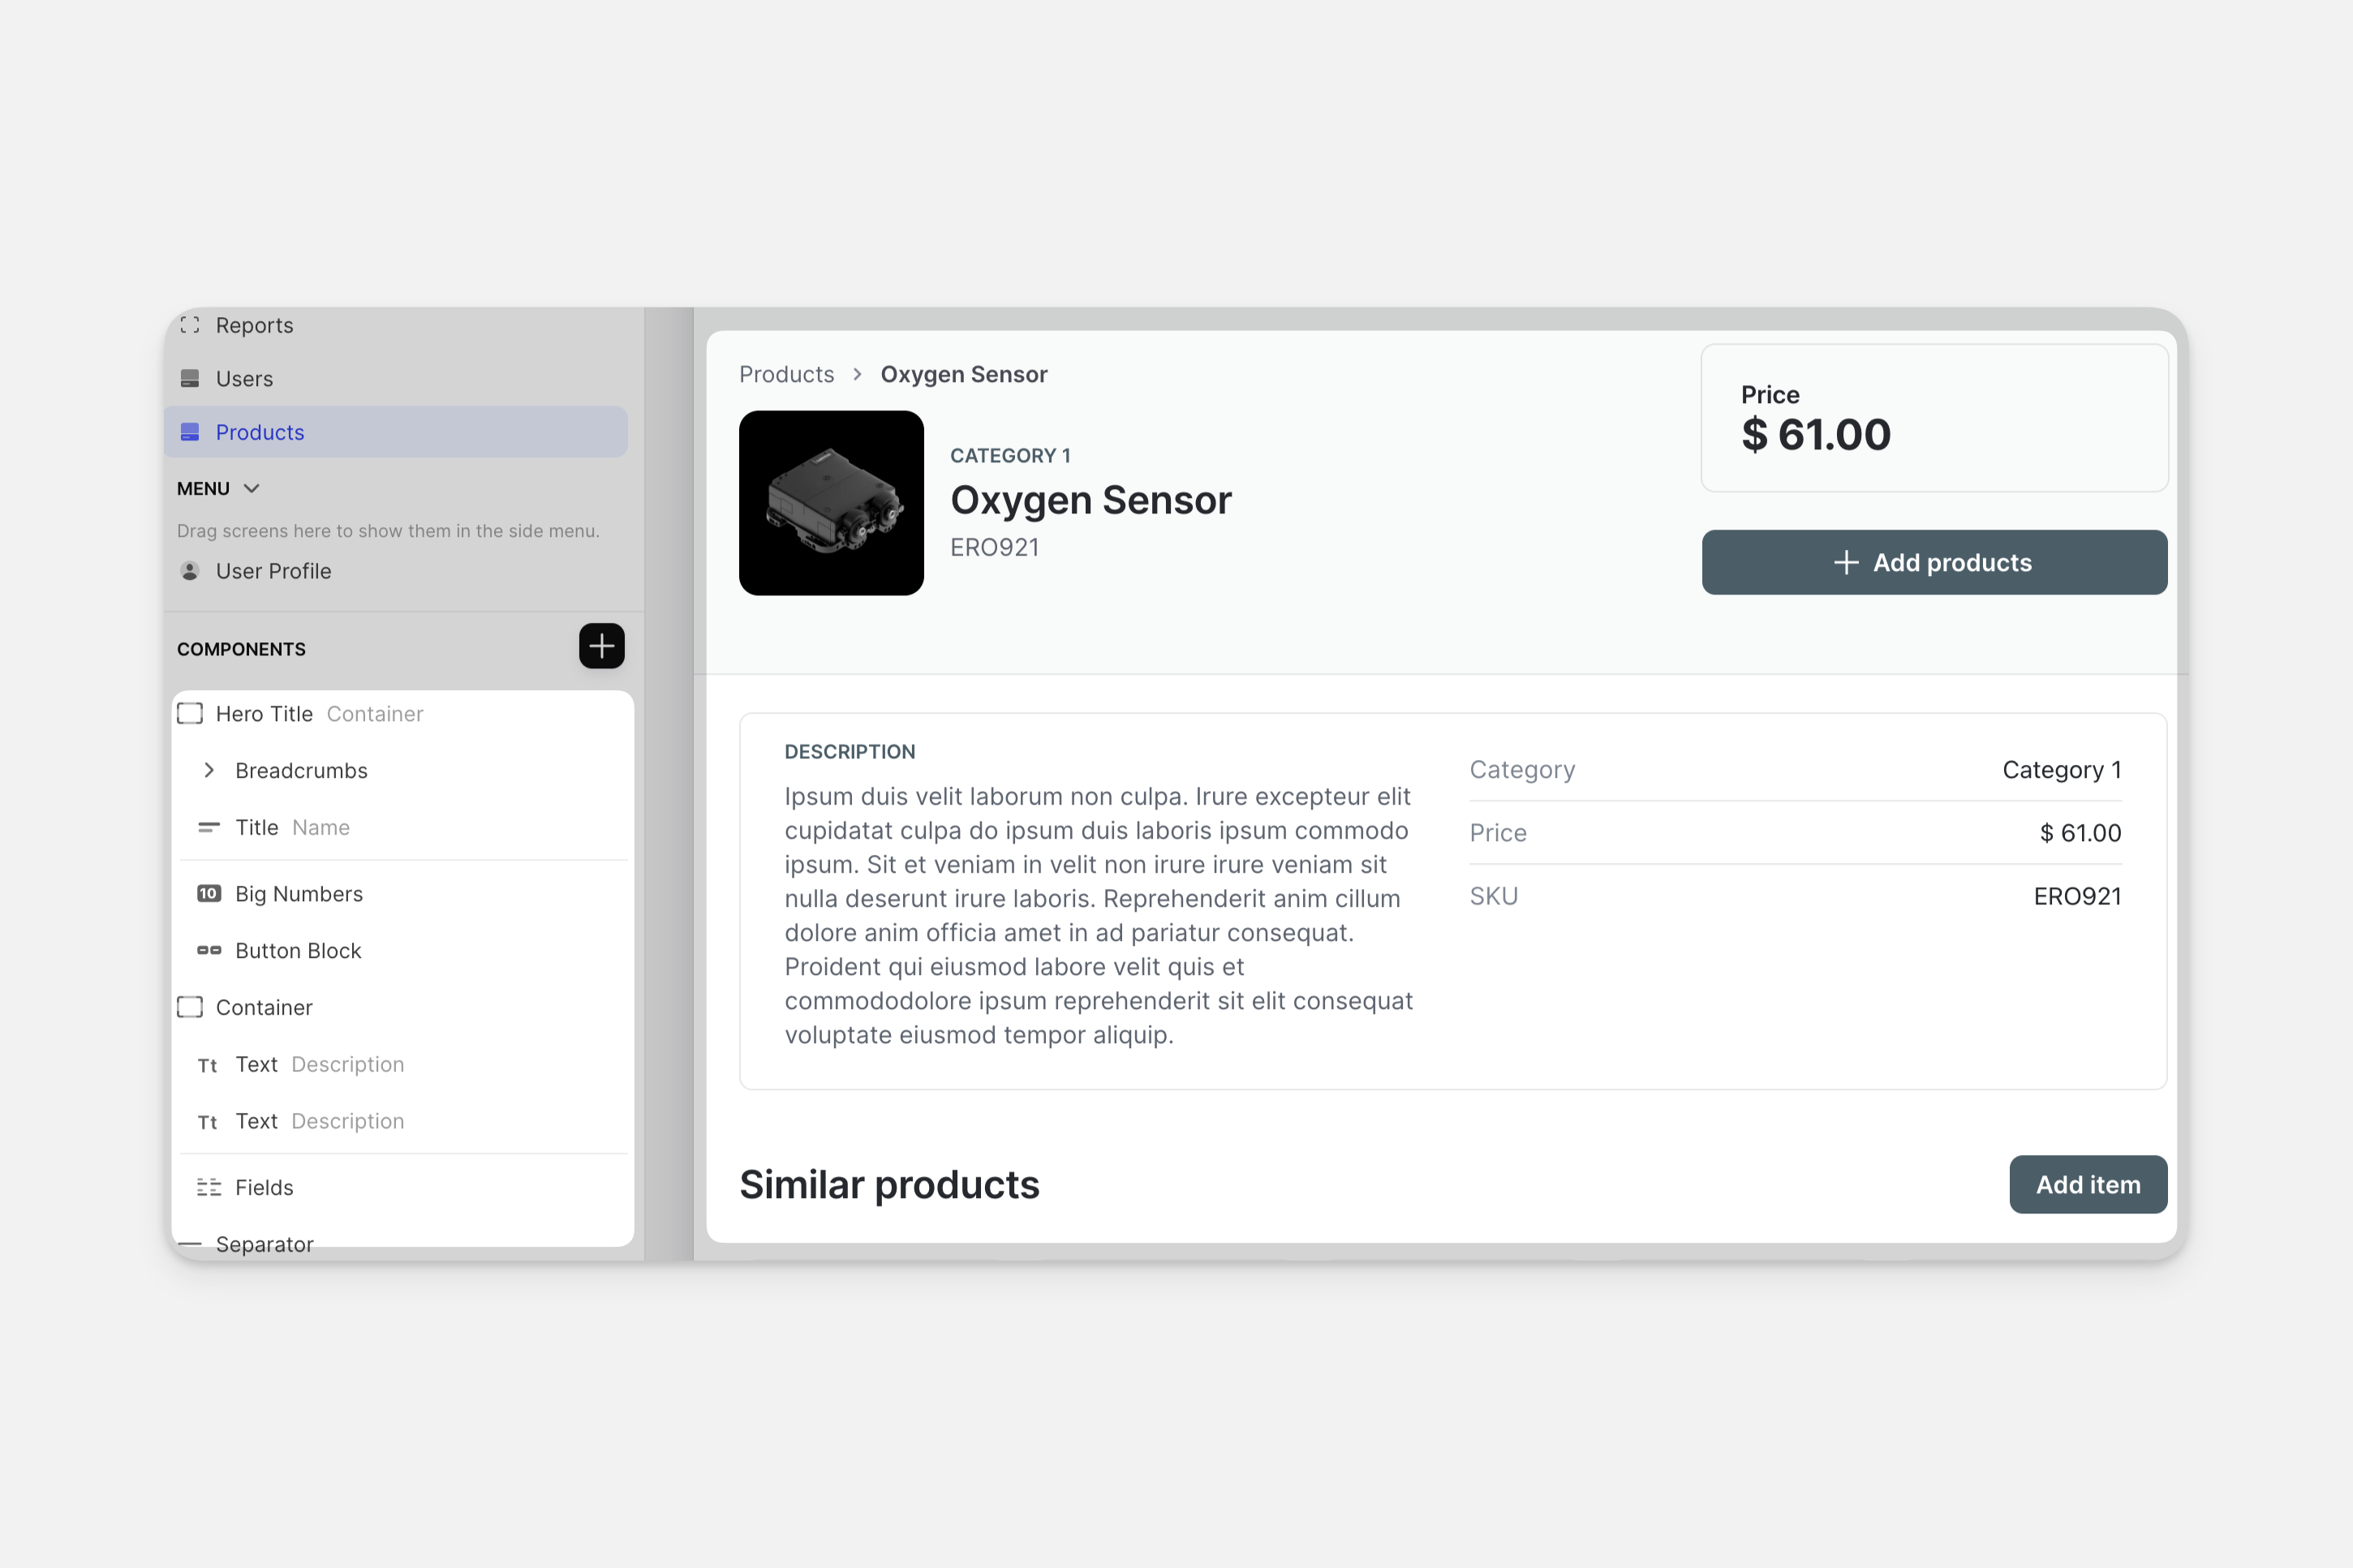
But you don't have to show every single column in a component. You can display the data you want and hide other columns using the components panel in the left sidebar of the Layout Editor.
Leaving components out of your screens is not a security feature as the data can still be downloaded to a user's device. Learn more in our Security Guide.
Column Values → Components
Some components can display only one column from your row, and others, like the Title Component, can display more.
Get a deeper understanding of Screen Types