
If you’re looking to create an app with no-code, there are really only four steps:
- Organize your data in a spreadsheet
- Configure the app functionality
- Customize the app design
- Promote and share with others
Easier said than done? Well, with a no-code app builder, a great idea and some elbow grease, it’s actually totally manageable to build a fully functional app with zero coding in just a few minutes. And you can do it for free.
The goal of this post is to provide the knowledge and tools to empower you to create your app today.
What is a no-code app?
But before we get into the actual steps of building an app yourself without coding we want to give you a high-level view of the no-code app landscape. There are three components you need to be aware of:
- Spreadsheets
- Data and configuration
- No-code app builders
To understand how they interact with each other, think of your favorite pub:
A blank spreadsheet is like an empty pub—it’s got shelves, glasses, running water, bar towels, etc. It’s got all the organizational power you need to serve people libations, but no spirits and nobody to make the drinks.
A spreadsheet filled with data and properly configured is like a fully stocked bar. It’s ready for a party, but with no bartender to serve the drinks, it’s still not much fun.
An app, however, is like your favorite pub. It’s got all the food and drinks you like, but it’s also got friendly bartenders to make sure you get great service and everyone has a good time. An app is a party.
Bars and restaurants are risky investments, and so are custom mobile apps developed natively. This is where no-code apps come into play—get your idea out of your head, onto a spreadsheet, and into your phone quickly and with little to no expense.
Analogies aside, let’s get into the tactical steps for building your no-code app.
When to Use a No Code App
- When speed is of the essence: Developing an app using traditional methods can be time-consuming, but with a no-code platform, you can create functional apps within hours.
- Prototyping and testing: No-code platforms are perfect for prototyping and getting user feedback quickly. They allow you to iterate on your design with minimum time and effort.
- Limited Budget: If you're a startup or a small business with a limited budget, no-code platforms can be a cost-effective way to develop an app without hiring a development team.
- Non-technical users: No-code platforms are a boon for business owners, entrepreneurs, and hobbyists who don't have coding knowledge but wish to create a mobile app for their needs.
Things to Keep in Mind Before Developing a Mobile App
Before you start the app development process, here are some key factors to consider:
- Understand your target audience: The needs and preferences of your target audience should inform your app's features and design. Conduct market research to understand their needs.
- Define the purpose and functionality of the app: What problems does your app solve? What functions should it perform? Clear answers to these questions will guide the design and development process.
- Choose the right platform: Platforms like Glide are great for building certain types of apps, like business automation or workflow software. If you are looking to build a consumer app like a dating app, you may want to consider other platforms.
- Plan for app maintenance: Creating the app is just the first step. Be prepared for regular updates and maintenance to keep the app relevant and secure. Glide releases updates regularly to remove this complexity as much as possible.
Step 1 - Organize your data
The three main components of an app are:
- Data
- Functionality
- Design

Data is the foundation of any app because without it, there is no fuel to drive the functionality.
When building an app without code, that data is generally going to be stored in a spreadsheet. Google Sheets is typically the easiest and most accessible spreadsheet software, and it also has a ton of flexibility in the form of add-ons.
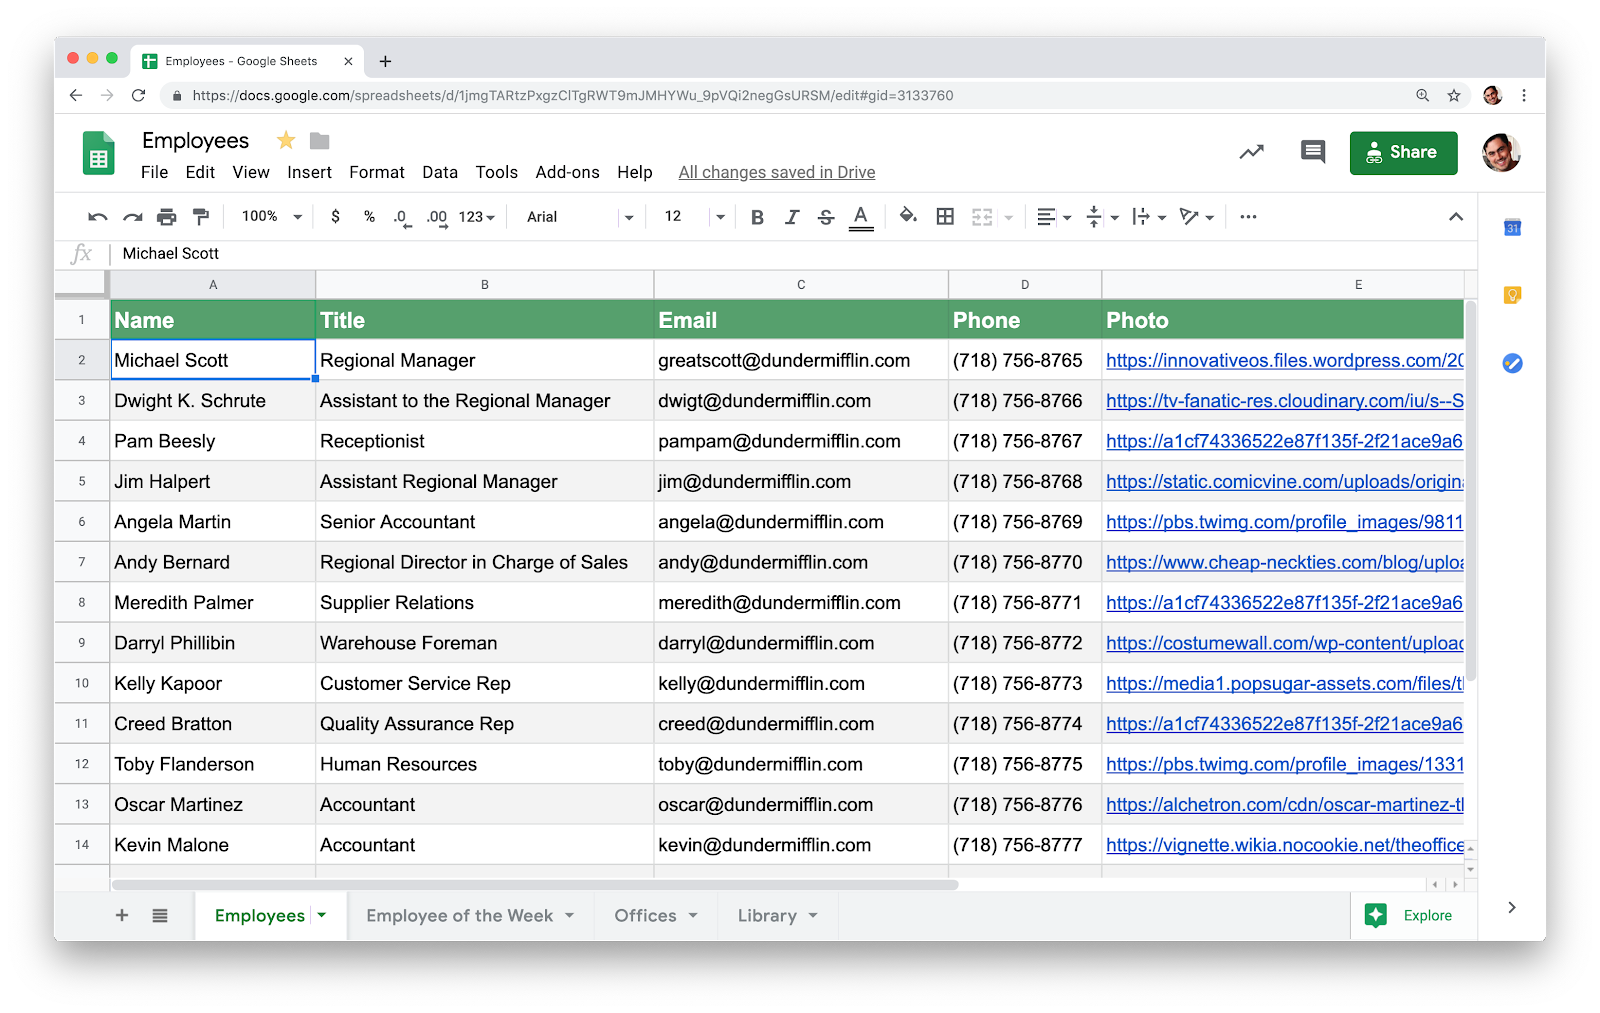
The good news is that you likely already have your data sitting around in an existing spreadsheet. Let’s say you wanted to build an app that would function as your employee directory. All the data you would need to power that app would be a spreadsheet with the first row listing all the column headers:
- Name
- Title
- Phone
- Photo*
*If you include a link to the employee’s headshot hosted online, you can customize your app to include their picture!
The spreadsheet is technically functional as a directory in its current state, but it’s boring and not easily accessible on mobile. You can use no-code software to turn it into an app that your coworkers will find engaging and useful.
Additionally, a spreadsheet doesn’t really function the way you’d want a directory to. Ideally, you’d be able to search an employee by name, tap their photo, and then call or email with one more tap—this isn't possible with just a spreadsheet.
Note—At Glide, we have amassive library of templates for commonly created apps, including one for anemployee directory.
Depending on which no-code platform you choose, you will likely have to configure your spreadsheet in a way that can translate into app form. While an employee directory is a relatively simple example, you’d be amazed what you can do by connecting a Google Sheet to your app—the possibilities are virtually endless so long as you have a solid foundation of data.
We strongly recommend housing your data in Google Sheets because it’s easy to use, it’s accessible, and you can typically sync your app and spreadsheet (depending on your software vendor) so that edits to the data in either source update both records.
But your app isn’t limited to just displaying static rows and columns from a spreadsheet.
Depending on what functionality you need, you might want to take advantage of something like our Data Editor. This tool allows you to further manipulate the data from your spreadsheet with powerful functions that structure and connect your data in limitless ways.
https://www.youtube.com/embed/c3d6ST9SGVI
Bottom line: Building an app without code starts with a solid data foundation housed in a spreadsheet.
Step 2 - Build your functionality
Now it’s time to bring your app to life with layout and navigation. But first, let’s talk a little strategy.
Think of the most-used apps on your phone, like email—it’s basically a collection of screens that show you different pieces of information and allow you to move back and forth between them as needed. For the majority of apps, there are three main layers you need to think about:
- Tabs
- Top-level screens (lists)
- Detail screens
Let’s dissect each one.
Tabs
Tabs are the main navigation of an app. Tabs help you move back and forth between your top-level screens.
In our employee directory app example, we have a tab for Staff, Locations, and Me.
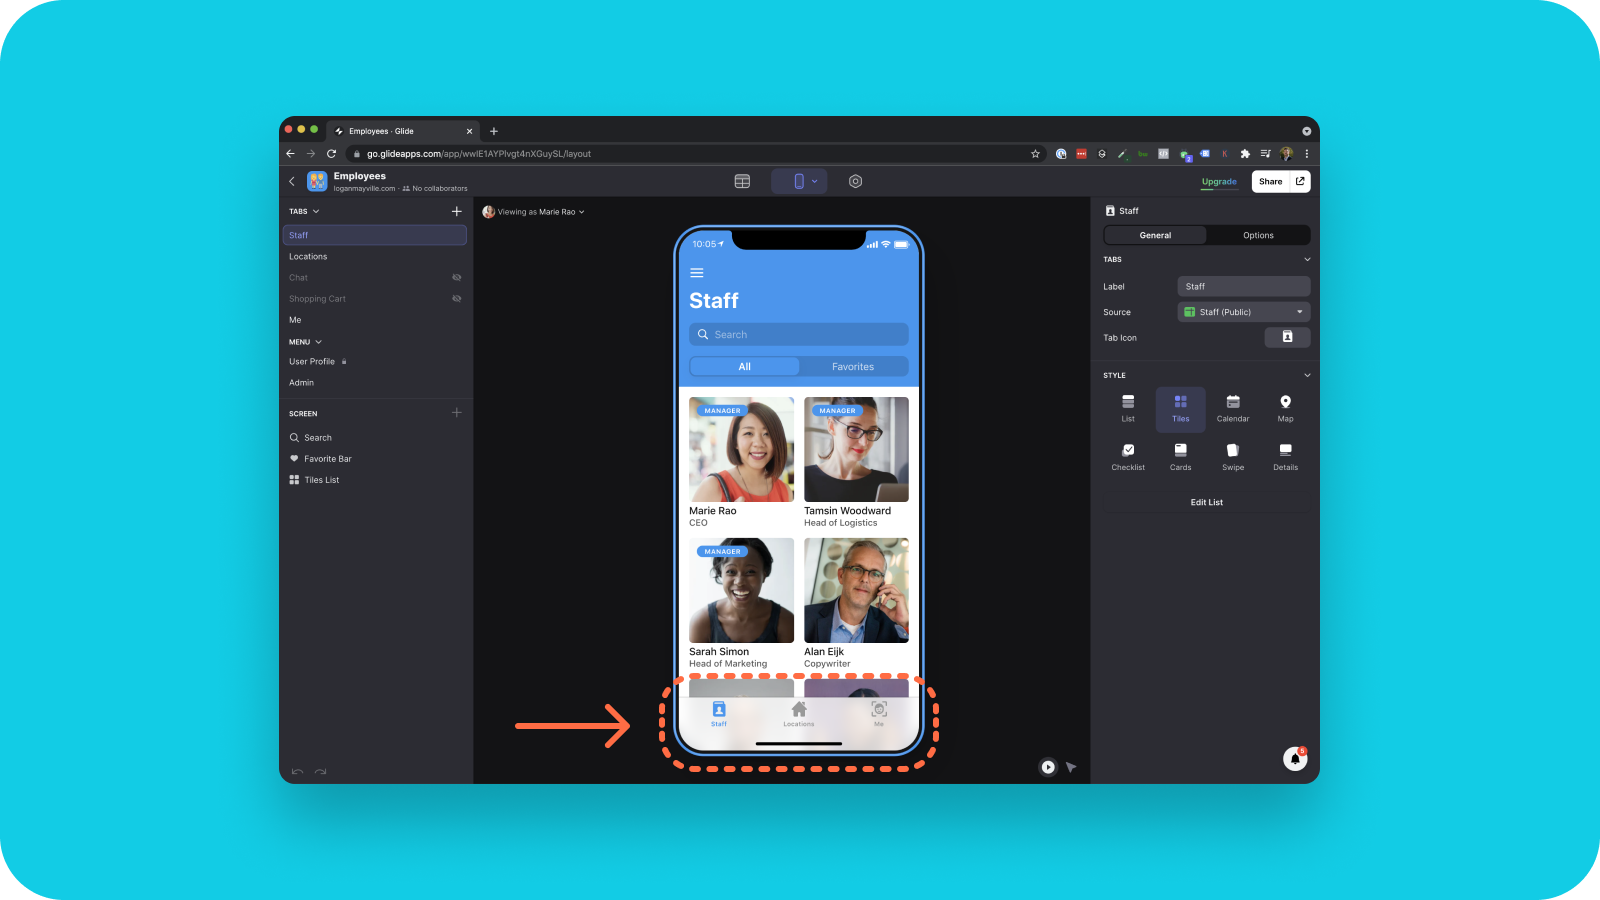
You’ll also see examples of tabs on basically all the apps you currently use. Open Instagram—see the tabs for your home feed, your mentions, and your profile? Same concept here, but now you’re in charge.
If you’re brand new to app building, you might want to review some native apps in your category to get an idea of how their tabs are organized. Or, if you’re using Glide, you can always start from a template.
Top-level screens
Tabs navigate you to top-level screens, which is where a lot of your functionality lies. Top-level screens are often some type of list with summary info. For example, when you open up your email inbox, you see a list of all your emails with snippets of info: Subject line, sender, preview text, etc.
Each top-level screen you build will be associated with a specific tab from your Google Sheet.
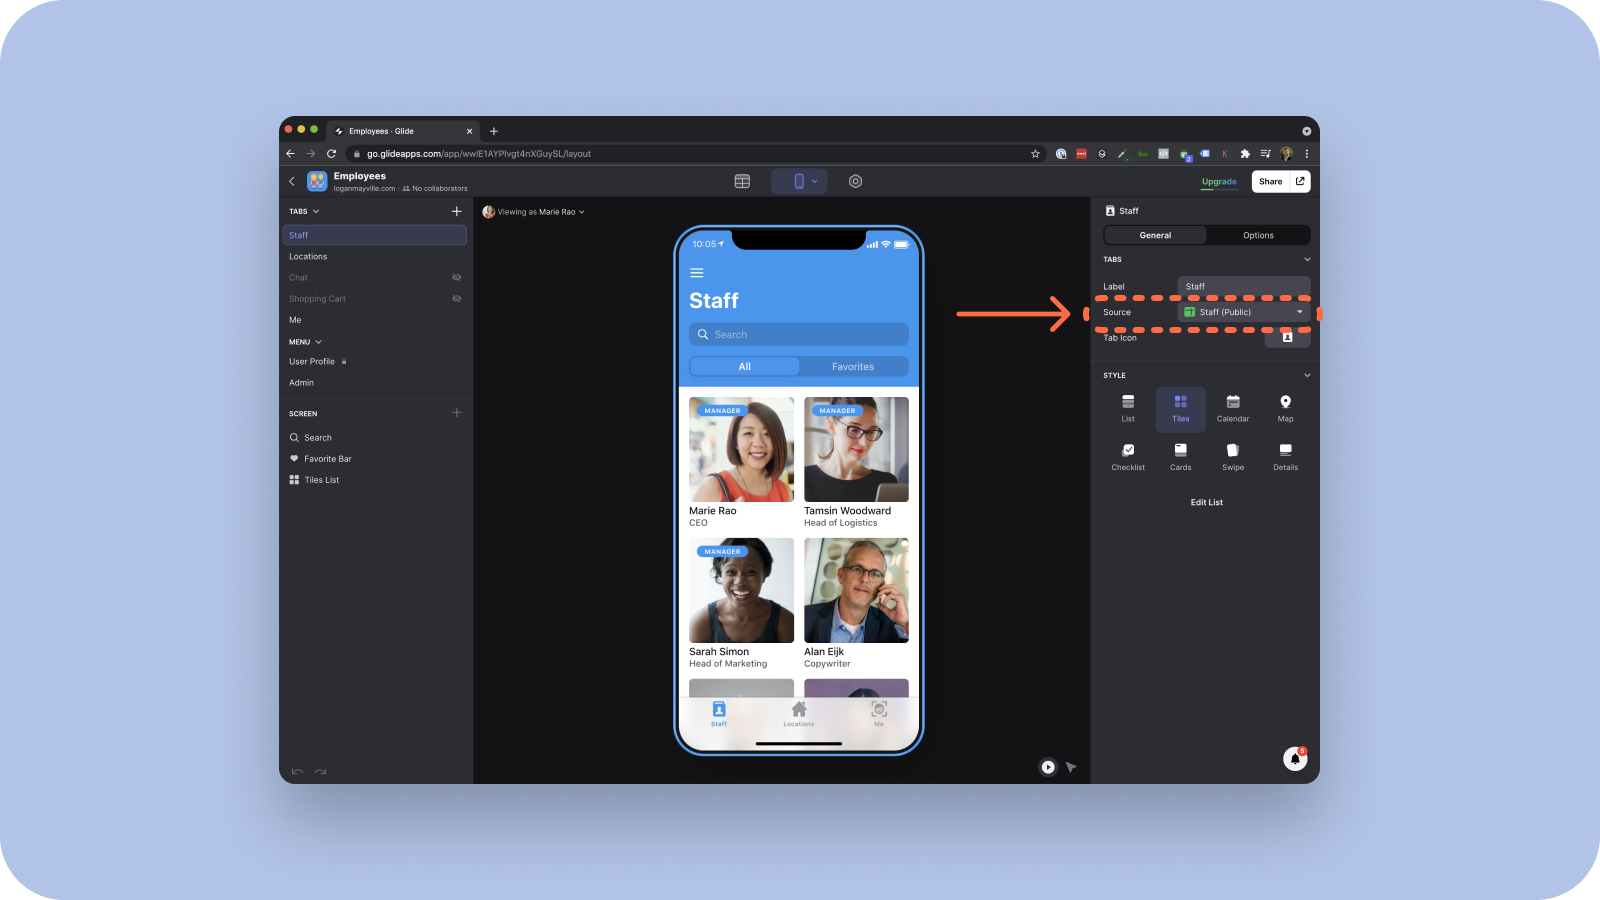
Again, this is why your data from the first step is so crucial. You do not have to get your data right on the first try, however. Once you get to this step, you can always go back and forth adding and reconfiguring your Google Sheet.
So these top-level screens are essentially lists, but they don’t have to be just boring lists. You can customize the layout depending on the type of app you’re building. For example, the staff page in our employee directory app is primarily driven by the photos, so a grid layout (like the screenshot above) makes more sense.
The ability of the ‘list’ to take on many different forms is entirely dependent upon which type of data the top-level screen is mapped to. If your data source has addresses, for example, you can display your ‘list’ as a map.
Top-level screens are designed to help your users find the information they’re looking for housed on your detail screens.
Detail screens
If a user sees something on your top-level screen that interests them, they’ll tap that part and be taken to a detail screen. In our employee directory example, this would be a profile of a staff member.
From here, you’ll want to use your intuition to think through all the different actions a user would want to take once they reach this screen. In our employee directory example that might be to email their coworker, call, see where they’re located, etc.
Note—With Glide, any update you make to one detail screen will automatically apply to all others from the same list. No need to go through and edit each screen individually.
At this point, you should have a functional app that provides the intended utility to your users.
Step 3 - Customize your design
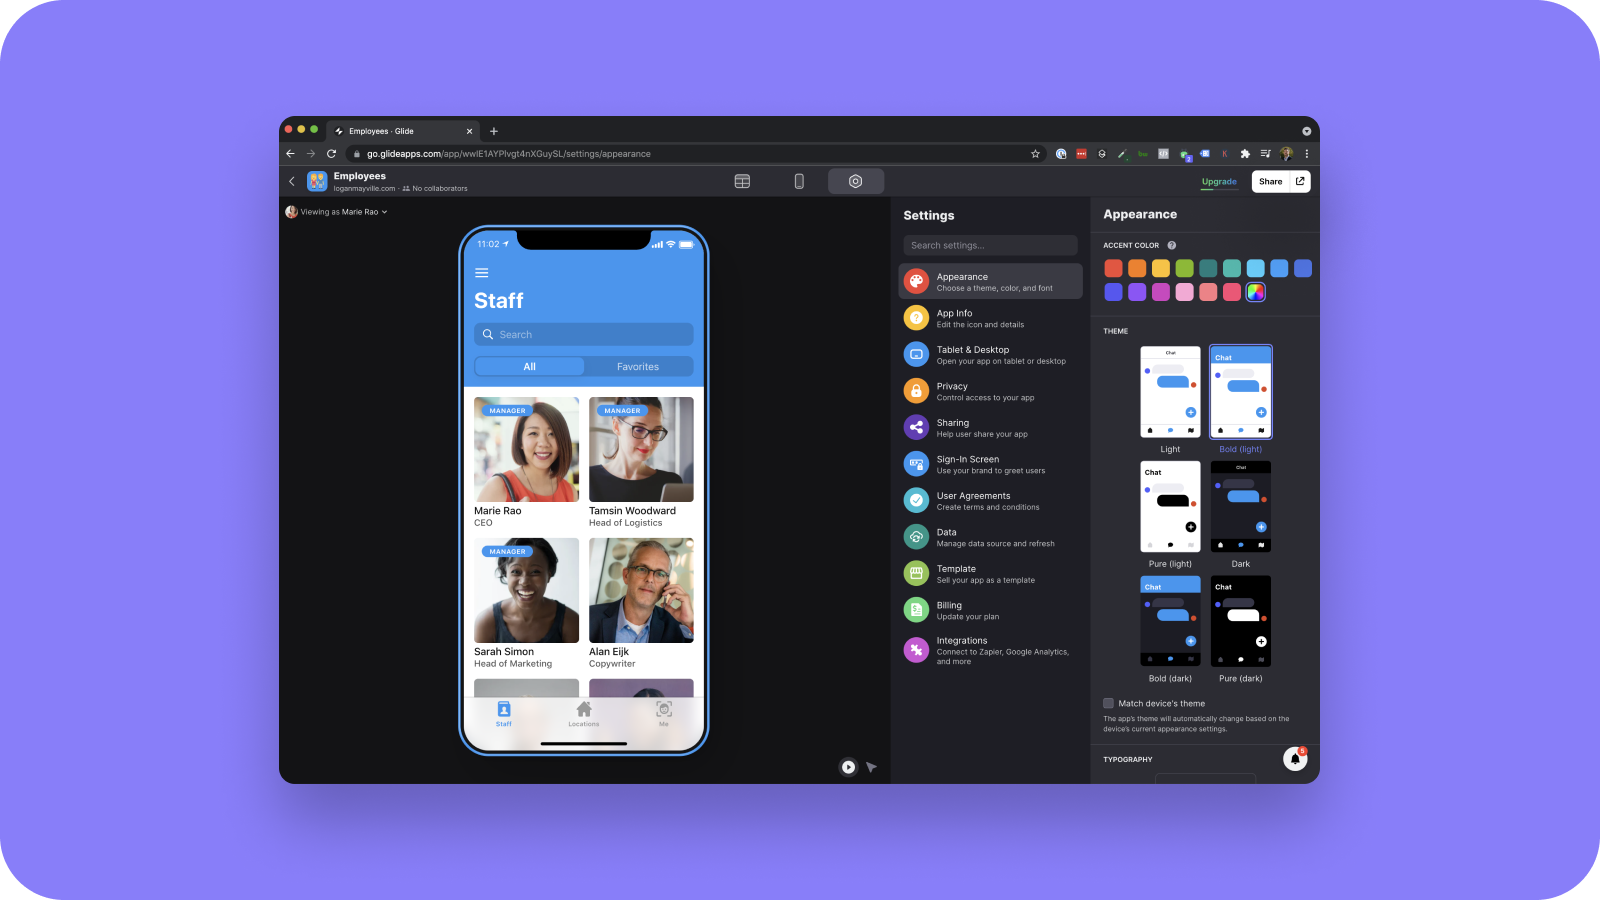
If you want your users to feel a sense of delight when using your app—which is essential to get them to keep using it—you’ll want to polish the appearance. Colors, typography, icons, themes… There are virtually limitless ways you can customize your app.
In our employee directory example, just toggle the view to “Appearance” using the icons at the top of the app editor to see what’s possible.
Your brand design and personality is unique and personal, so we can’t give you too much direction there. However, we recently did a brand refresh ourselves and wrote a detailed account of how it all went down—feel free to check it out for inspiration!
Step 4 - Publish and share
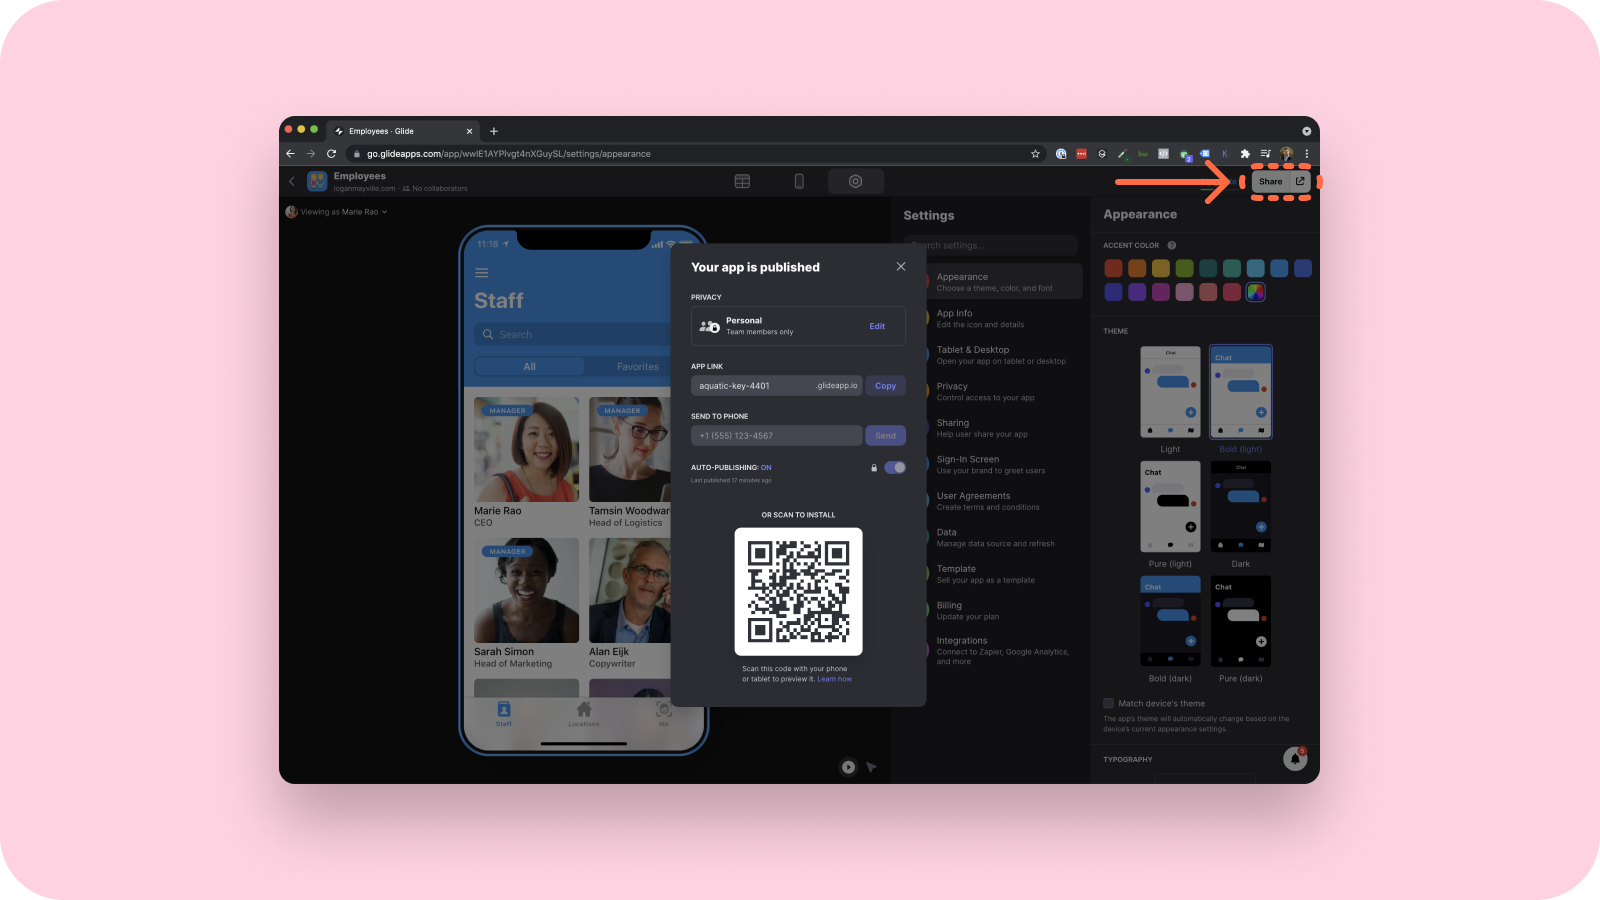
Once you have your app looking just how you want it, it’s time to publish it so you can add it to the home screen of your phone. Hit the “Publish” button in the top right of the app builder screen and you’re all set.
Of course, apps are more fun when other people join in, so take advantage of the options for sharing your app with others.
So there you have it—how to create an app with no-code.
Building an app with Glide
Glide is a no-code app builder that turns spreadsheets into powerful apps for work or personal use. If you like what you’ve seen here today, why not create a free account with us and build your first app in just a few minutes?
As you likely noticed, many of the steps we listed in this blog post come from our own documentation. But if you’re not sold yet, come check out our Core Concepts page and get a better sense of how your app might come together.
FAQs on Creating an App
Q1: Do I need any technical skills to create an app using a no-code platform? No, you don't need any programming skills to create an app using no-code platforms like Glide. These platforms are designed for non-technical users and have intuitive interfaces that guide you through the app development process.
Q2: How much does it cost to create an app with a no-code platform? The cost of creating an app with a no-code platform varies based on the platform and the complexity of the app. Many platforms offer free tiers with basic features, while premium tiers allow more users, more data, and additional features. Check Glide’s pricing for more information.
Q3: How long does it take to create an app using a no-code platform? The time it takes to create an app using a no-code platform varies based on the complexity of the app and your familiarity with the platform. However, even for beginners, creating a basic app can often be done in a matter of an hour or two.
Remember, the journey of creating your first no-code app may seem daunting at first, but with the right platform and guidance, it can be a rewarding and enjoyable process.
We can’t wait to see what you build!


