
NOTE: We have replaced the legacy barcode scanner mentioned in this guide with the updated Scanner component and Barcode and QR Code Scan action. Read the updated guide here.
In this guide, we’re going to make a simple ticket barcode scanner with Glide & Airtable.
Understanding Barcode Scanners: A Key Tool for Modern Businesses
Before we delve into the details of creating a barcode scanner using Airtable and Glide, it's worth understanding what a barcode scanner is and how it operates.
A barcode scanner is a device that reads the series of numbers and parallel lines printed on a product, translating them into a form that a computer can understand and process. This conversion from physical form to digital data happens in three main steps:
- Illumination: The scanner uses a light source (usually a red LED) to illuminate the barcode.
- Sensor and Conversion: A light sensor located inside the scanner measures the amount of light reflected back from the barcode. The sensor then converts this light into an electrical signal.
- Decoding: This electrical signal is sent to the decoder, which interprets the signal into meaningful data, typically a sequence of numbers.
Barcode scanners can significantly enhance operational efficiency for businesses, especially those dealing with inventory management, retail, and logistics. Here's why:
Inventory Management: Barcode scanners streamline the process of tracking stock levels. By scanning barcodes when items arrive or are sold, businesses can maintain real-time inventory counts, minimizing human errors and reducing the time needed for stock takes.
Speed and Accuracy at Point of Sale (POS): Barcode scanners enable quick and accurate product identification at the POS. This not only speeds up the checkout process but also enhances customer experience.
Logistics and Shipping: In the logistics and shipping industry, barcode scanners play a crucial role in tracking packages throughout their journey, improving the accuracy of delivery information and ensuring packages arrive at their correct destinations.
Access Control: Businesses can use barcode scanners for access control, such as scanning ID cards or badges for entry to secured areas, making it easier to manage and monitor access.
Building a barcode scanner using Airtable and Glide, as we will outline in this blog, empowers businesses to enjoy these benefits without needing to invest in costly specialized hardware or software. This can prove to be an invaluable resource, especially for small businesses or startups looking to streamline their operations and improve efficiency.
Getting Started Building a Barcode Scanner Without Code
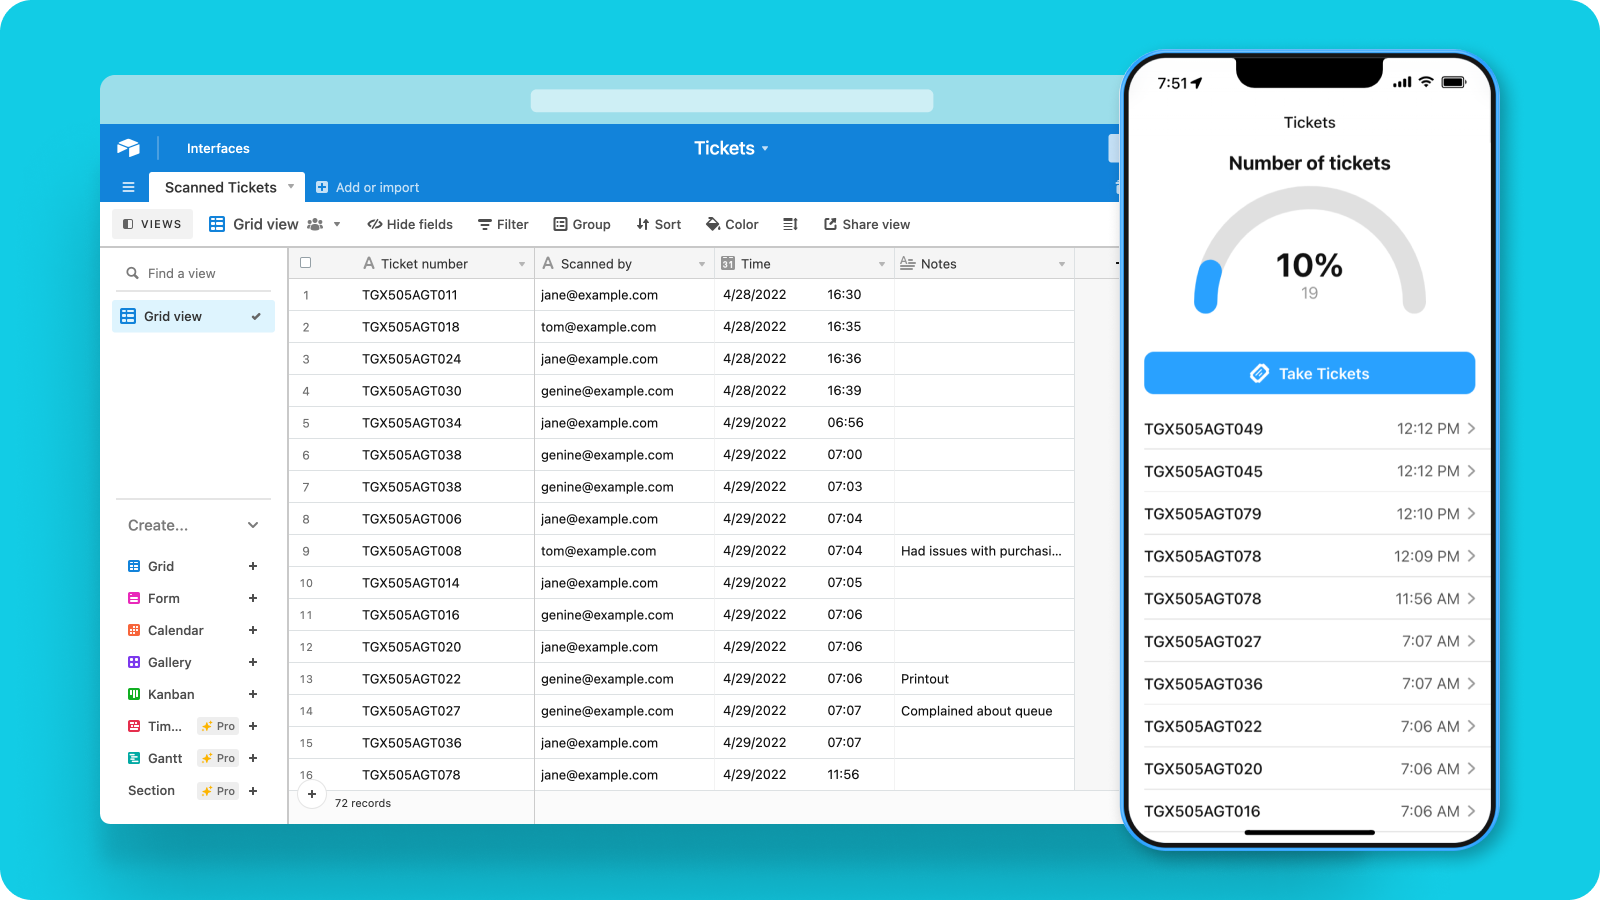
Our app will have a list of scanned ticket numbers and a button that scans new ones and adds them to the list. At the top of our app, we’ll have a progress bar showing how many tickets have been scanned, and all of this will sync directly with our Airtable base.
Let’s dig in!
Logging tickets
Here’s a table of existing ticket numbers that have been logged.
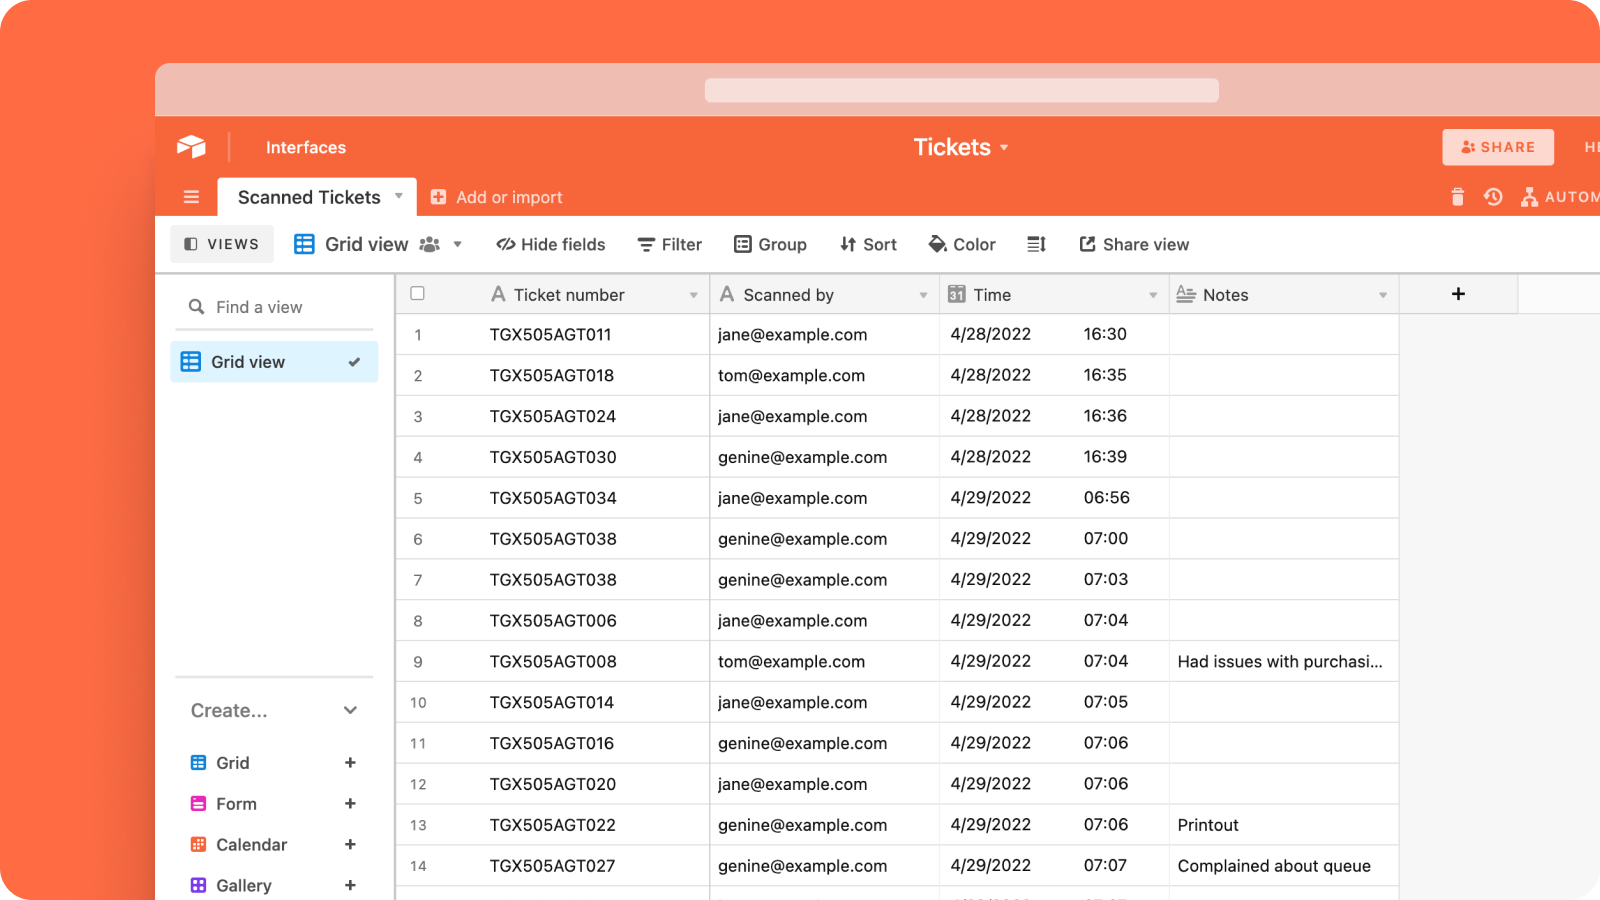
In Glide, we’ll create a new app and pick this Airtable base as the source.
Glide creates a basic app as a starting point. This is a list screen, and it’s currently showing all the rows in our table.
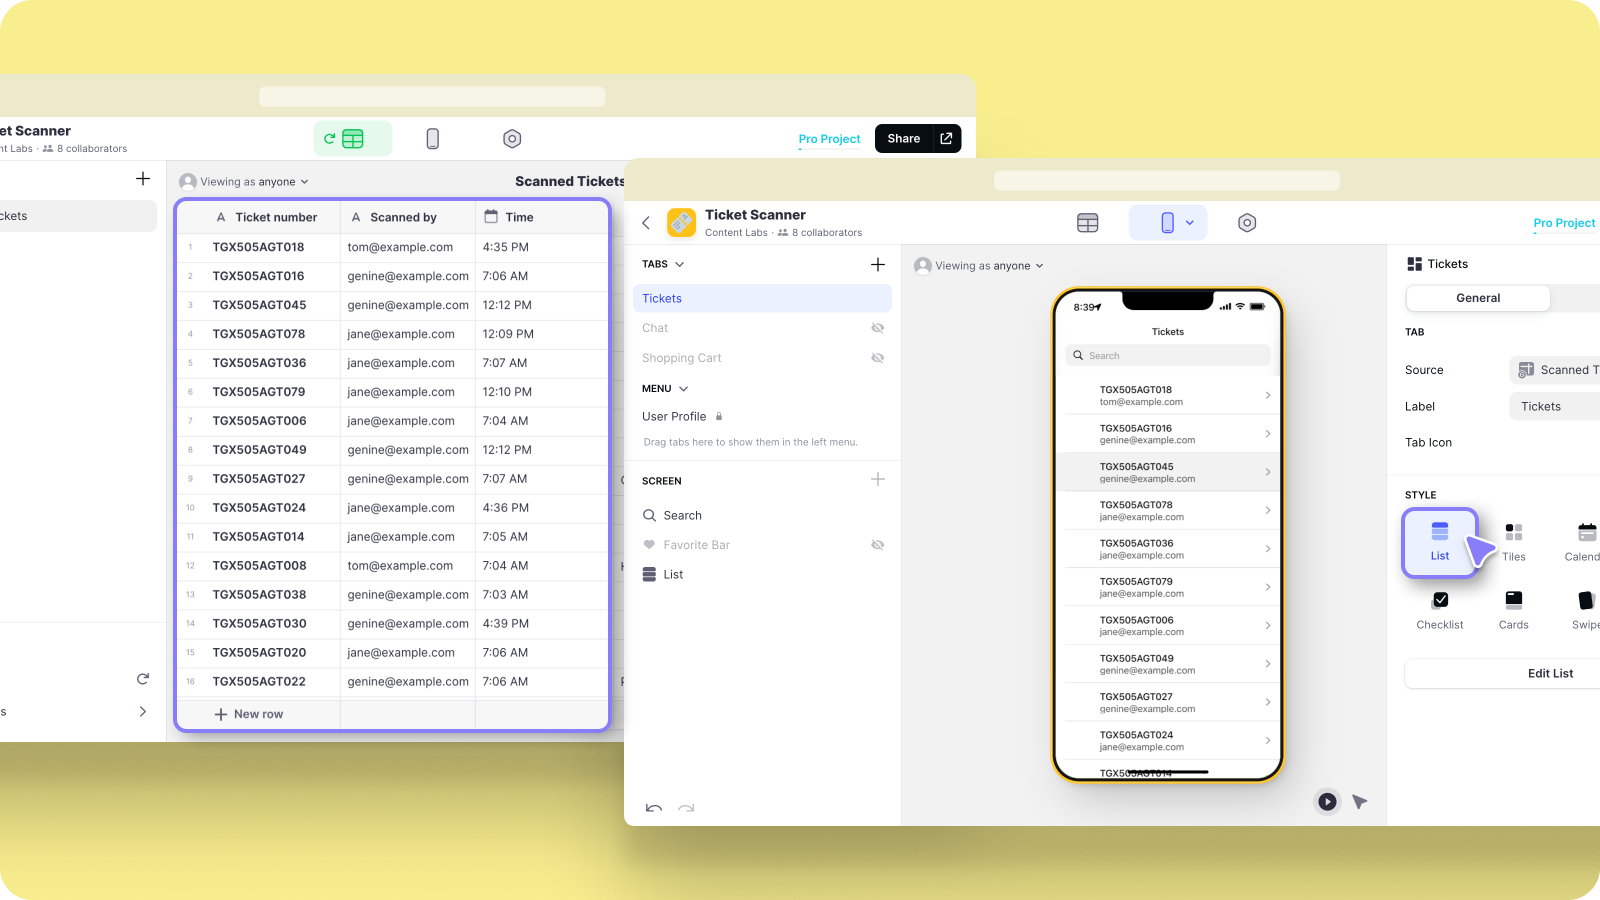
List screens are great for showing lots of records, but you can’t add things like buttons to them. So let’s change this screen type to a details screen. Now, we can add components.
We’ll add a barcode scanner button and an inline list.
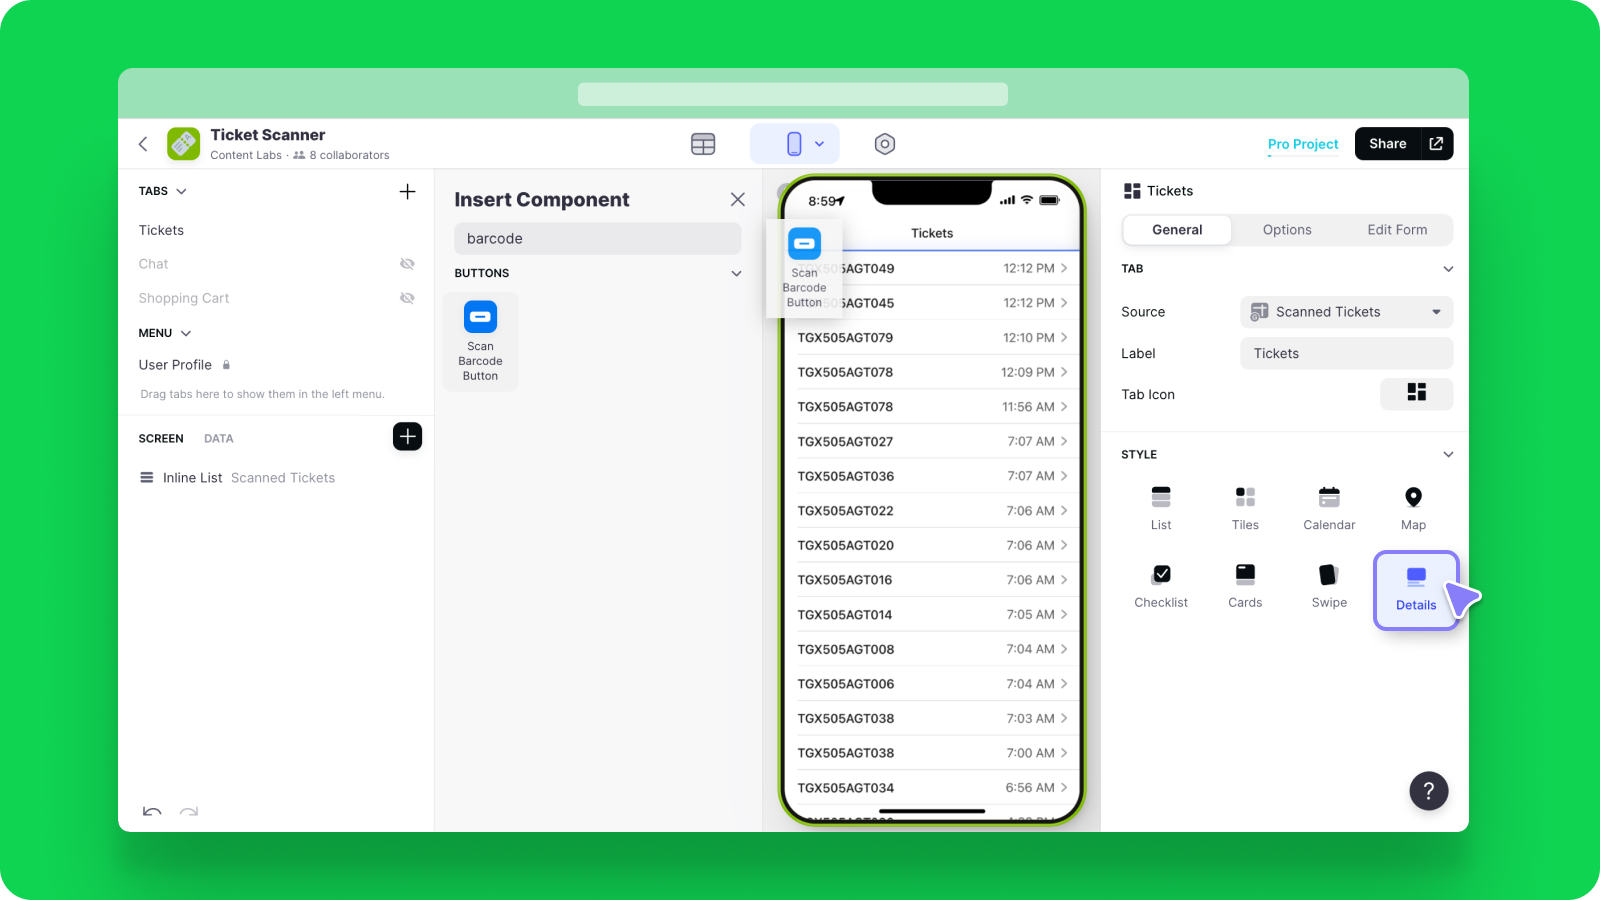
We’ll make sure the barcode scanner is connected to our ticket number column.

And we’ll make sure the inline list is showing the records from our tickets table.
Now, when we scan new tickets, they’ll show up in the list and be logged as new rows in Airtable.
Progress bar
Next, we need to create the progress bar.
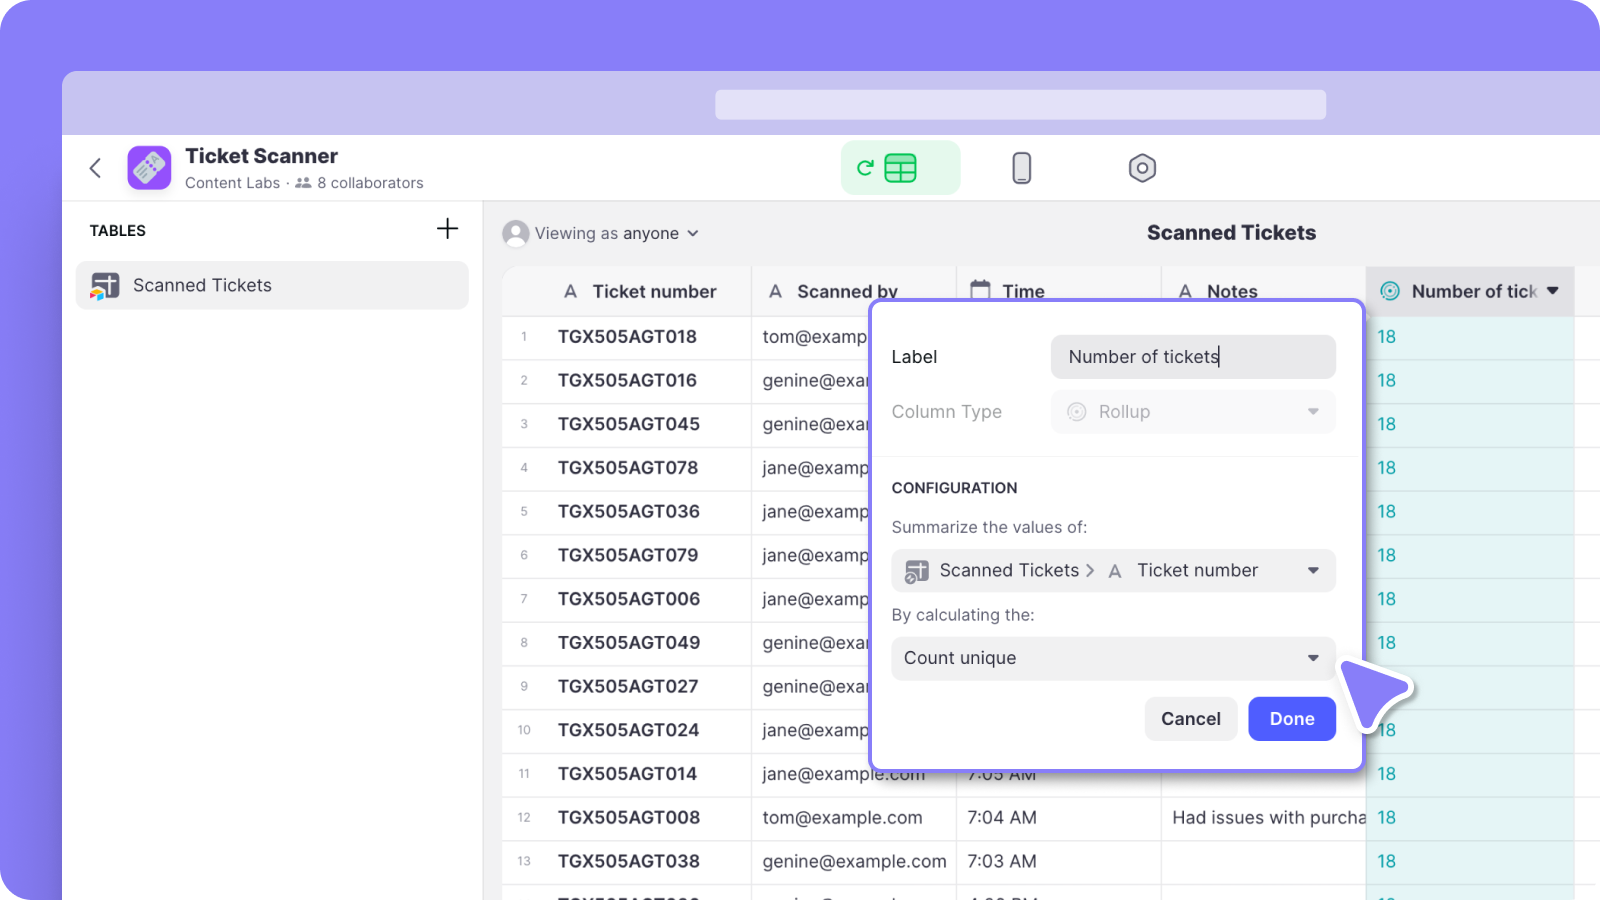
Firstly we need a value that the progress bar can count. So, in the data editor, we’ll create a rollup column and make it count up all the unique values in the ticket number column.
Next, we’ll add the progress bar and set the column to the rollup we just created.
We have 100 tickets in total, so we’ll set the minimum to 0 and the maximum to 100.
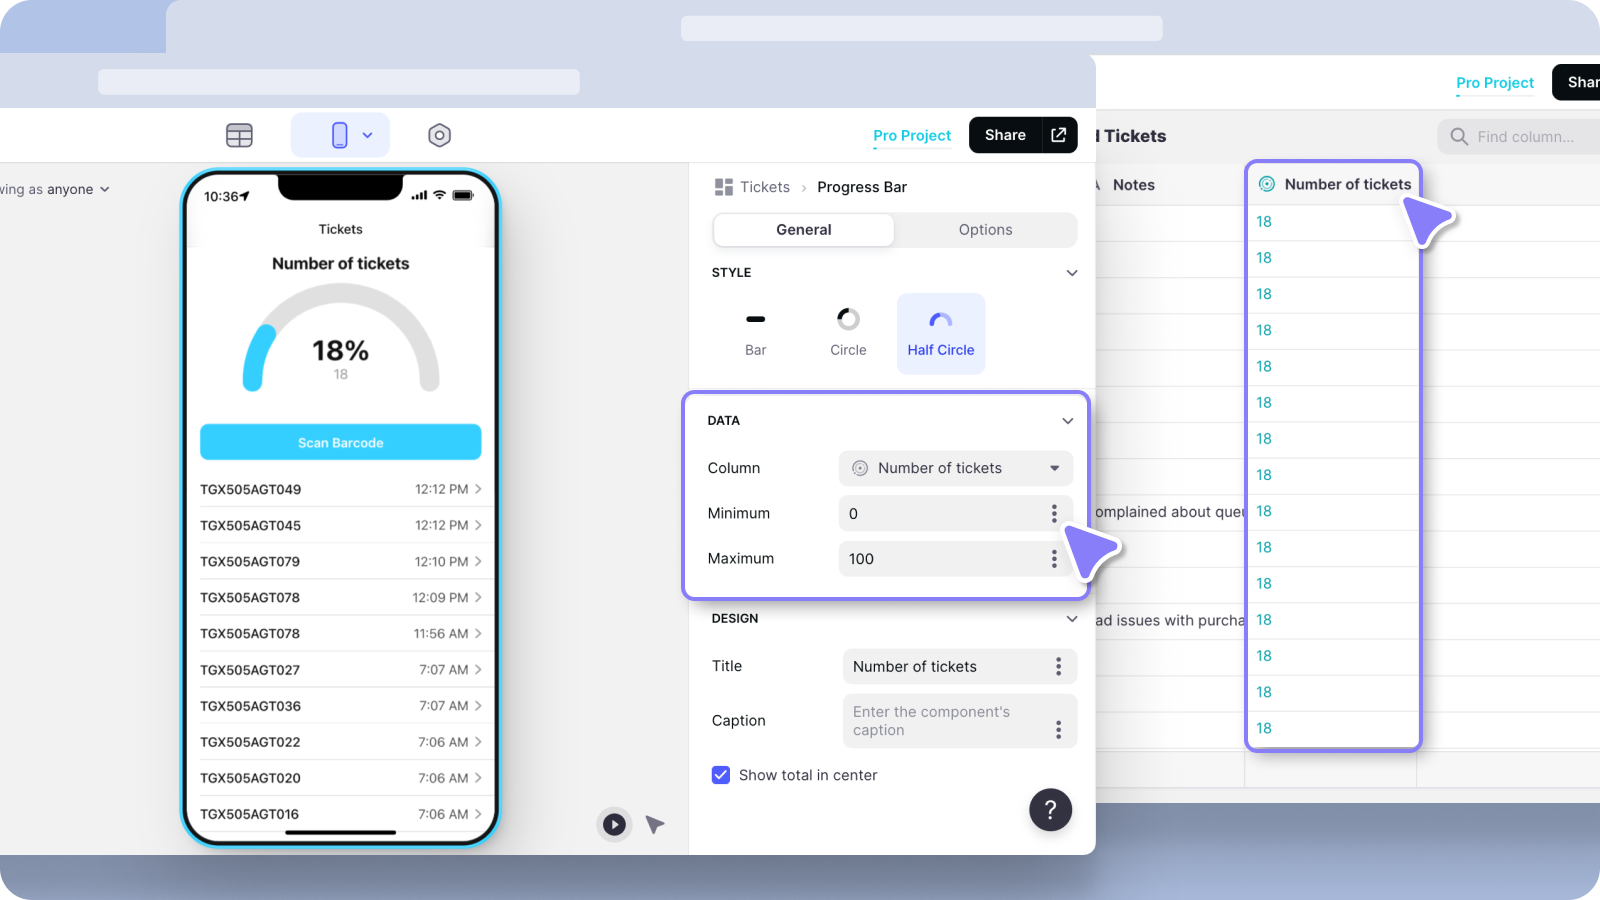
Now, the progress bar updates every time we add new tickets, and we can see clearly how close to full our event is.
So that’s a very quick look at barcode scanning in Glide. Barcode scanning can fit into a lot of complex workflows, so if you’re interested, make sure you check out our university to learn more.
Sign up for Glide to start building today.


