This is an Airtable base called Lost & Found. It enables staff at a live event to coordinate all the lost & found items across the site — connecting people with items that have been found and posting items that have been lost.
With Glide, we can make an app with this data so that volunteers across the site can easily view and add new items with their phones — helping people find their items much quicker.
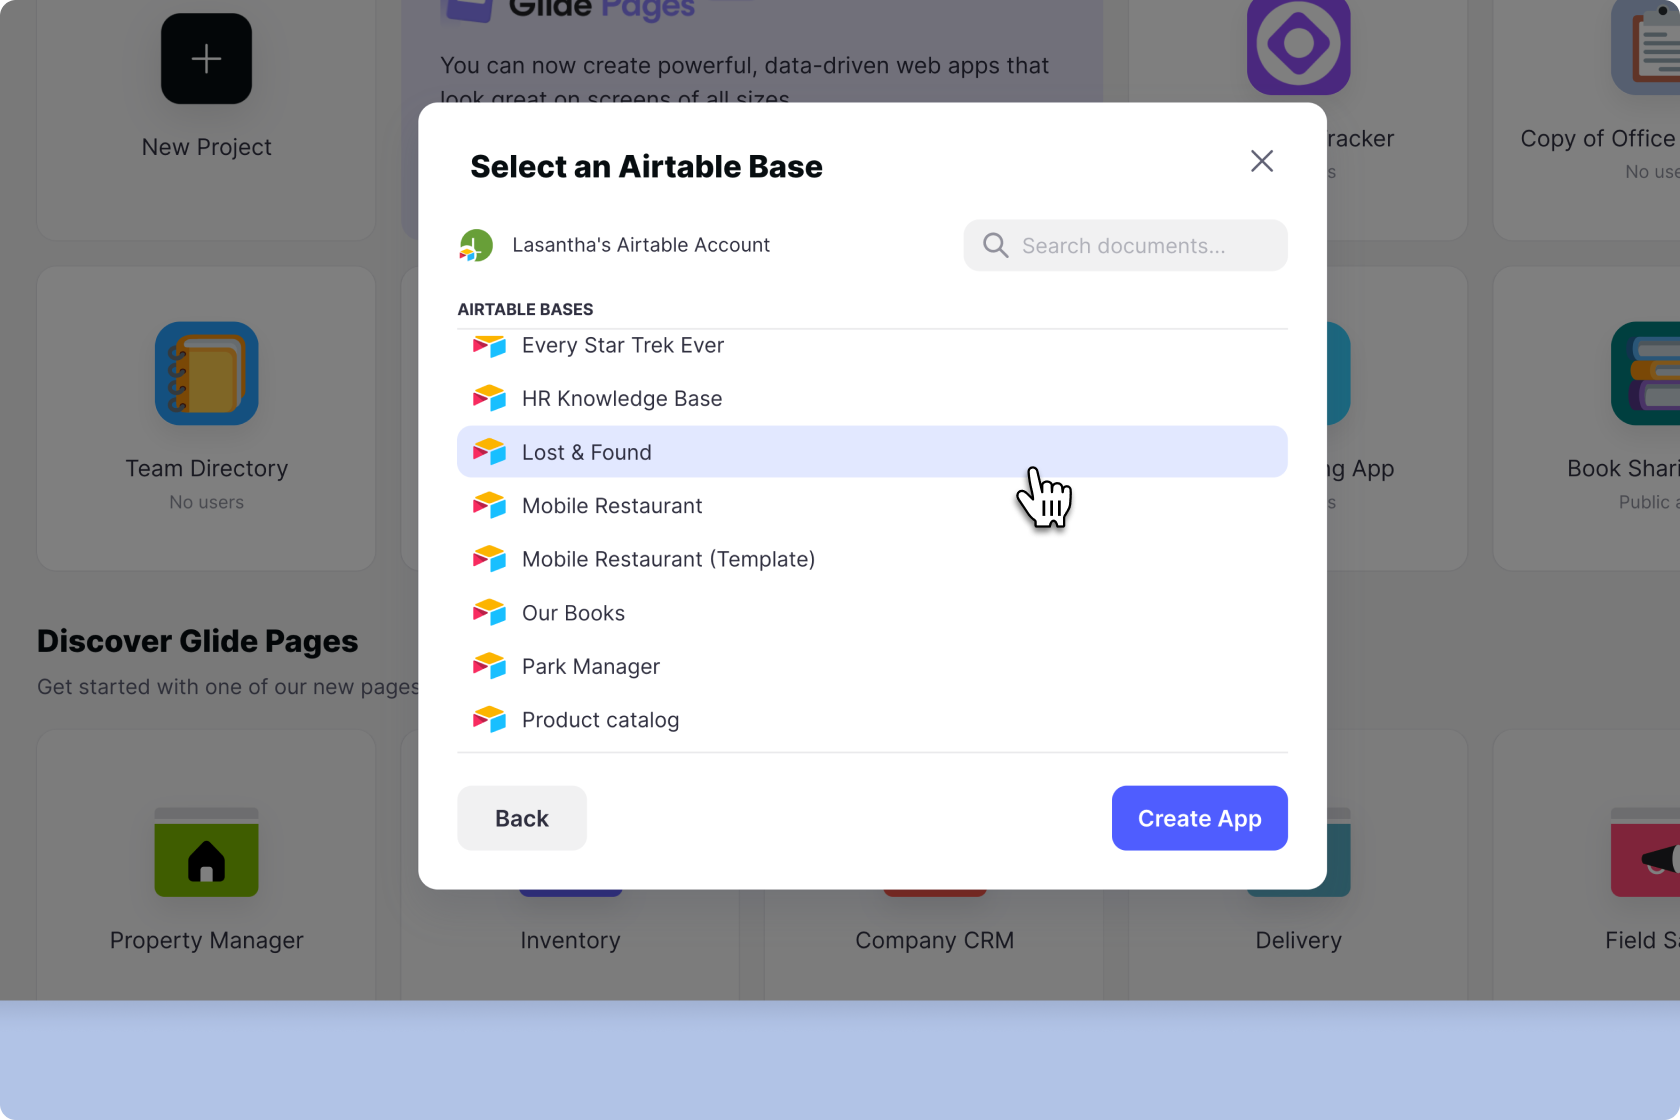
In Glide, we’ll create a new app and pick our Airtable base as the source.
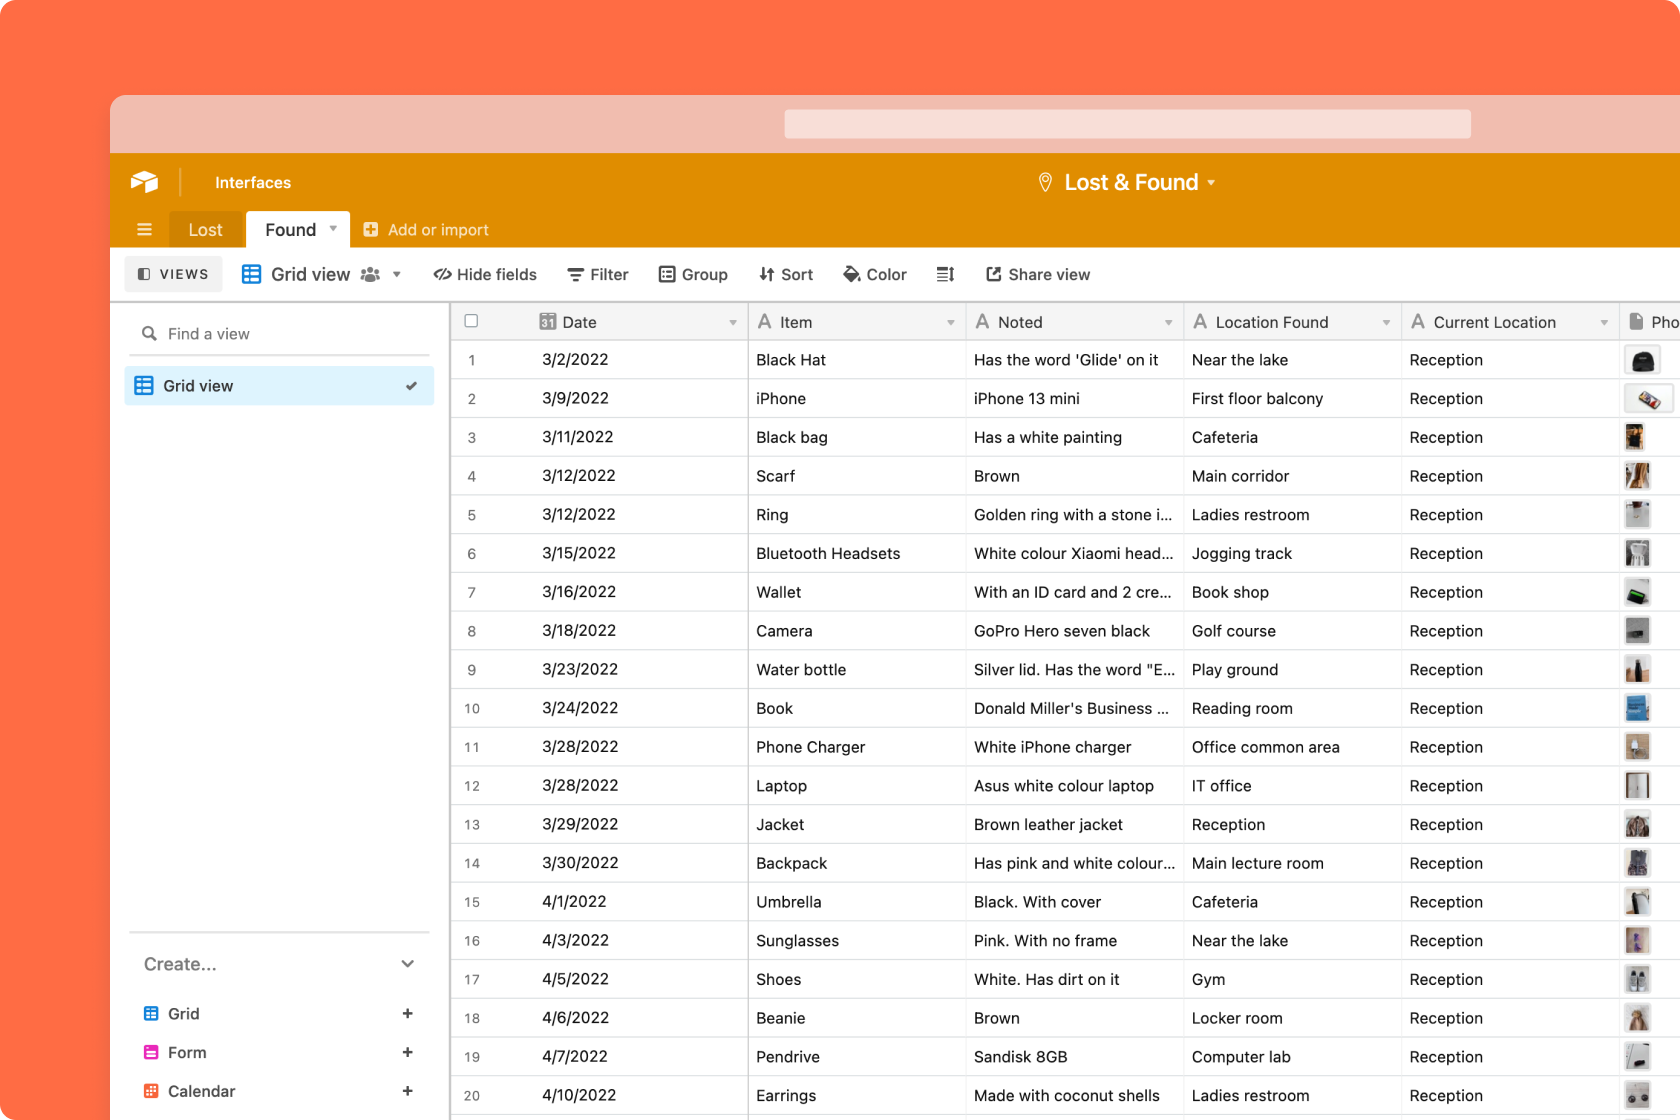
Our base has two tables, one for lost items and one for found, and Glide has made a tab for each of them.
The first thing we can do is change the icons to better match the names and then style the lists on each screen.
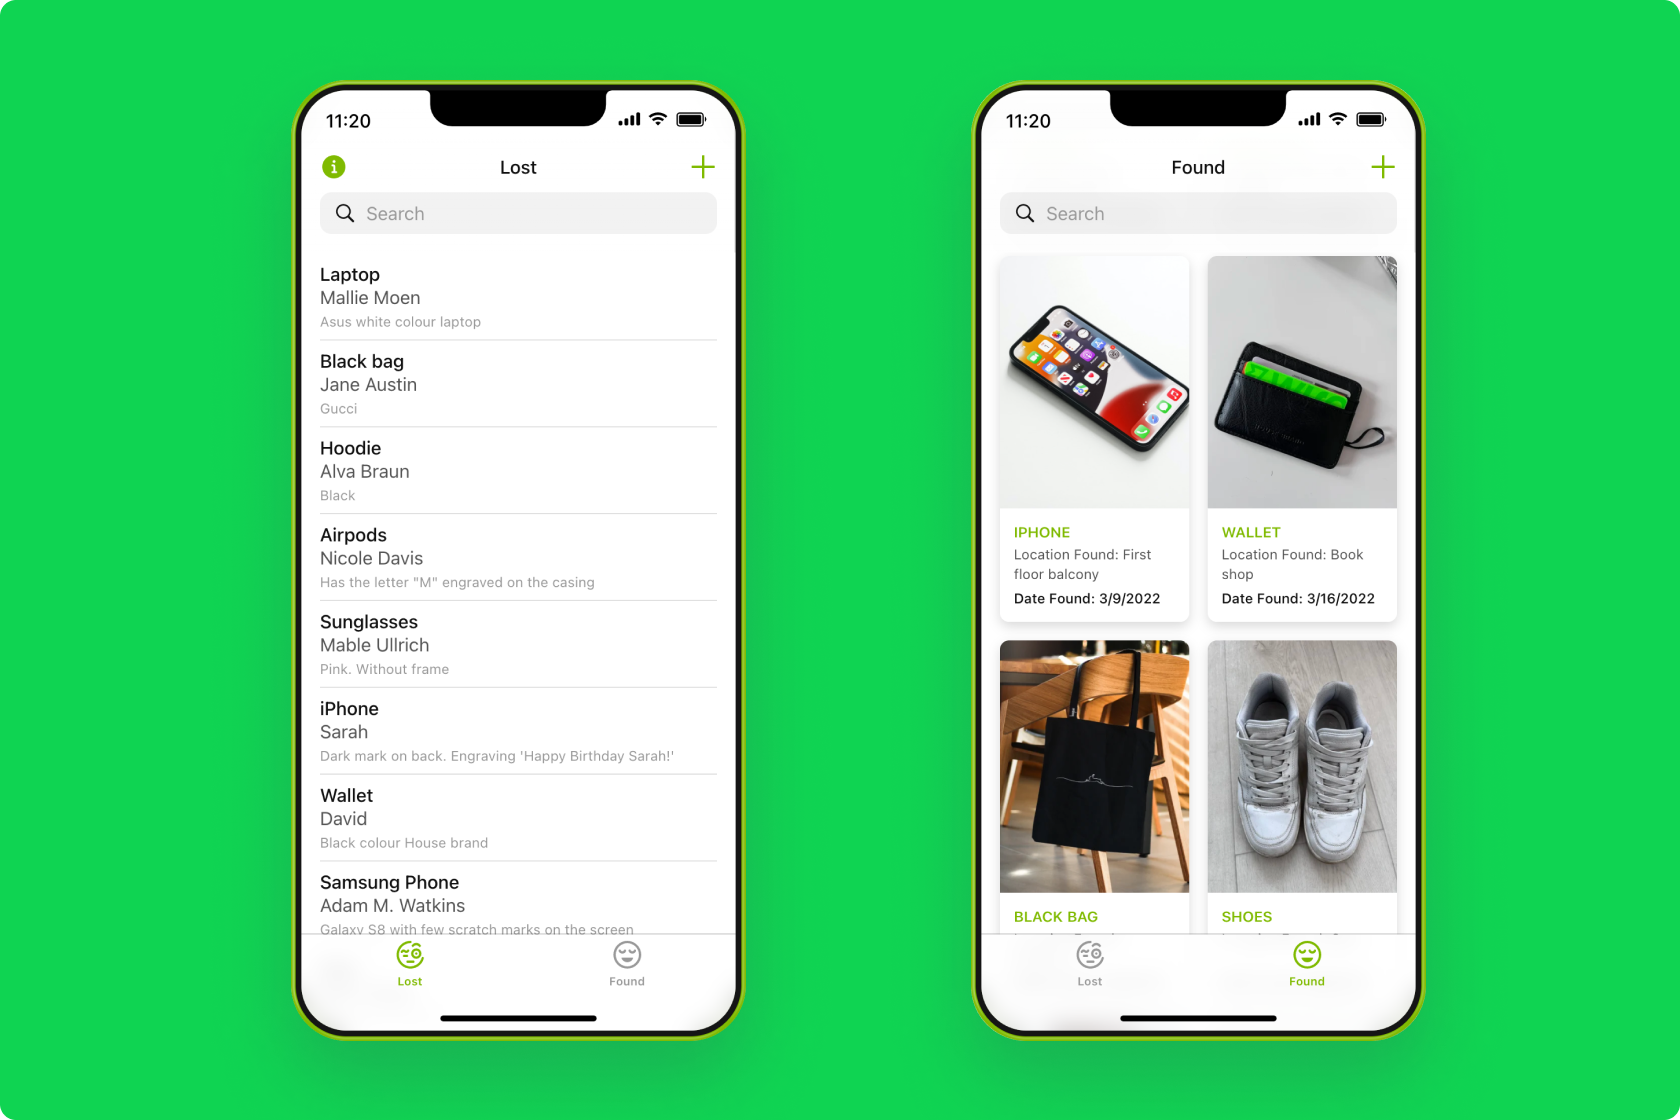
The first screen is the lost items. This is where people post items that they have lost and leave their contact details — so that if someone finds it — they can get in touch.
We’ll pick a simple list style and make sure it shows the item, name, and notes.
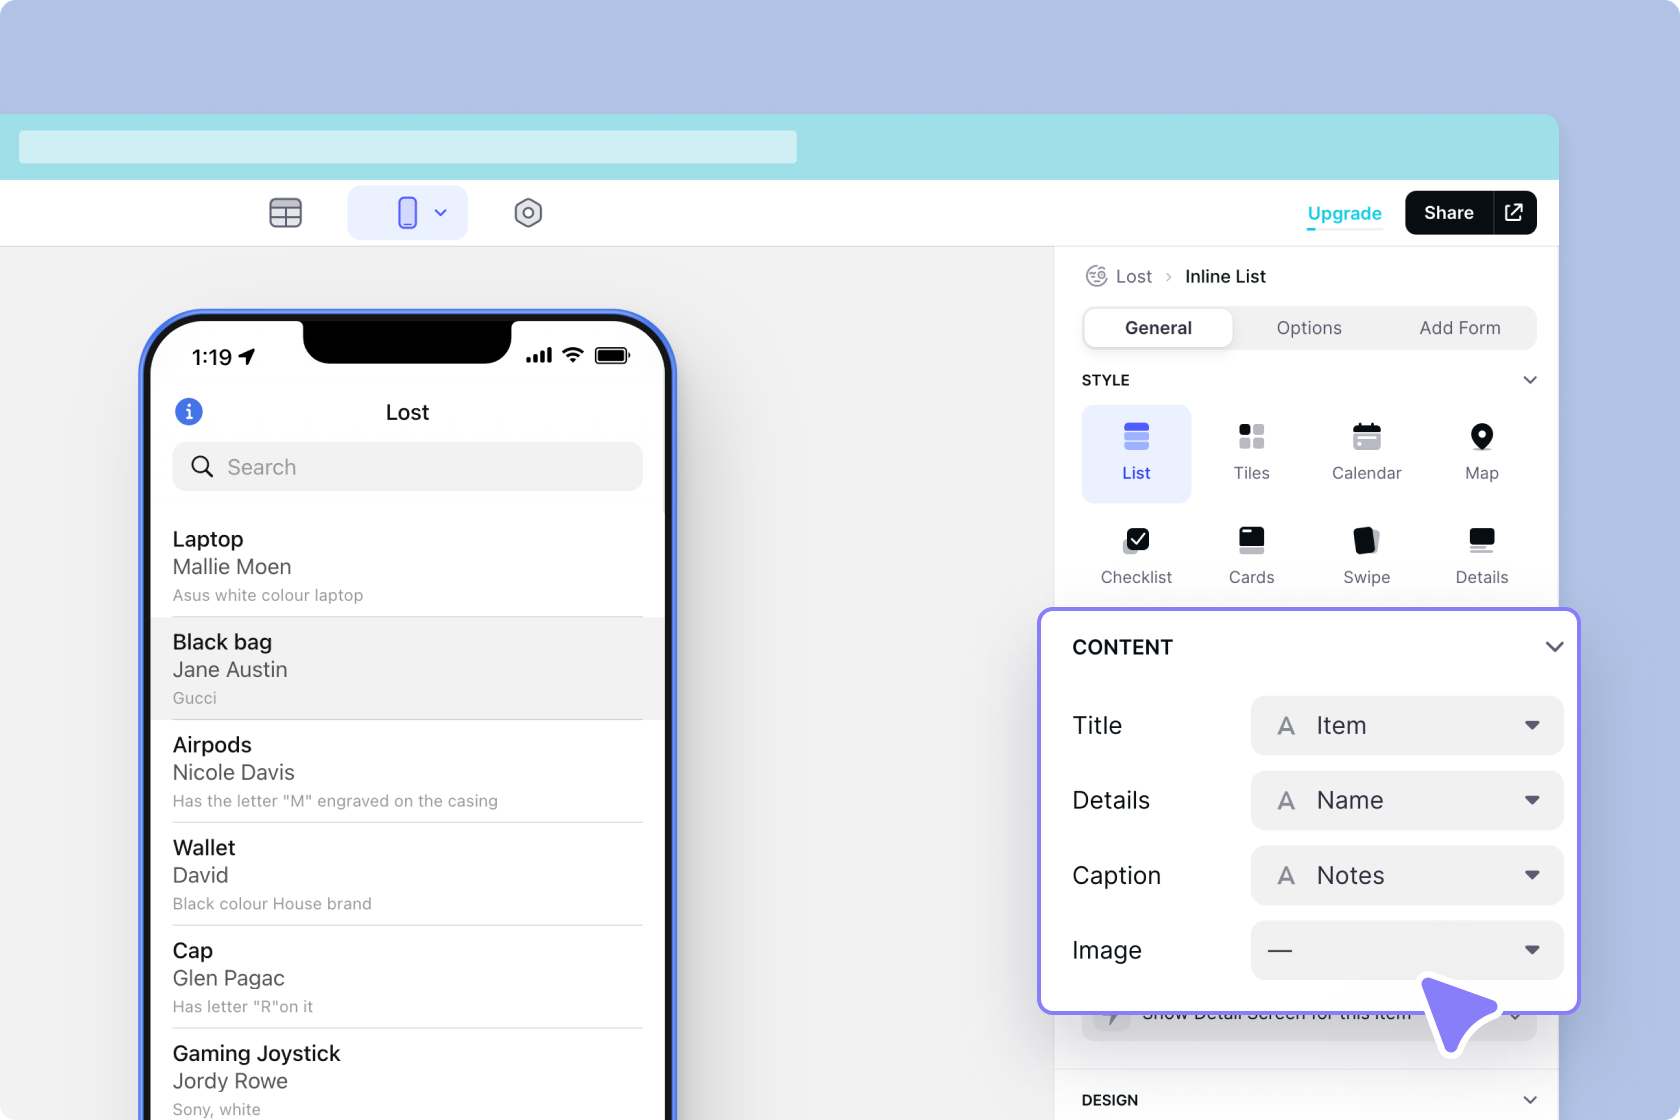
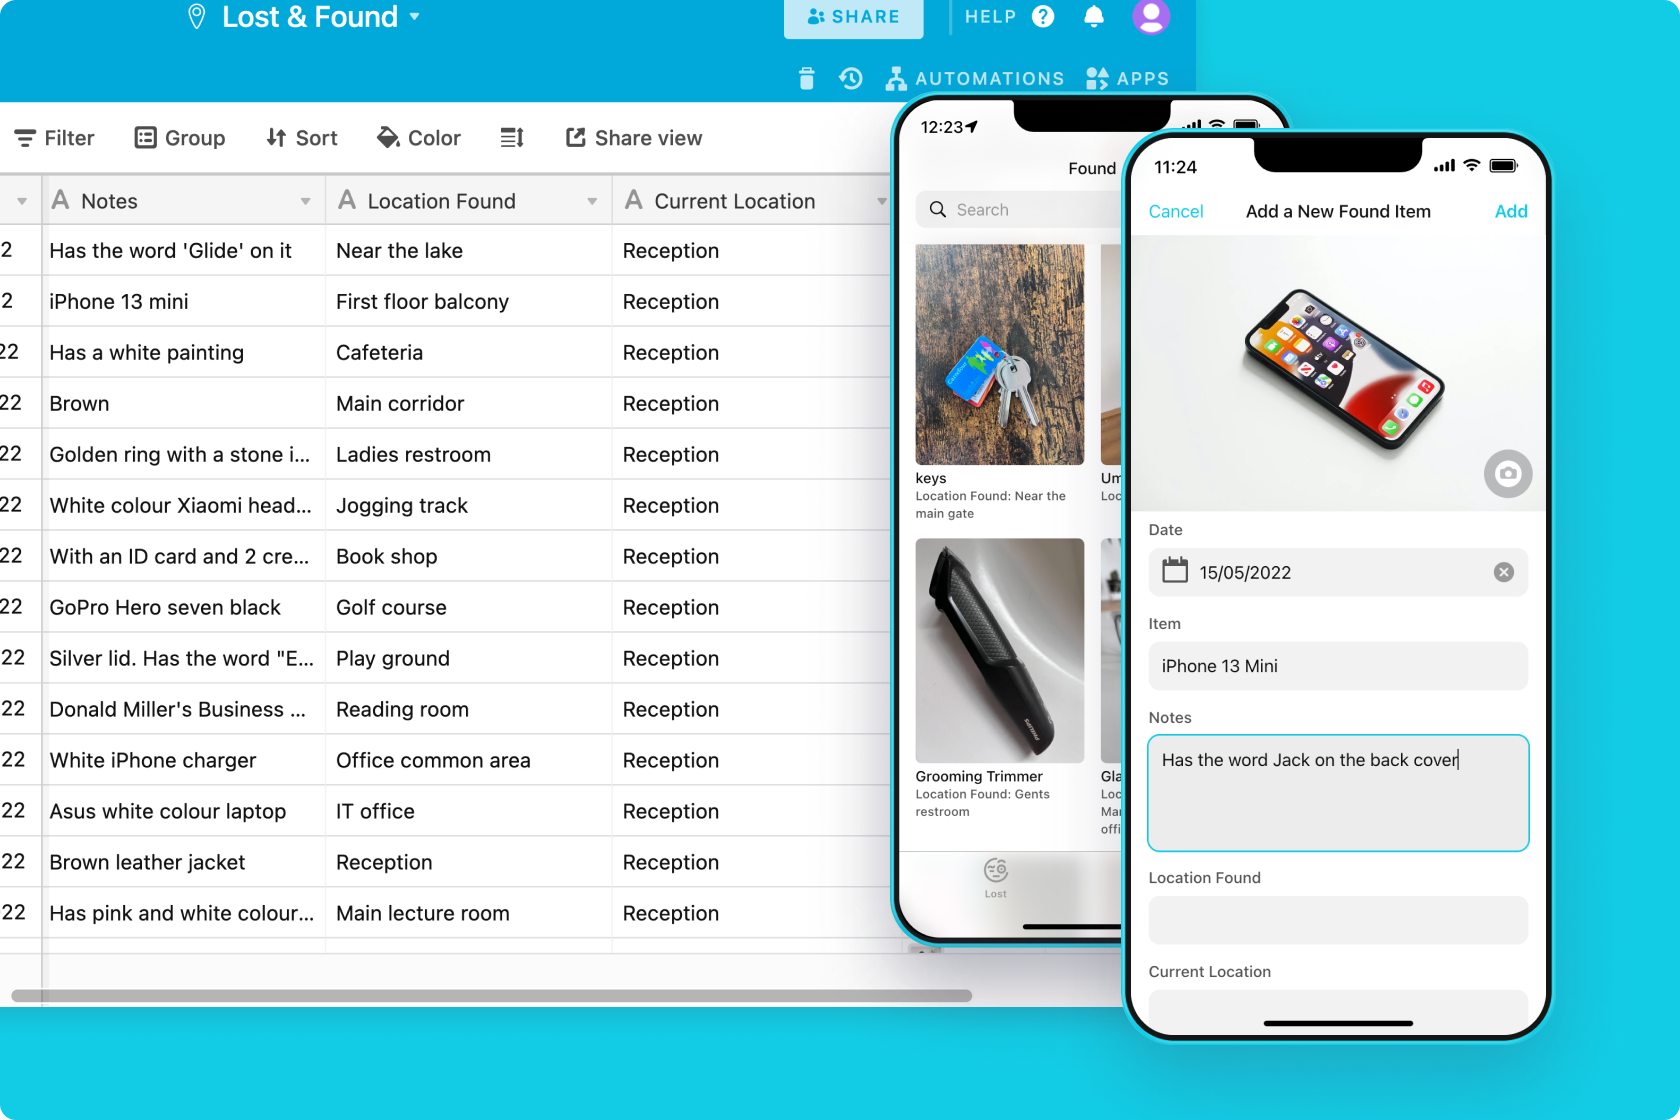
Next, we’ll enable adding to this list so that volunteers can add new items easily. This creates a form screen that, when clicked, will open a form to add a new item.
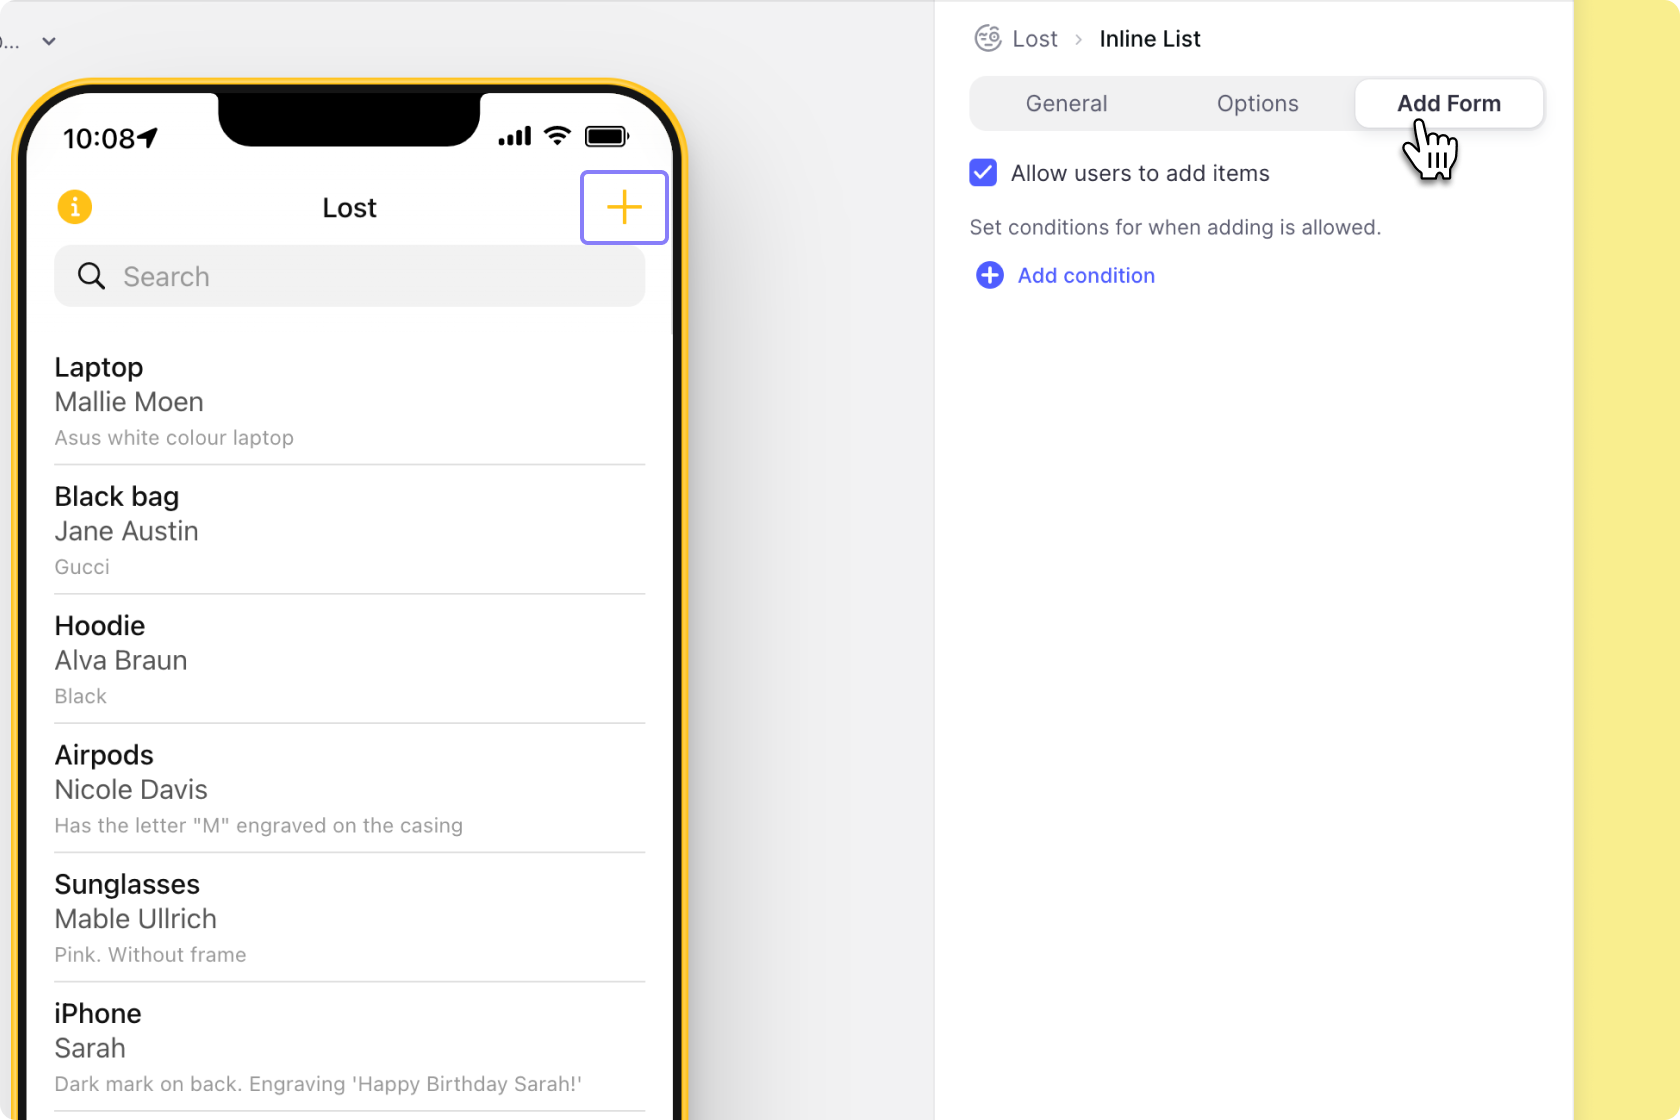
Glide has added entry fields to match the columns in the table, but we can customize this screen however we like. We’ll leave it as is but remove the ‘returned’ field. We’ll work on this later.
Now when we add a new item, it will appear on the list.
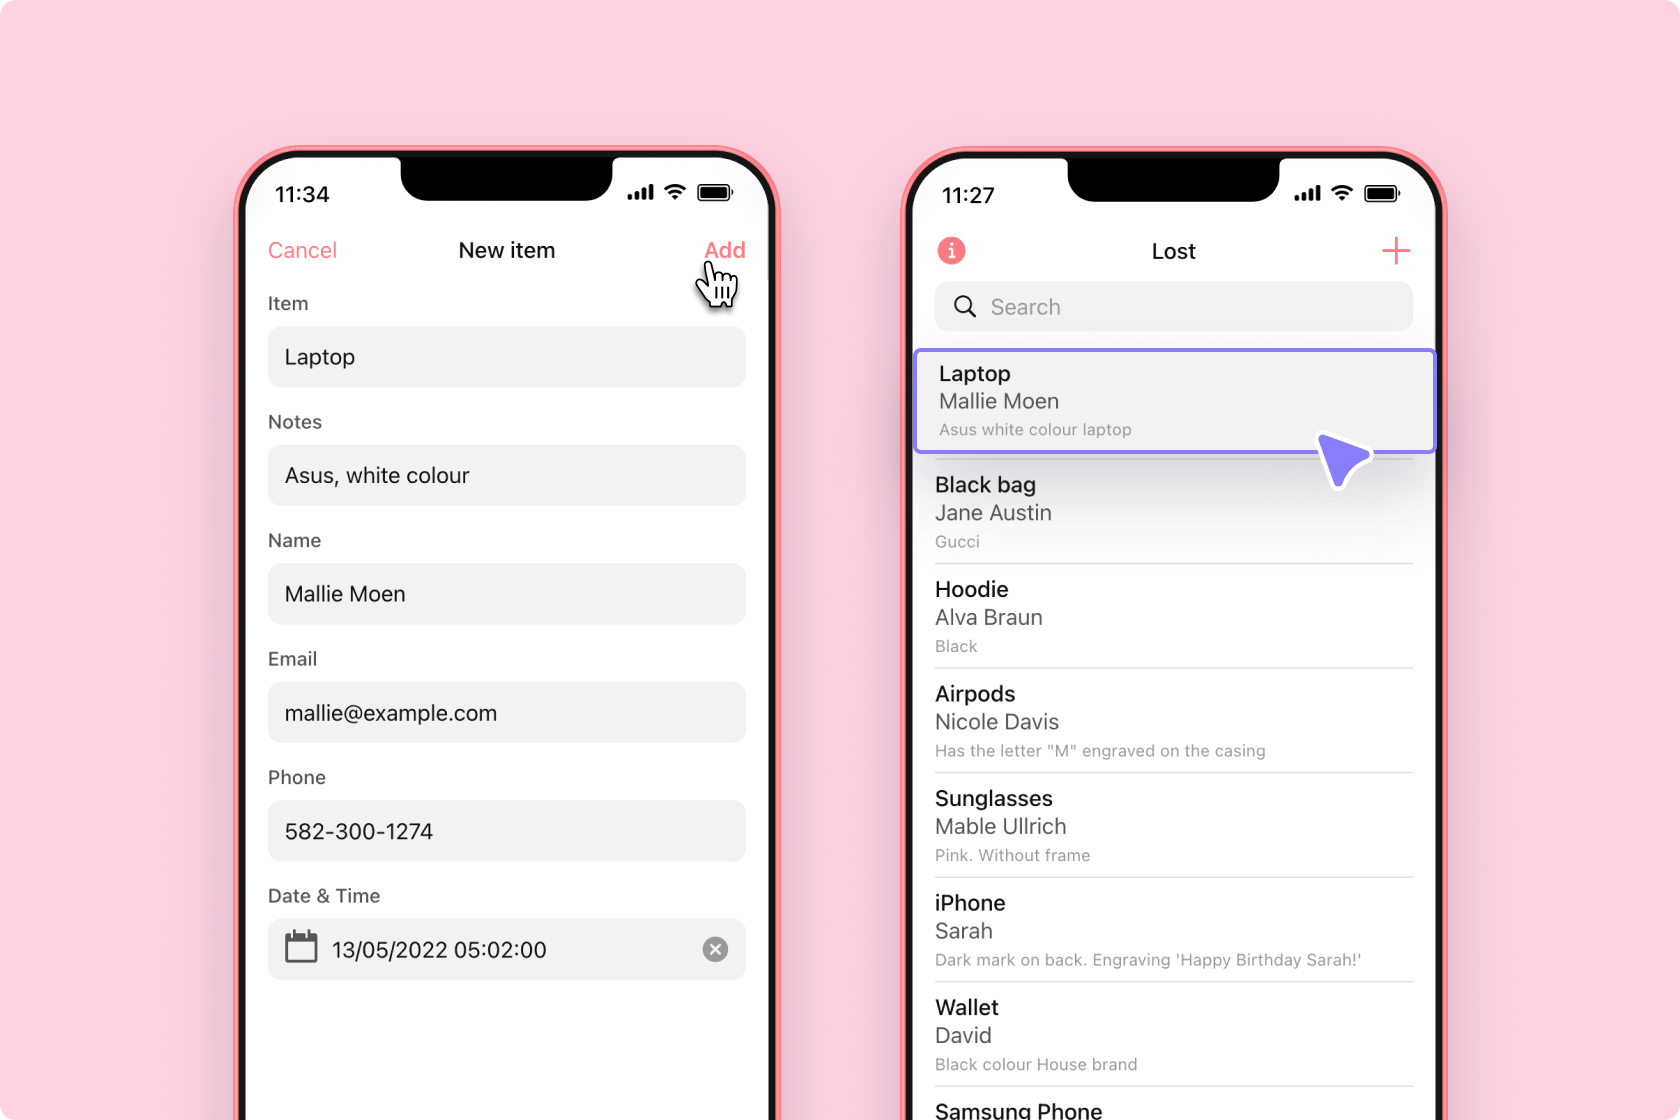
Let’s add a new item and click on it. The details screen looks pretty good. Let’s select the phone text and add an action to dial a phone number.
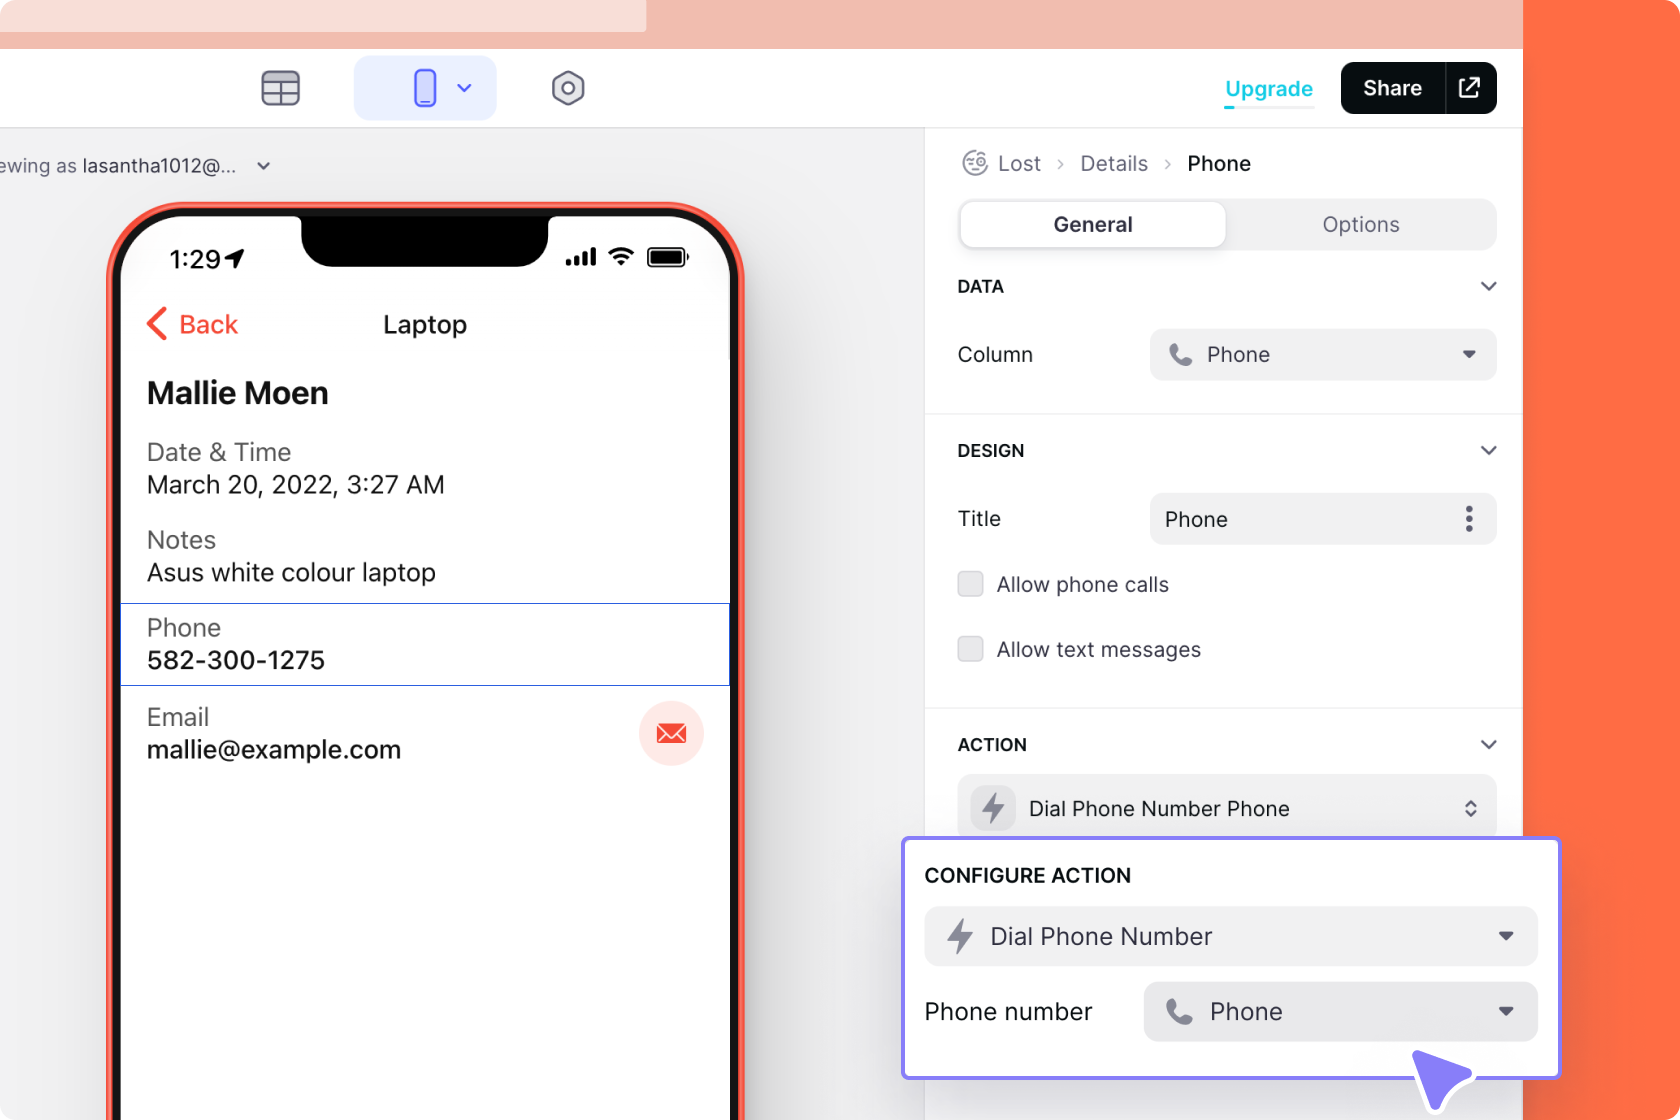
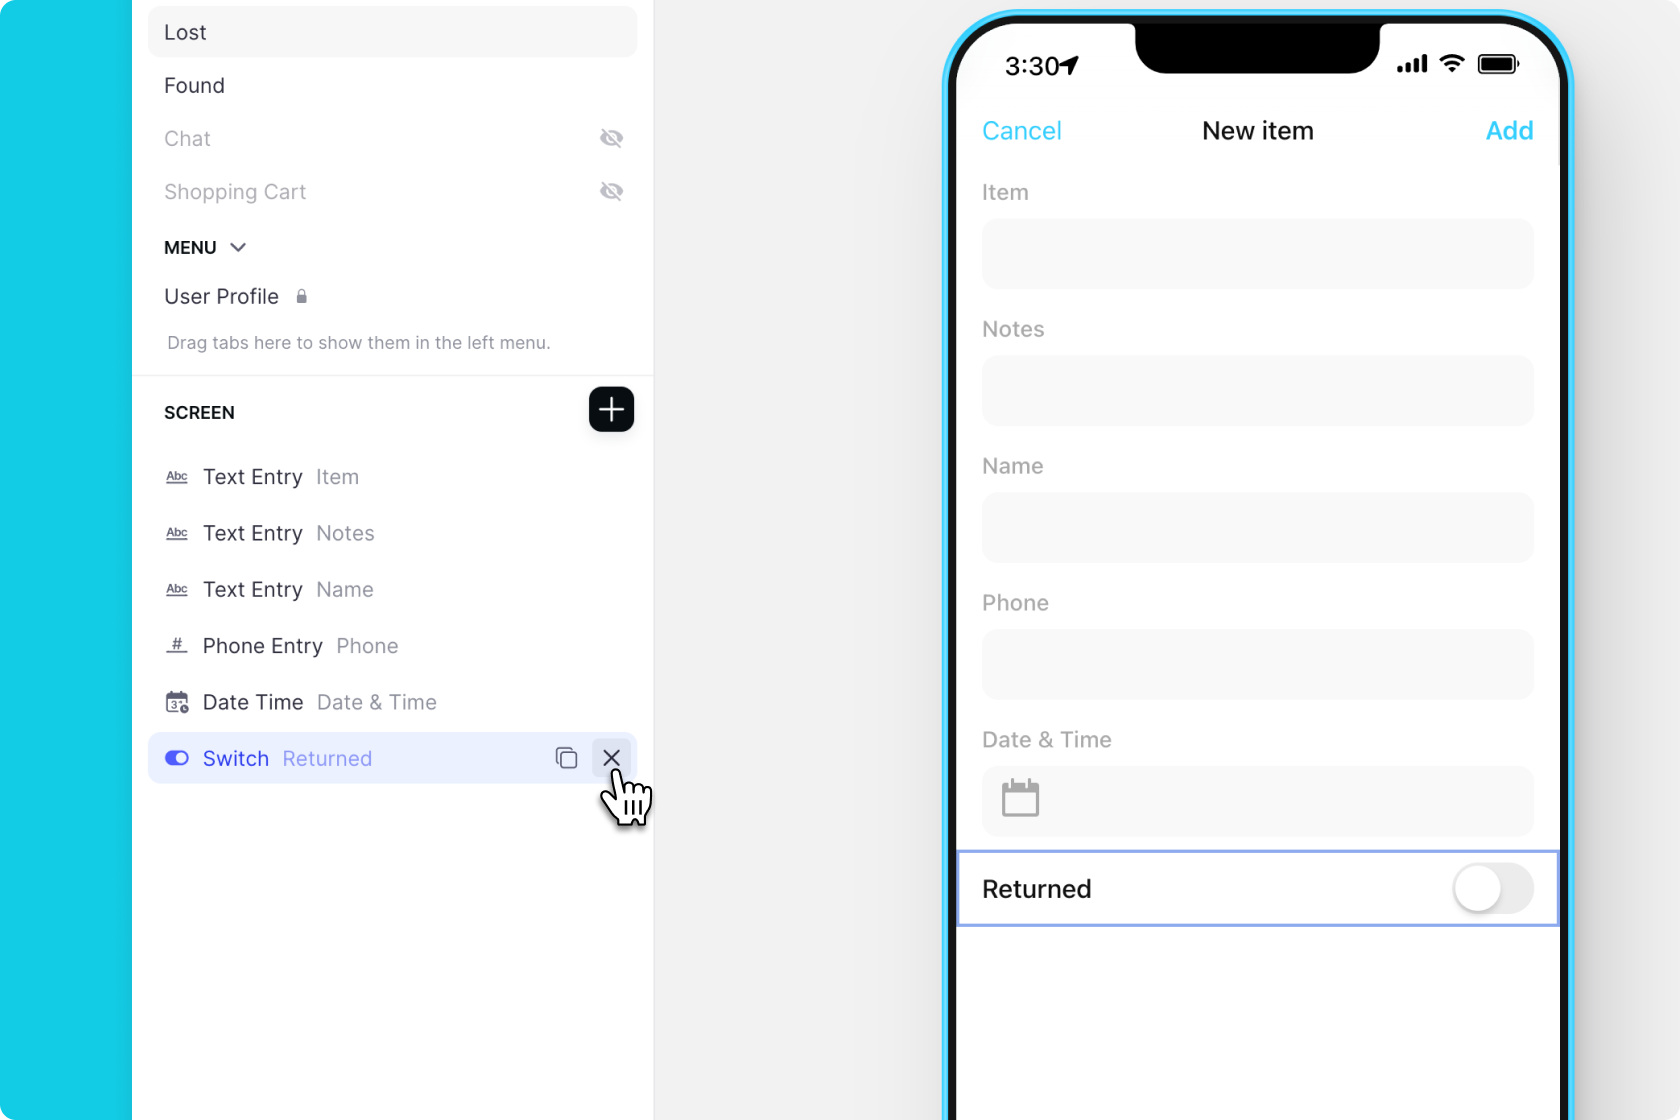
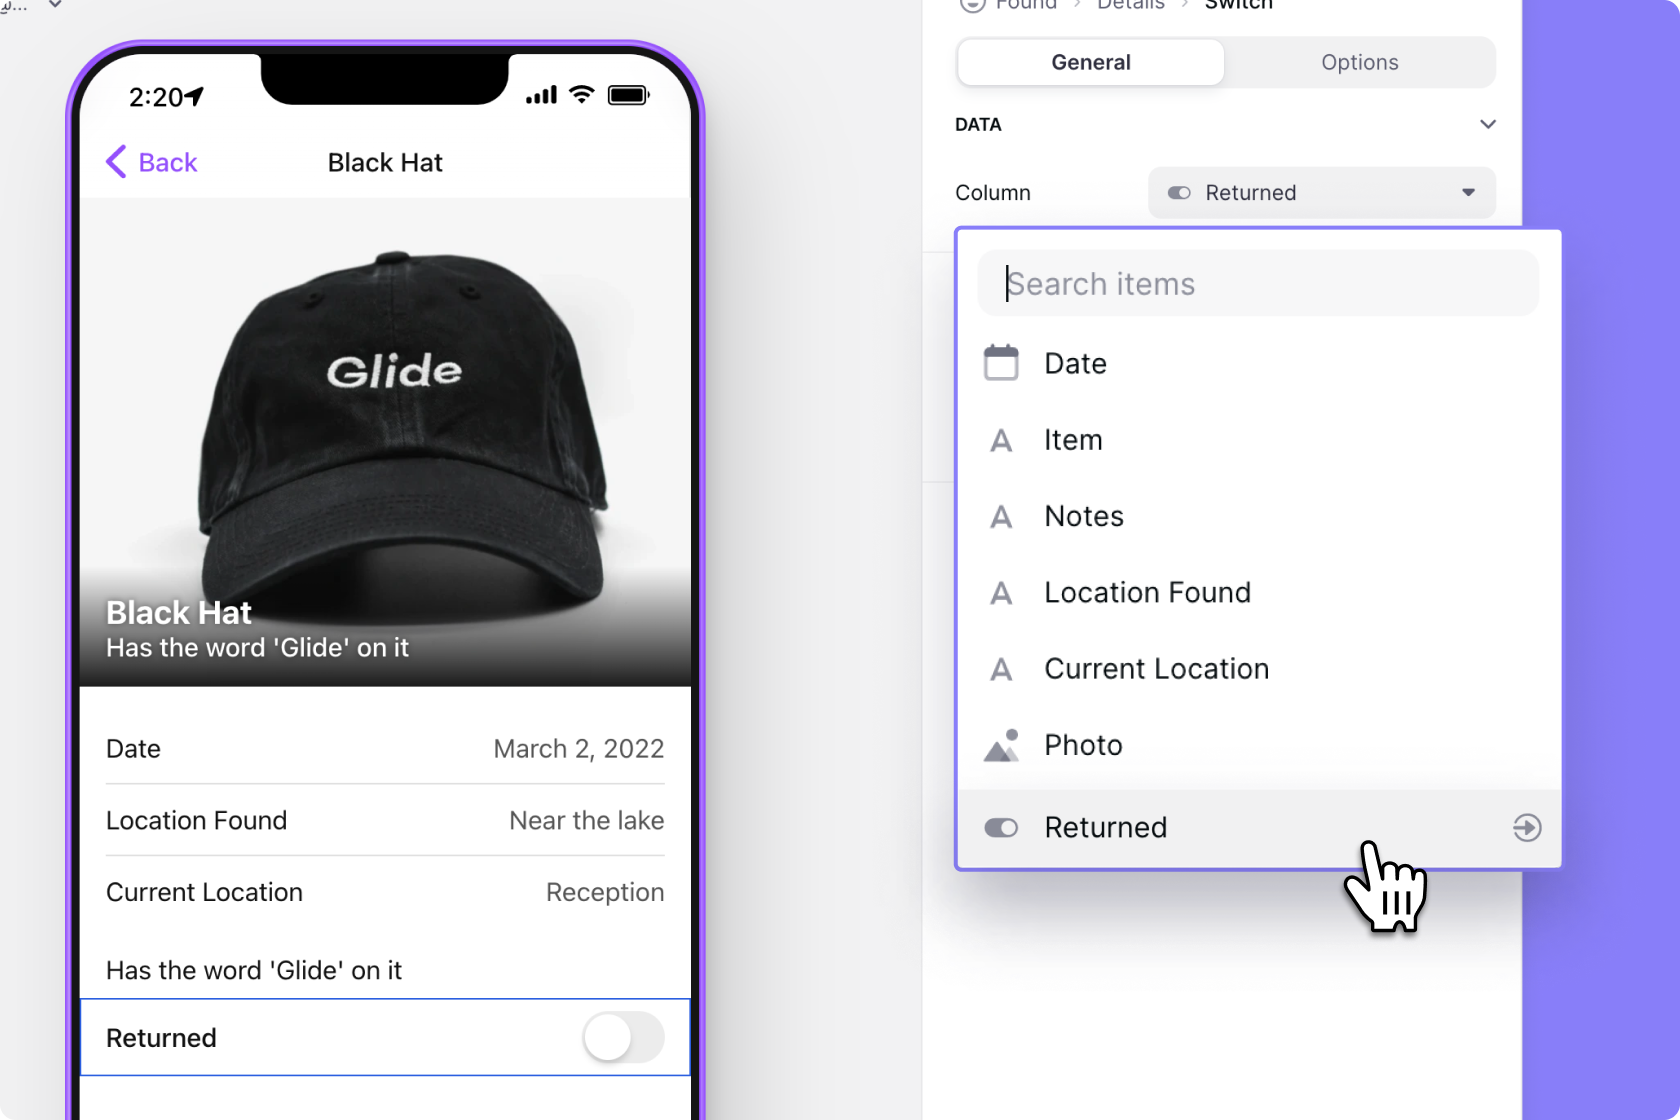
The only thing we need now is a way to mark whether it has been returned or not.
Let’s add a switch component and connect it to the returned column.

The switch component outputs either true or false. This is represented often as a checkbox in Airtable — false is unchecked and true is checked.
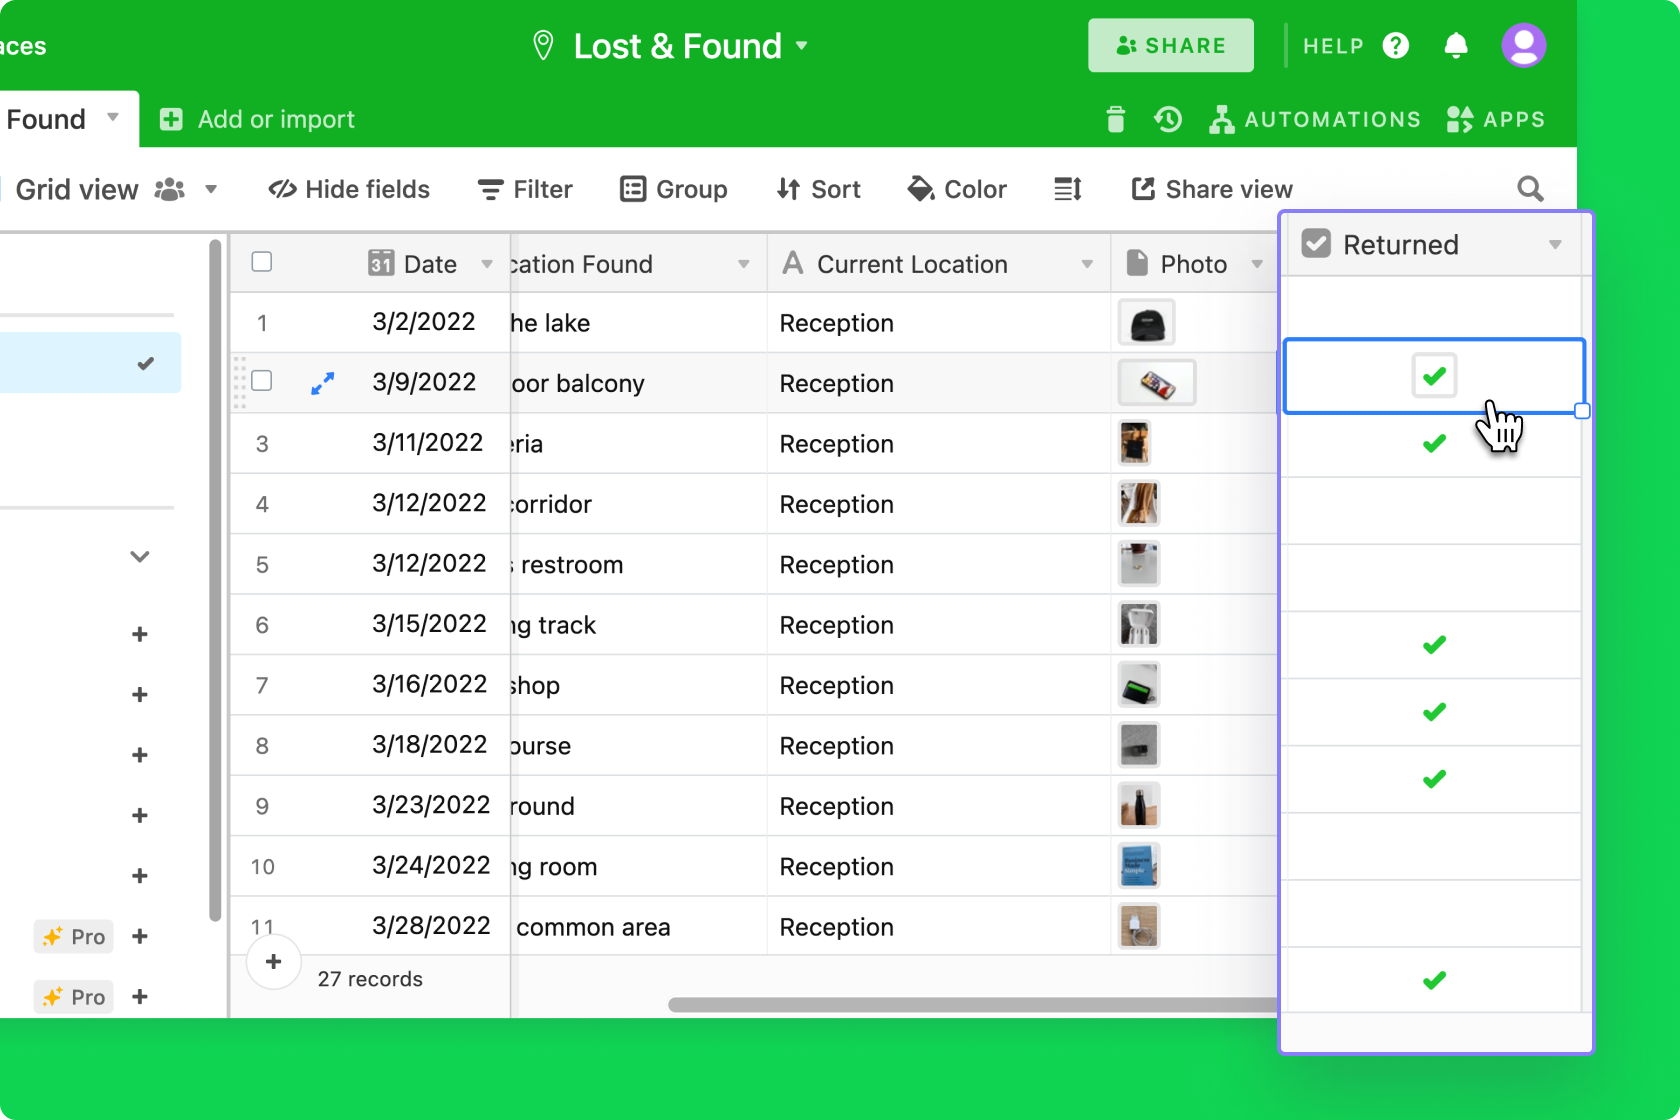
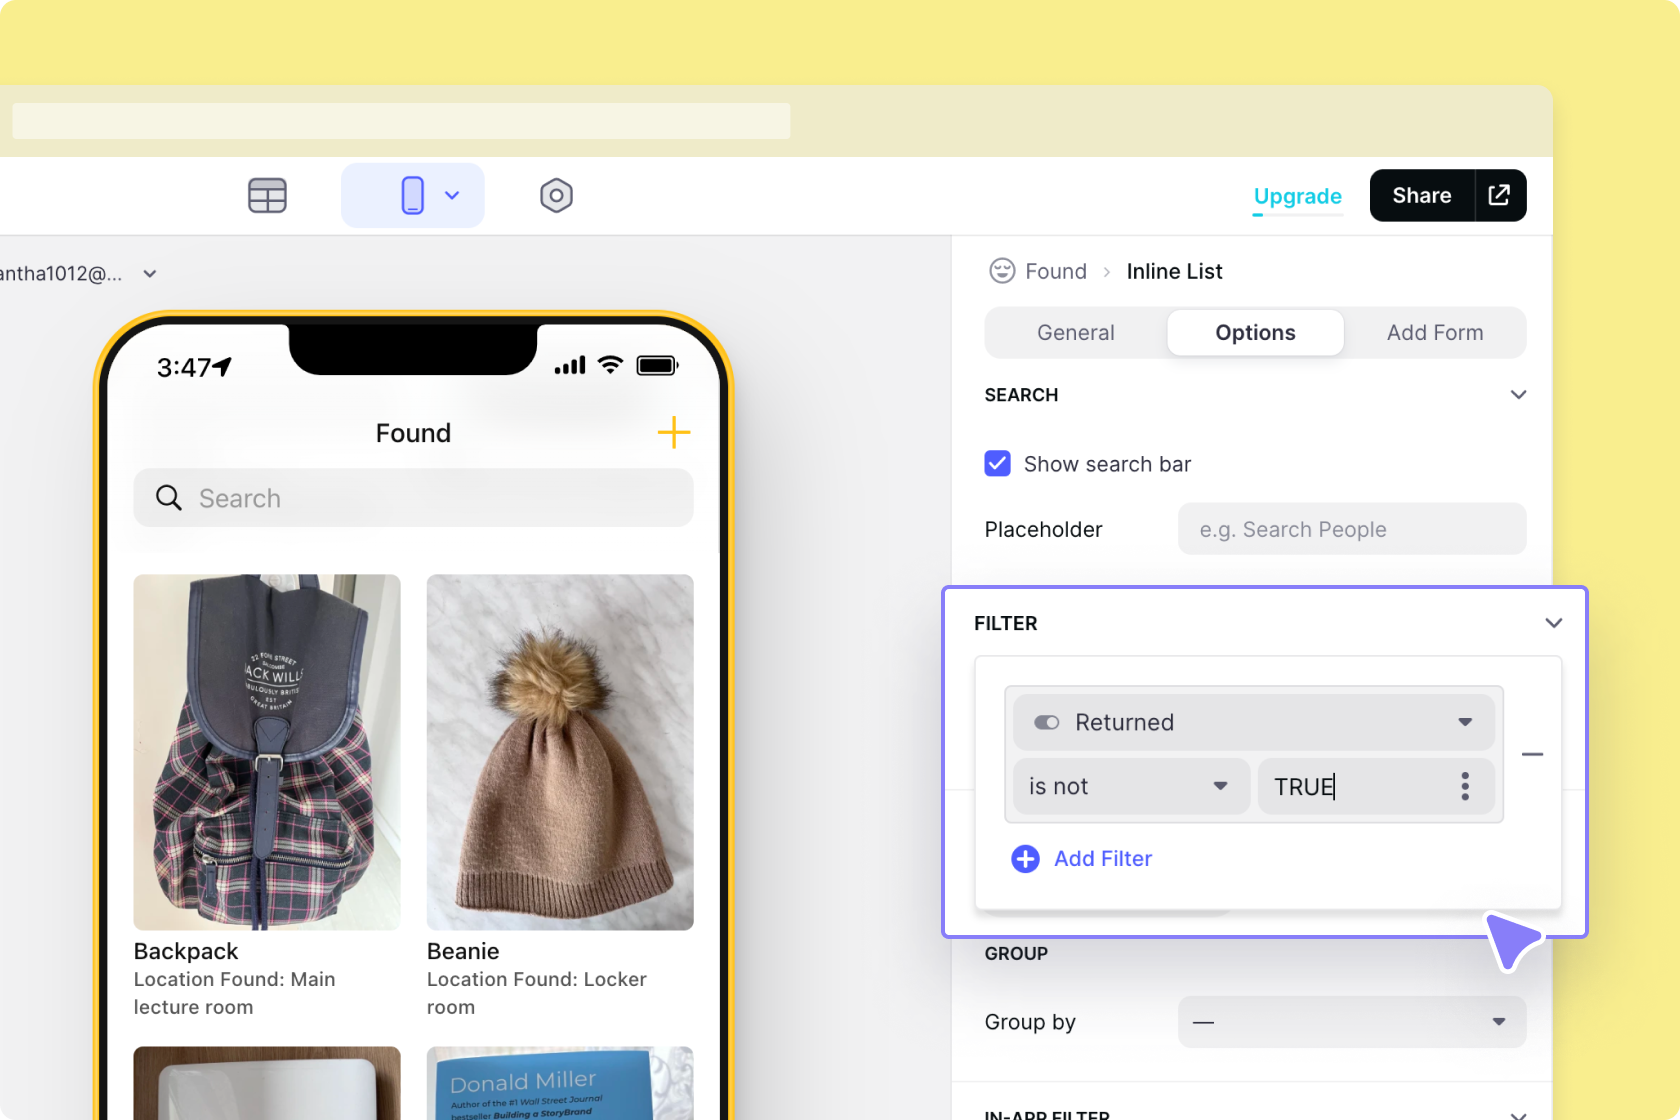
Now we can go back to our main list and filter out items that have NOT TRUE in the returned column. Every time something is marked as returned, it will disappear from our list of lost items — but it will still be in the Airtable base.
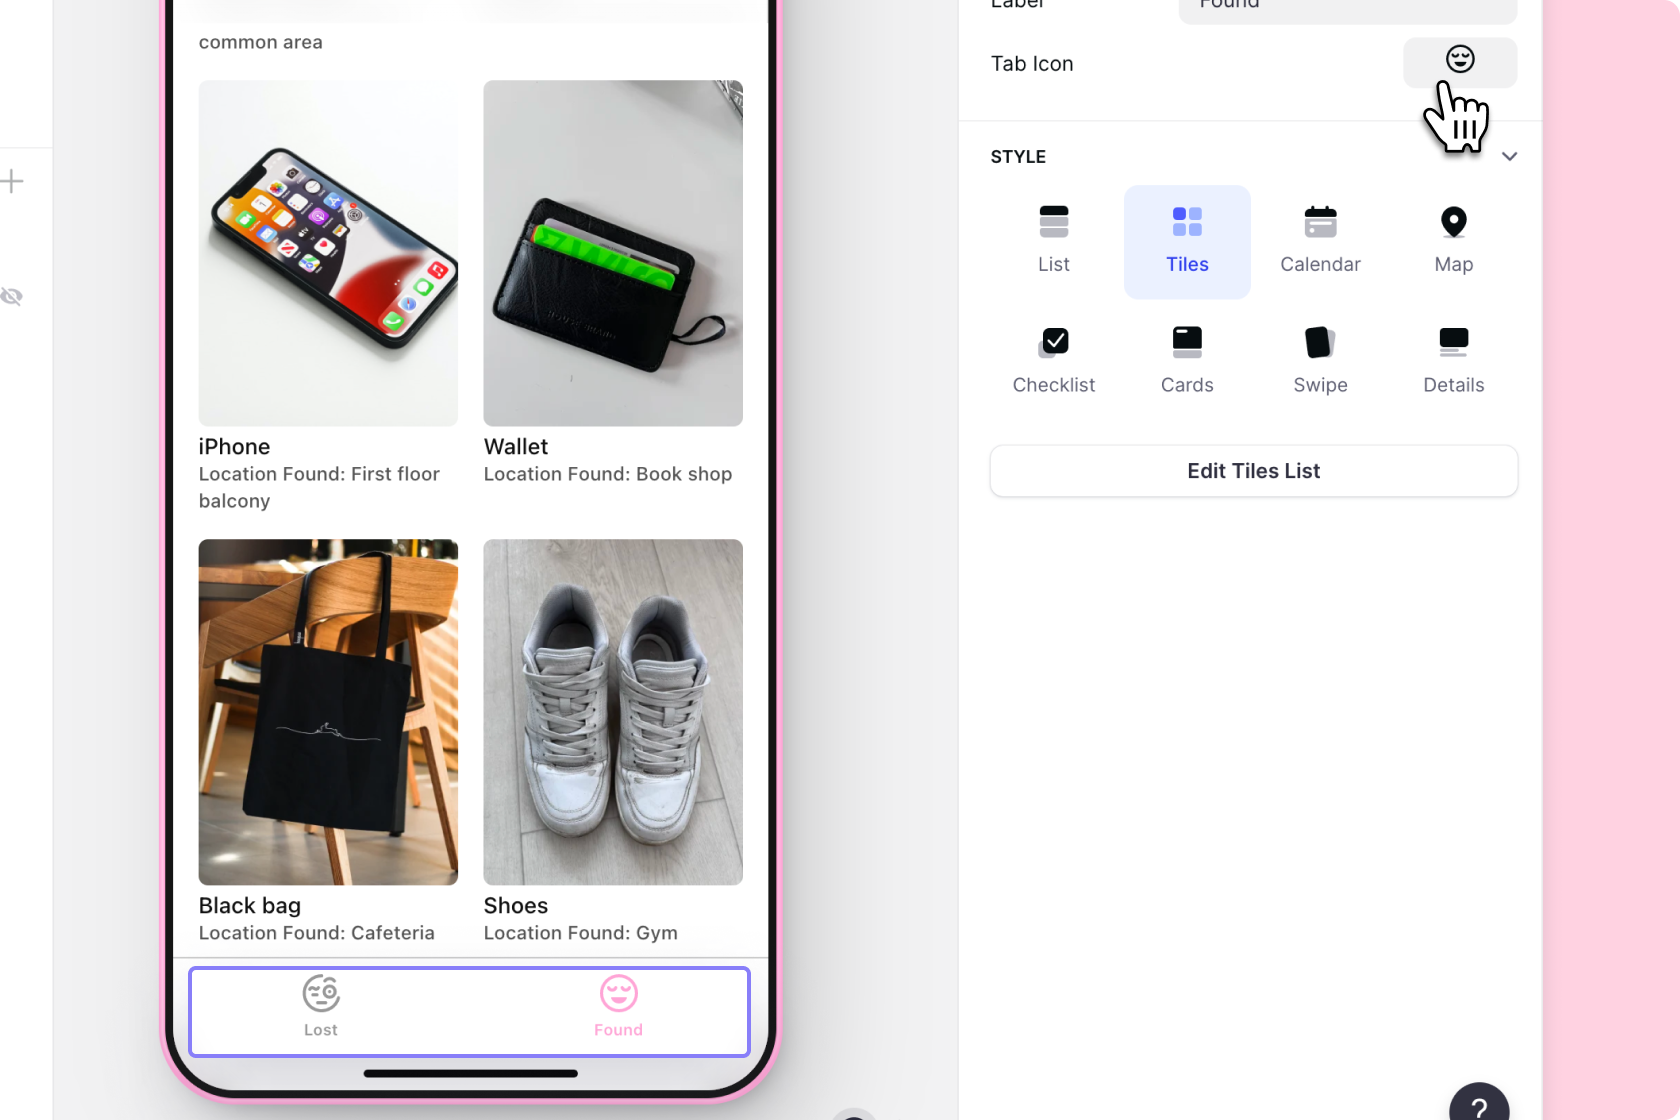
For the found items, it’s important for users to easily browse the images of things that have been found, so we’ll choose the tiles layout and show the Item, the location it was found, and the image. We’ll also tweak the layout’s settings to show more images, more clearly.
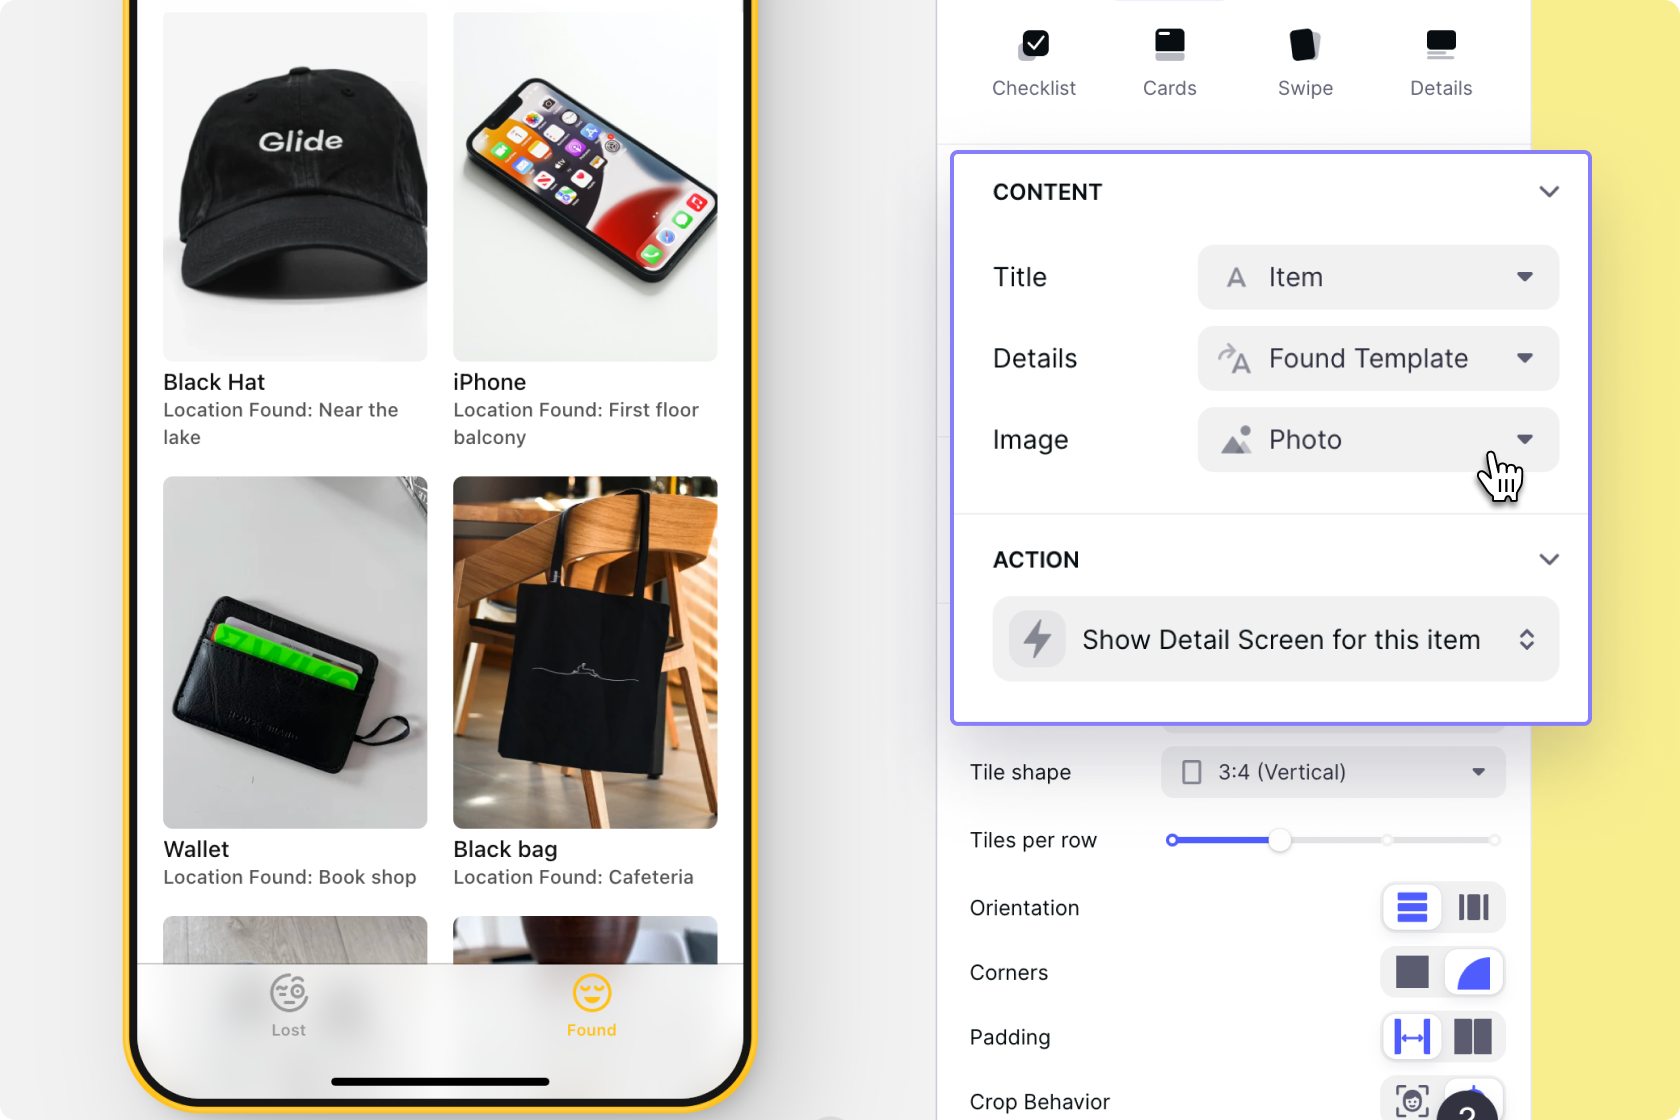
Next, let’s tap into an item and make sure the details screen is showing all the right information. Let’s delete all the components that Glide has added for us and start from scratch.

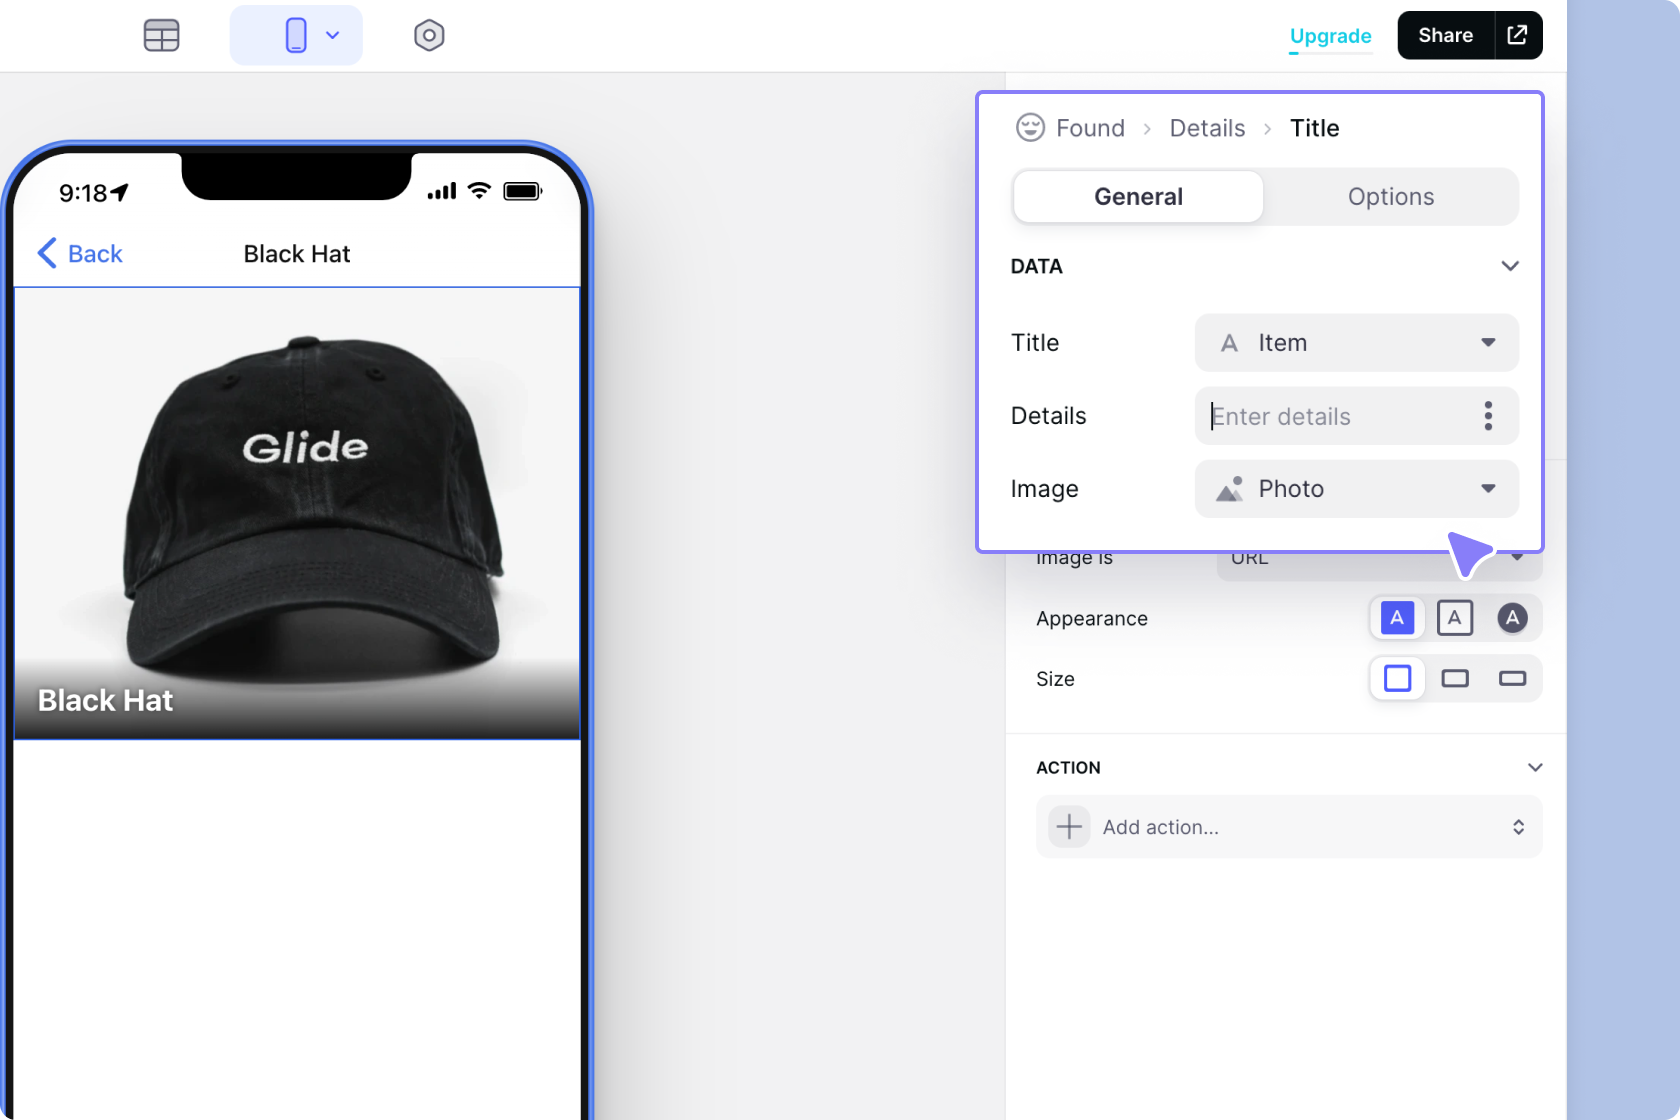
We’ll add a title component and remove the details.
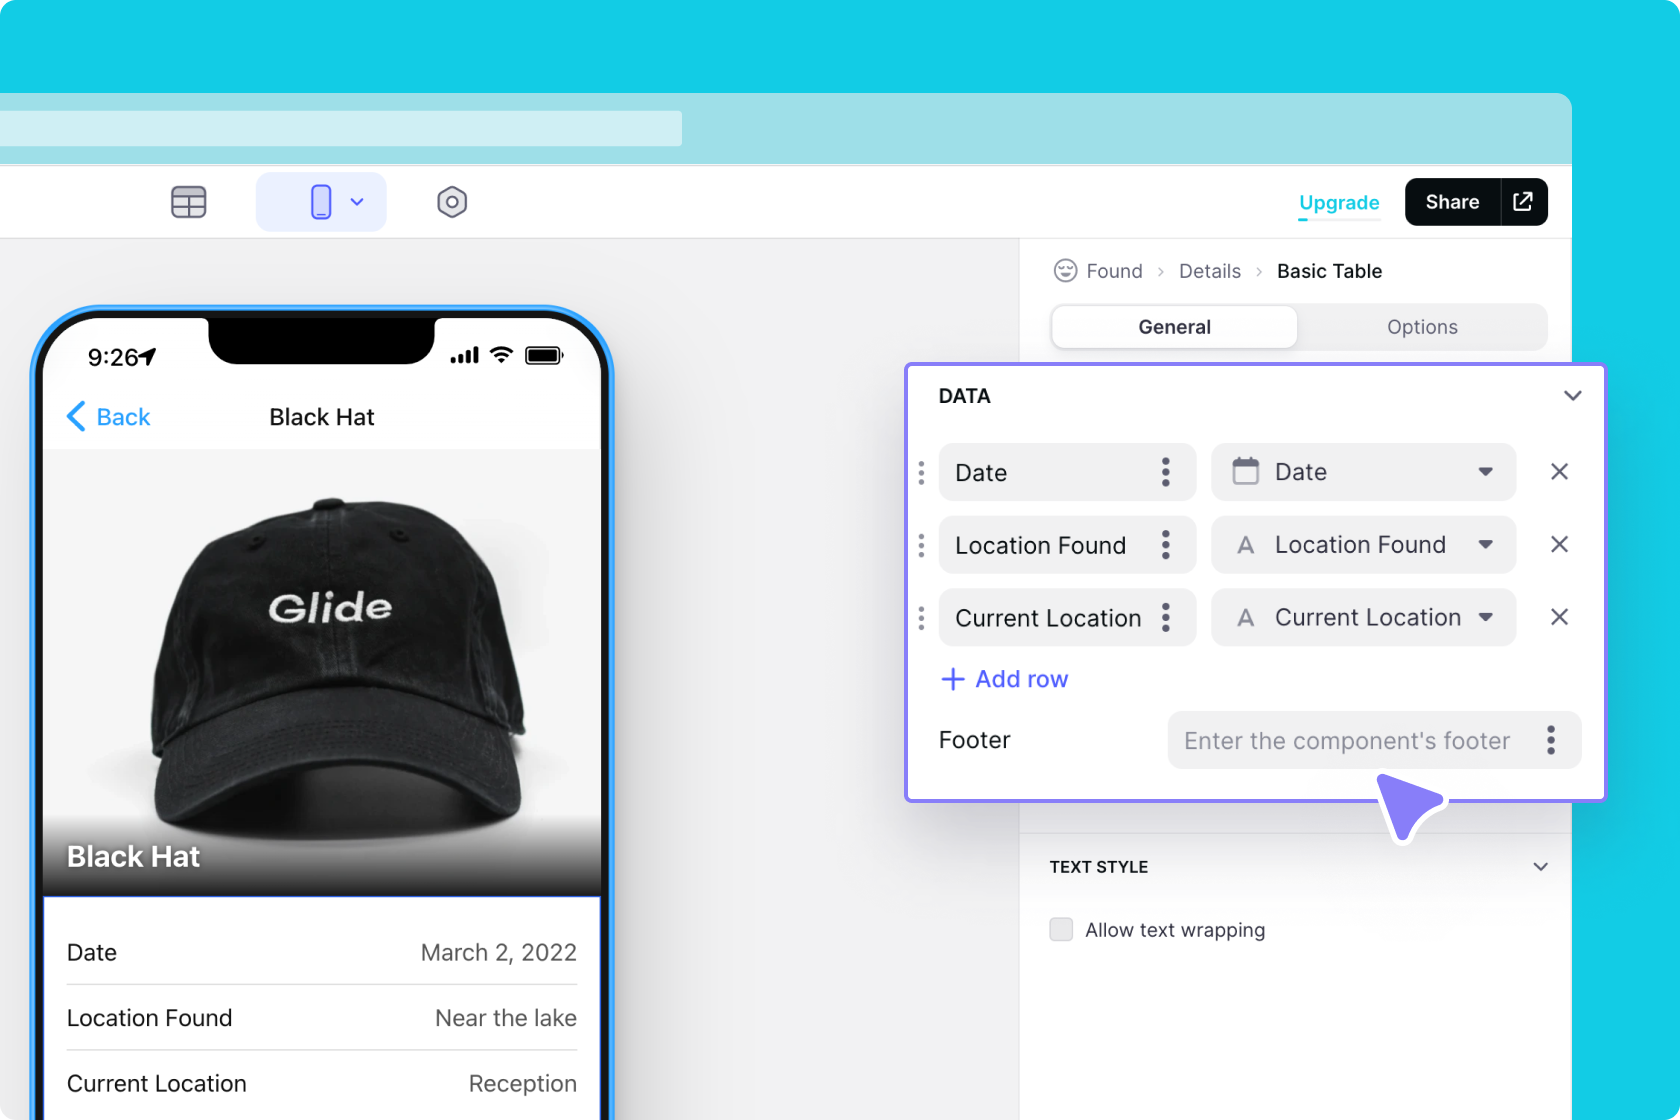
We’ll add a basic table to show the date, location found & current location
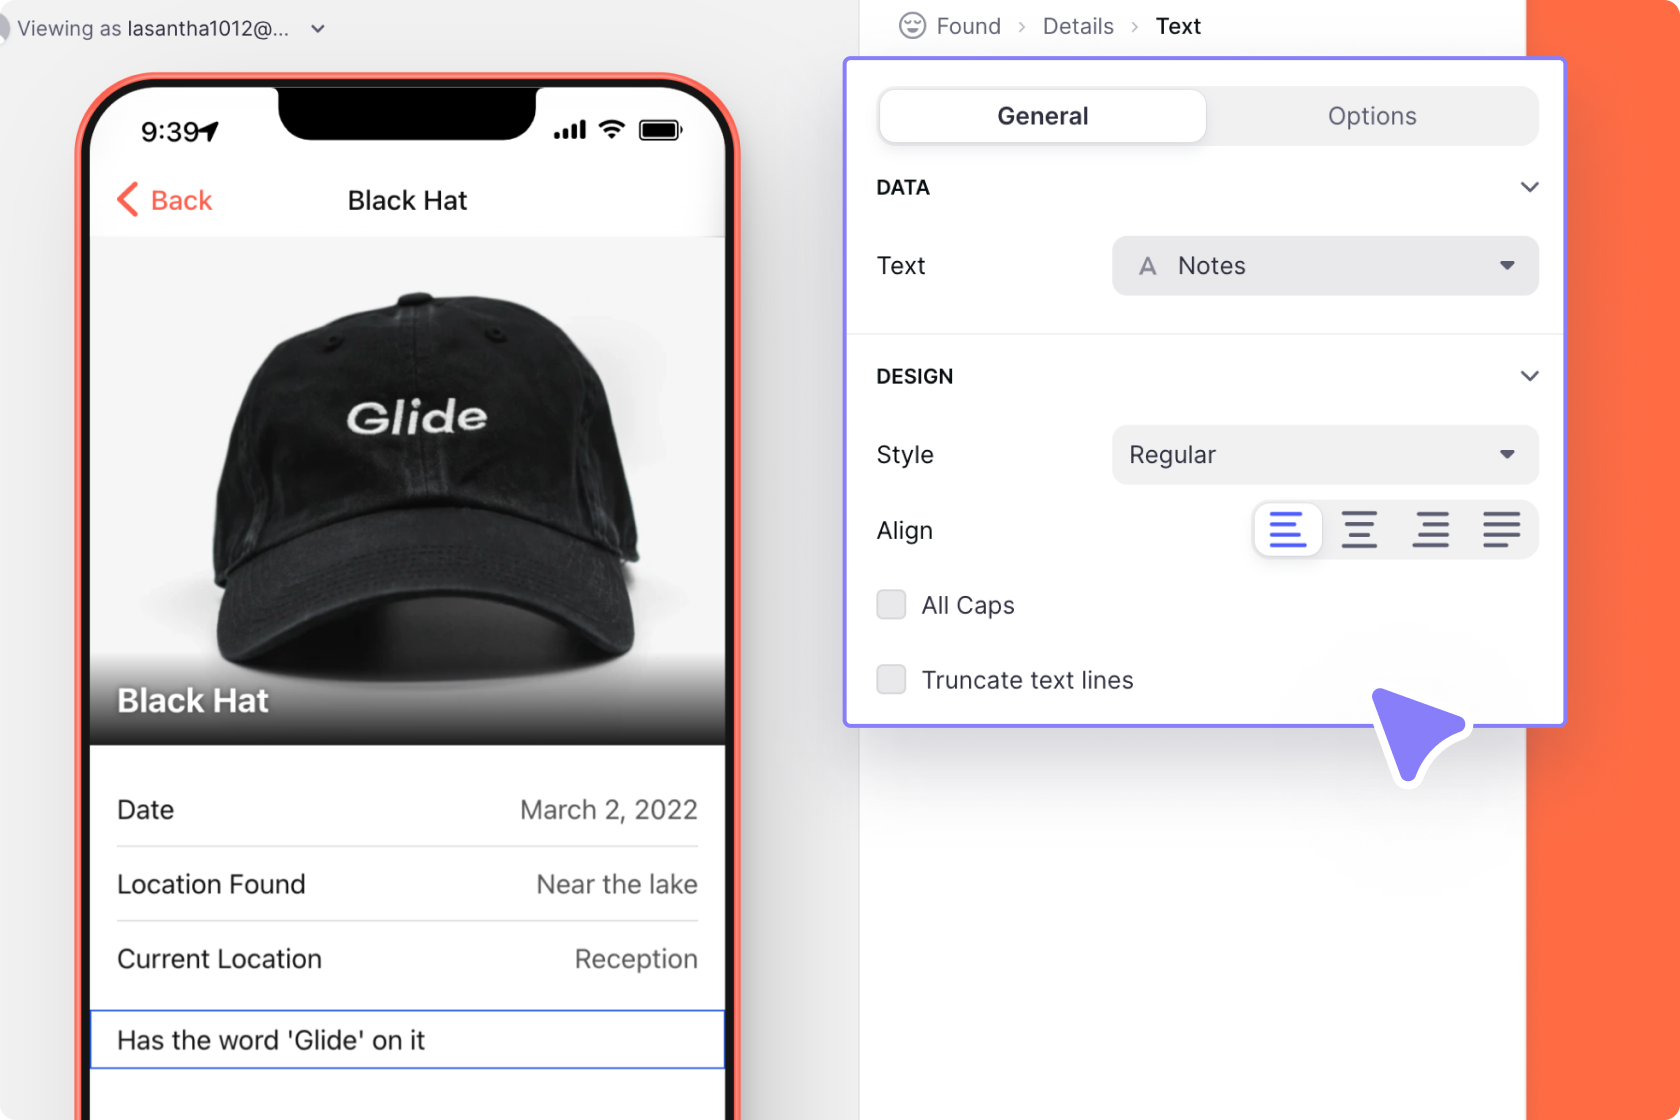
A text component to show the notes
And, as before, a switch component to mark whether it has been returned.
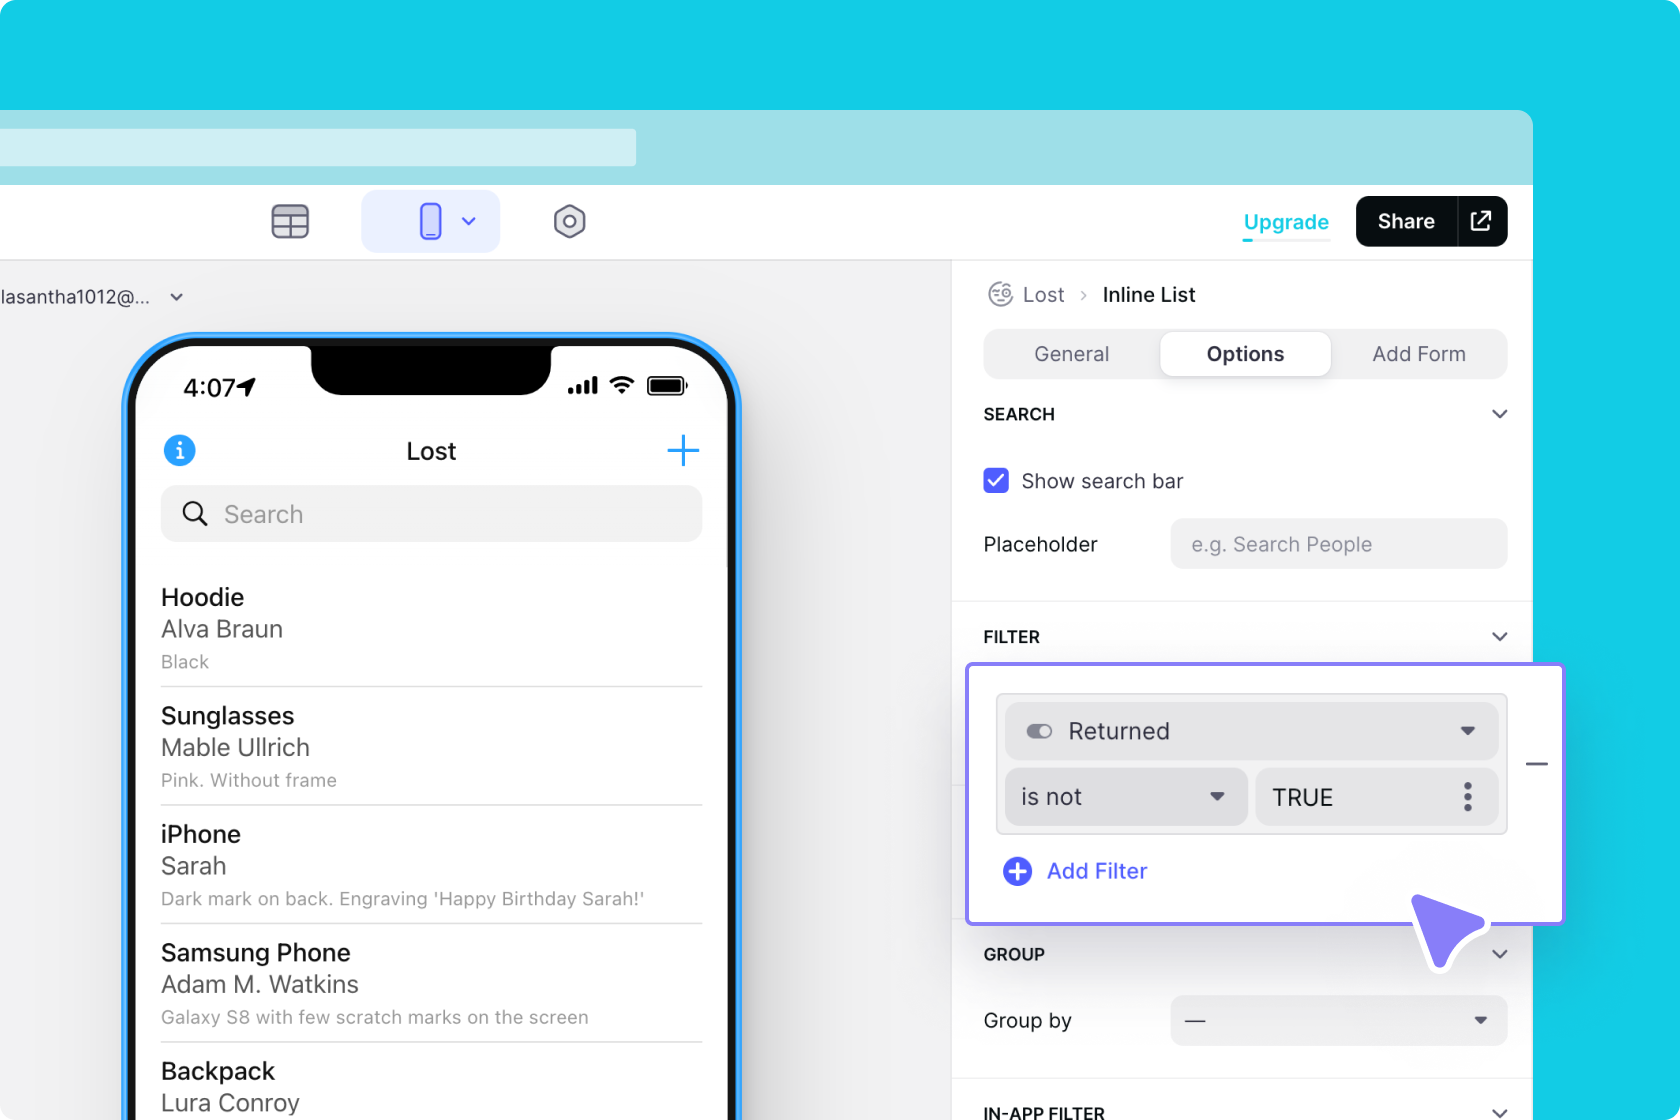
Finally, we’ll filter this list as we did with the other one — to show only items that have not been returned.
So that’s it.
If someone comes to the staff having lost something, they search the list of found items. If it hasn’t been handed in yet, they take the details and add that item as lost.
If a lost item is handed in, staff can take a photo of it and add it to the list so other people across the site with the app can find it.


