Turning your Excel Expense Tracker Into an App Without Code
For many businesses and individuals, Excel has been a go-to tool for tracking expenses due to its powerful computational and organization capabilities. It allows you to input data systematically, apply formulas to calculate totals, and analyze data through graphs or pivot tables. However, working with Excel spreadsheets, especially complex ones, can often be daunting for those not entirely comfortable with the software. The good news is that you can simplify and streamline this process by converting your Excel expense tracker into a user-friendly app with Glide.
Imagine being able to enter expenses directly into a beautifully designed, intuitive app right from your mobile device, and then having those expenses automatically synced to your Excel spreadsheet. This level of convenience is possible with Glide. Here's how:
1. Connect Your Spreadsheet: The first step is connecting your existing Excel spreadsheet to Glide. Once you've uploaded your Excel file to Google Sheets, you can easily import it into Glide. Glide will automatically interpret your spreadsheet data and create a basic app layout.
2. Customize Your App: Next, you'll customize your app. Glide's user-friendly interface allows you to personalize your app's look and feel without any coding or design skills. You can choose colors, fonts, and layouts that match your brand or personal preference.
3. Add and Modify Features: Depending on your expense tracking needs, you can add various features to your app. For instance, you can add a form for inputting new expenses, create categories for better organization, or include visual elements like charts and graphs for a more visual representation of your expenses. Glide's intuitive drag-and-drop functionality makes this process straightforward.
4. Sync and Go: Once you're satisfied with your app, all that's left to do is to sync it with your spreadsheet. Every time you enter data into your app, it's automatically updated in your Excel sheet in real time. You can also share your app with team members or family, so everyone involved can contribute to and access the expense data.
In this guide, we're going to build a simple app to track our daily expenses. By turning your Excel spreadsheet into an app with Glide, you transform a potentially cumbersome process into a simplified, user-friendly experience. You retain all the powerful tracking capabilities of Excel but gain the accessibility and convenience of a mobile app. It's a win-win for effective expense management.
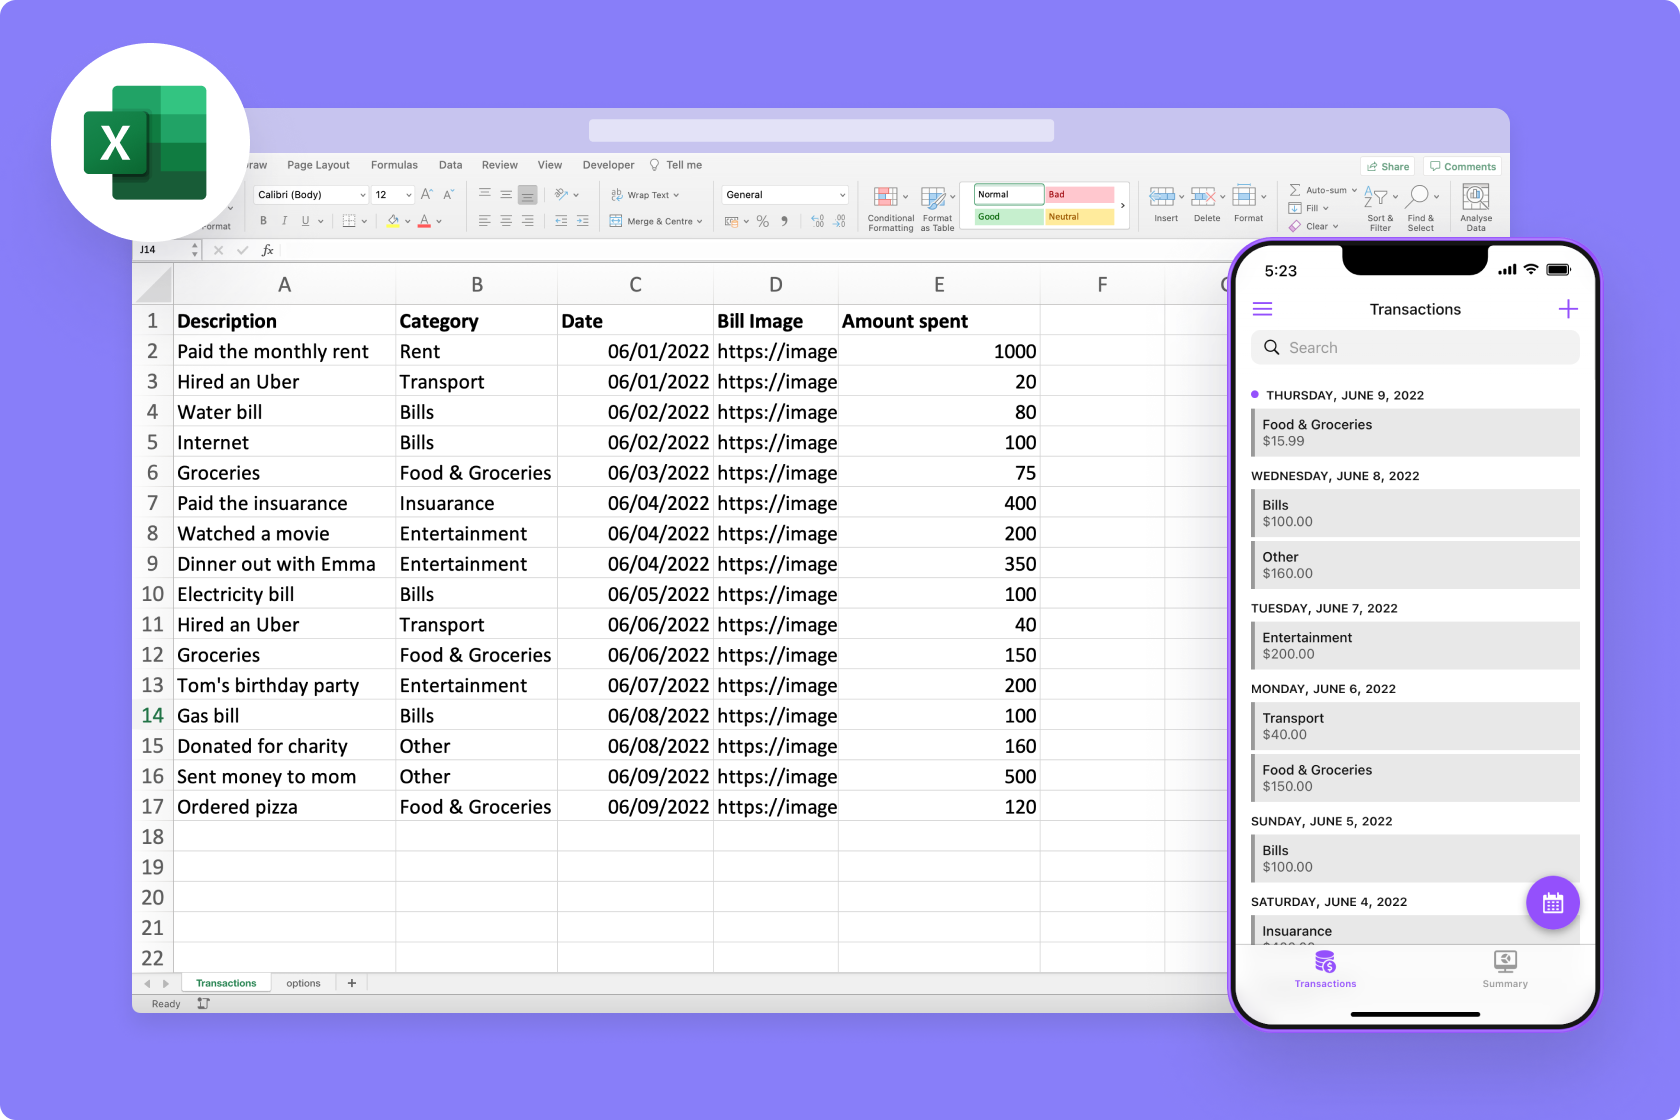
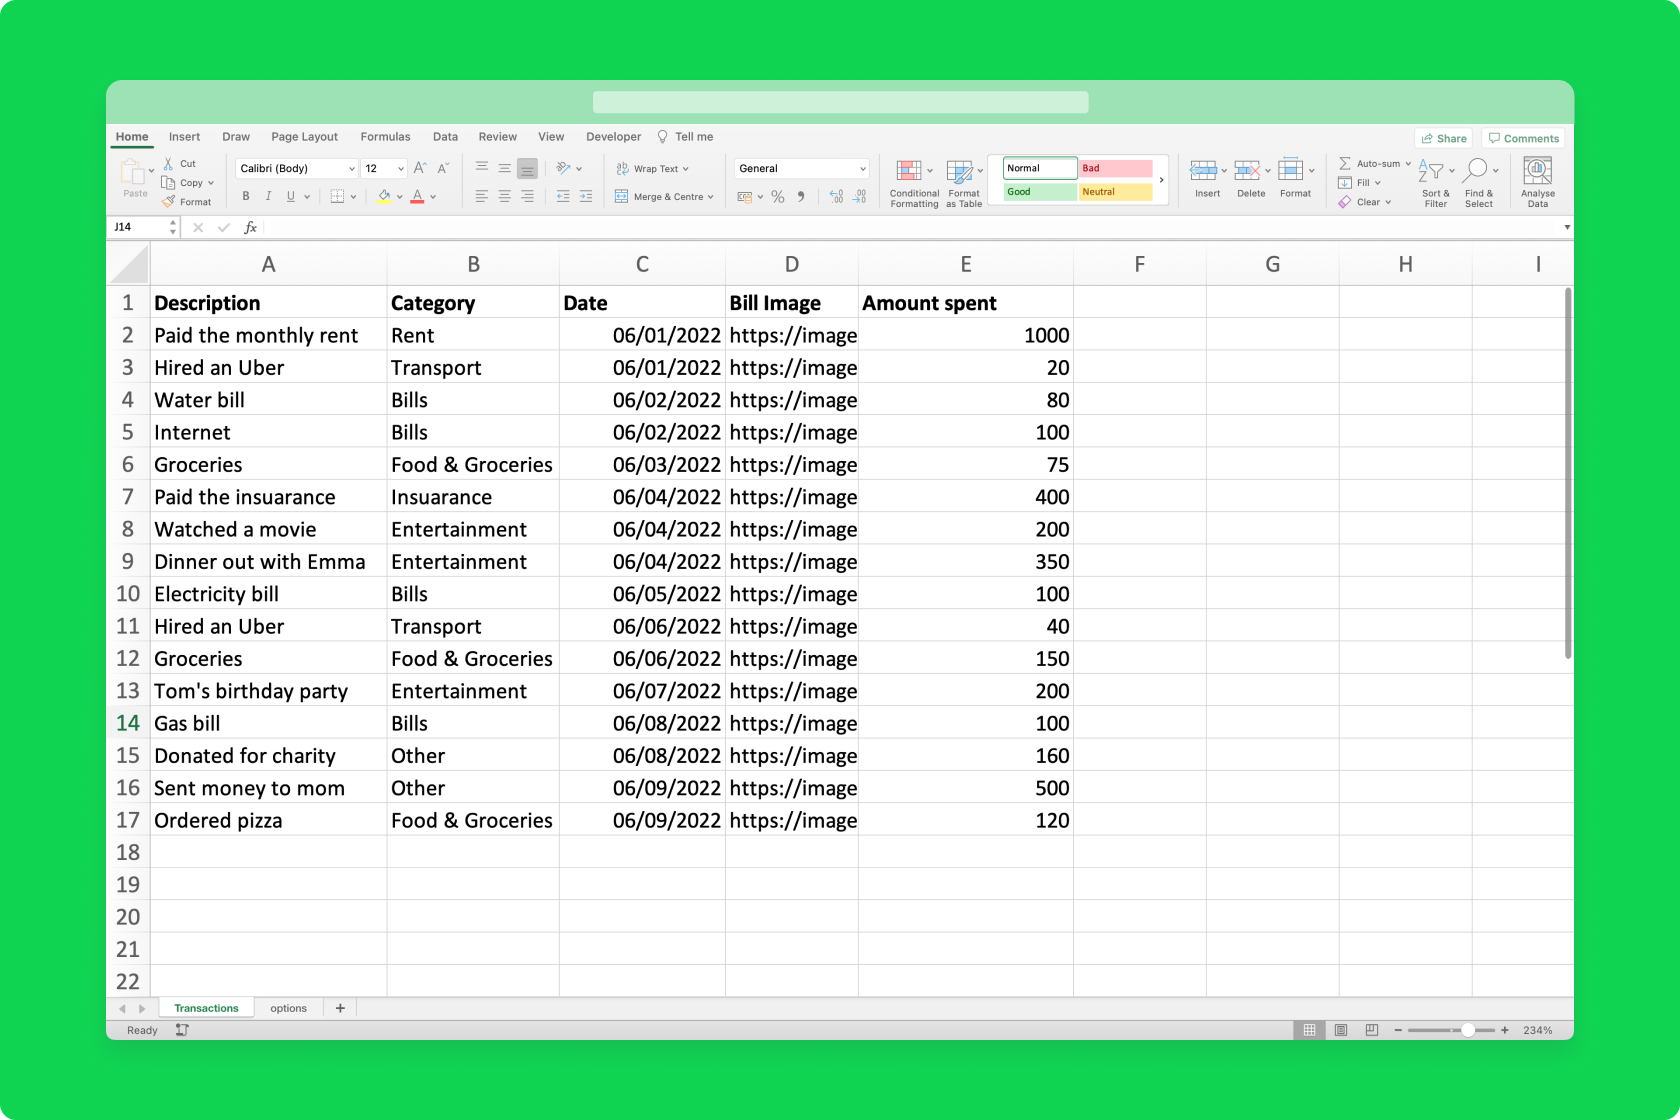
We already have an Excel file with some transactions. This is great, but logging and viewing these in an app would be much more fun.
So let's create one!
We'll start a new project in Glide and upload this Excel file as our data source.

Glide creates a basic App as a starting point and if we look in the Data Editor, we can see and edit our 2x Tables.
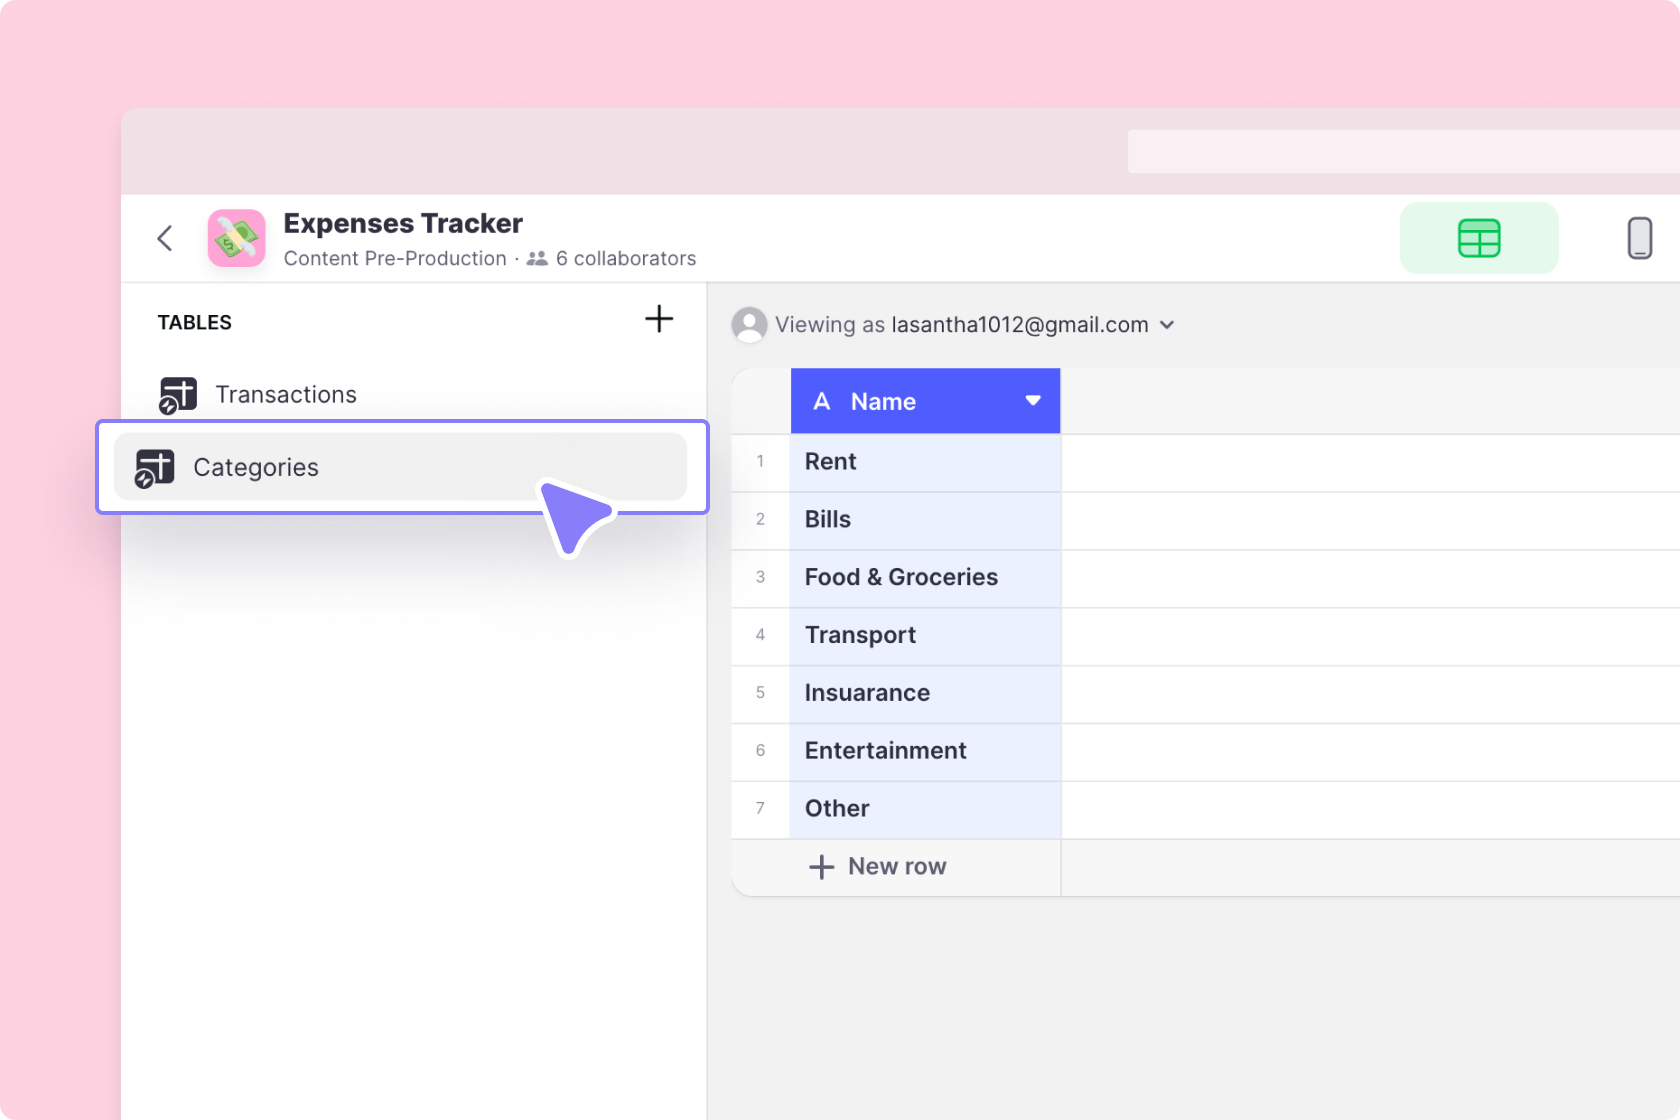
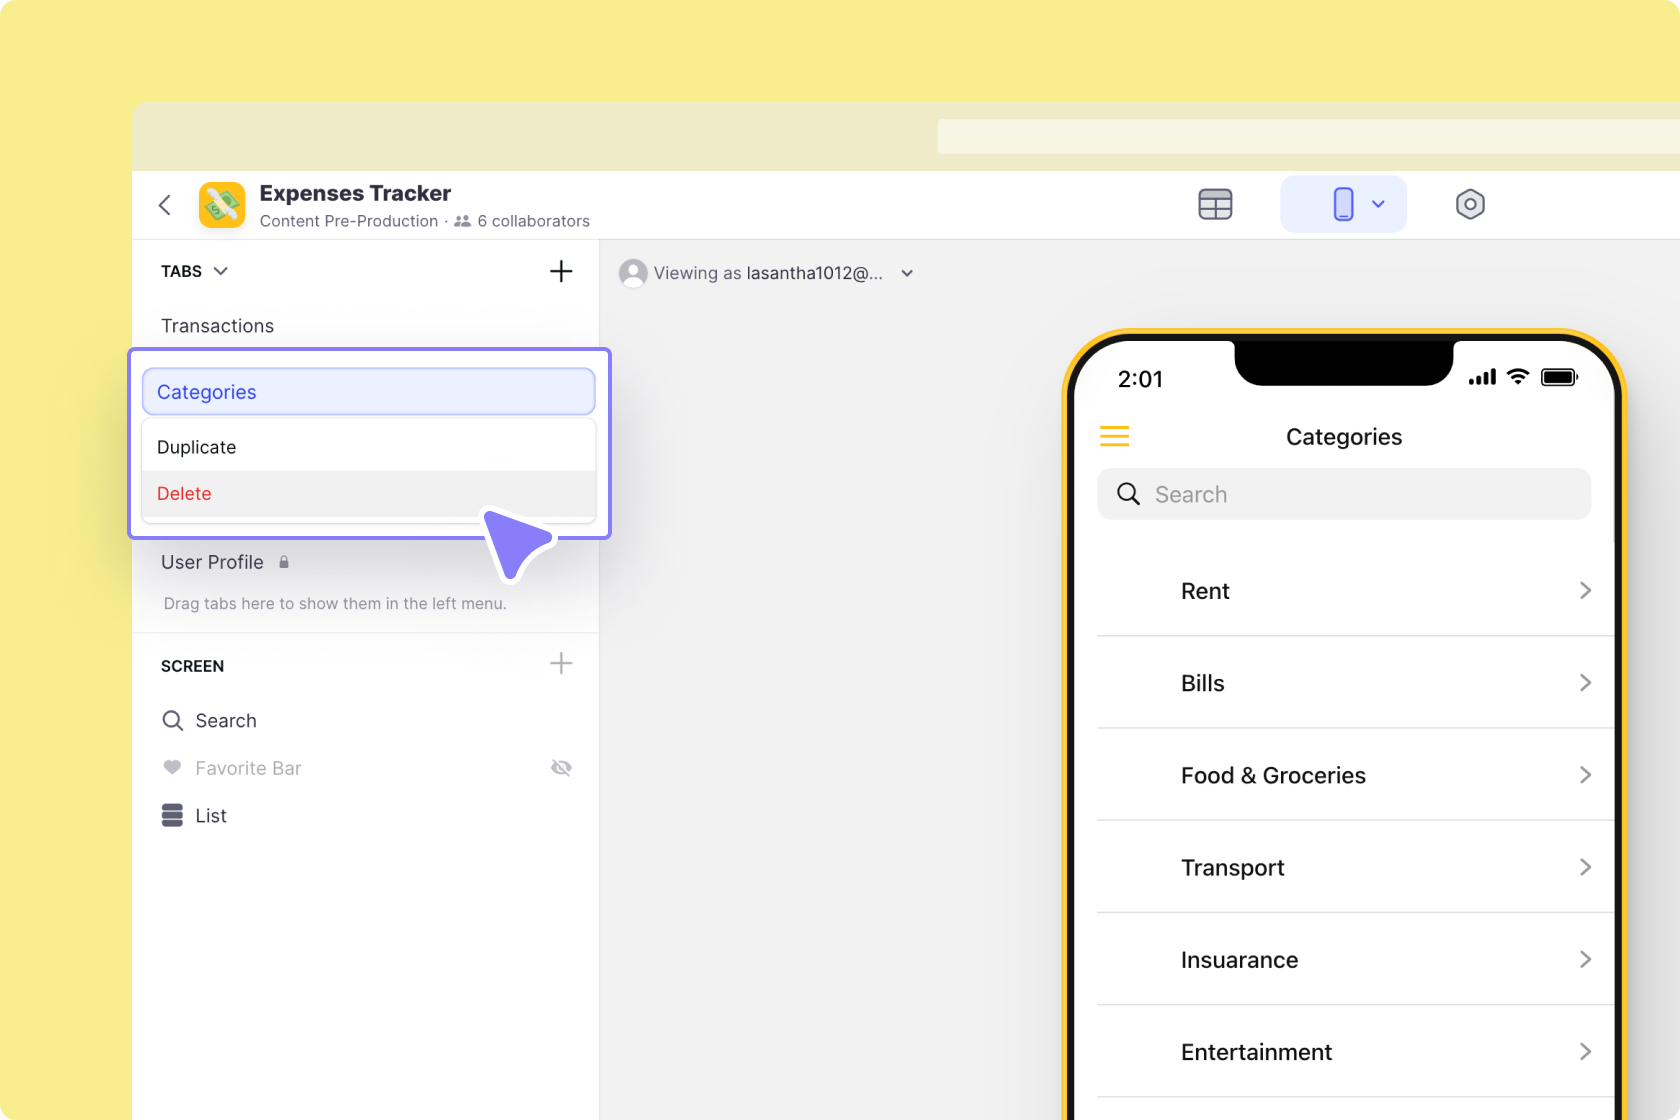
The ‘Categories’ table is there to help us create reports. We don’t need to use it in our project, for now, so we’ll remove the Tab that Glide created for it.
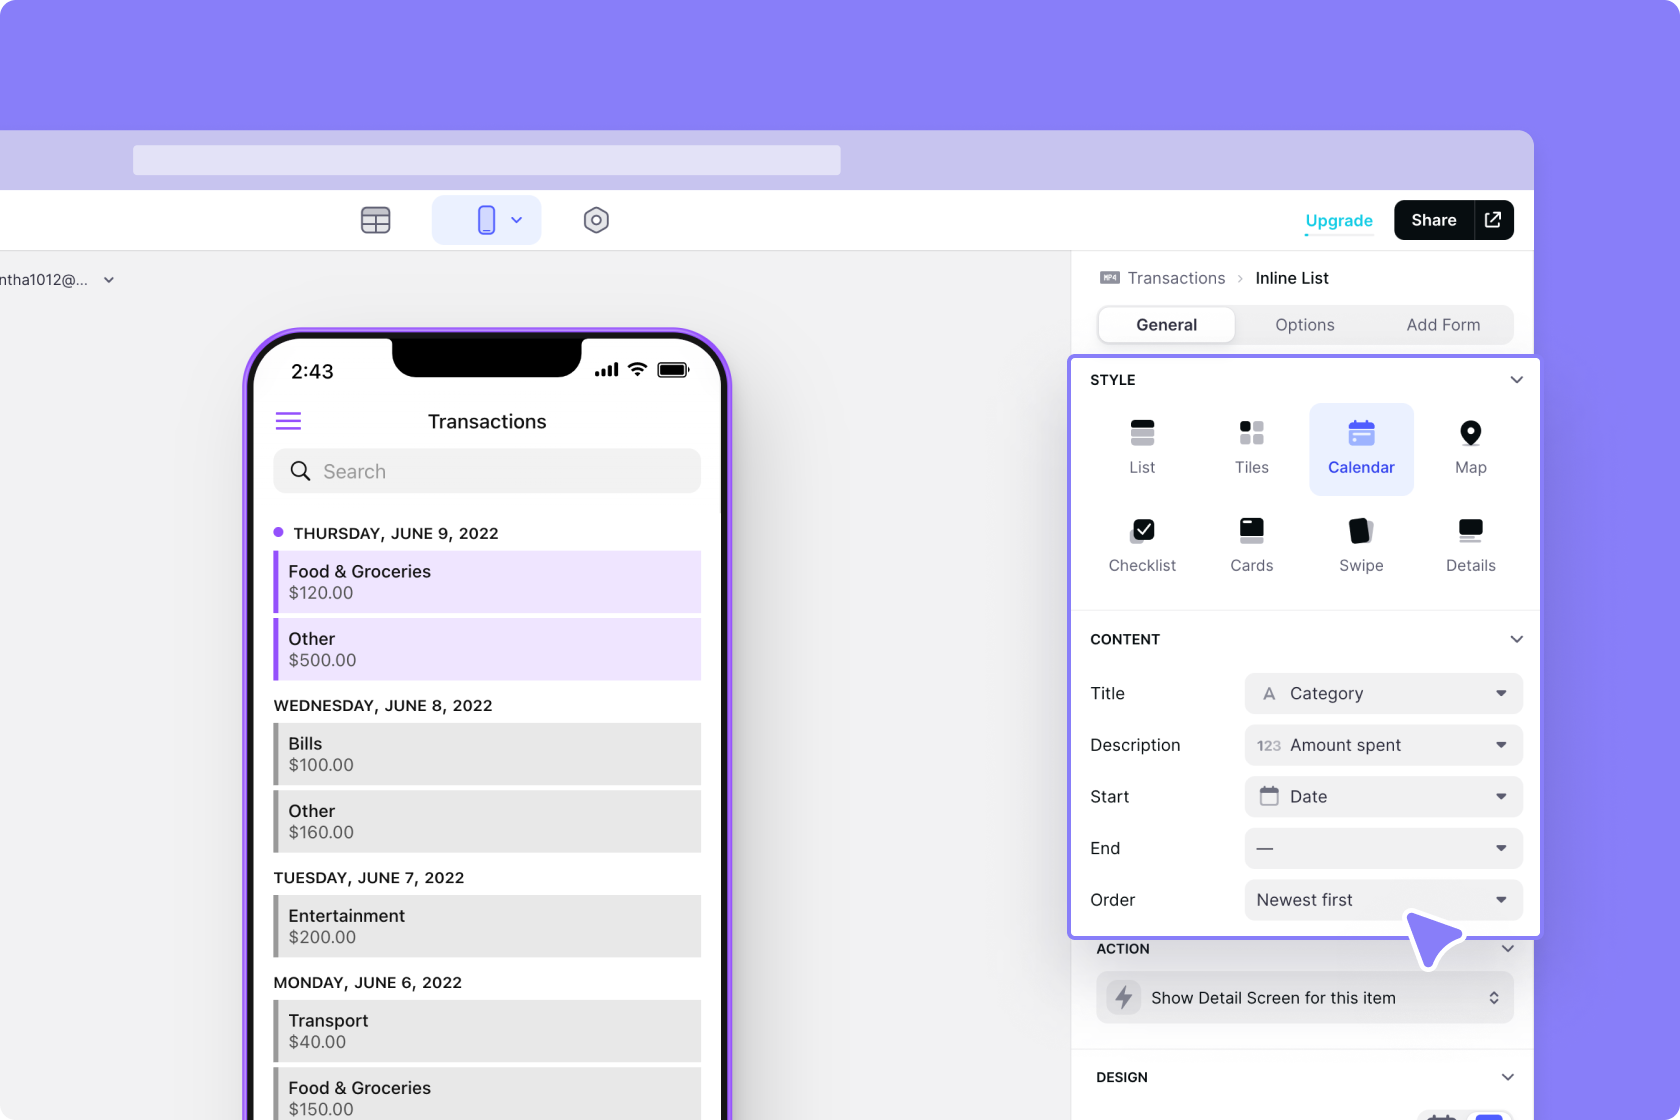
Glide has automatically created a list for us based on the data in our table.

We can choose different styles for this list. Because this is an app to track our expenses over time — let's use the calendar layout.
We’ll configure this list to show the category, the date, and the amount we spent, and then sort the list to show the newest items first
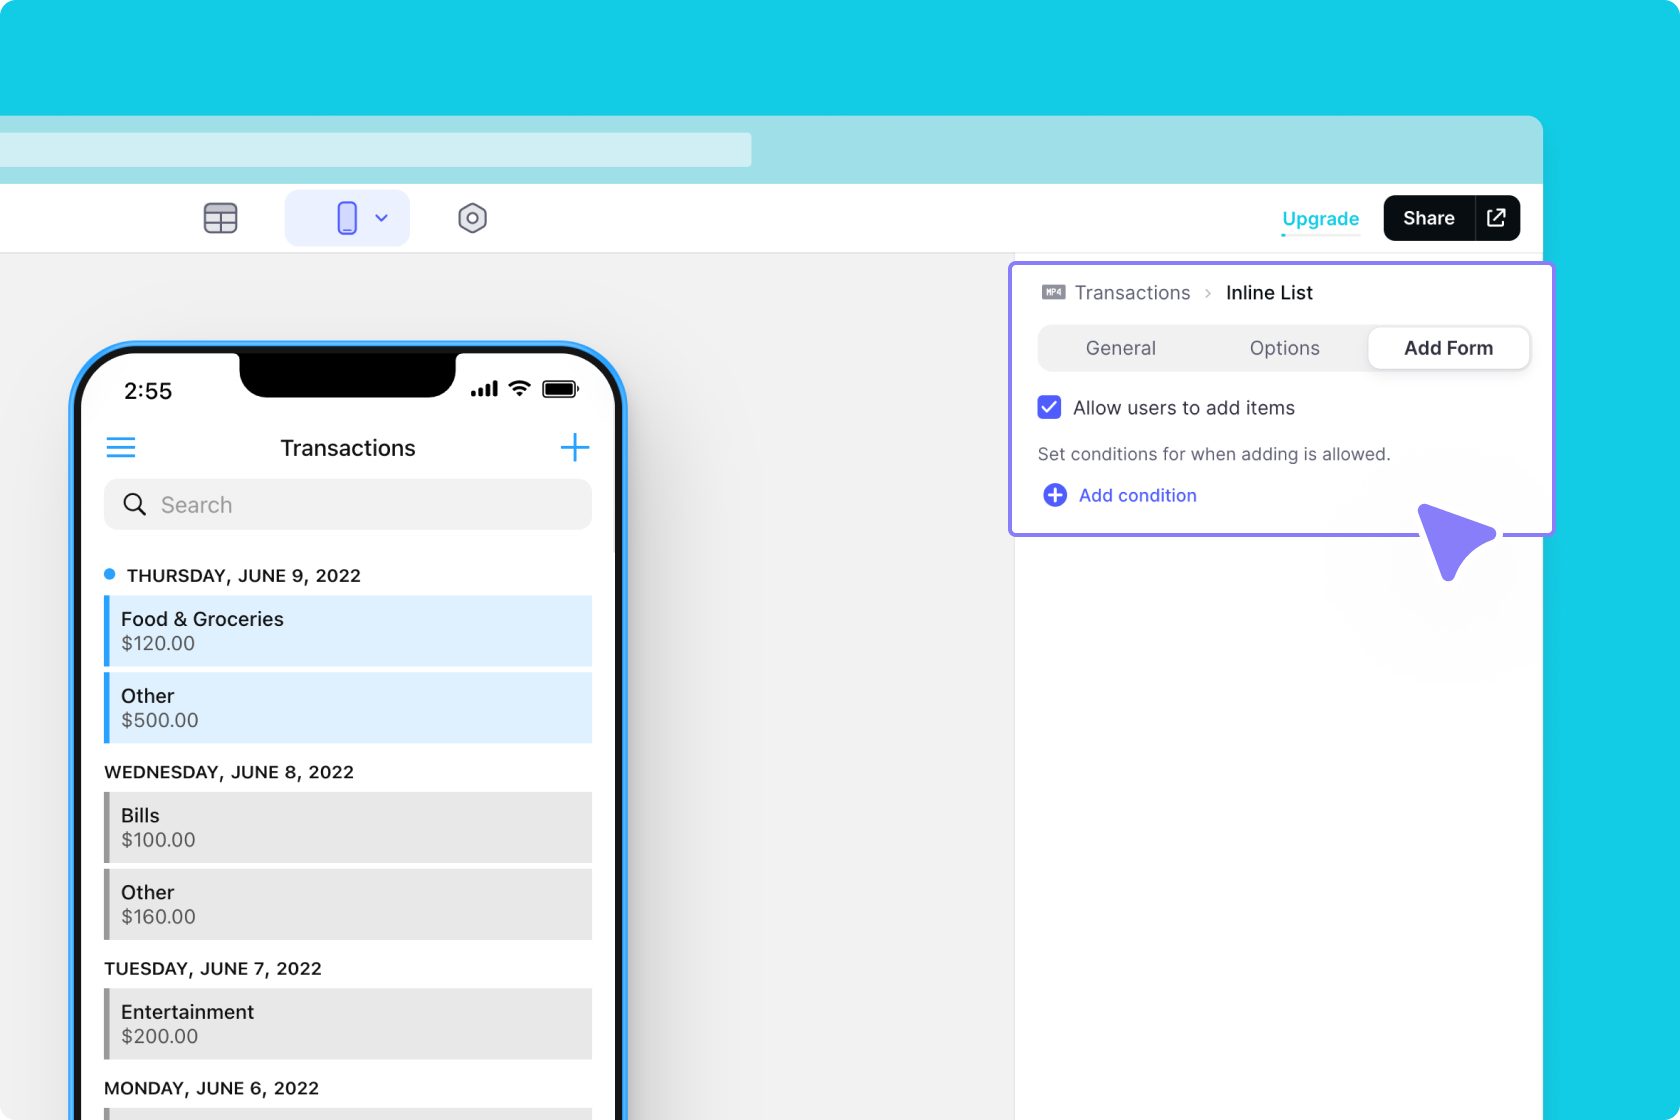
Now we’ll enable adding to this list. This creates a form screen.
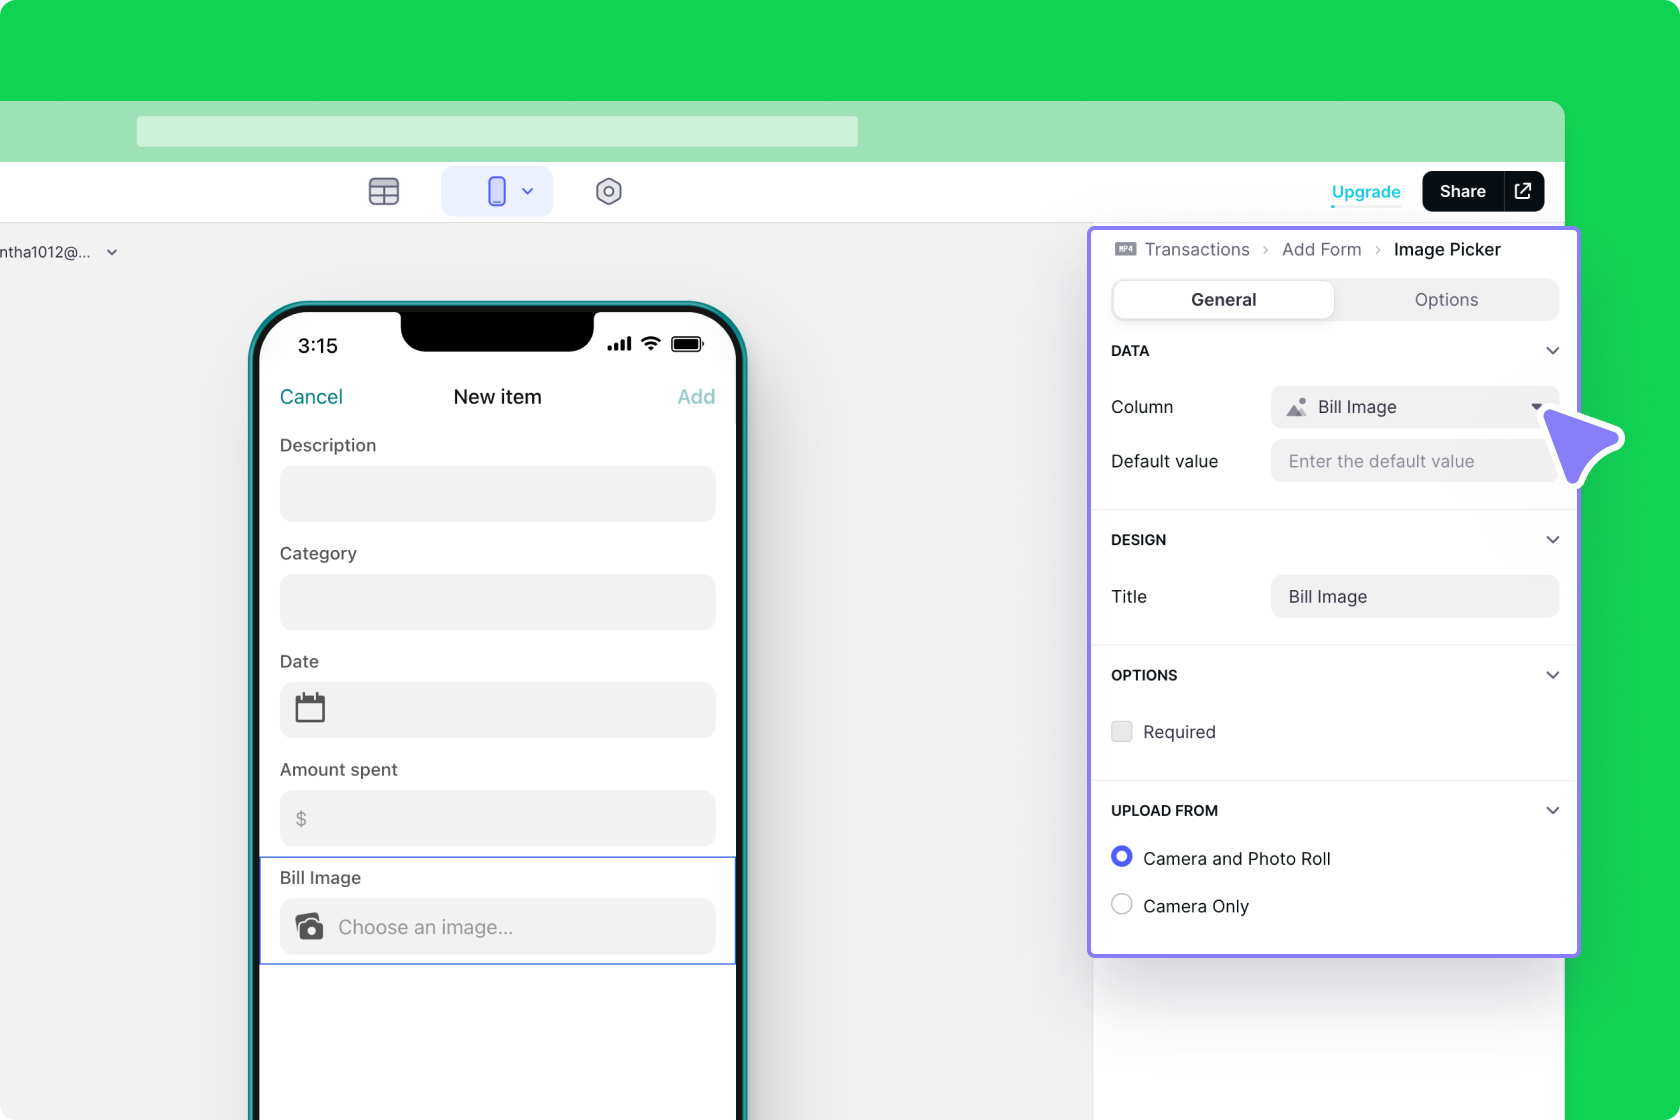
Glide has added entry fields on this screen to match the columns in our table, and it’s almost perfect! Let’s add an image picker component and link the component to the image column in our table.
Before submitting this expense, we want to be able to categorize it.
Currently, we have a field that we are just typing any value we want into. But we have a set number of specific categories that we want to use. These are in our categories table.
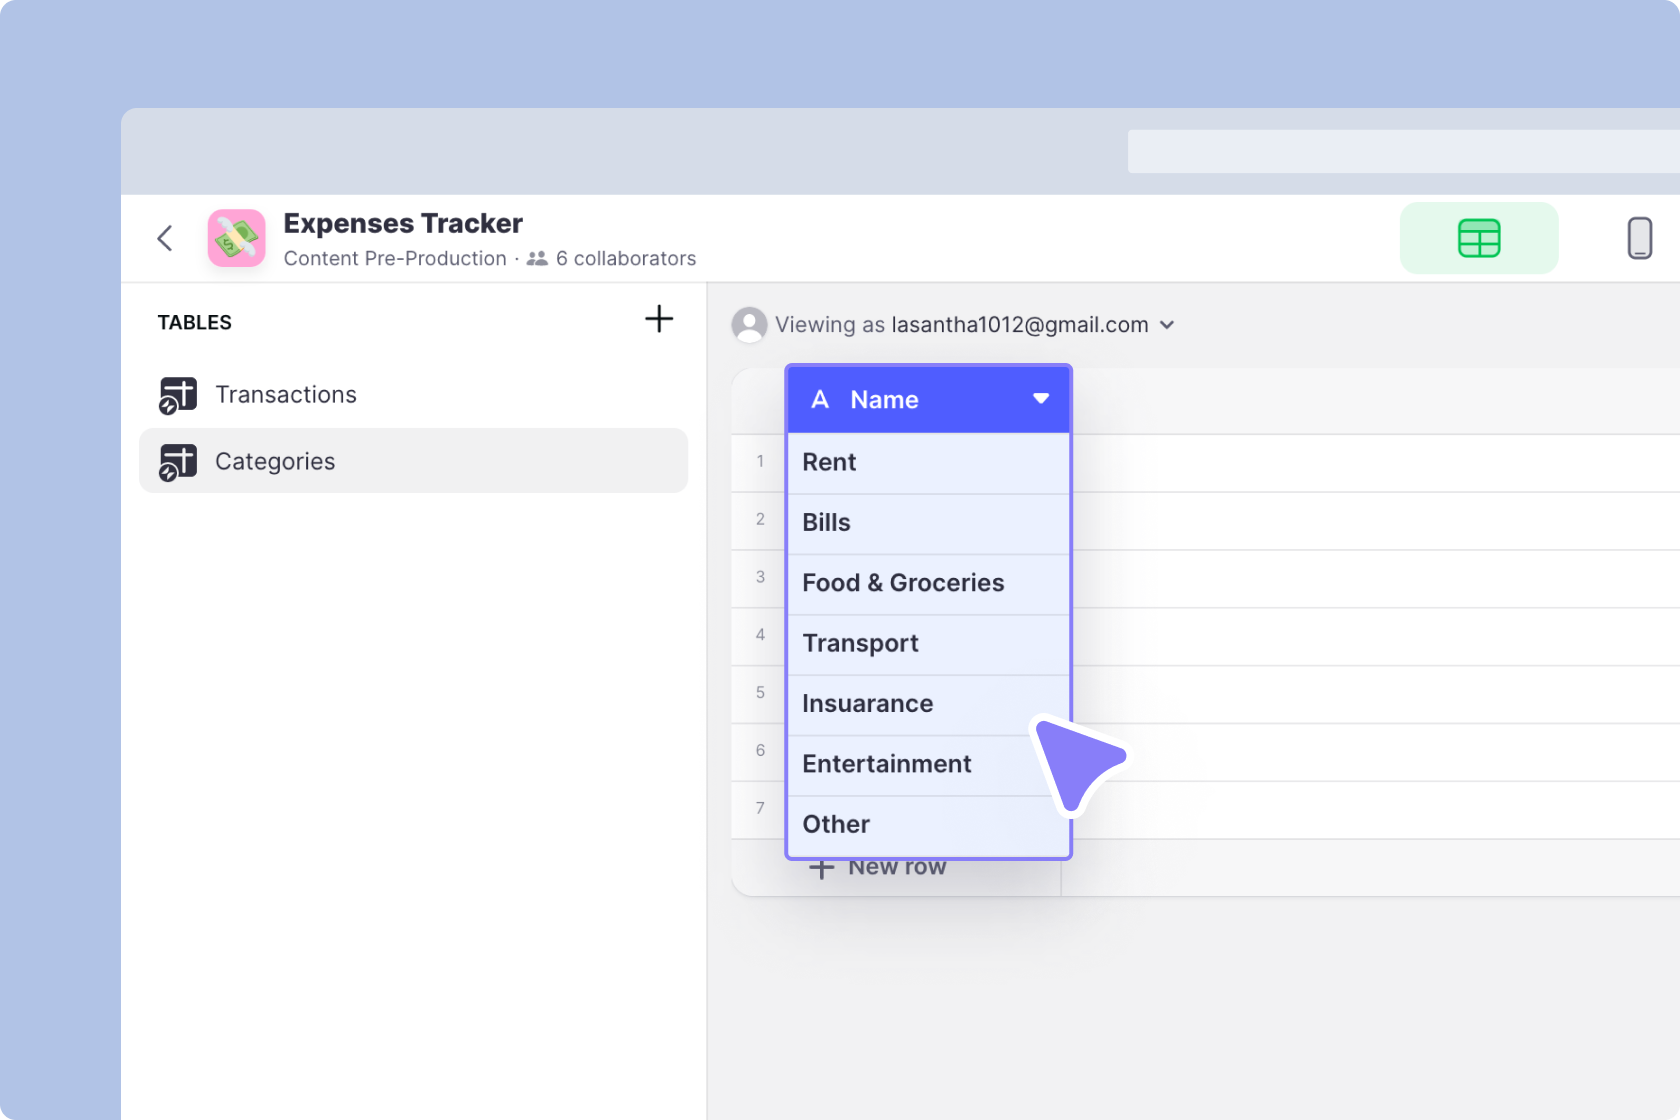
We really don’t want to type a category each time — it would be much better if we could just pick one from a list. The best way to do this is to add a choice component and make it read from the Categories table.
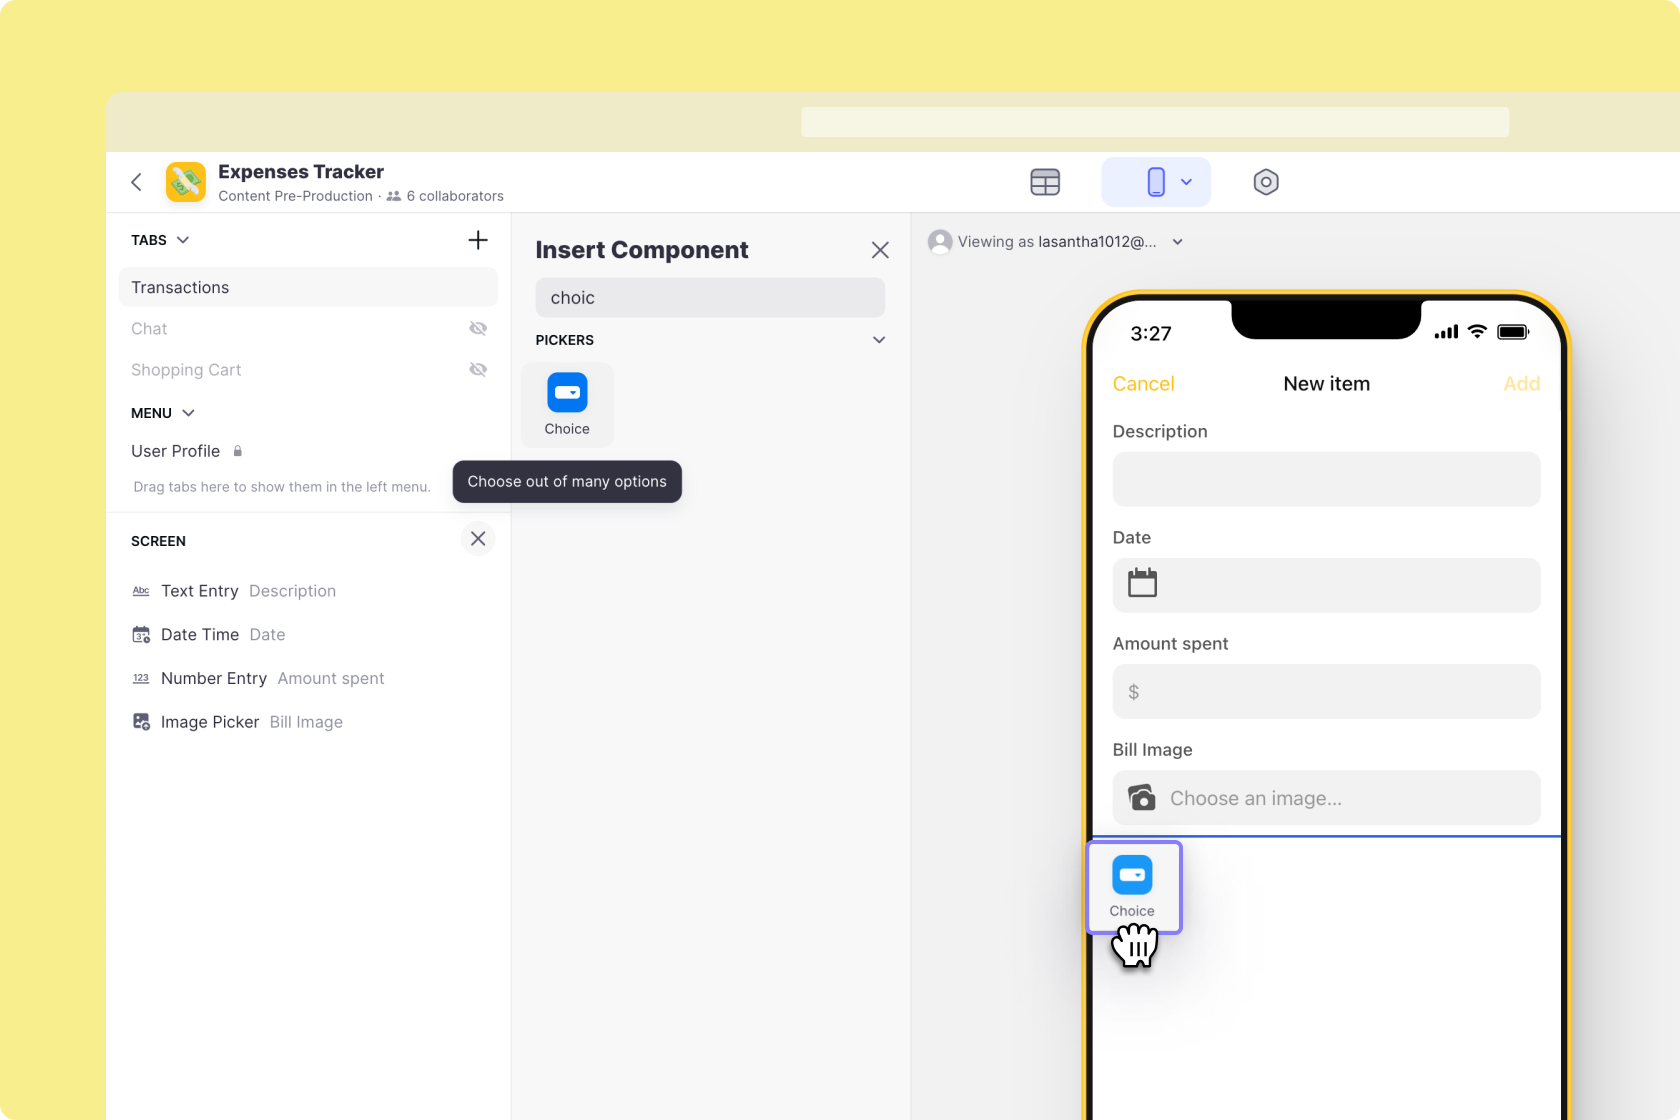
The choice component needs a list of items for the choices — and a location where the choice will be written to.
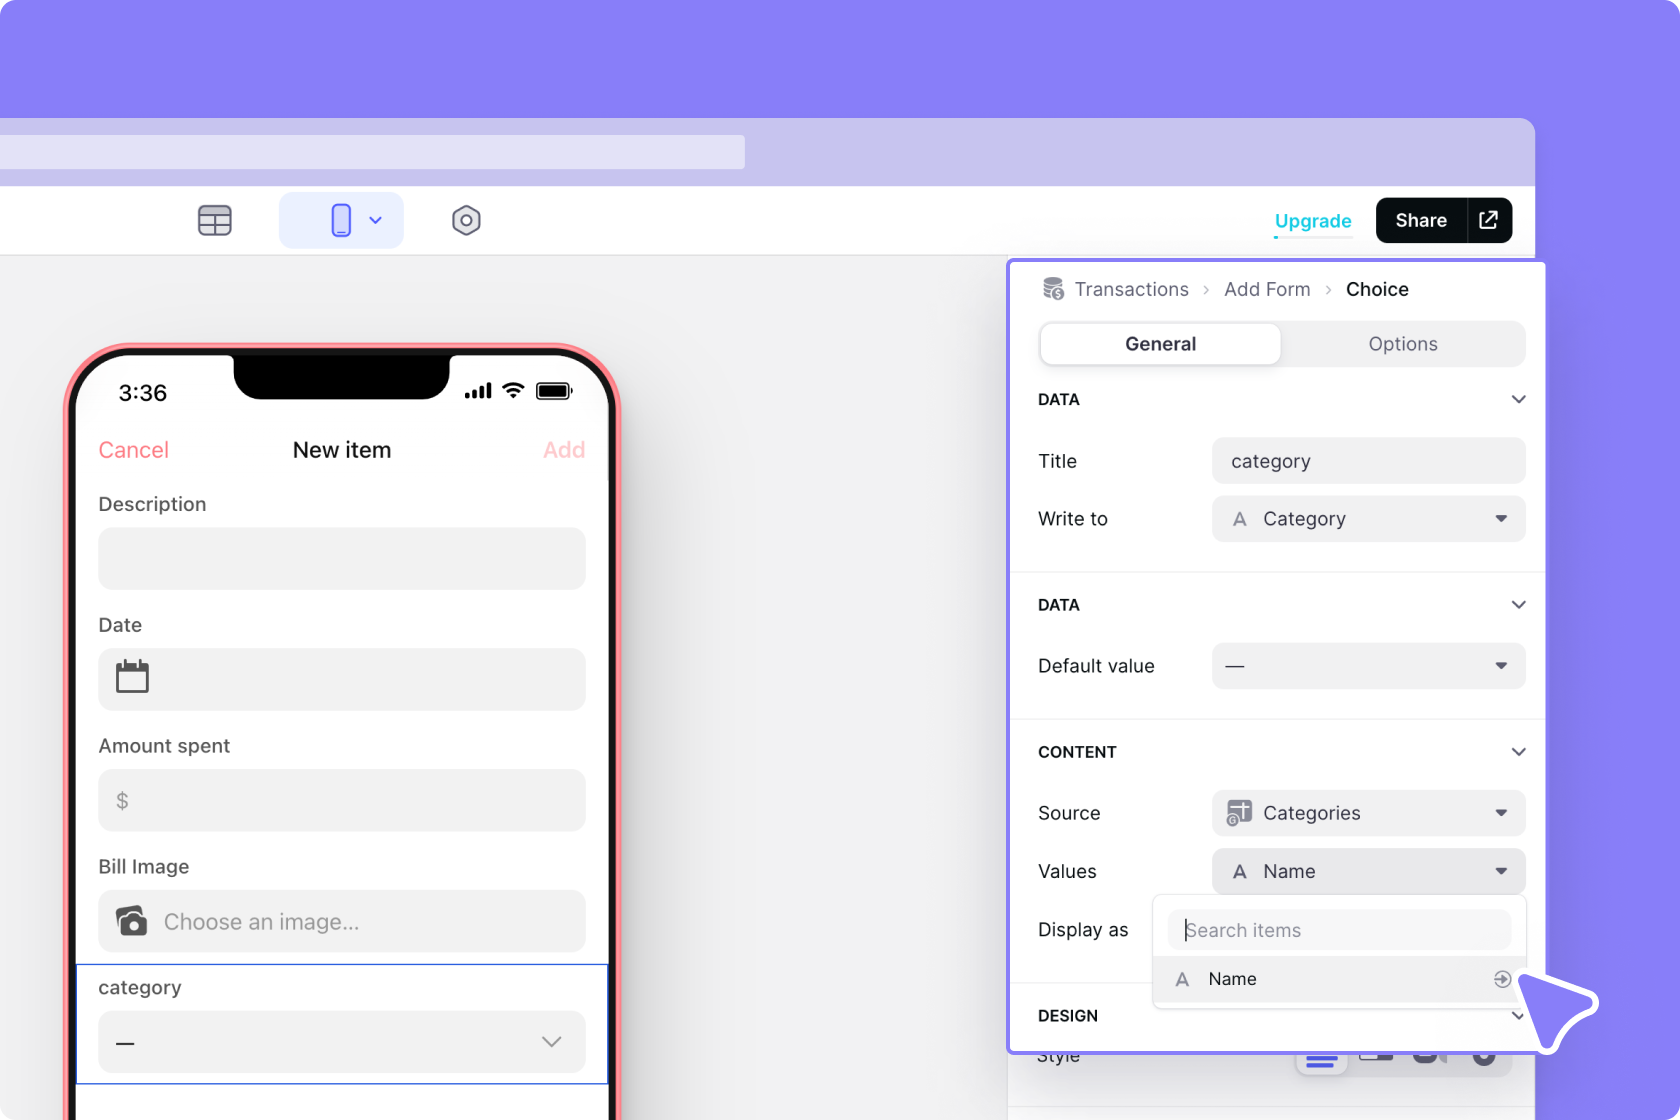
We'll link the choice component to the ‘Name’ column in our ‘Categories’ table and make sure it’s writing to the ‘Category' column in our ‘Transactions’’ table.
Let's test this now by adding a new transaction. Perfect, let's click on the new item we added.
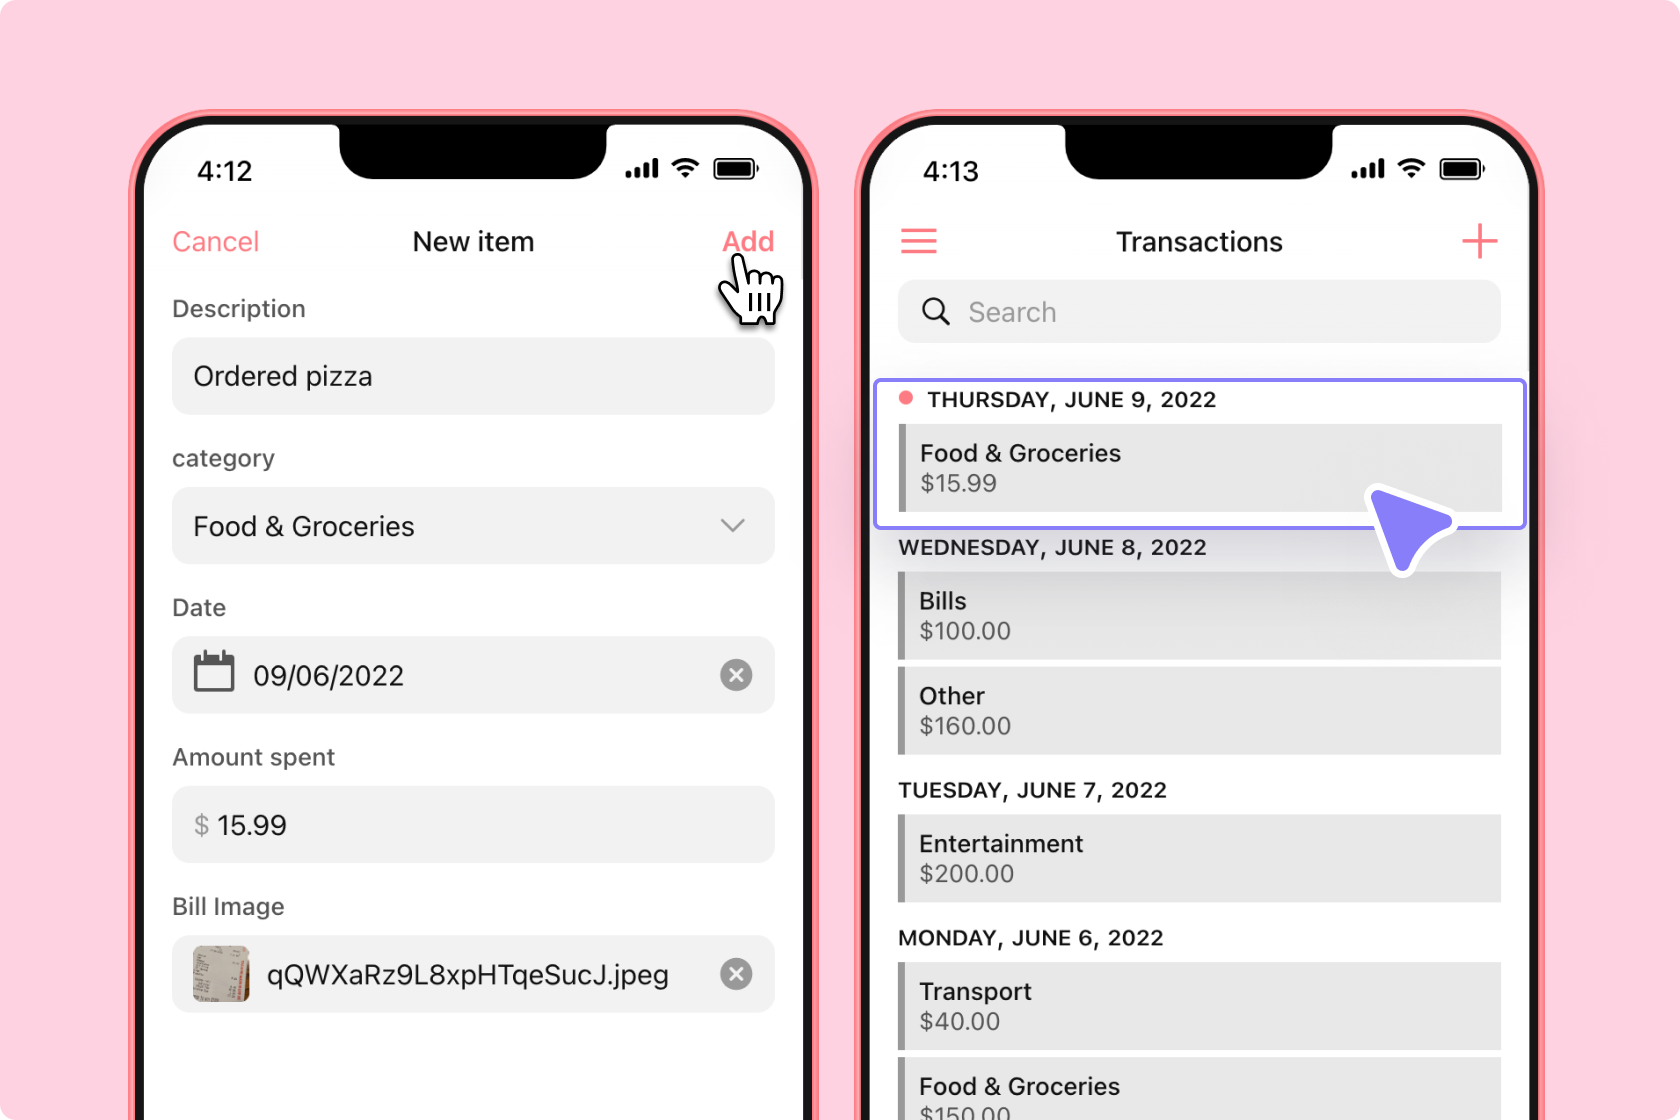
We now see all the details of this transaction. Glide has added some basic components for us — based on the columns in our table. But we can change and customize this screen however we like.
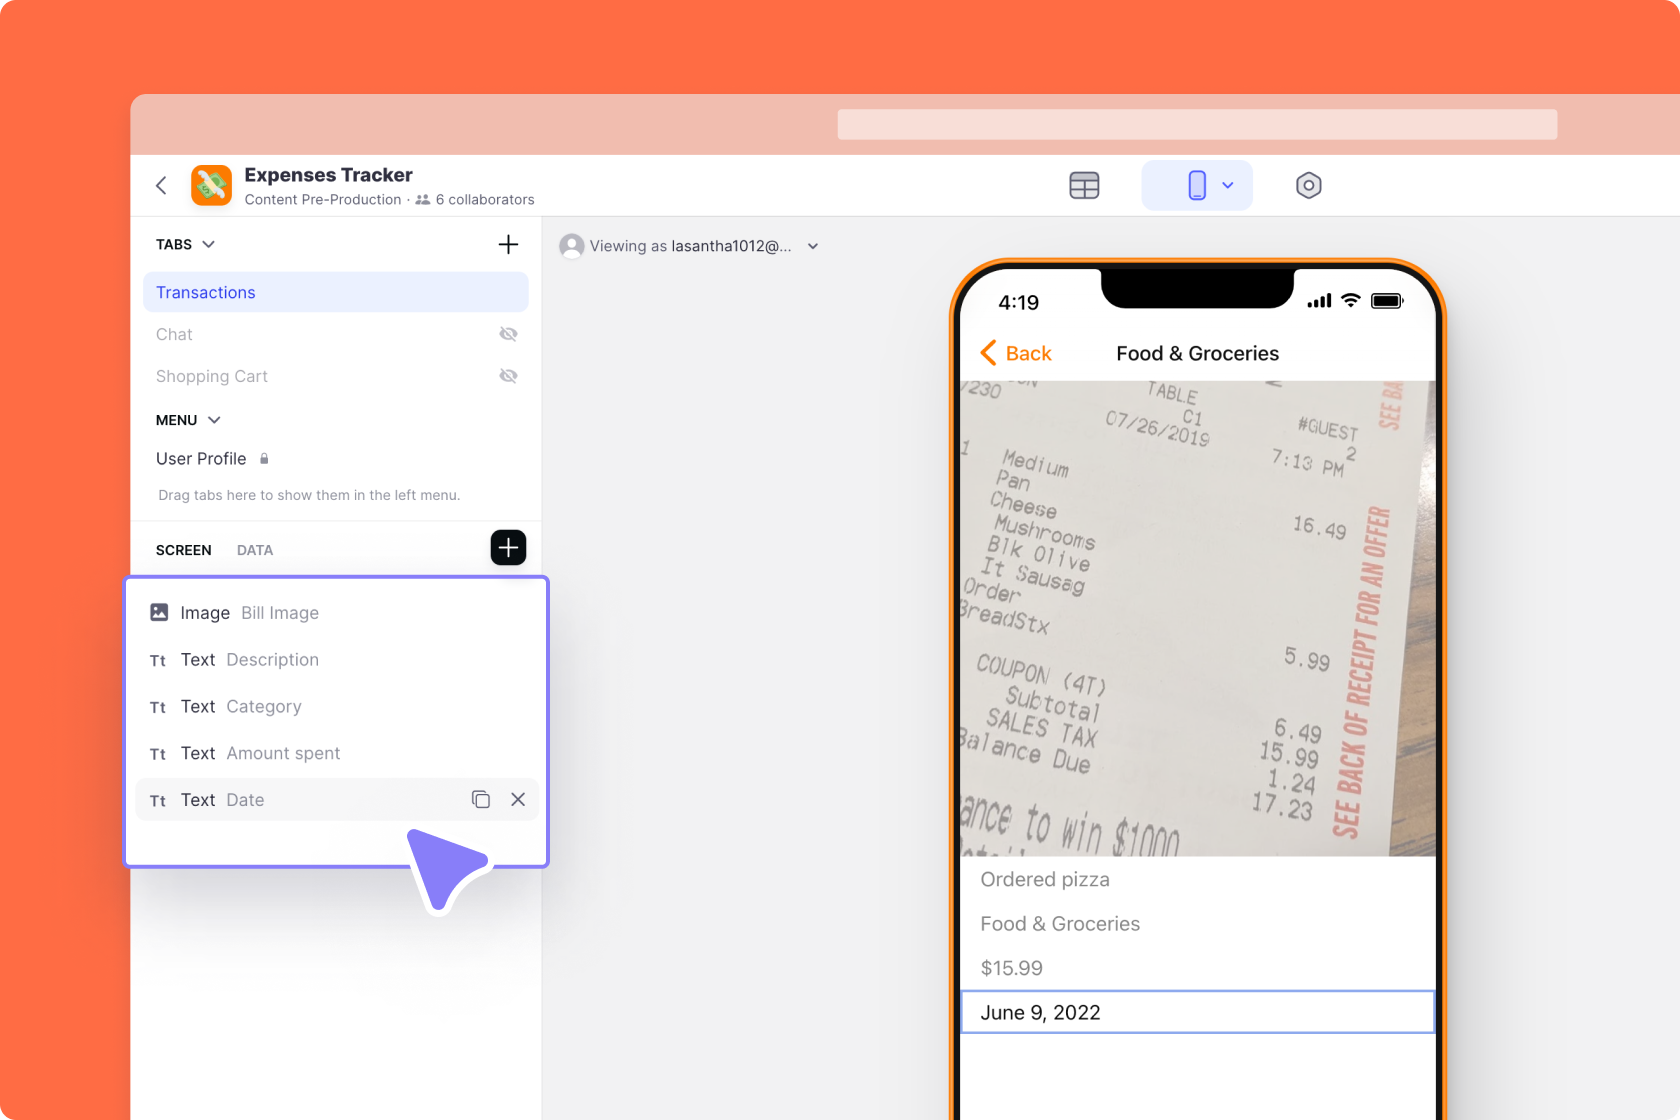
Let's keep the image and remove everything else.
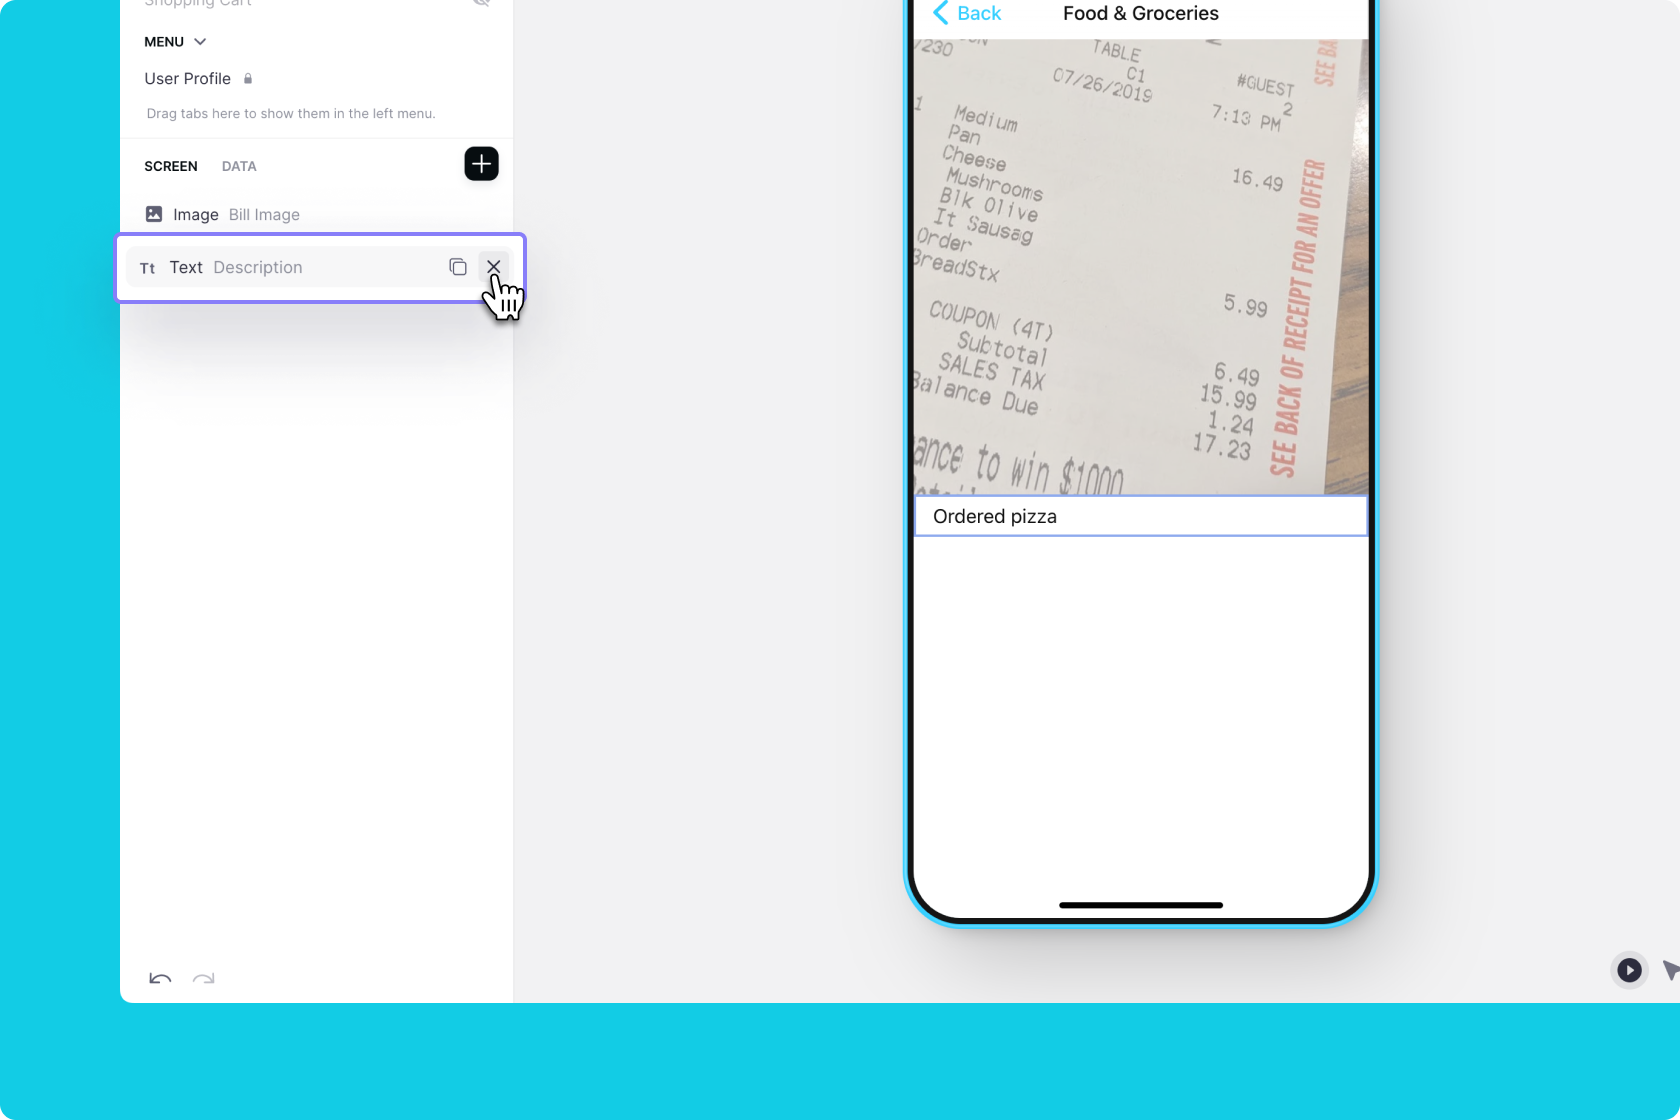
The basic table component is really good at showing lots of values neatly and compactly. Let's add this and configure it to show all the details we want to see.

There’s a lot more we could do with this screen, but for now — let’s keep it as is.
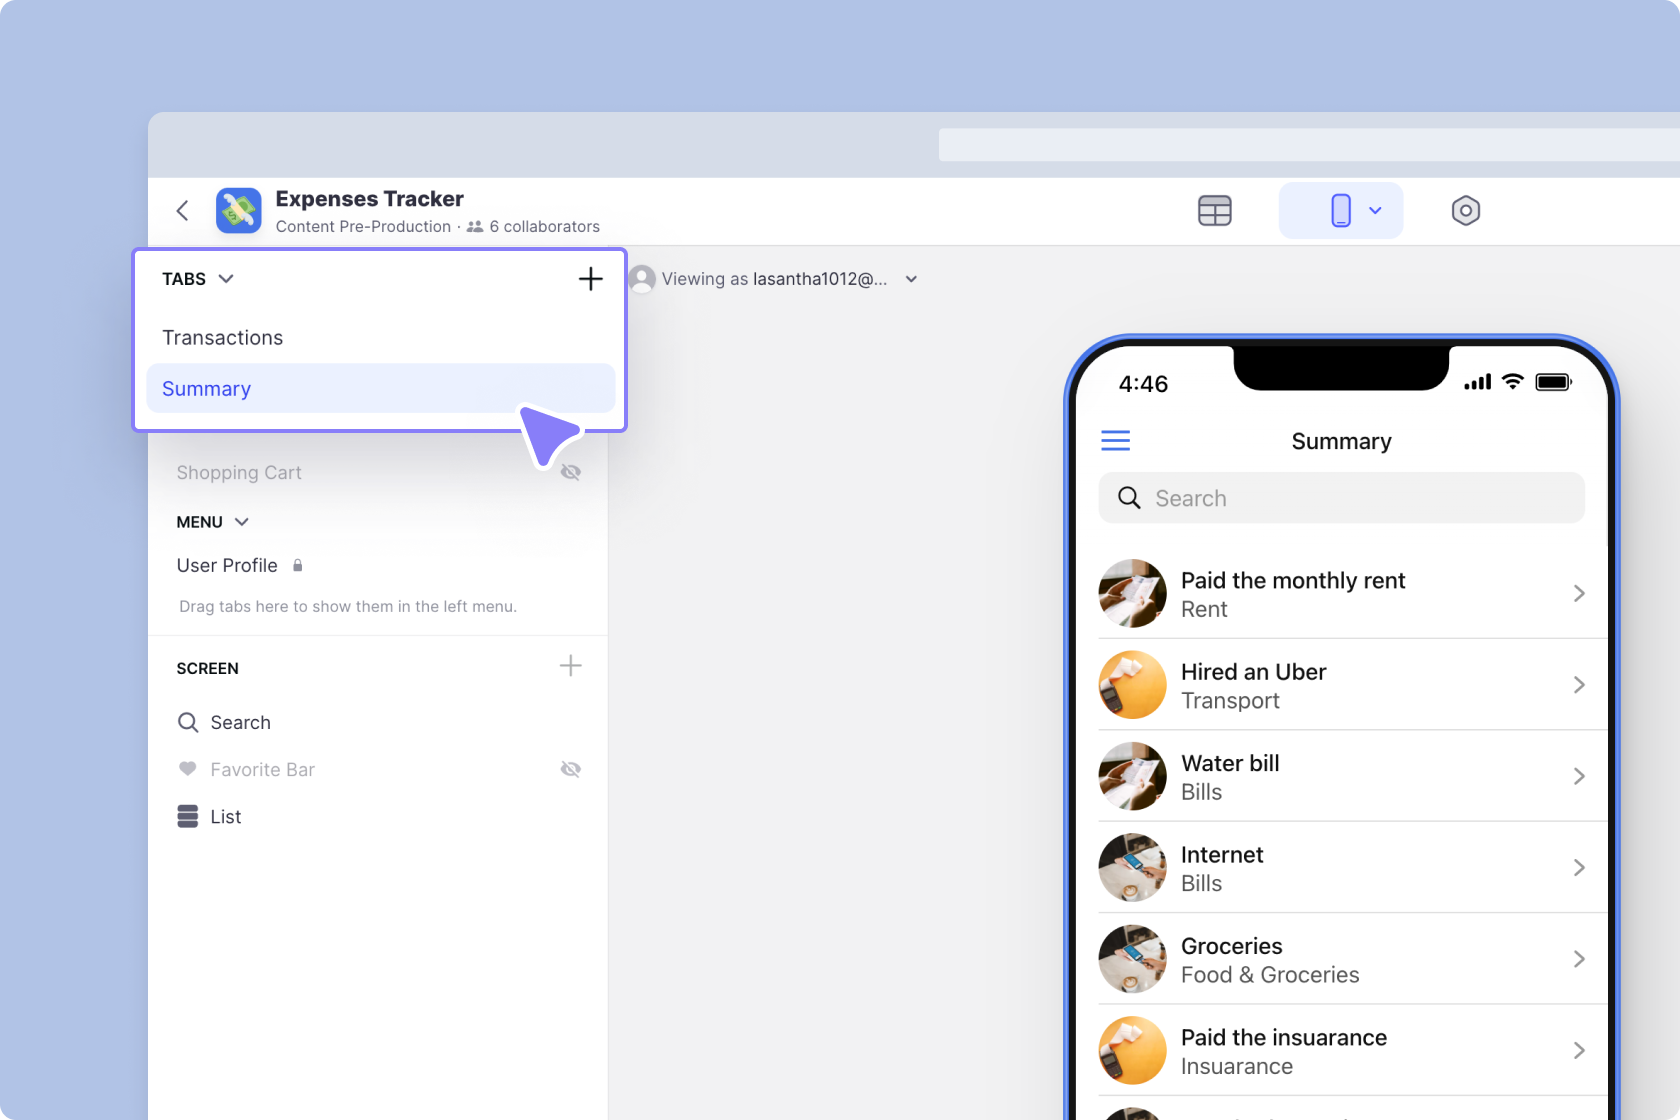
One final thing we can do to enhance this app is to add a chart. Let's create a new tab and call it "Summary."
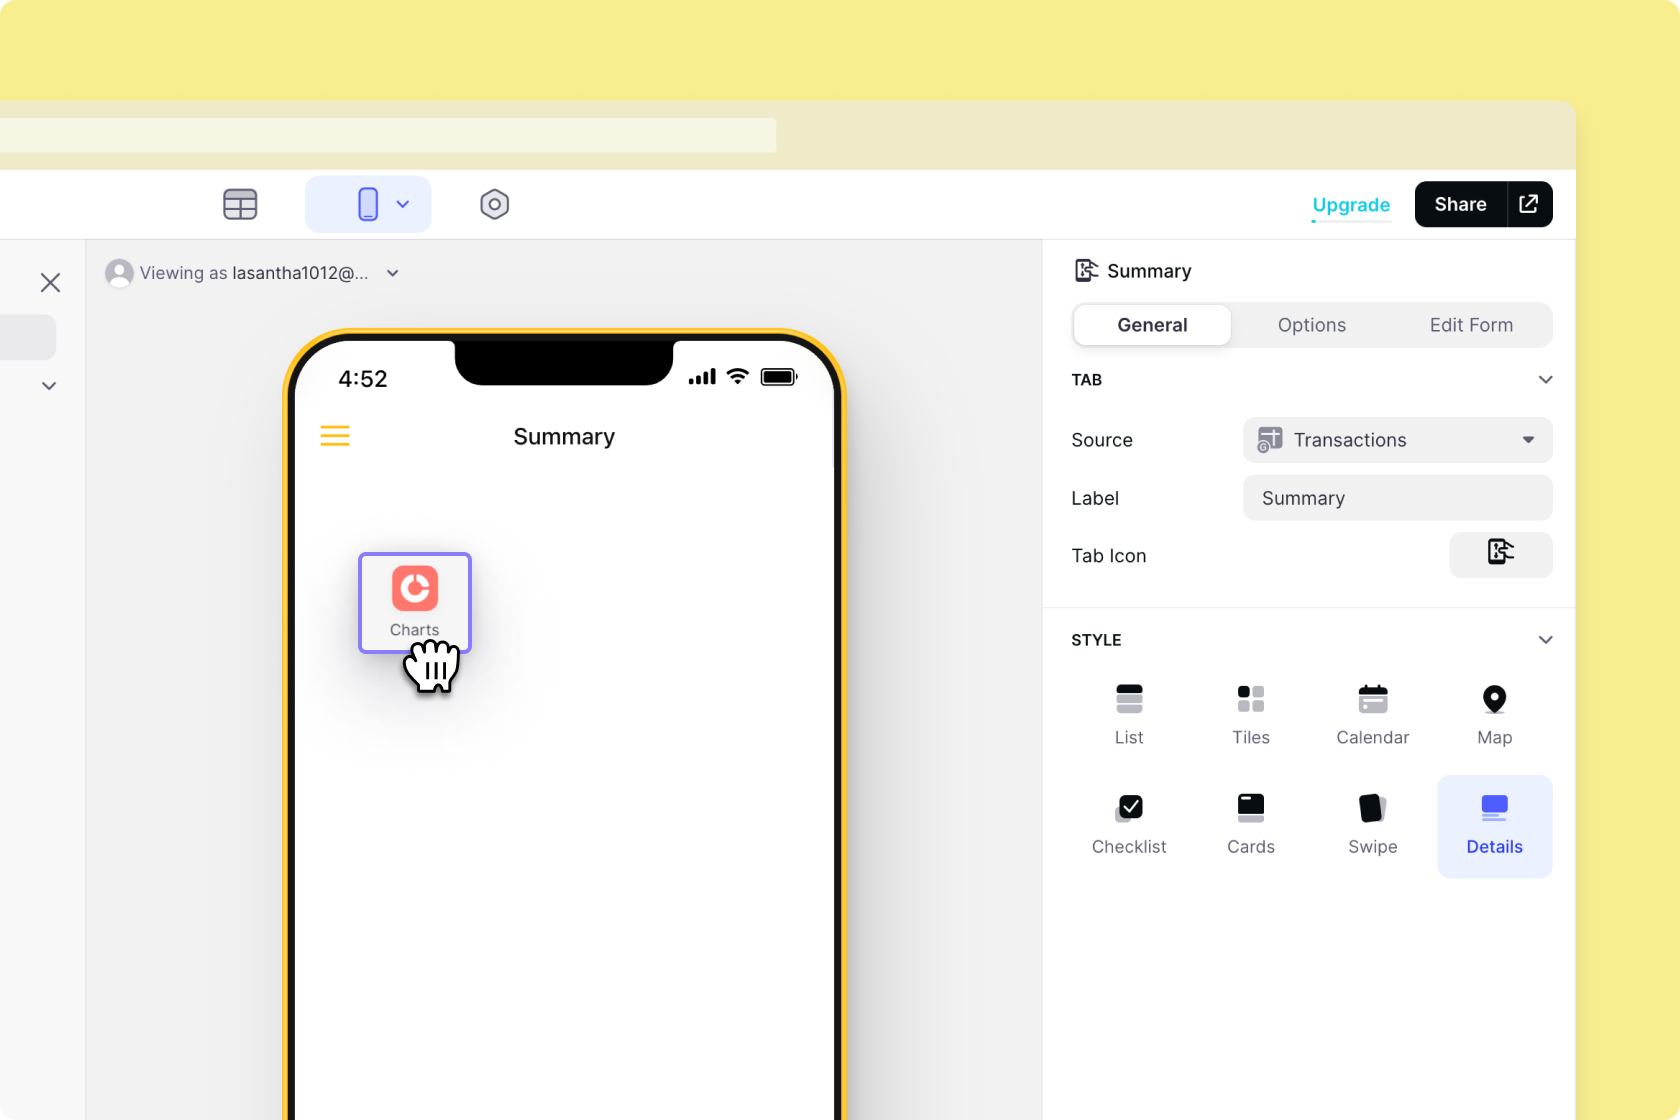
We'll choose the details layout, delete all the components and add a chart component.
We’ll make sure the chart is connected to the data in the ‘Transactions’ table and choose a pie chart as the style.
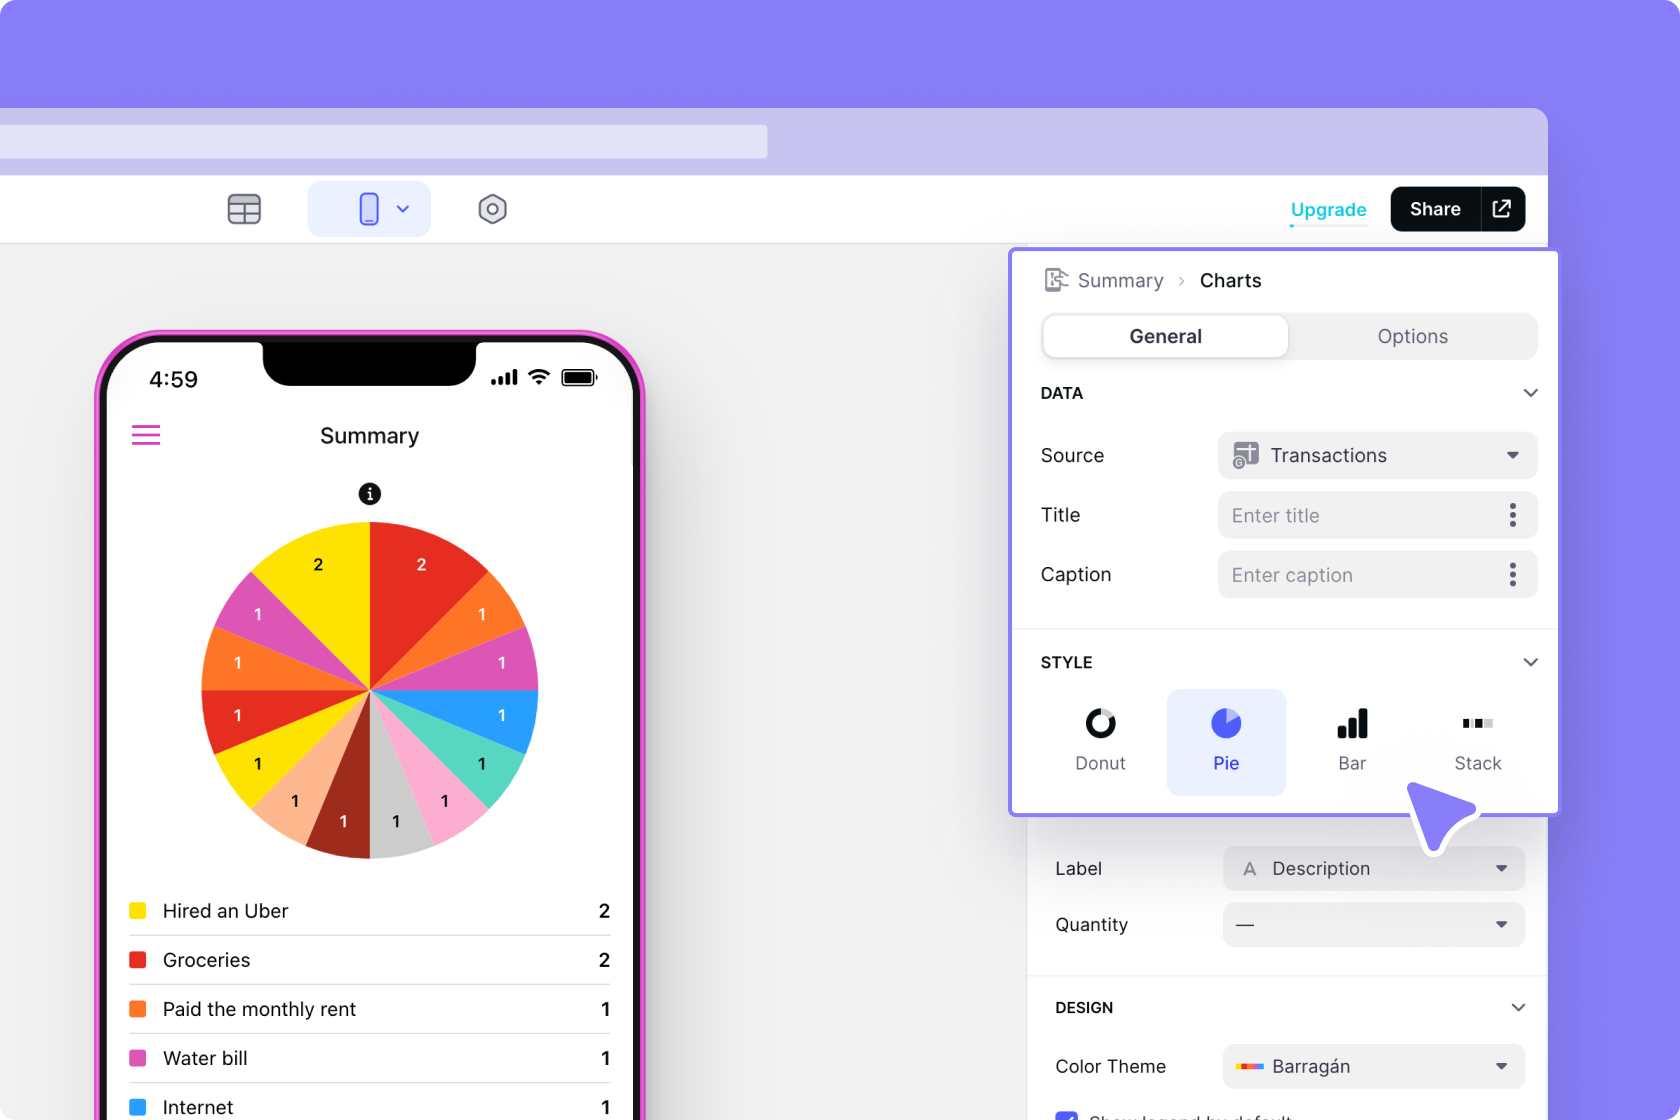
We want the pie chart to show the spending for different categories, so we’ll choose the category as the label and the amount spent as the quantity.
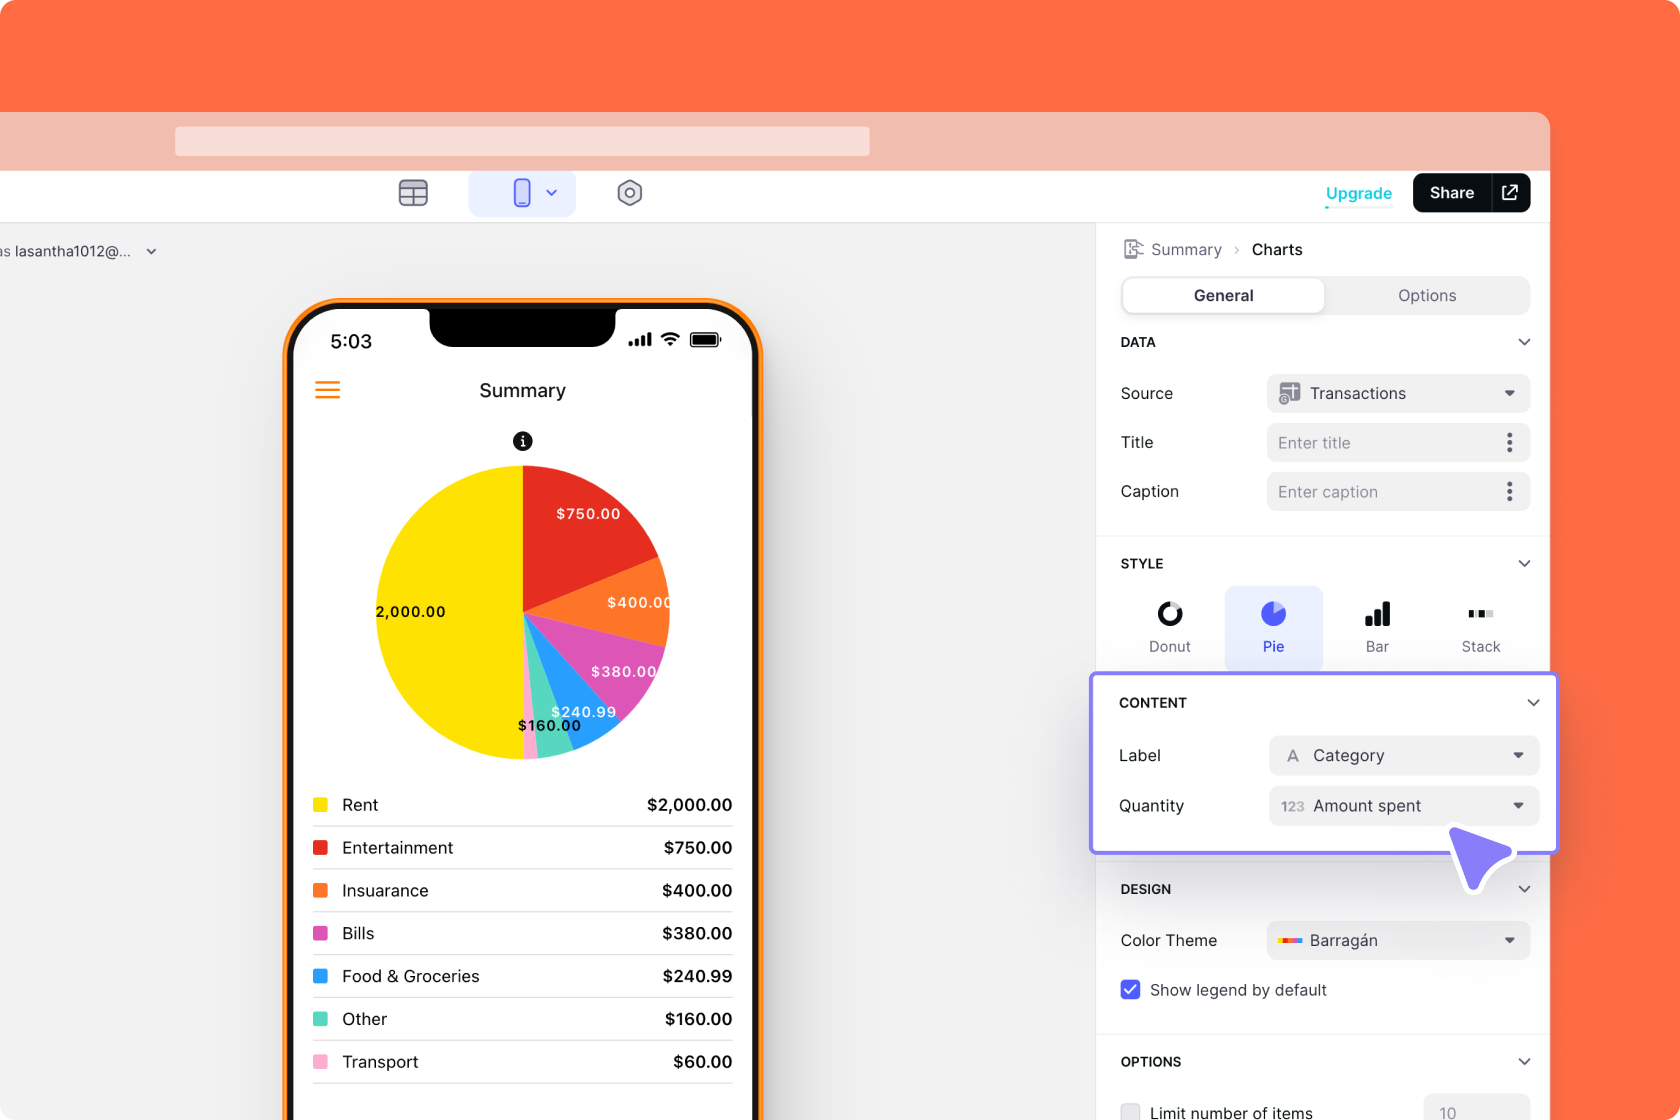
Perfect!
Sign up for Glide to get started today.


