
25,000 Row Limit on Spreadsheet Data Sources
Rows from spreadsheet data sources have a total cap of 25,000 rows across all tables. If you need more than 25,000 rows of data in a team, consider a high-scale data source like Big Tables.
Glide Tables are spreadsheets that live in Glide and are the most compatible data source for Glide apps. You can share Glide Tables among apps using the Link Table feature. Making changes in Glide Tables does not consume updates, unless you make changes through Glide API or have an Enterprise plan.
How to create an app with Glide Tables
When you create a new app, Glide sets Glide Tables as the data source by default unless you select a different source.
From the dashboard, select New app.
Choose the template type you want.
Select Create app. Glide will create your app using Glide Tables as the data source.
Change the default name of the table
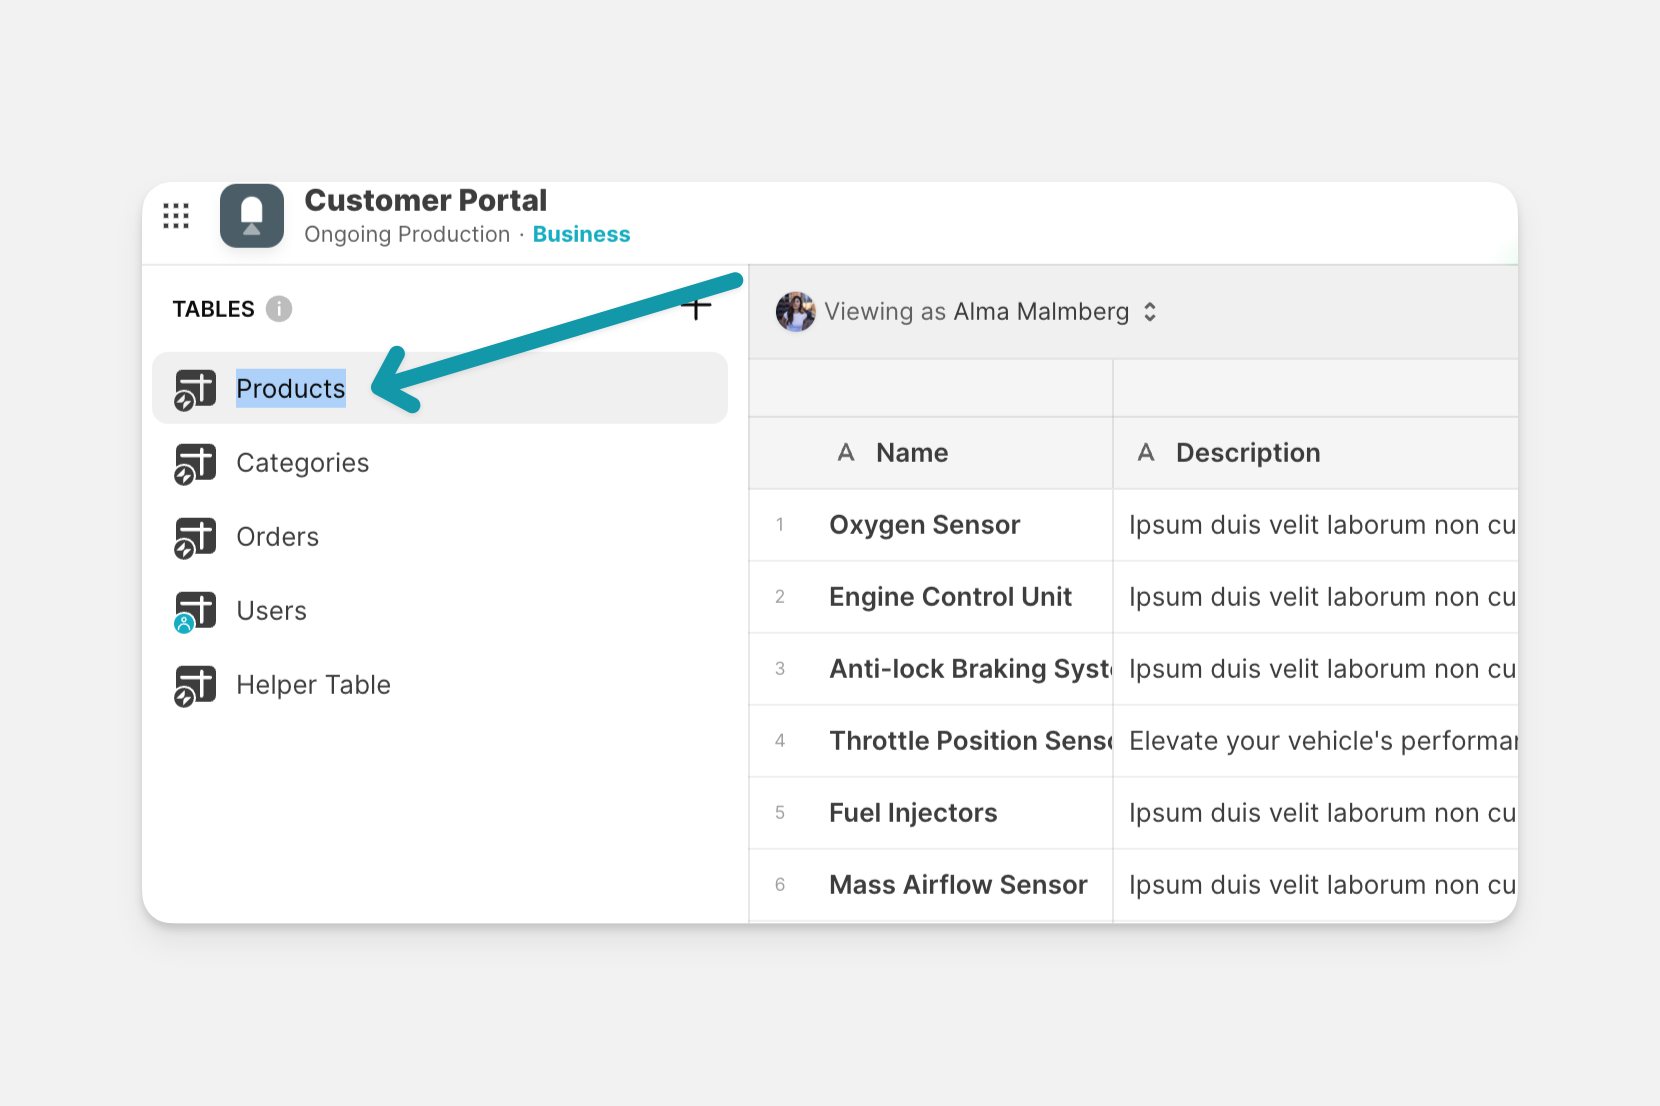
Select the Data Editor icon.
On the left side of the Data Editor, double click on the name of a table, type the name you'd like to use, and hit enter.
Change the default data in the table
You can make changes to the placeholder data in your new Glide Table using the Data Editor. Below are some basic ways to make changes and input data for your new app.
To edit a column, hover over the column you want to edit, select the dropdown arrow, and select Edit to change the name and column type. You can also duplicate, add, or delete columns with this menu.
To change the data in a cell, select it with your cursor, then edit or enter new data.
You can add multiple cells of data at one time by copying cells from another data source and pasting the data into your Glide Table.
To add a row, select the plus icon located under the bottom row.
To add a column, select the plus icon located add the top right of the data table.
To add a full database of existing information as a table, you can upload an Excel or CSV file. Glide will create and populate a new Glide Table using the data from your file. For steps and details, see Create a new Glide Table from existing data below.
Add a new Glide Table to your app
If you'd like an empty database you can input new data into, you can add a new table.
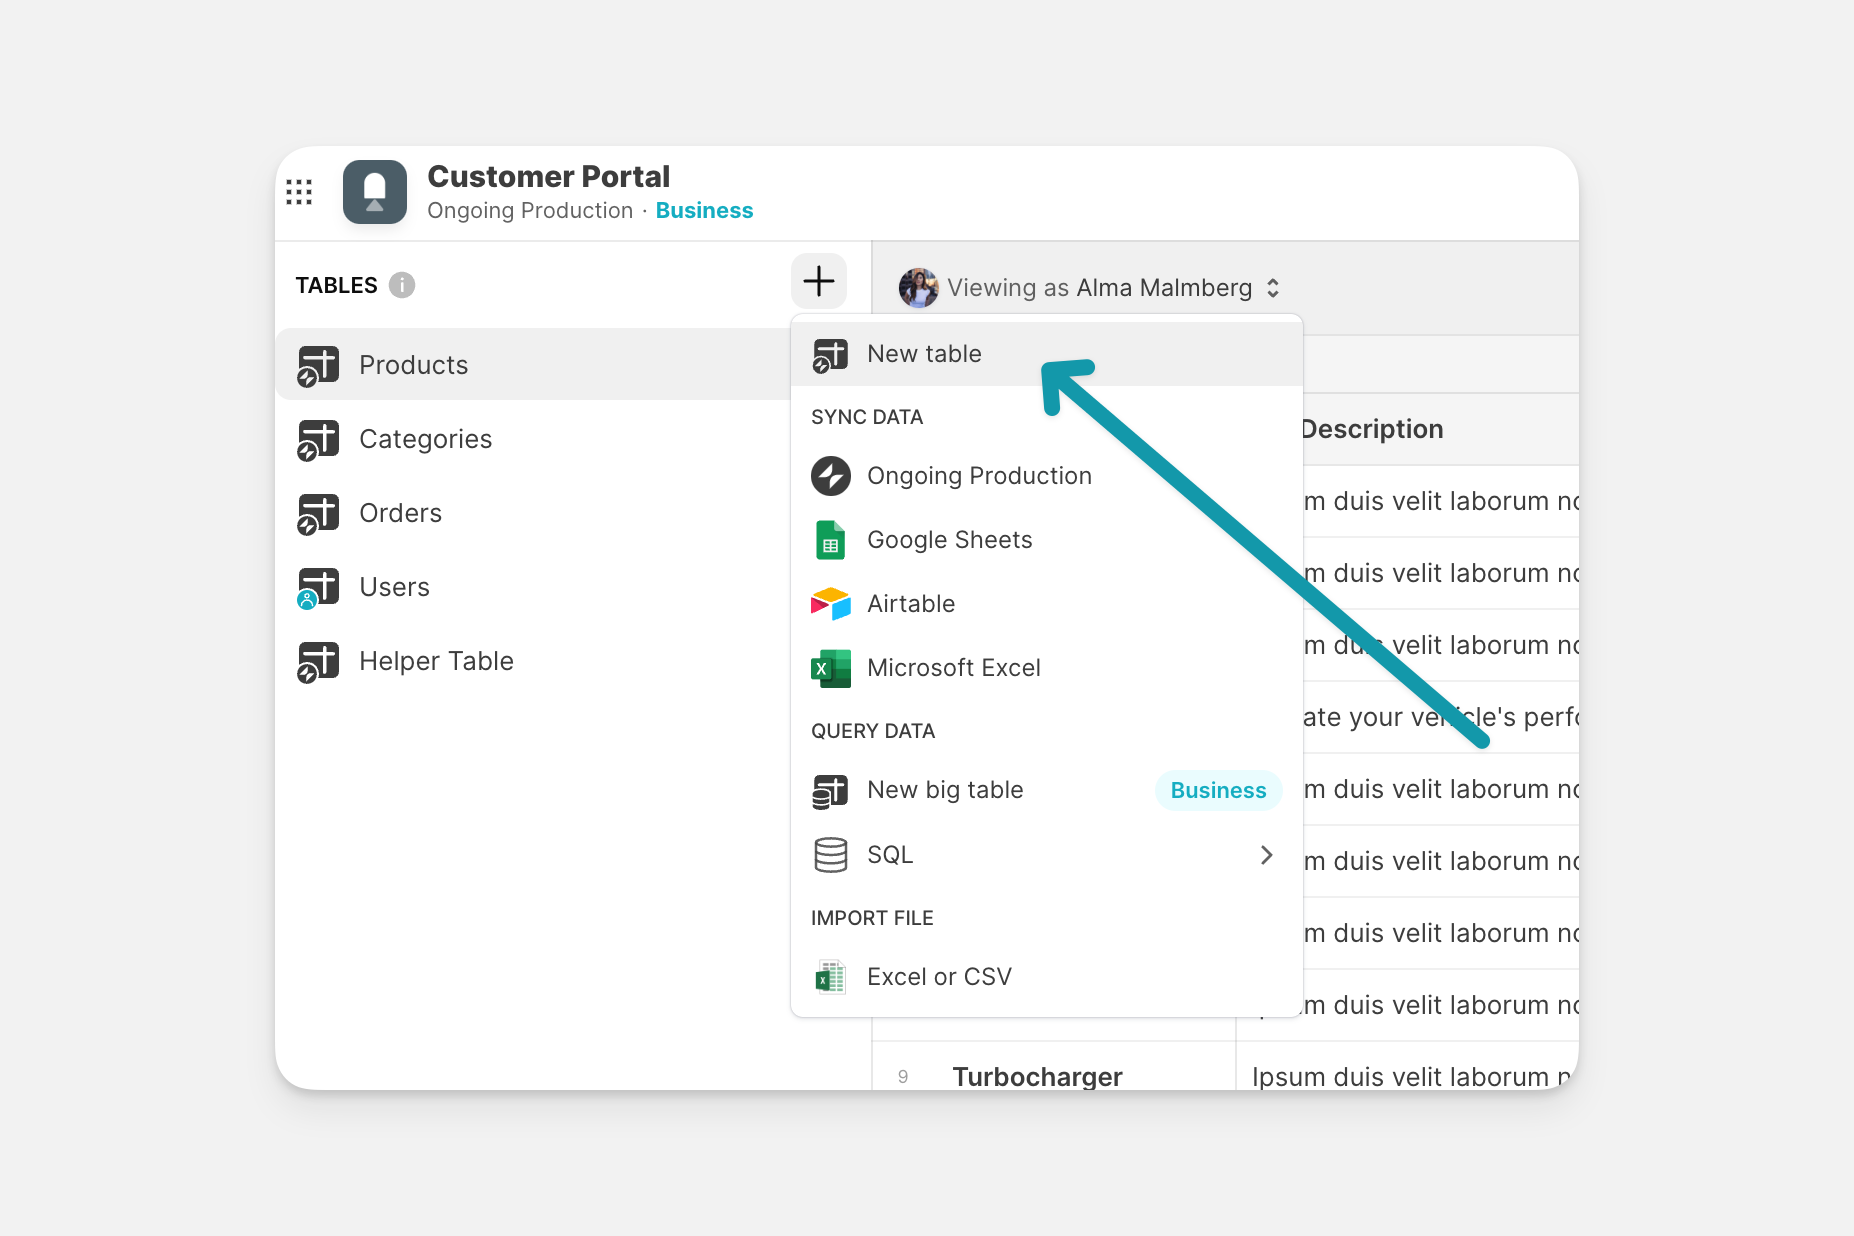
On the left sidebar of the Data Editor, select the plus (+) icon and New empty table.
Glide creates a new table for you with an auto-generated name. To change the table's default name, double click on the name and edit.
Create a new Glide Table from existing data
If you already have a full database of information that you want to add to your app, you can upload your data as an Excel or CSV file. Glide will convert the data from your file into a new Glide Table.
Select the Data Editor icon.
On the left side of the Data Editor, select the plus (+) icon.
Select Import File > Excel or CSV.
When prompted, click on the arrow in Import Data From a File.
Select the file you want to use for your new table or simply drag and drop.
Glide converts your data file into a Glide Table and adds it to the list of tables available in your app's Data Editor.
Link an existing Glide Table to your app
To share information across apps in the same team, you can use Glide's Link Table feature. When you link a table from one app to another, any changes made to that table's data will also be reflected in your other apps that use the same table.
To reuse information contained in a Glide Table without syncing updates across each app, see Duplicate a Glide Table below.
To link a Glide Table to your app:
Select the Data Editor icon.
On the left side of the Data Editor, select the plus (+) icon.
Under Sync Data, select the Glide Tables data source.
When prompted, select the Glide Table(s) you want linked to your app and Link Table.
Your linked Glide Table will now appear in the Tables panel of the Data Editor.
Only the data in a table's Basic Columns can be shared and synced across apps. Computed Columns are not affected. When you link an existing Glide Table to an app, computed columns will not appear in your app's Data Editor. For more information, see Computed Columns.
How to unlink a Glide Table from your app
Select the Data Editor icon.
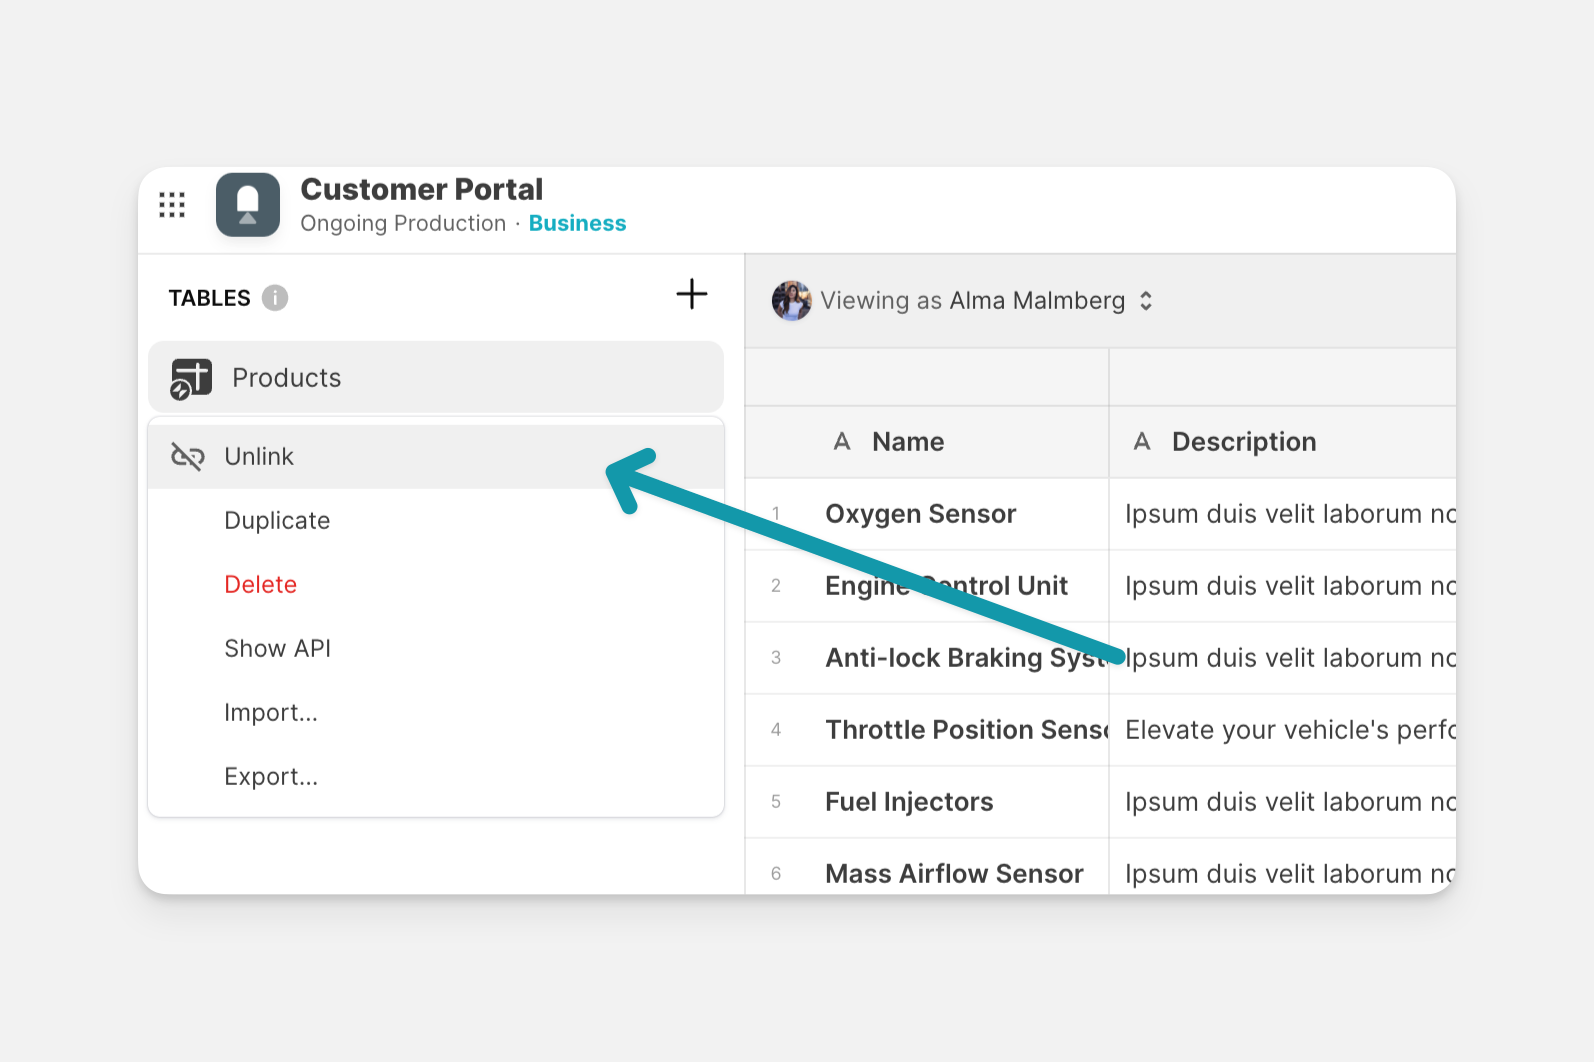
On the left side of the Data Editor, under Tables, right click on the name of the table.
Select Unlink.
Duplicate a Glide Table
If you want to reuse the data from an existing Glide Table but don't want the data to be synced across apps, use Duplicate.
Select the Data Editor icon.
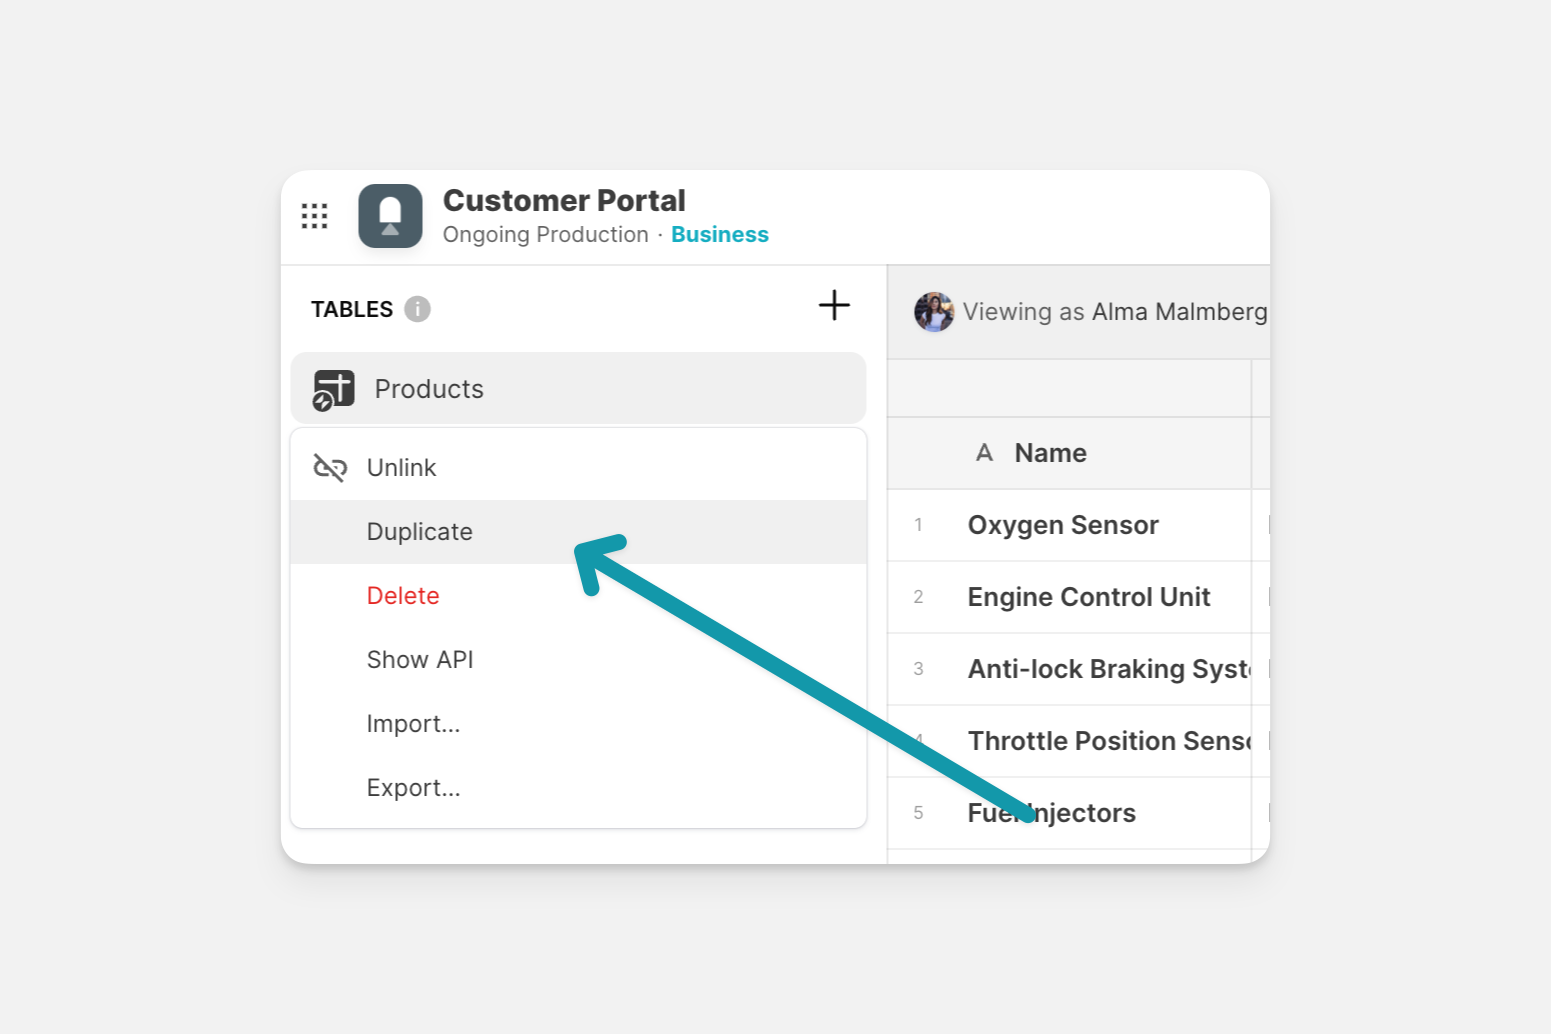
On the left side of the Data Editor, under Tables, right click on the name of the table.
Select Duplicate.
Glide creates a copy of the selected table and lists it in the Tables panel of the Data Editor.
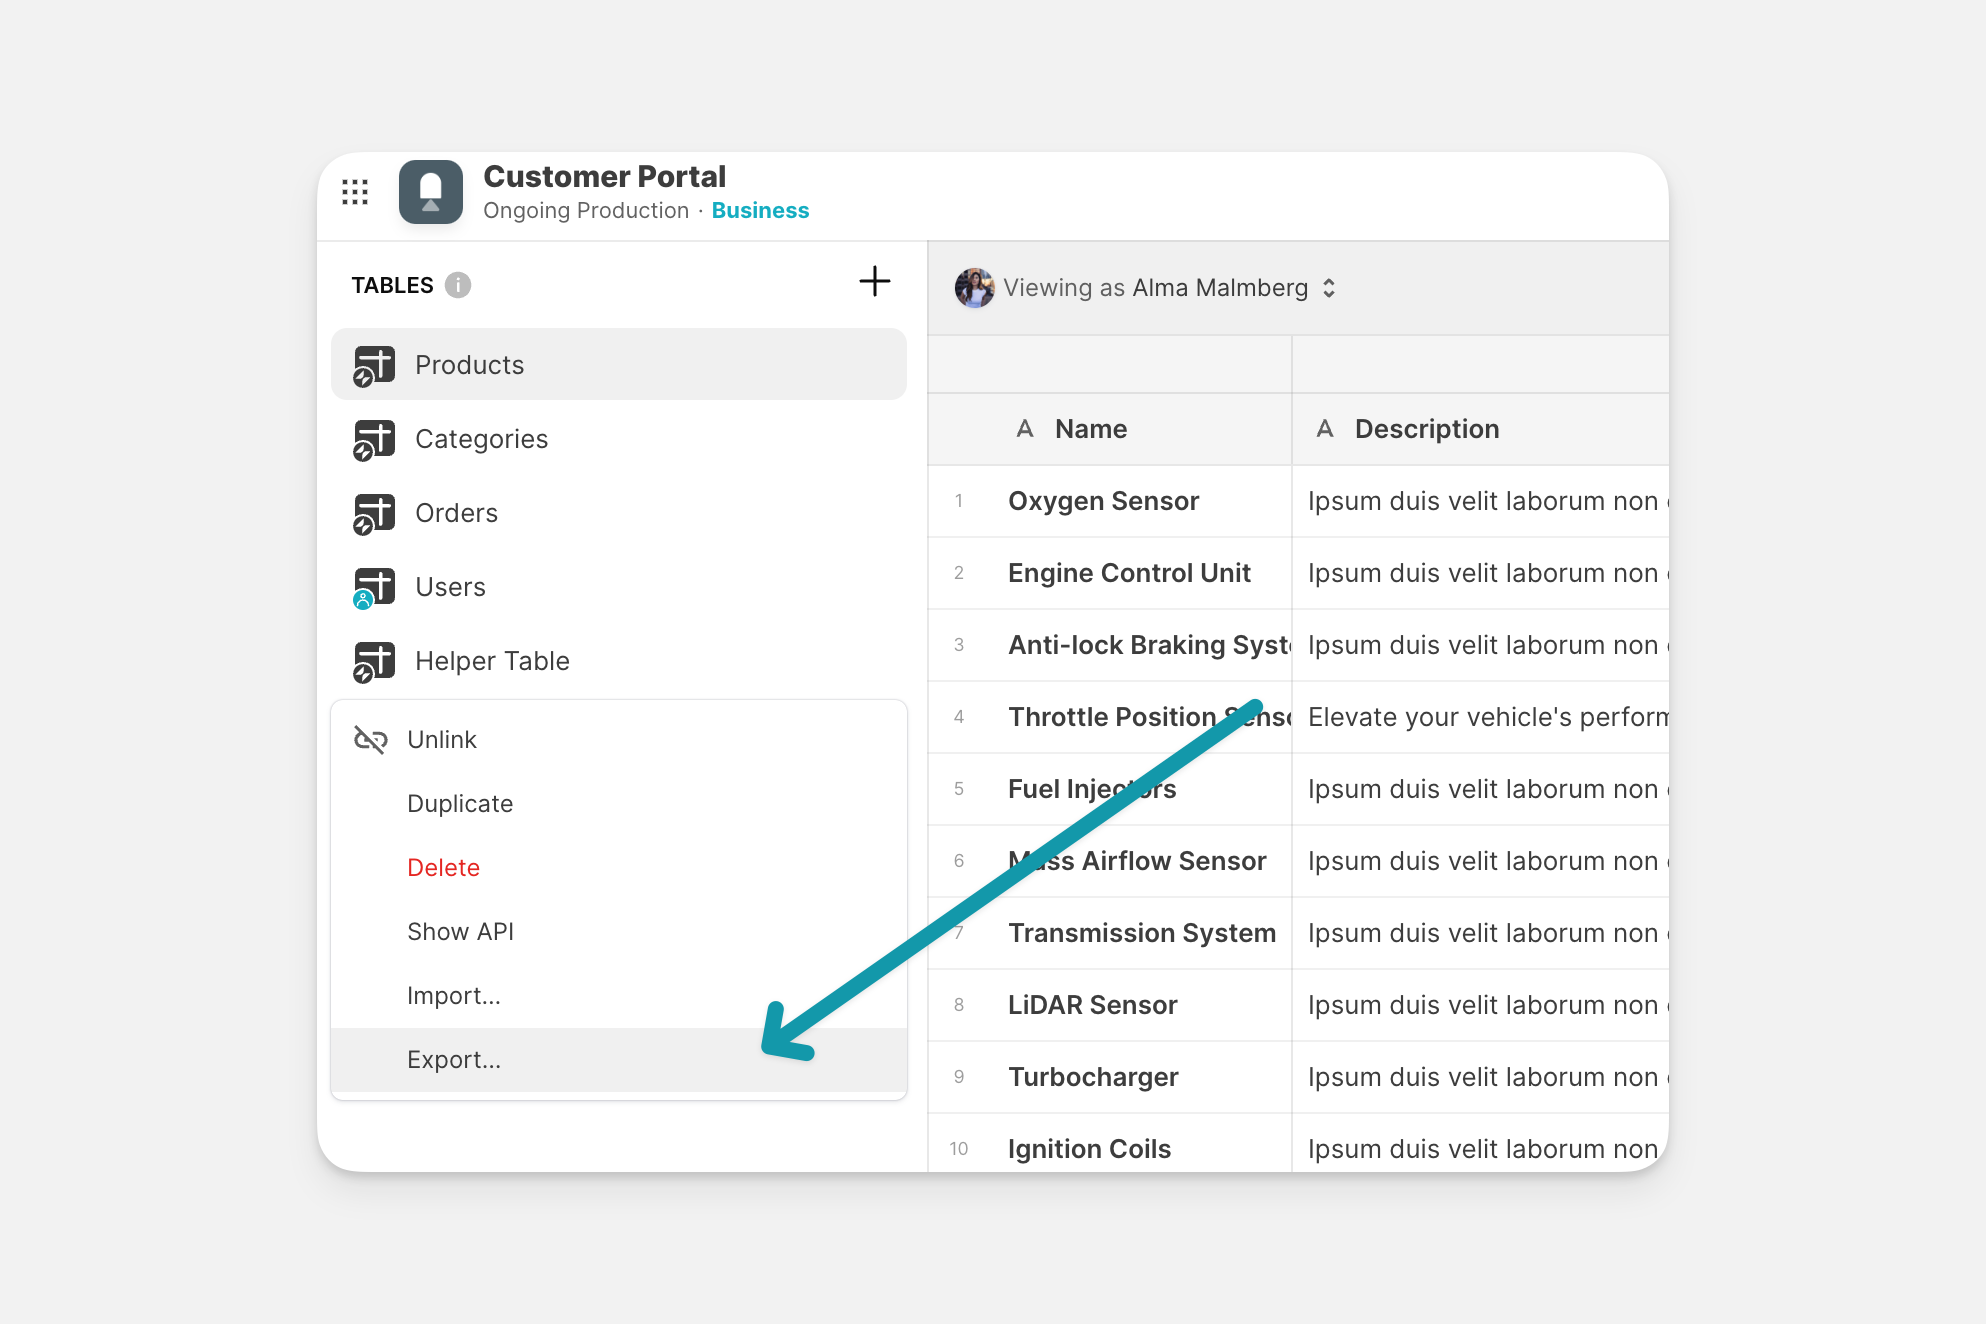
Export a Glide Table
To export a Glide Table as a .csv file:
Select the Data Editor icon.
On the left side of the Data Editor, under Tables, right click on the name of the table.
Select Export.
Choose which columns to include in the export, or select all.
Select Export.
A save dialog will open on your device. Choose where to save the export.
Export Limitations
Note that empty columns will not be exported. Computed columns that link to other tables will also not be exported.