
In the Quick Start guide, we went over the basics of creating, publishing, and sharing your first app. In this guide, we'll go into more depth, covering all the things you need to know about getting your apps out into the world.
Publishing
Publishing requires a paid plan
Publishing apps requires a paid plan. You can still build and preview your app in the builder. If you're on the Free plan and try to publish, you'll see a prompt to upgrade. Browse Glide's plans and find the right fit for you.
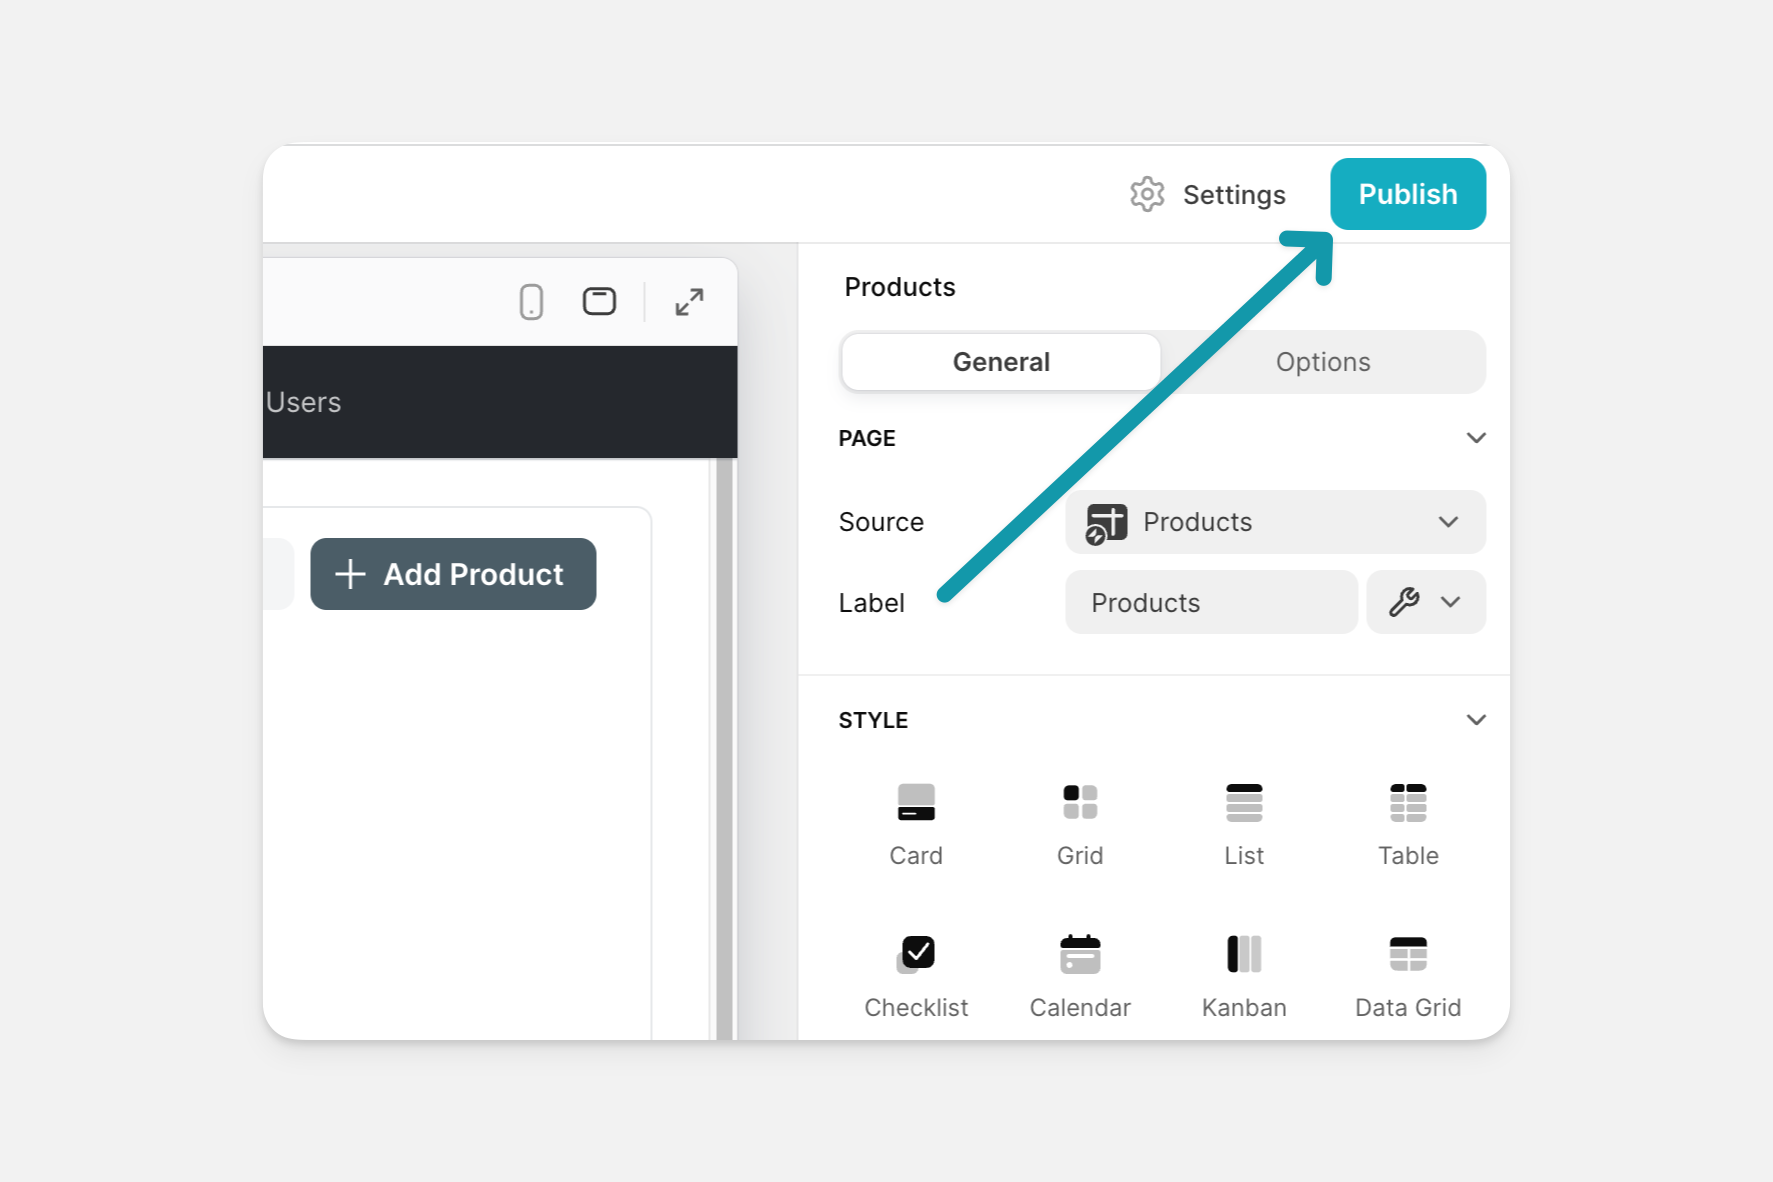
By default, all new apps are in draft mode. To publish your app, click the Publish button in the top right of Glide.
You'll then see a screen like this, where you can change your app's URL.
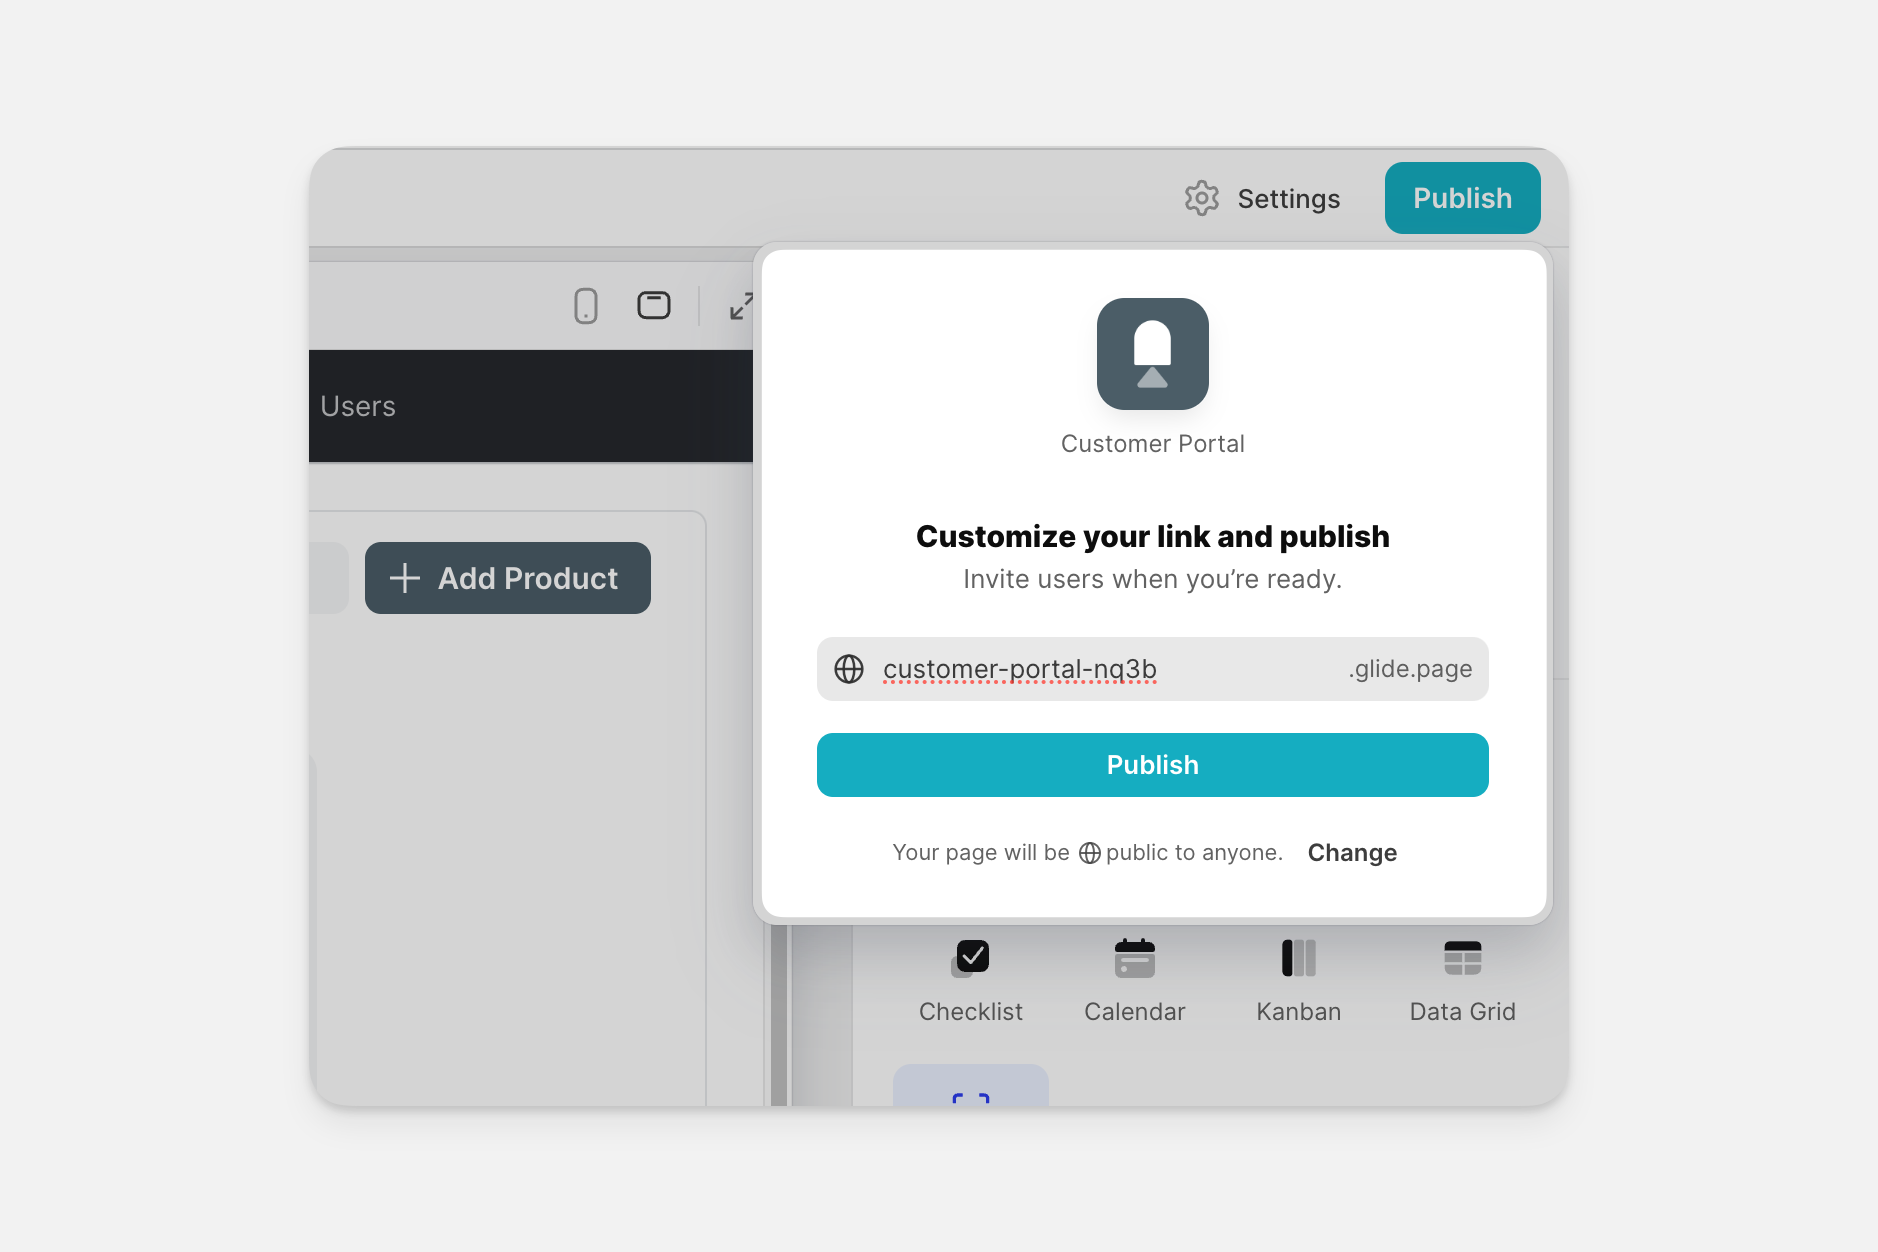
When you hit publish, you can see a screen where you can control auto-publishing, invite people to your app, or change the privacy settings. There is also a QR code that you can share with others. When people scan it with their phones, it will open your app in their browser.
Note that Glide apps are not indexed by search engines, so data from your app will not appear in searches on platforms like Google.
App URL
Your app gets an auto-generated unique URL by default. In the image above, you can see it's interesting-orange-1390.glideapp.io. You can change this to any domain or configure a custom domain like app.mycompany.com. You can also change your app's URL or name at any time, although you will have to send users the new link if you want them to continue to have access.
Publishing control
By default, auto-publishing is set to on. This means that any change you make to your app in the layout editor will be live. If you turn auto-publishing off, you can work on the layout of your app and then push those changes to be live when you're ready.
Apps with auto-publishing set to off have a dropdown in the publish button that shows this menu. From here, you can also discard any changes you made since the last publish if you don't want these changes to reflect in your app.
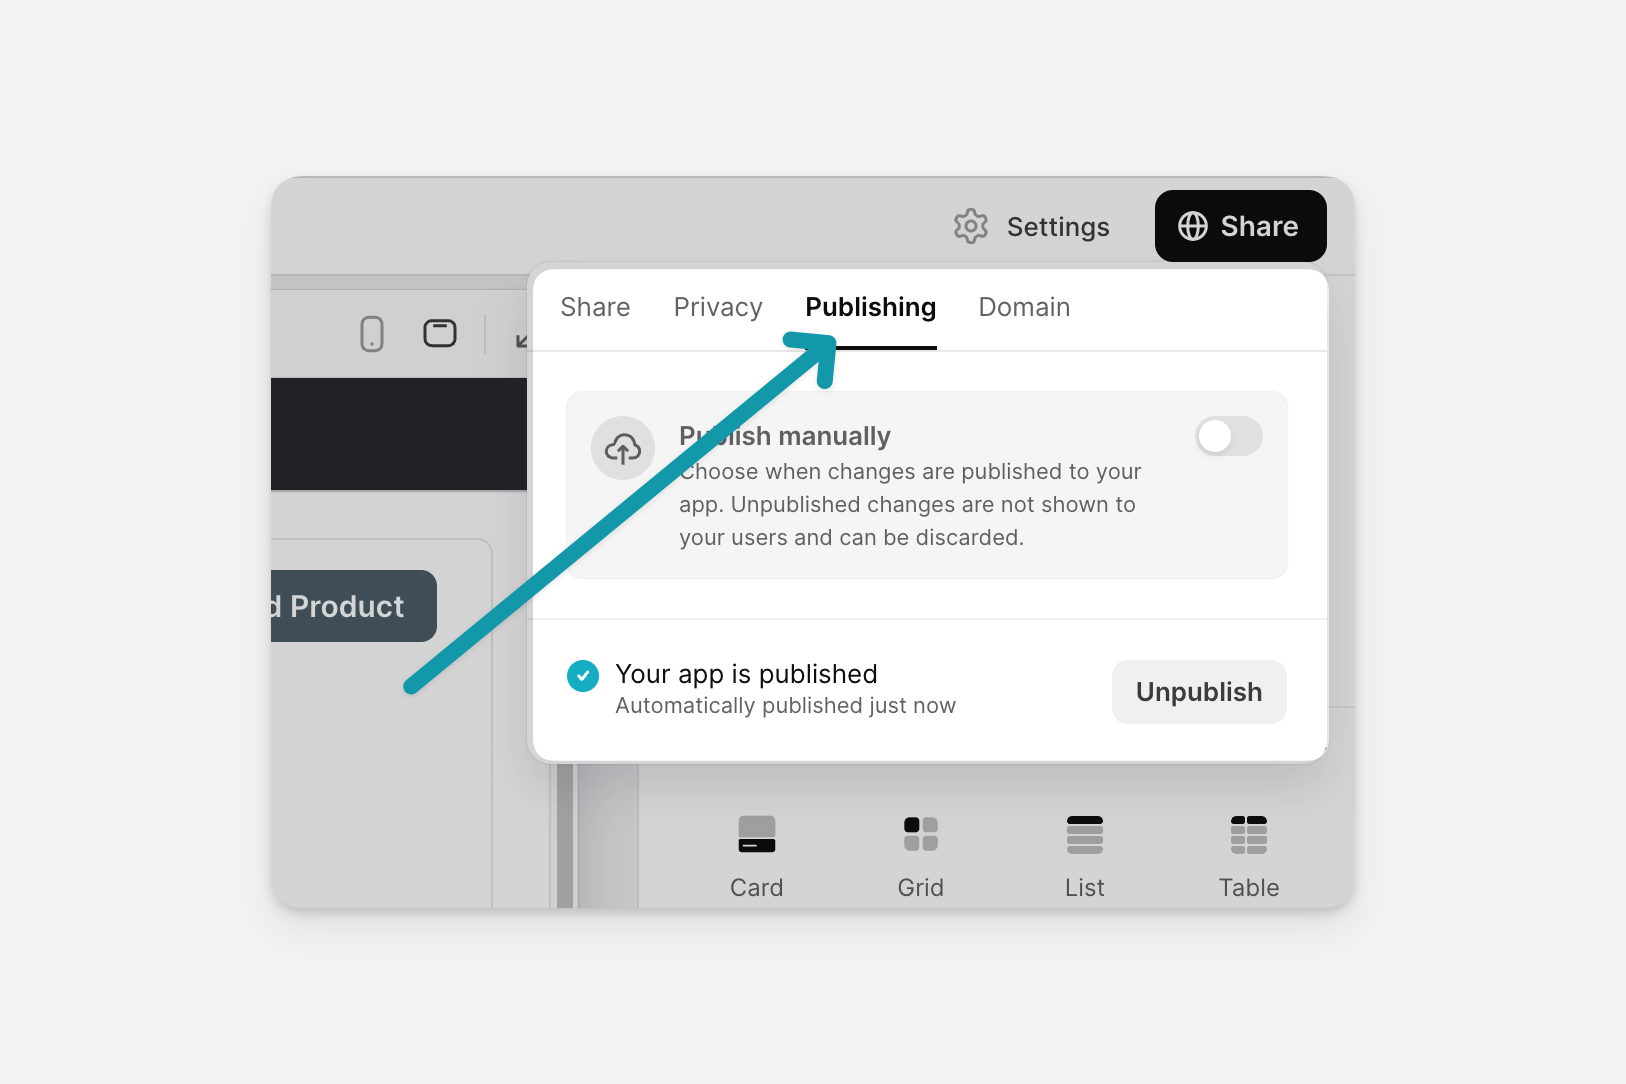
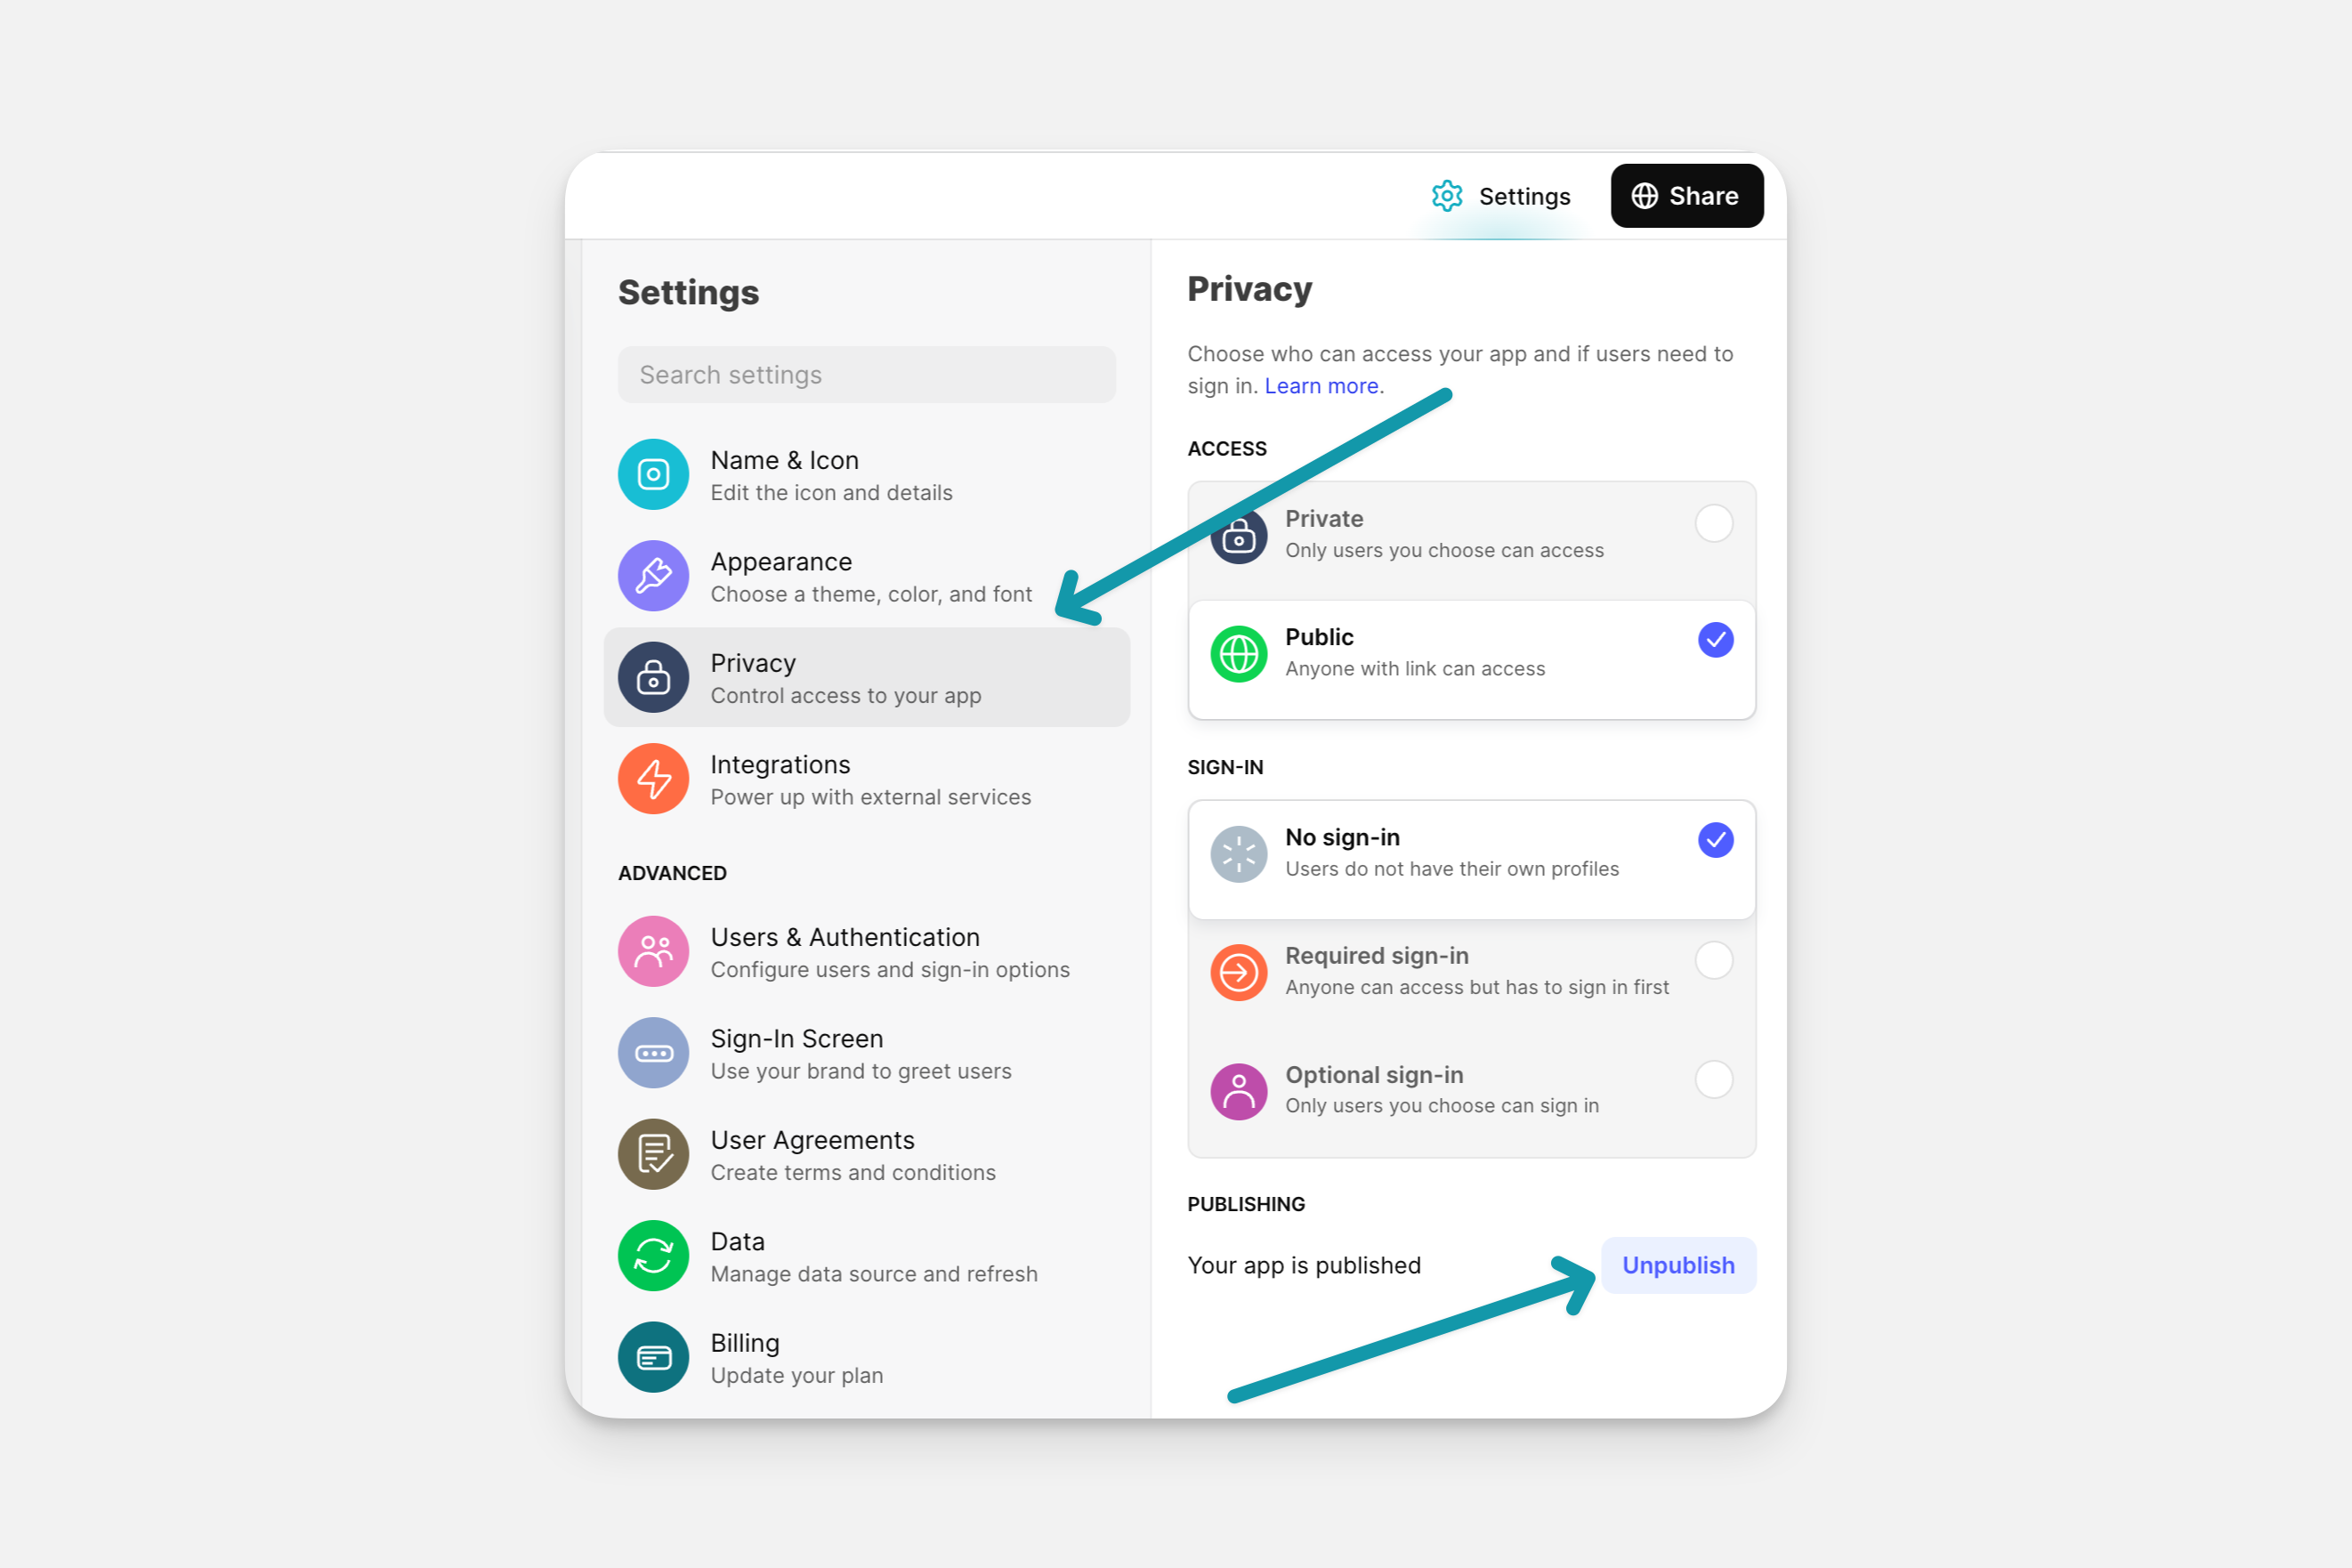
You can also unpublish your app if you need to. There are two places you can do this from: the Privacy menu in Settings, or the Publishing tab under the Share button. When you unpublish an app, all users will lose access to it. However, if you re-publish it, they will be able to use it again as before.
Discard Changes only reverts layout changes; it does not affect data, workflows, or any changes made in the Data Editor. After discarding changes, you'll need to reload the app in the builder to see the reverted layout.
Sharing
Links
Glide apps live on the web, so you can share them with just a link. This makes them much easier to share and update than regular App or Play Store apps.
You can share your app's URL with anyone, and they can open it on any device.
Installing on mobile
To install an app on your phone or tablet, you need to add it to your home screen.
Installing on Mac
Glide Apps can also be added to your dock from either Safari or Chrome.
In Safari, open your app and click the share icon in the upper right corner. Select Add to Dock and name the app. Click Done, and the app will appear in your dock.
In Chrome, open your app and click the Install icon in the URL bar. Select Install and then pin the app to your dock by right clicking on the app and navigating to Options -> Keep in Dock.
Inviting users
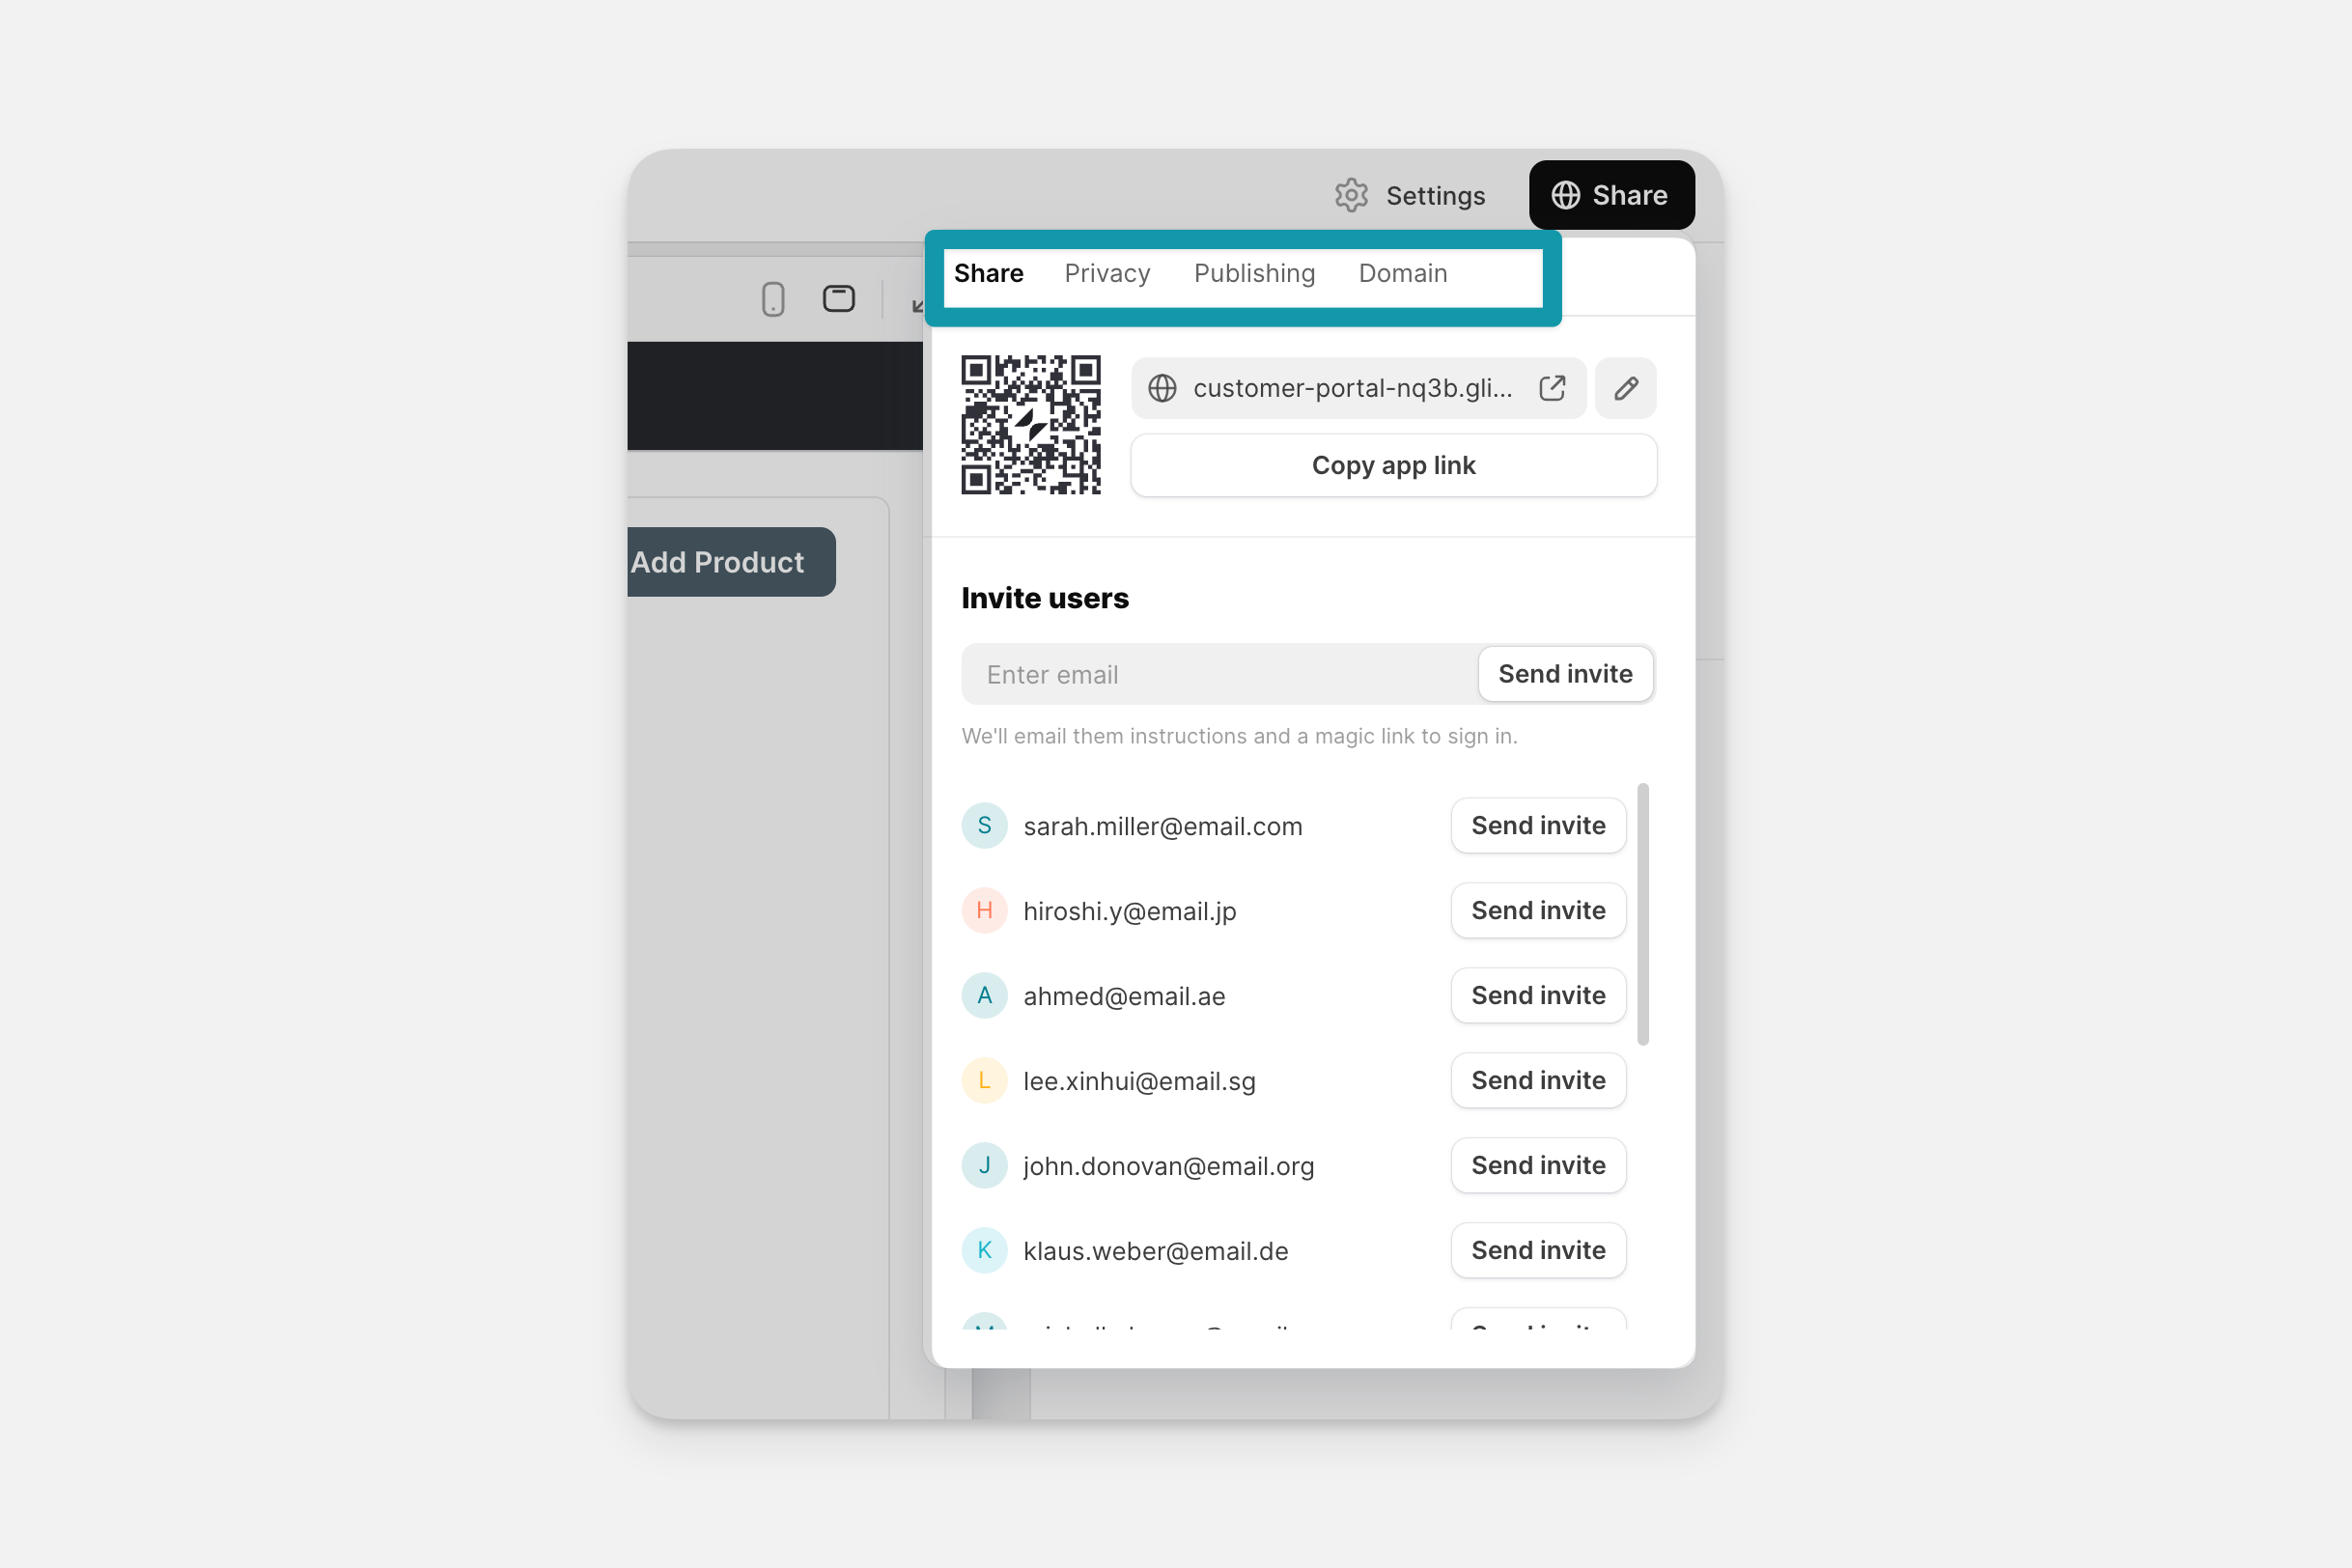
You can invite people to your app by using the publish/share screen. Here, you can enter the emails of all the users you want in your app. This will add them to the Users Table.
You can bring up this screen whenever you need using the share button on the top right of Glide.
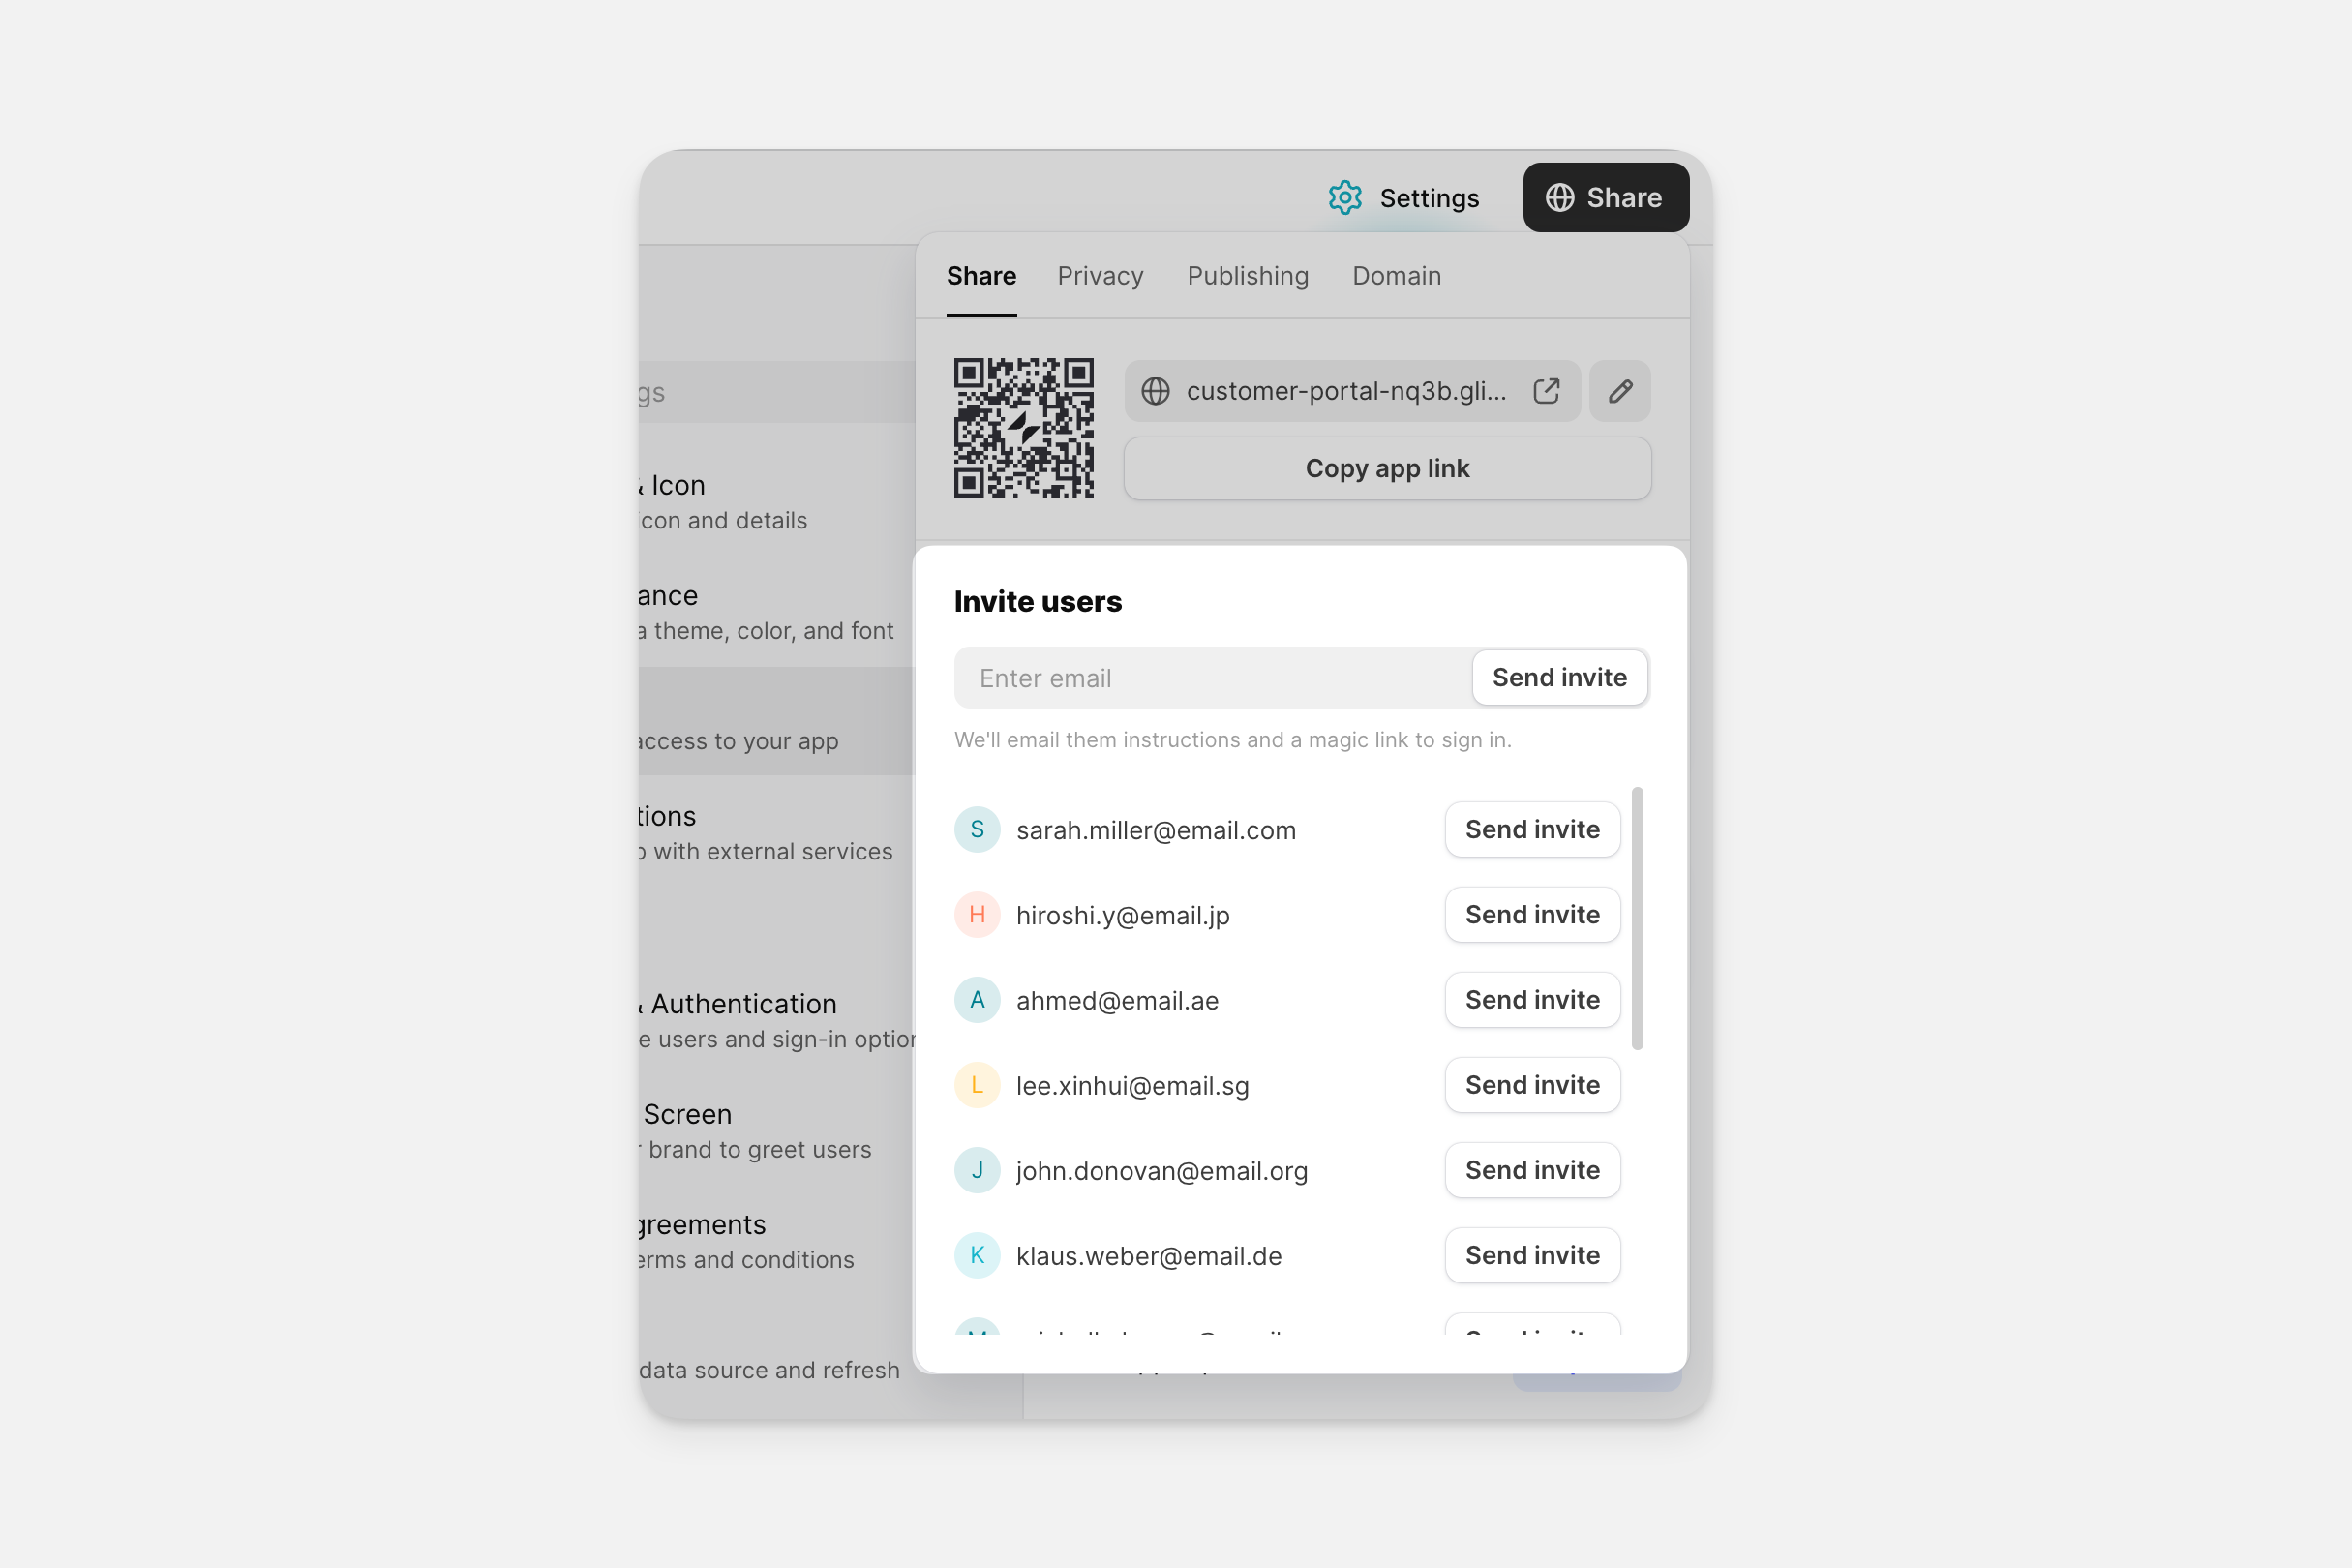
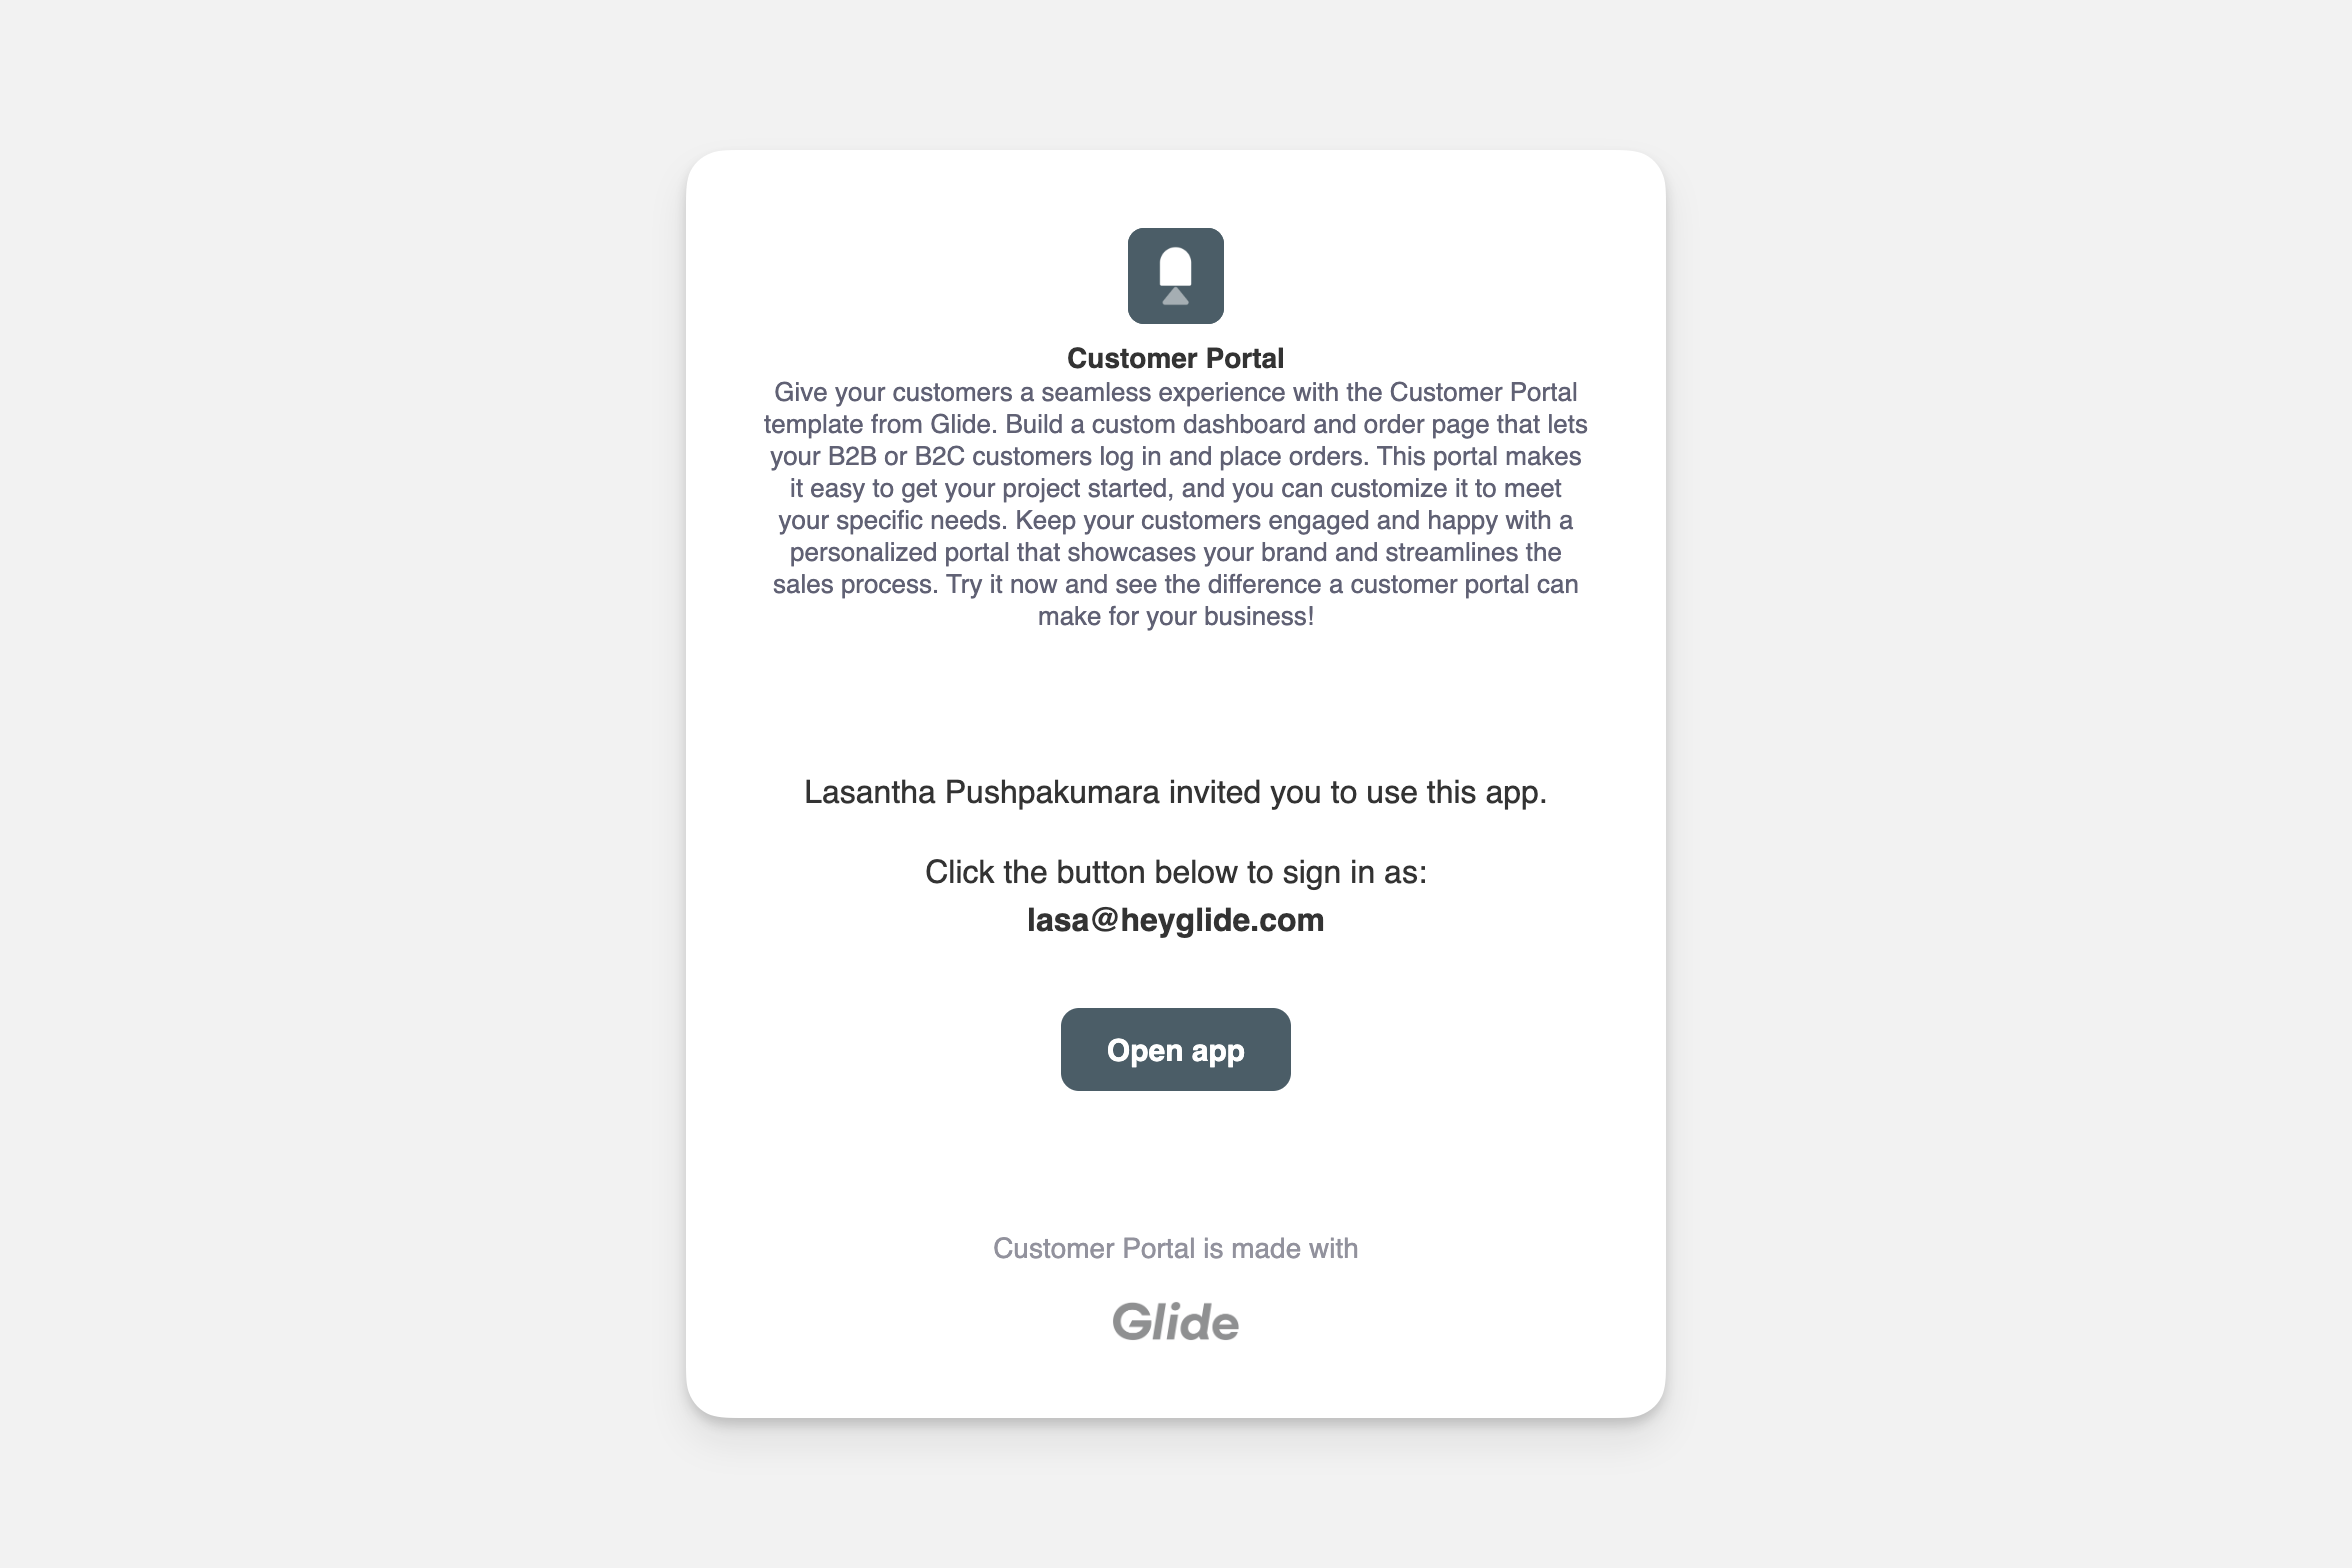
They'll get an email with a magic link, allowing them to immediately log in automatically, regardless of the privacy and sign-in settings you've set up.
Privacy Settings
It's important to choose the right privacy setting for your app. It you want to make your app safe and secure, check out our security guide.