
If your app has data that some, but not all, users should access, then you should use Row Owners to protect that data.
Anyone who can sign in to your app can see the data it downloads or stores in the data source, either in your app's user interface or by inspecting network traffic with common tools such as a browser's developer console.
Row Owners lets you restrict who can download or access data based on the email address they use to sign in. If a sheet has Row Owners enabled, then the current user can only download rows that they own. Glide's servers will prevent the user from downloading rows that they do not own, so they can't read those rows by inspecting network traffic or by any other means.
This feature is free to use and available for all Glide apps.
If your app has a User Profiles table, where each user should access their own profile row but not the profile rows of other users, you should enable Row Owners on that table. Here are some examples and strategies to help you apply this to your apps.
Multiple Columns as Row Owners
If you set multiple columns in your app as Row Owners, this will create an OR condition for row ownership. Either column member will be able to access the row.
Example 1: User Profiles
In the app below, there are two tables for staff. One is the for public profiles, and the other is for User Profiles.
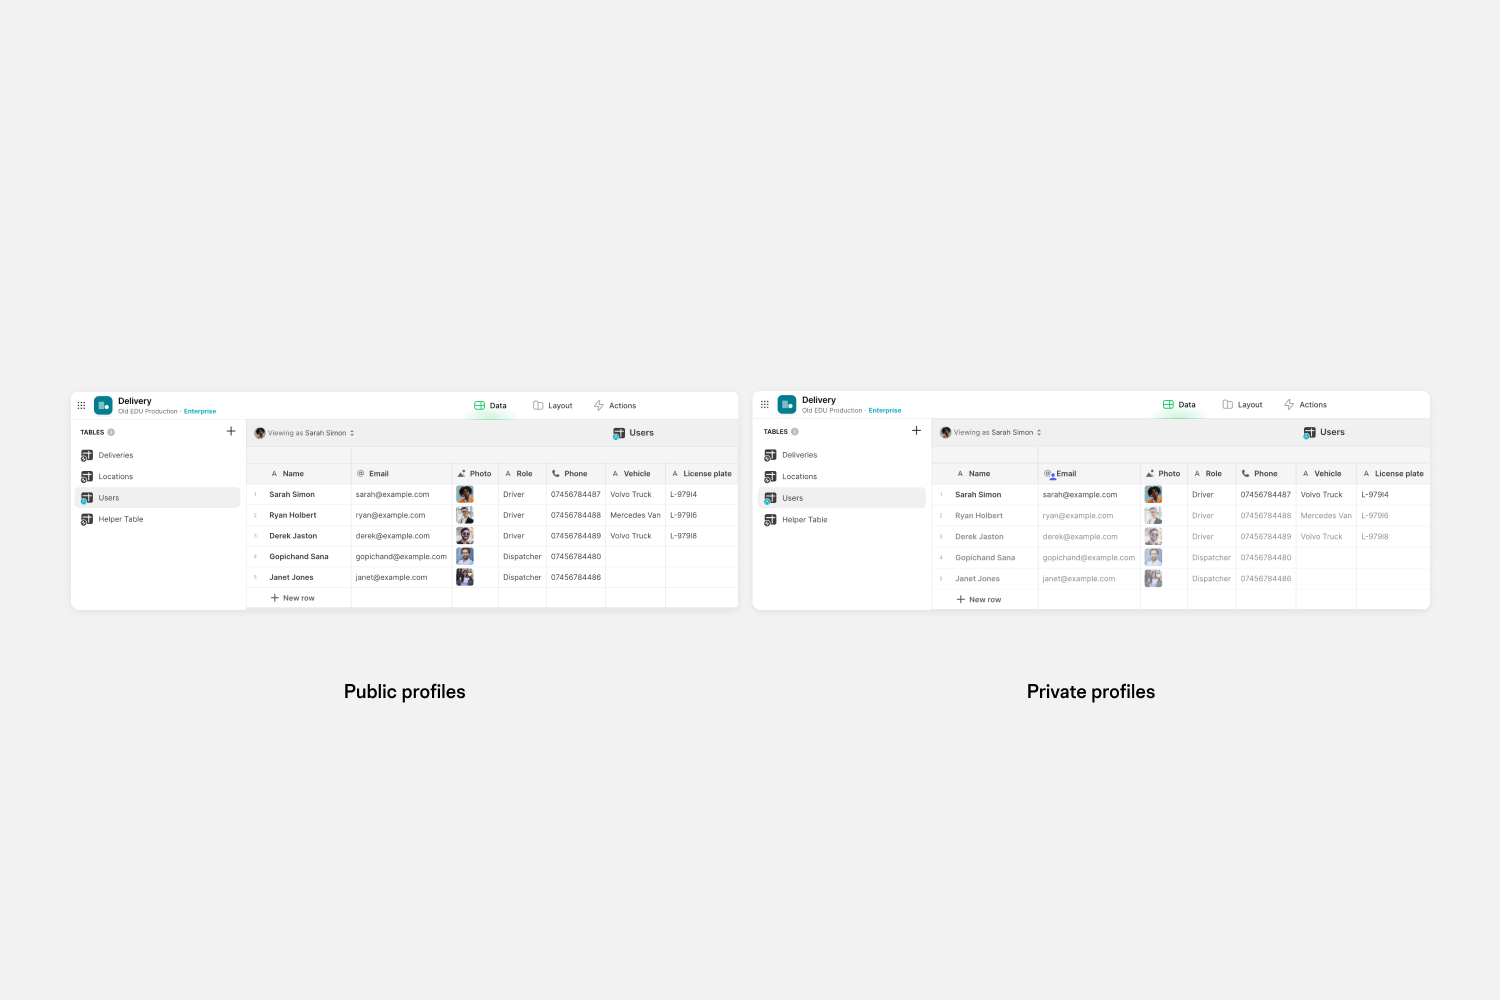
The public profiles table is used to display public profiles in the app. None of the data is private here (Name, Title, etc.), so we can just display it in a list layout (below left).
The User Profiles table however has private data on it (Social Security, Date of Birth, etc.) so Row Owners is enabled. The app will only access data for the currently signed-in user, and no other user data will be accessed. Therefore, only the row belonging to the currently signed-in user shows.
In this scenario, the user who is the row owner can access and add/edit data for their specific row, but no one else's.
Mirroring columns across sheets for different views
You want a "My Profile" tab where employees can edit their own private data and then a "Directory" tab where everyone can see the basic information for each employee.
Because Row Owners protects the entire row, this means we can't use Row Owners in the table powering our Directory tab.
We could manually maintain two separate tables (one with public staff information and the other with User Profiles), but this is arduous and easy to make mistakes.
Instead, we can mirror the non-private columns from the User Profiles sheet and display them in a second sheet. Then we can show the data in the non-private sheet without Row Owners.
We can do this using =ARRAYFORMULA. In the image below you can see the two sheets. The top-left cell of the Staff sheet is using =ARRAYFORMULA('User Profiles'!A1:H) to mirror the non-private columns in the User Profiles sheet. The Staff sheet is then displayed as public Company Directory data.
Example 2: Protecting an entire sheet for an admin
You may have an entire sheet that has private information that you only want to be visible by one admin user. To do this, you just need to make sure that every row in that sheet has the admin's email in an email column, and then make that column a Row Owners column.
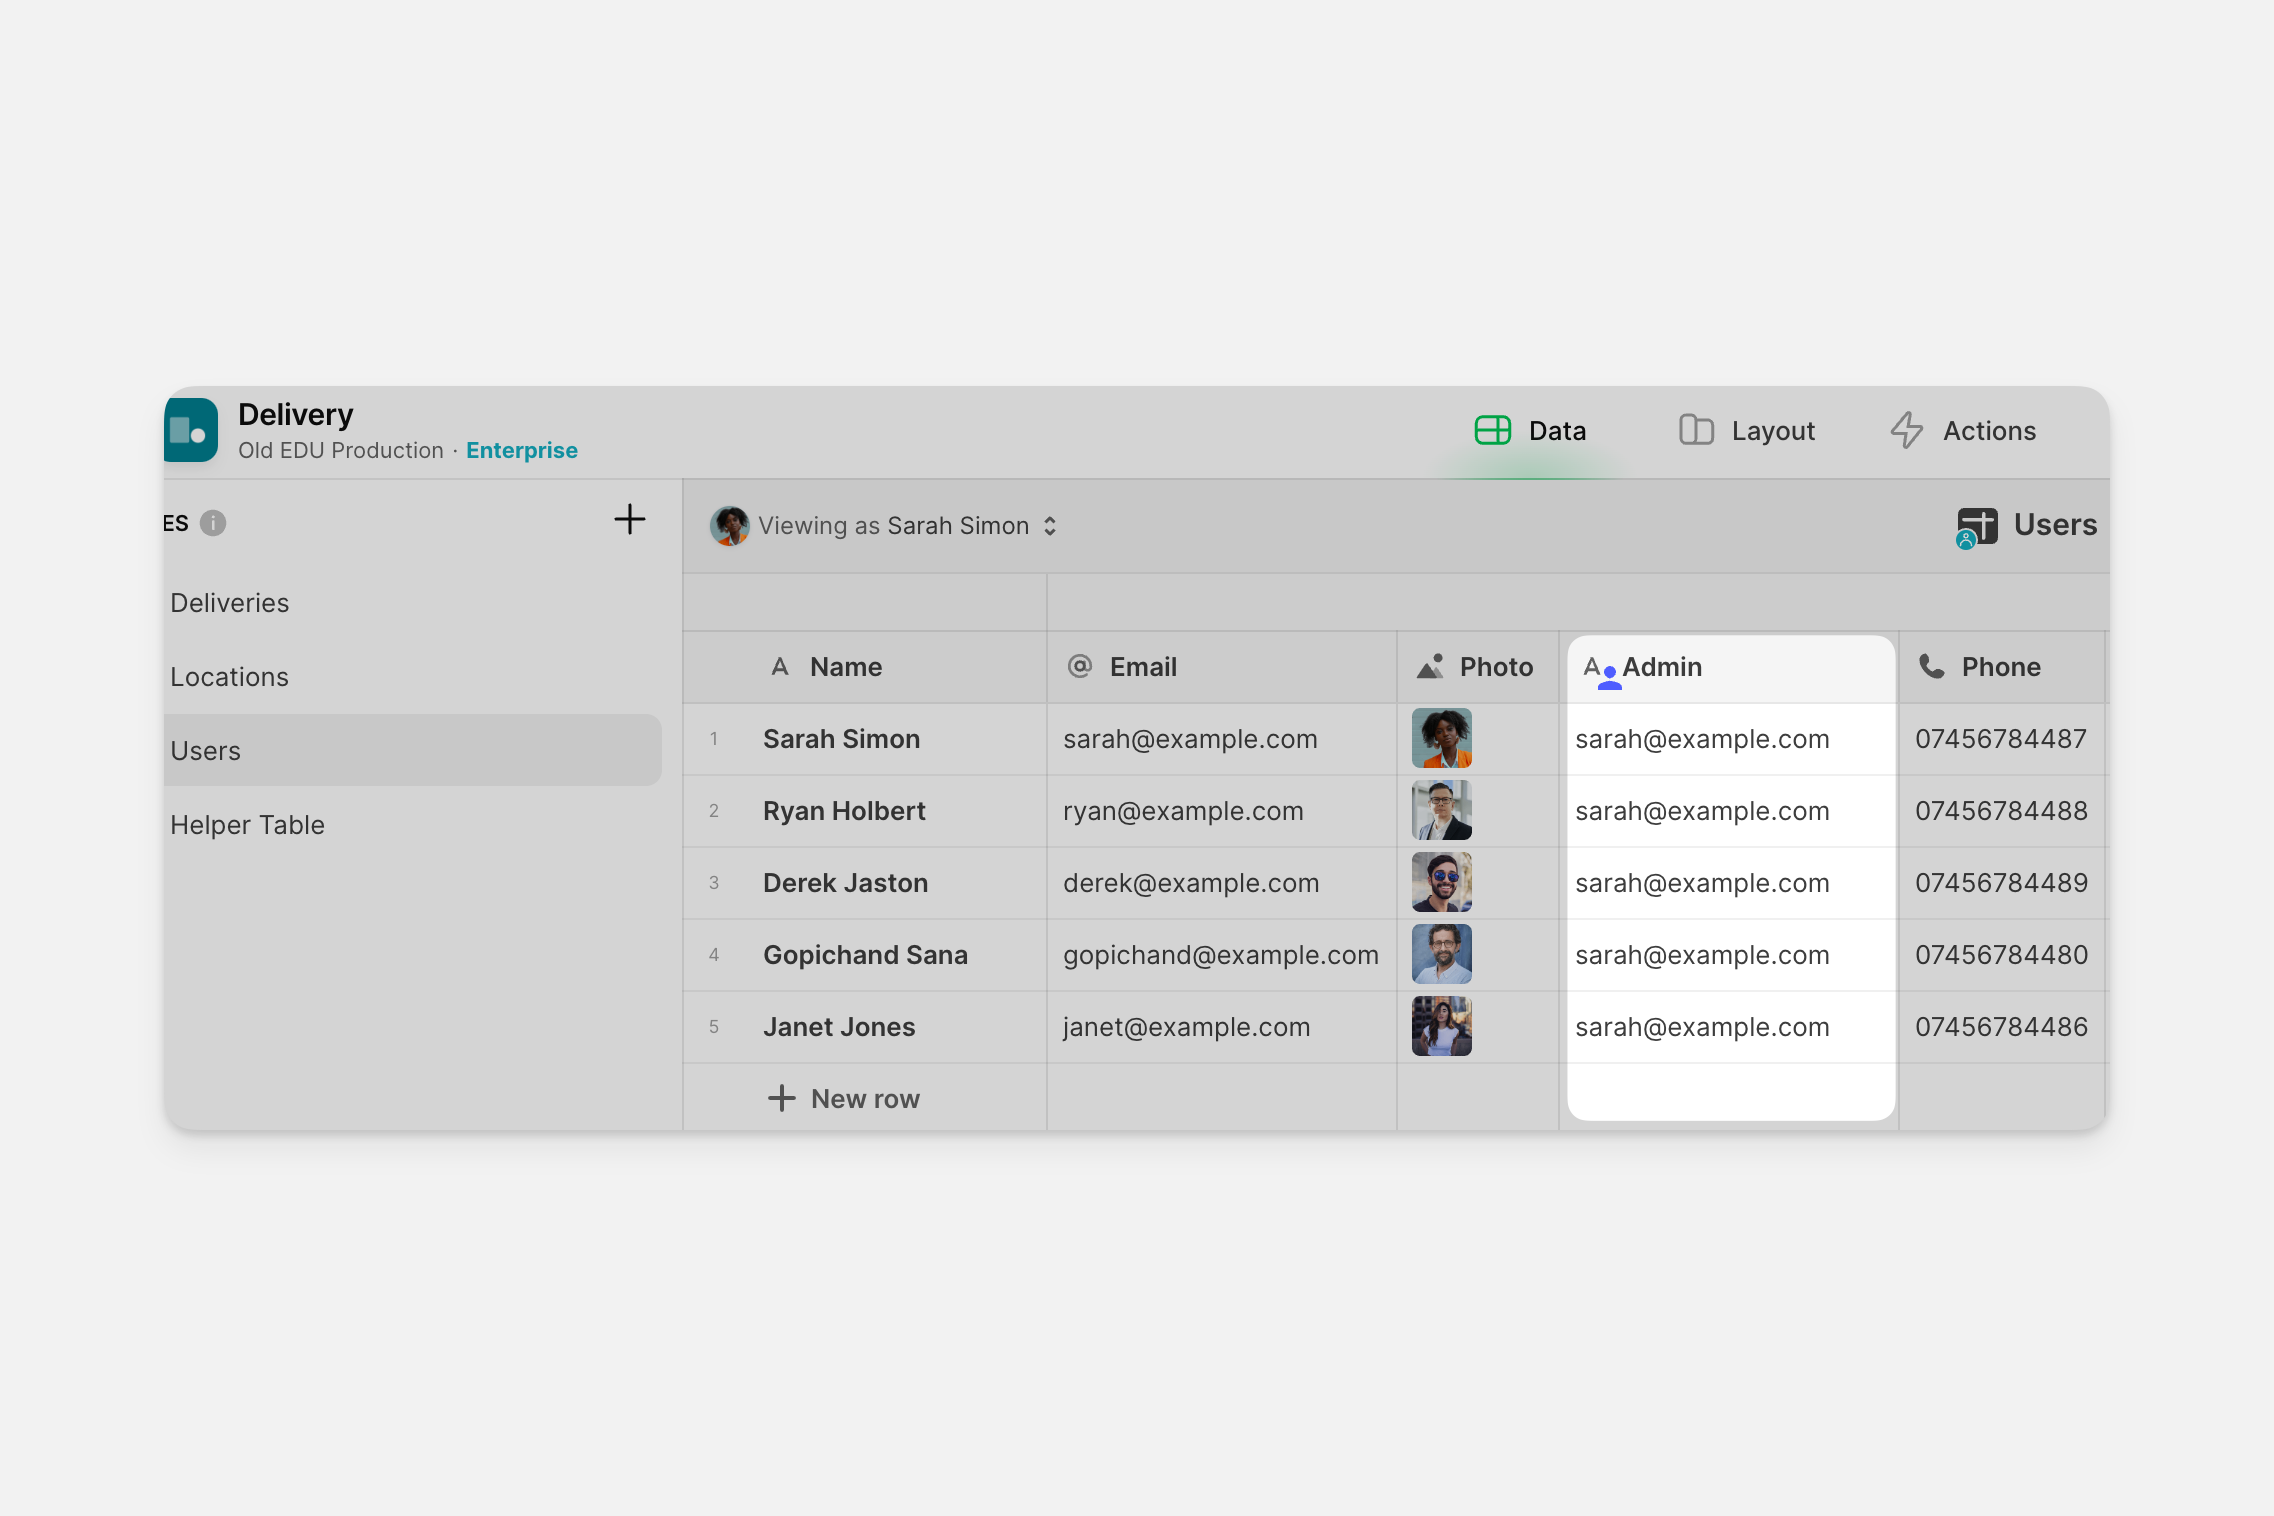
Now the only person who will be able to download that sheet's data is the person who's email you've added in the Row Owner's column.
Protect a sheet
If you are trying to protect a sheet that has new rows added often, then you'll want to use ARRAYFORMULA to automatically add the admin's email to new rows.
Example 3: Assigning multiple Row Owners
You may want multiple owners for certain rows. With Row Owners, there are two ways of doing this:
If your app uses Google Sheets as its data source, you can use an Array Column containing multiple emails or multiple roles, and assign that as the Row Owner. Once this column is a Row Owner, each of the emails or roles in the array will be able to access the row’s data. You can also configure this column as the as the role source column for user profiles.
To make an Array Column in Google Sheets, create columns with the same name and then number each one sequentially. It’s important that each column has the same exact text and then the next number in each column. For example, Email 1, Email 2, and Email 3.

Making multiple users row owners.
You can also make more than one column a row owner column. For example, in the table below, there is a second email column that contains an administrator's email in each row. This way, each individual user is a row owner for their row, and the administrator is also a row owner. This approach will work for any data source that is linked to your app if you need to assign multiple emails as the row owner.

Enable Row Owners
Above all, enable Row Owners wherever you can. We recommend turning on Row Owners for any sheet you can, even if you don't yet have plans to use that data in your app. This will prepare your data to be secure in the event that you decide to use it in your app later.