
Introduction
Conditions appear in many places in Glide and are used in different ways. You can use Conditions to do things like:
Show all the items with status marked as completed
Hide a component if the user is not an admin
Notify your team in Slack if an order is bigger than $10K
Show the delete button only if a user has the right privileges
There are different situations where you can use conditions:
Filtering lets you filter out records from your collections. If you don't want everything in your data source to show, you'll need this.
Visibility lets you hide tabs and components. You should use this if there are certain screens or functionality that you don't want all users to have access to.
You can also create conditions that affect who can add and edit data, and when they can do so.
Filtering and Visibility conditions are NOT security features. When you hide tabs, components, or filter out items in lists, the data is still accessible on the user's device. Read our Security Guide to learn how to protect sensitive data.
Filtering
Filtering a collection
By default, Collections show all the rows coming from your data source. However, you can set filters to choose which rows should appear. To filter items out of a collection, visit the component's options panel.
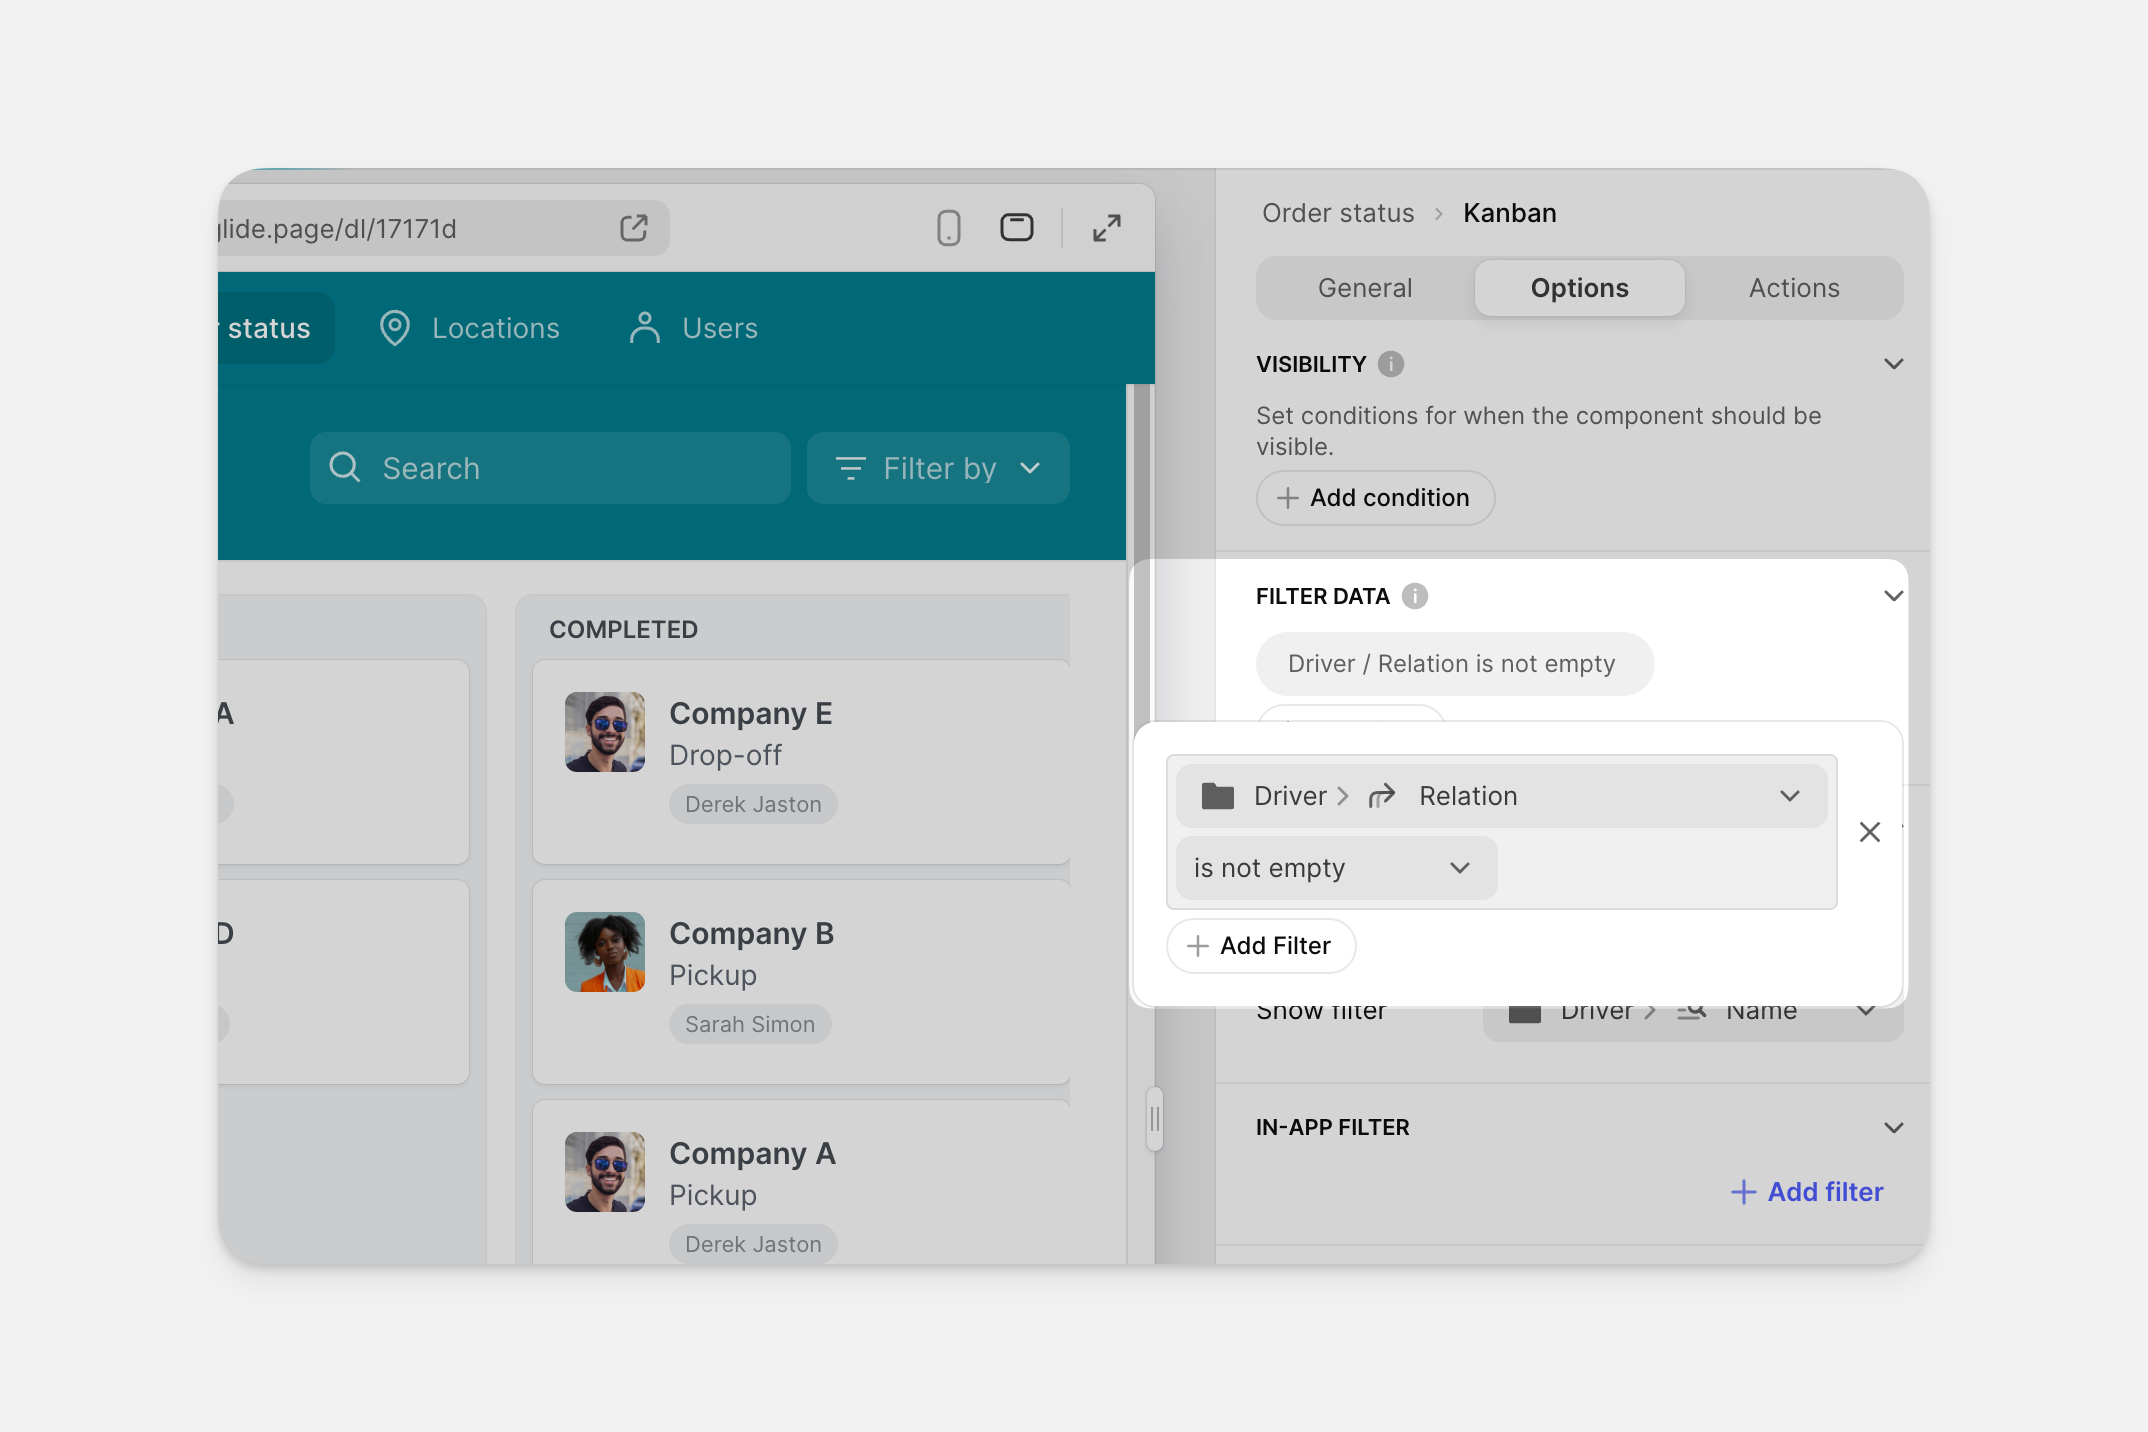
To set a filter, click +Add Filter in the Options section on the right of the Layout Editor. A new filter will be added by default.
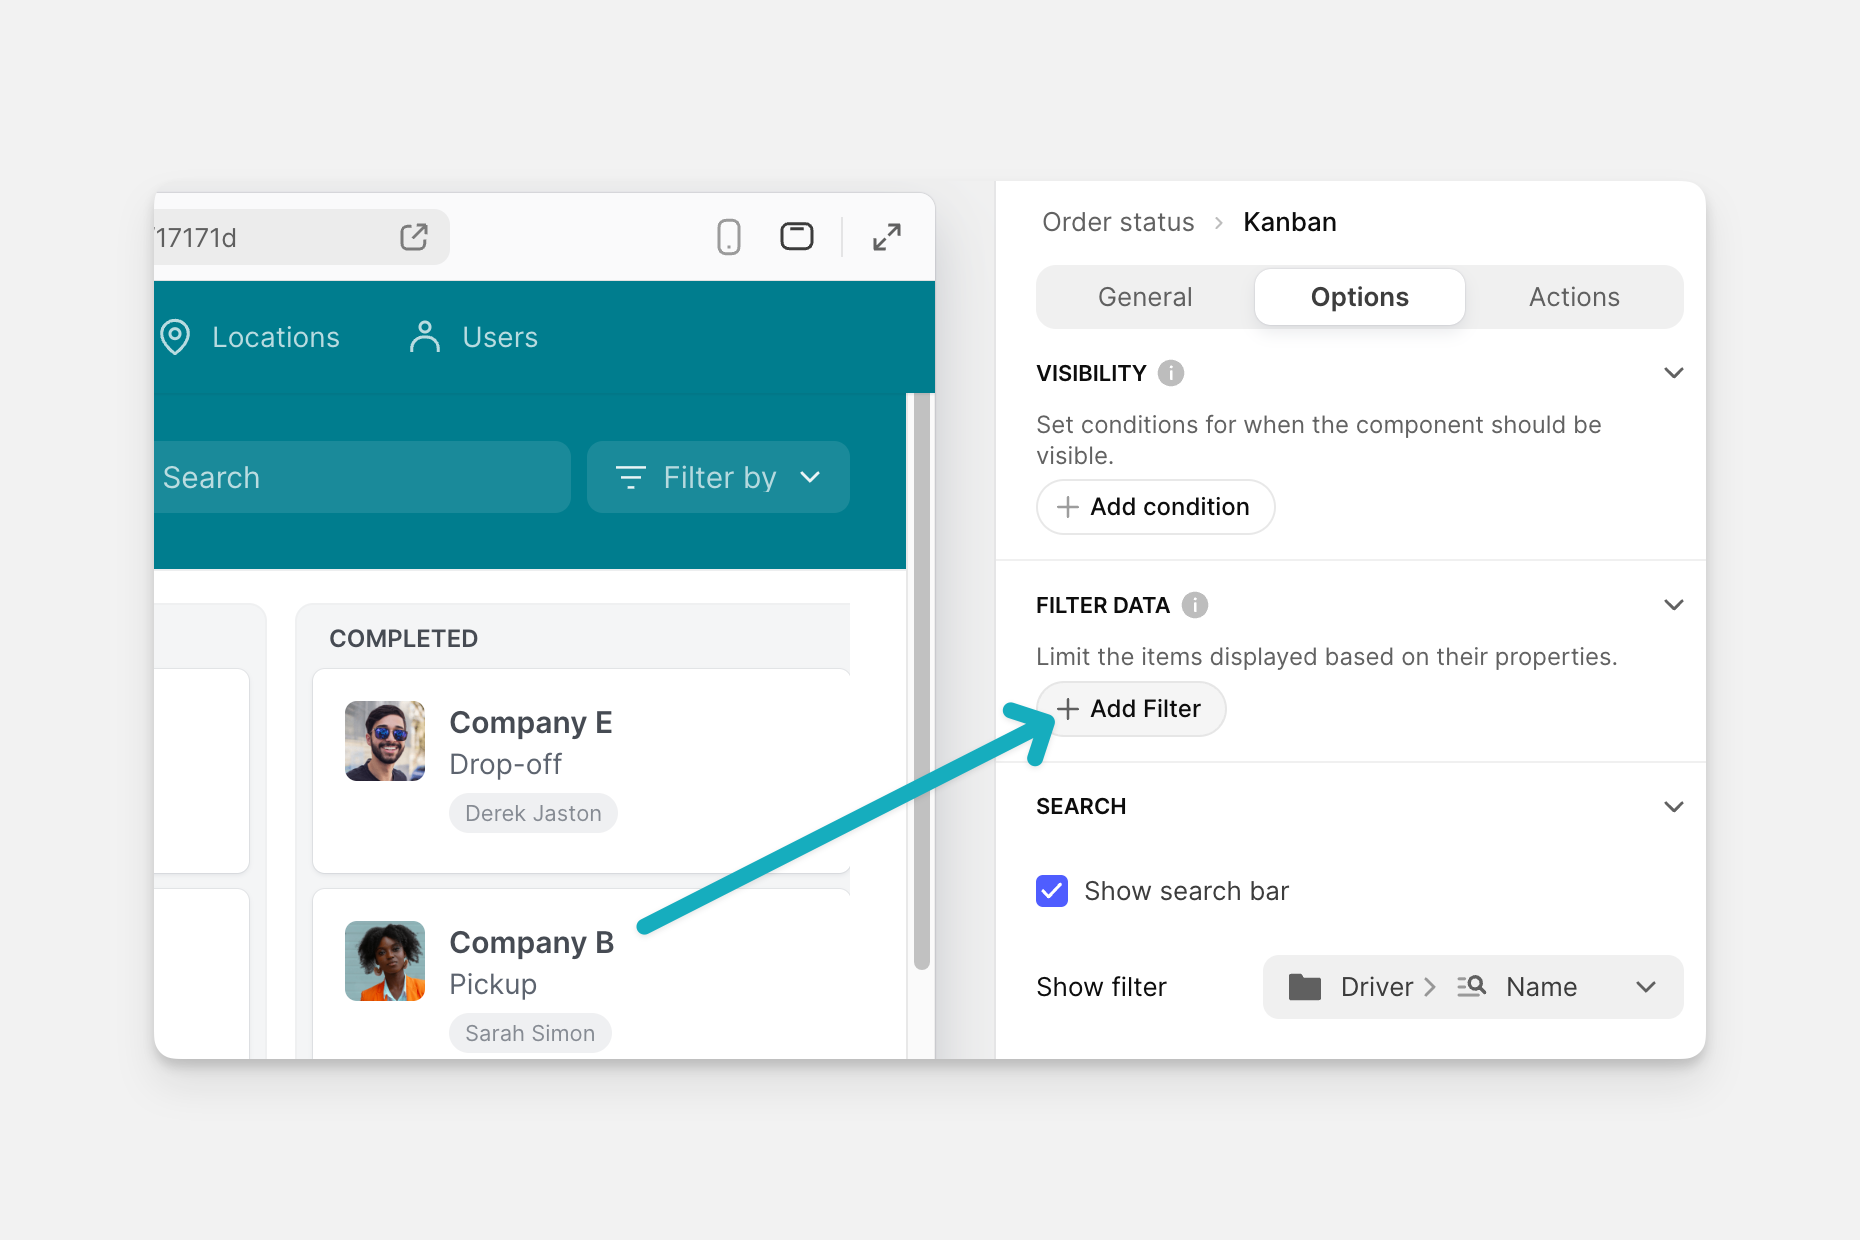
The app below has a filter that shows only the Order Status where the driver relation is not empty.
You can use the same table as a source in multiple tabs and then filter each one in different ways. For example, the app below shows the same product list in three different tabs. Each tab has the same source table, but each one is filtered to show only the products belonging to a specific category.
Multiple filters
You can use multiple filters on a list with AND + OR logic. The example below applies two filters to the list of products. It shows only items where the product category is 'Connectors' and the stock level is greater than 500.
Custom vs Column Values
You'll notice that all the previous examples had custom values in the final part of the condition. But if you click the three dots in that field, you'll have access to column values, user-profile values, and potentially even more.
To learn more about the types of values, check out the values guide.
Visibility
Tab Visibility
You can hide and show different tabs based on User Profile data.
To do this, you can add conditions in the Options section of each tab on the right of the Layout Editor. For example, in the app below, the Orders tab will only show users who have the role of admin.
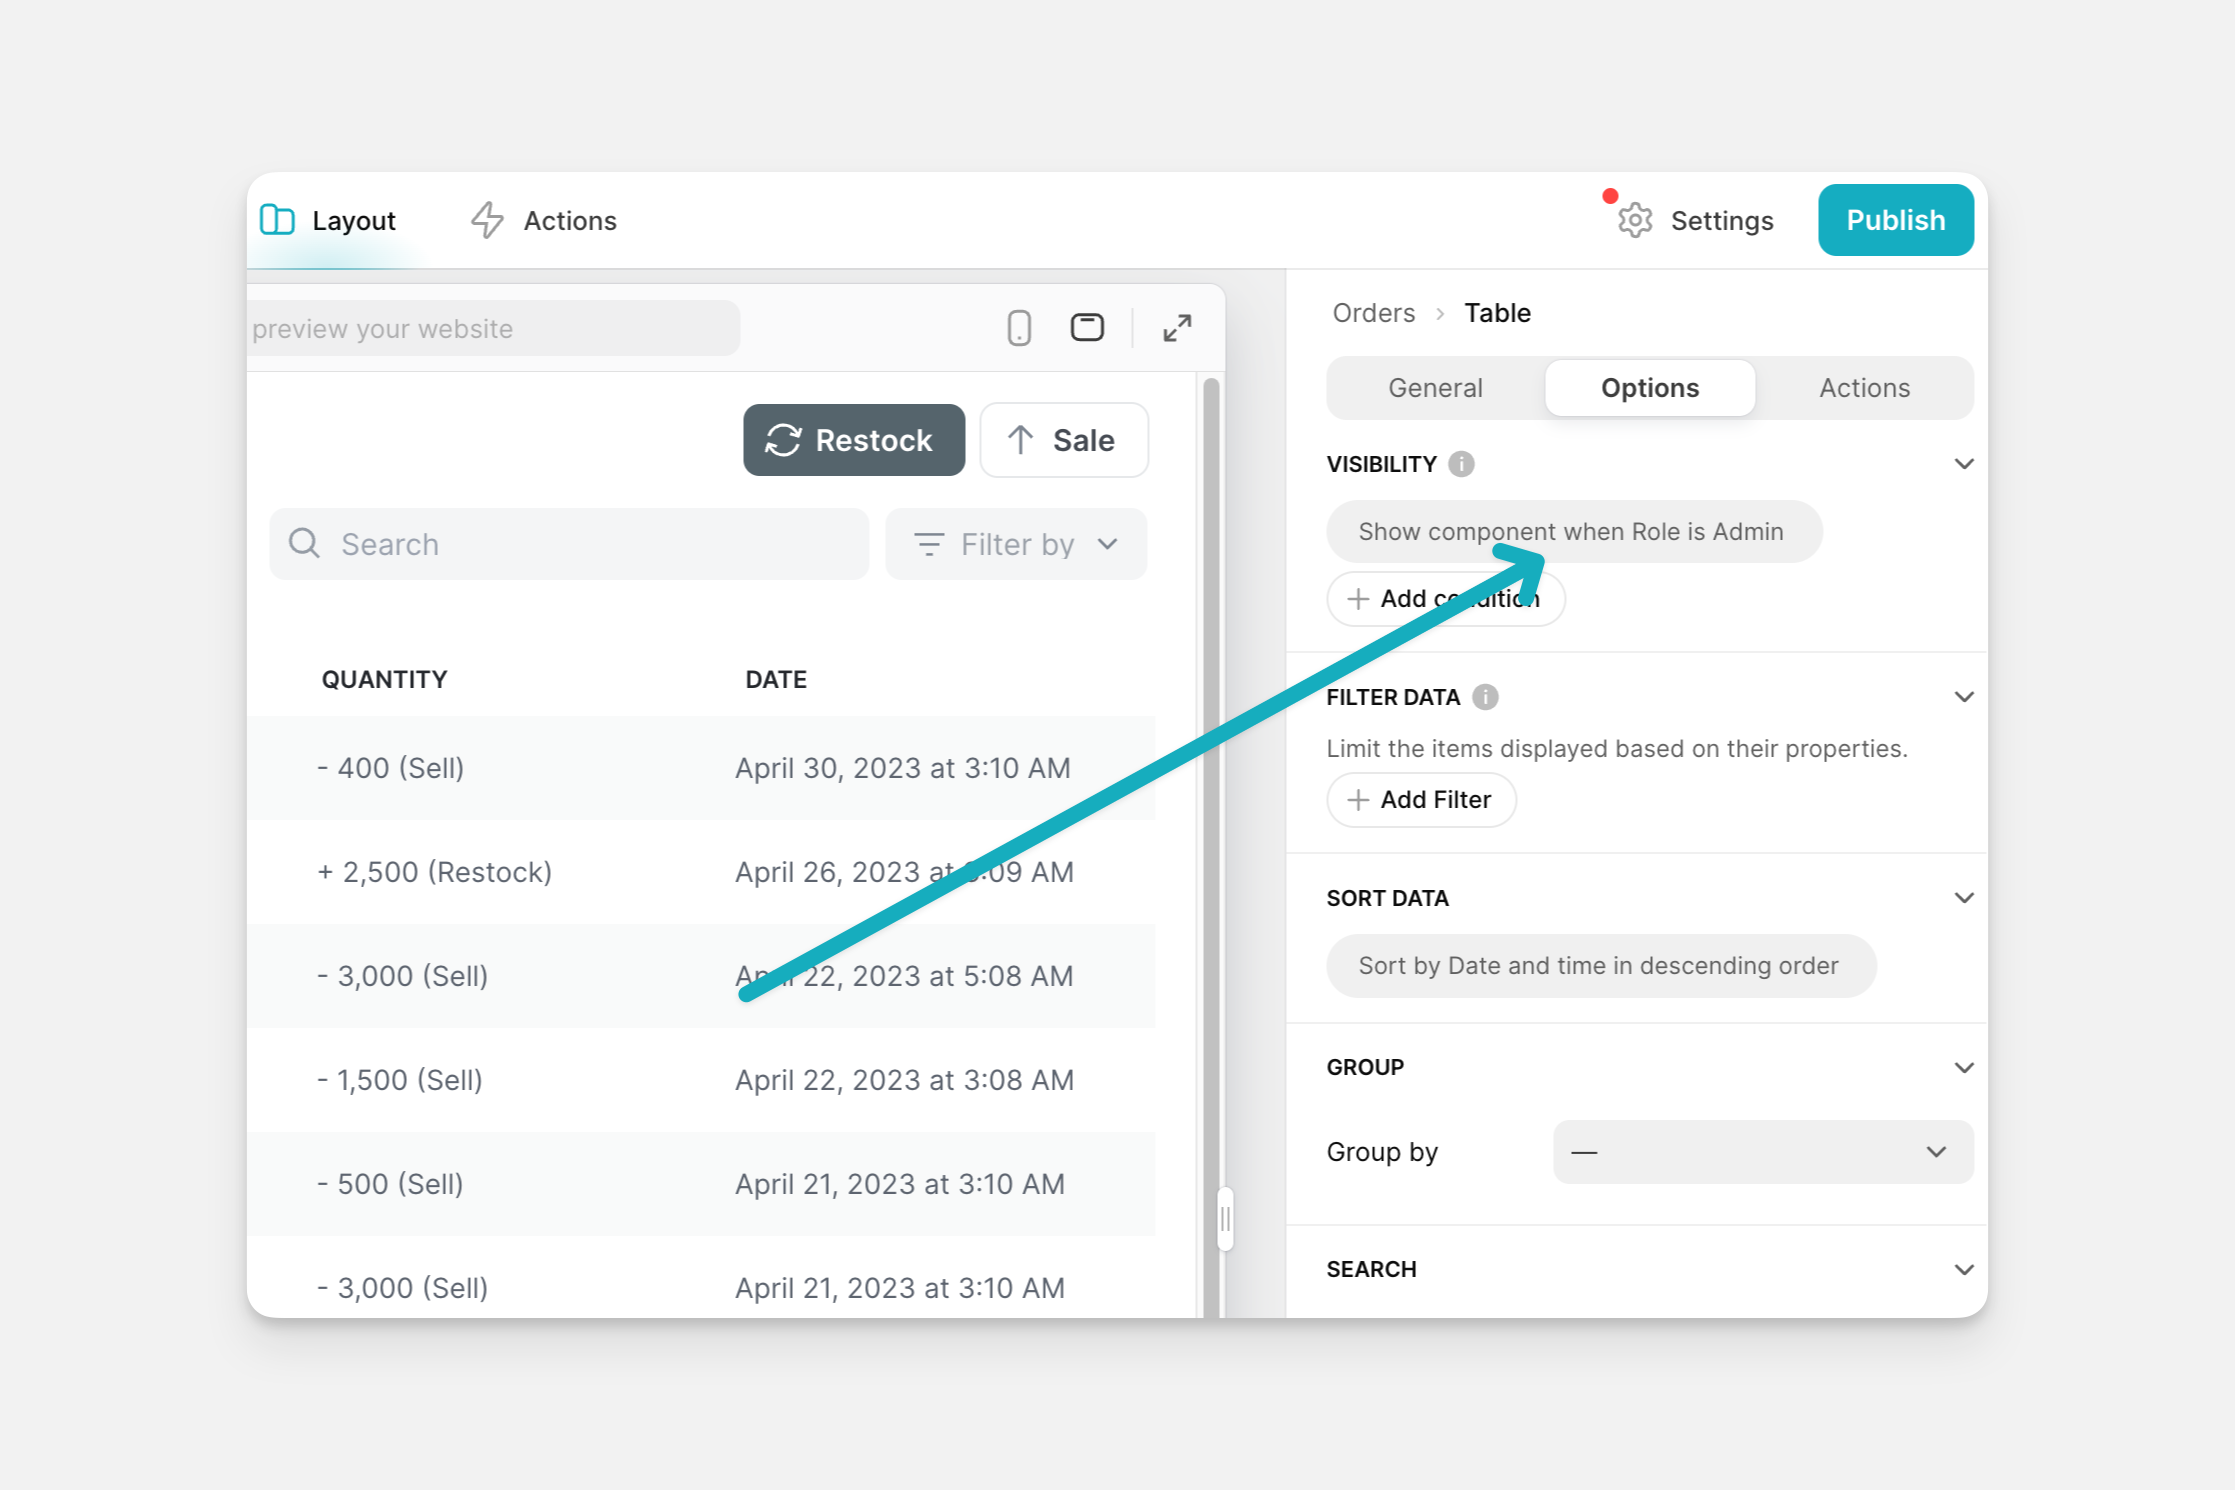
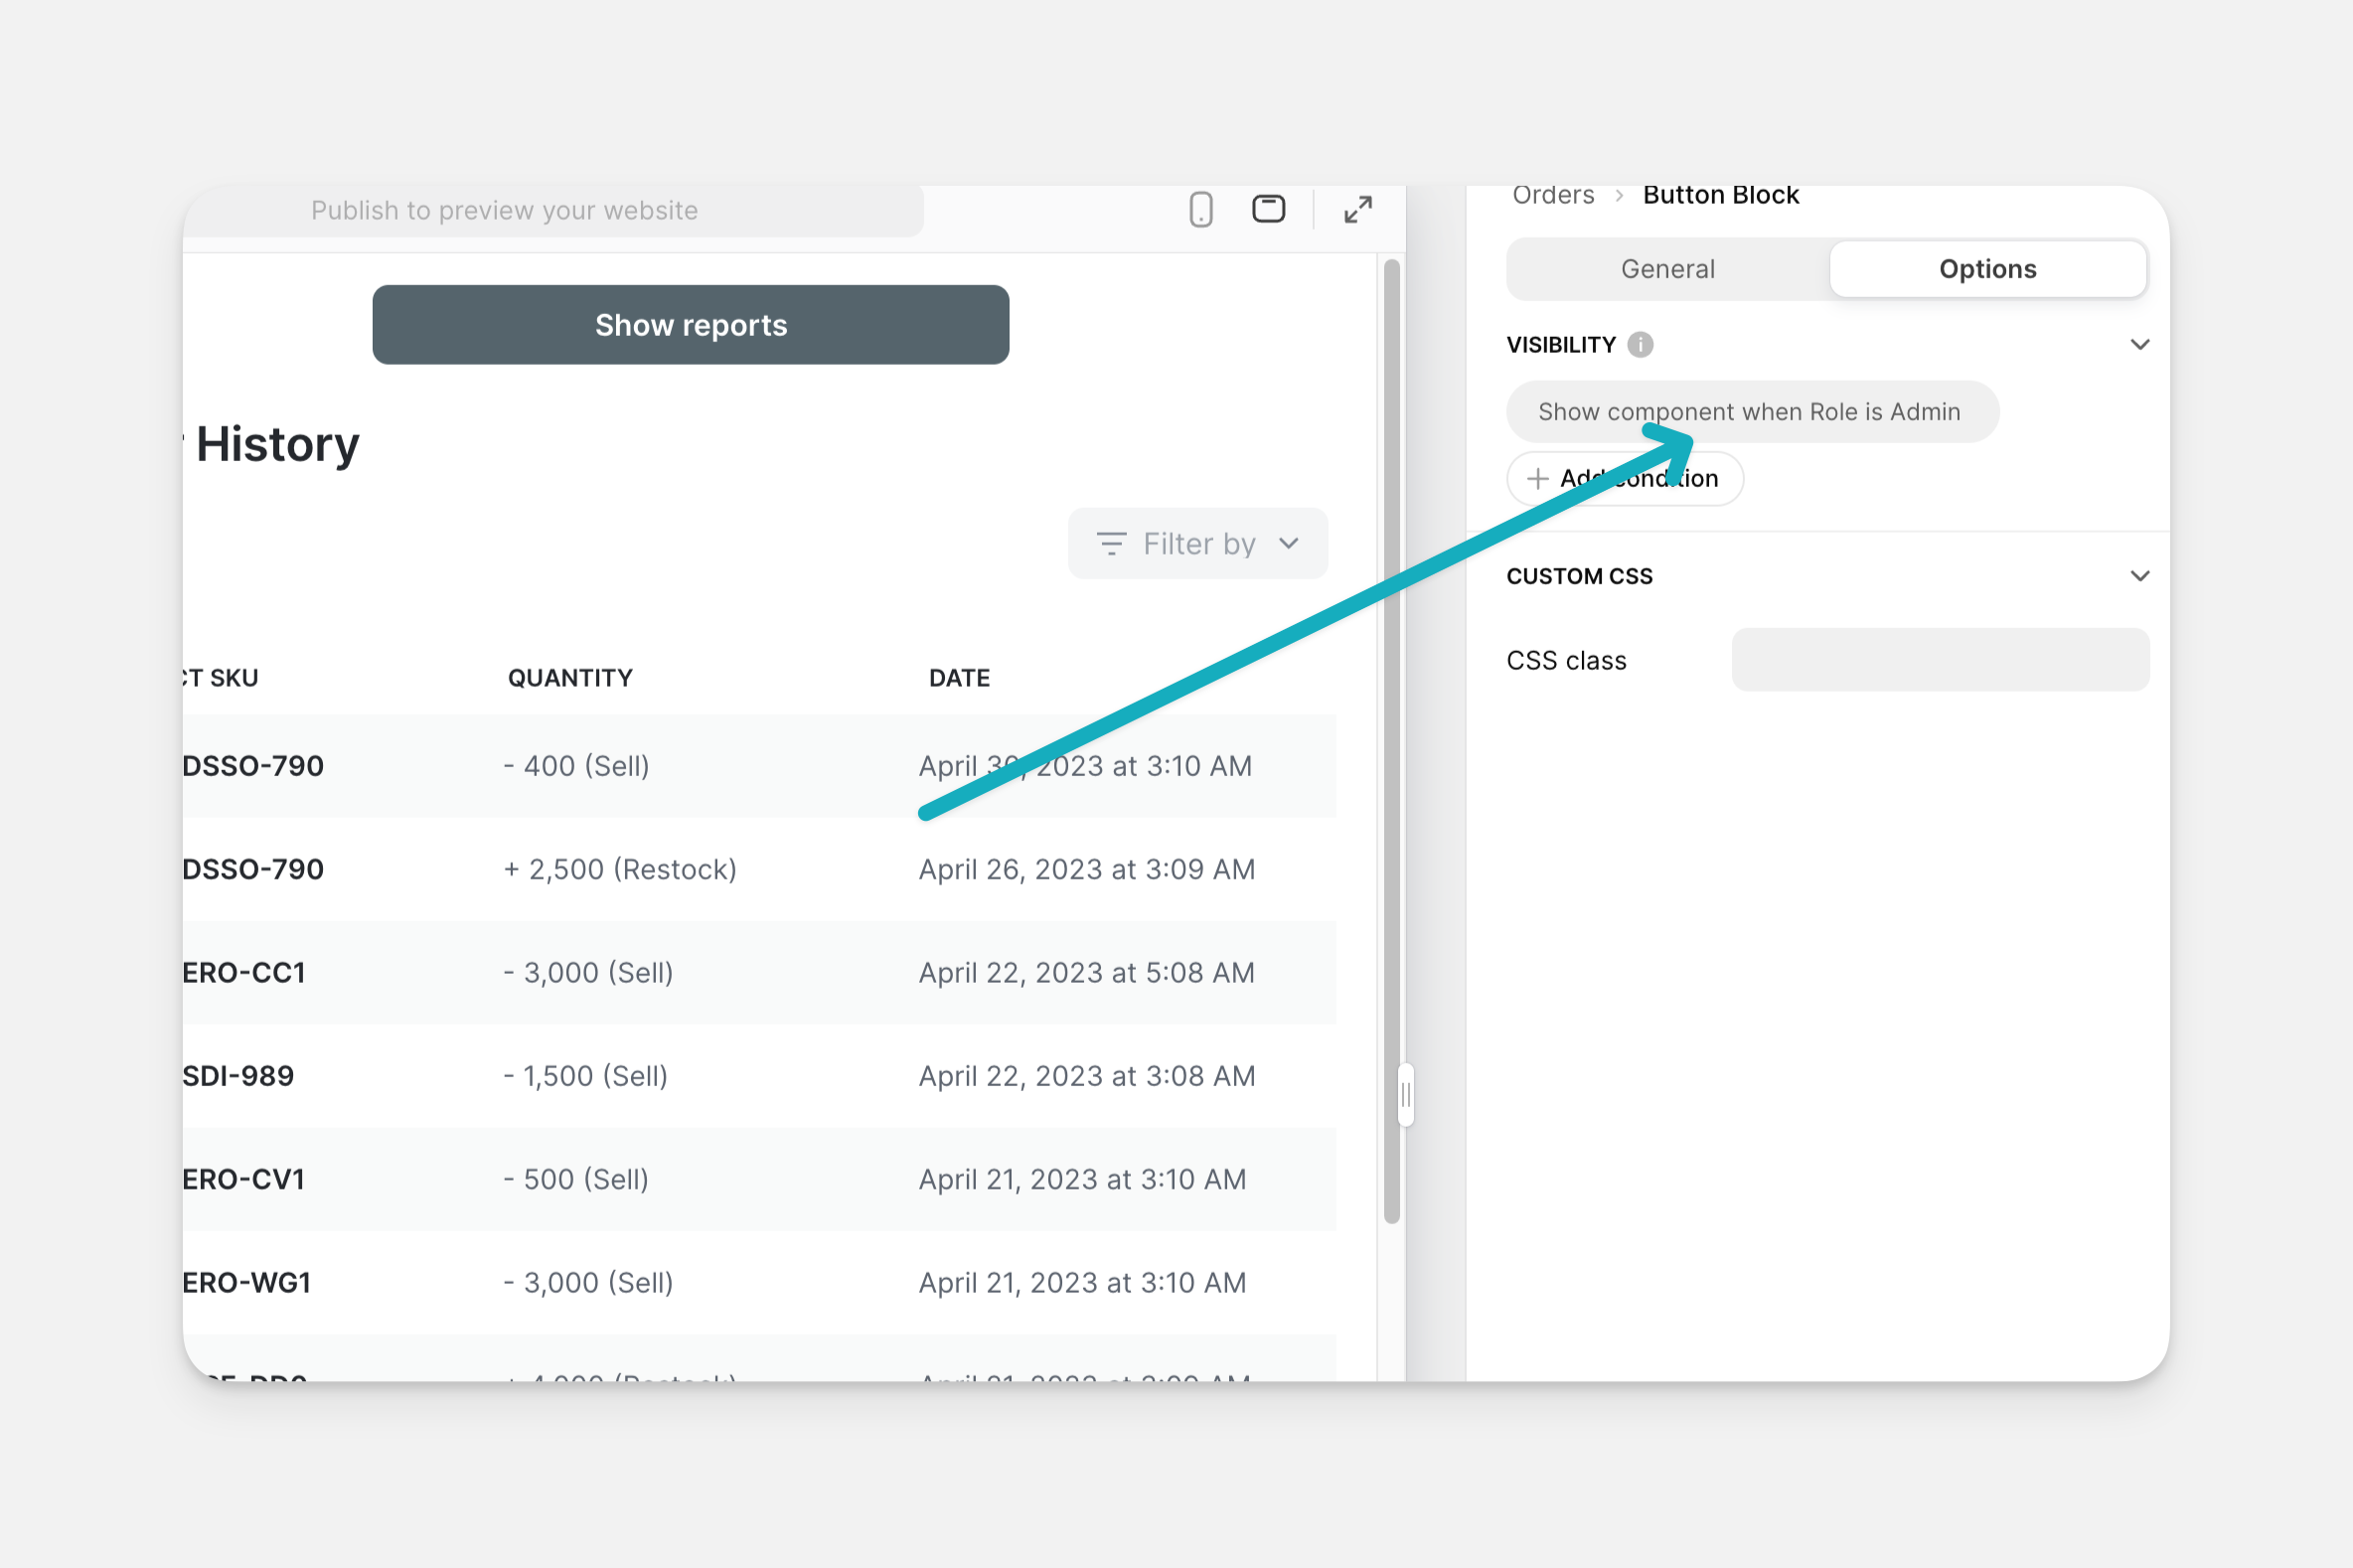
Component Visibility
To set a condition on a component's visibility, head to the Options section in the component's settings. You can add a condition based on the table's data. Once you add this condition, the component may disappear from the app's screen, but you can still access it from the Components panel on the left side of the Layout Editor.
In the image below, the button component is only shown if the User's role is Admin.
See our full guide on visibility conditions to learn more.
Conditional add, edit, and delete
Allowing users to add, edit, and delete records can be powerful, but you'll almost certainly want to restrict this to only certain items or to certain users. To apply conditions to a collection, click on the Collection component and go to the Actions tab in its settings. You can enable or disable add/edit/delete, and you can also add custom conditions for each one.
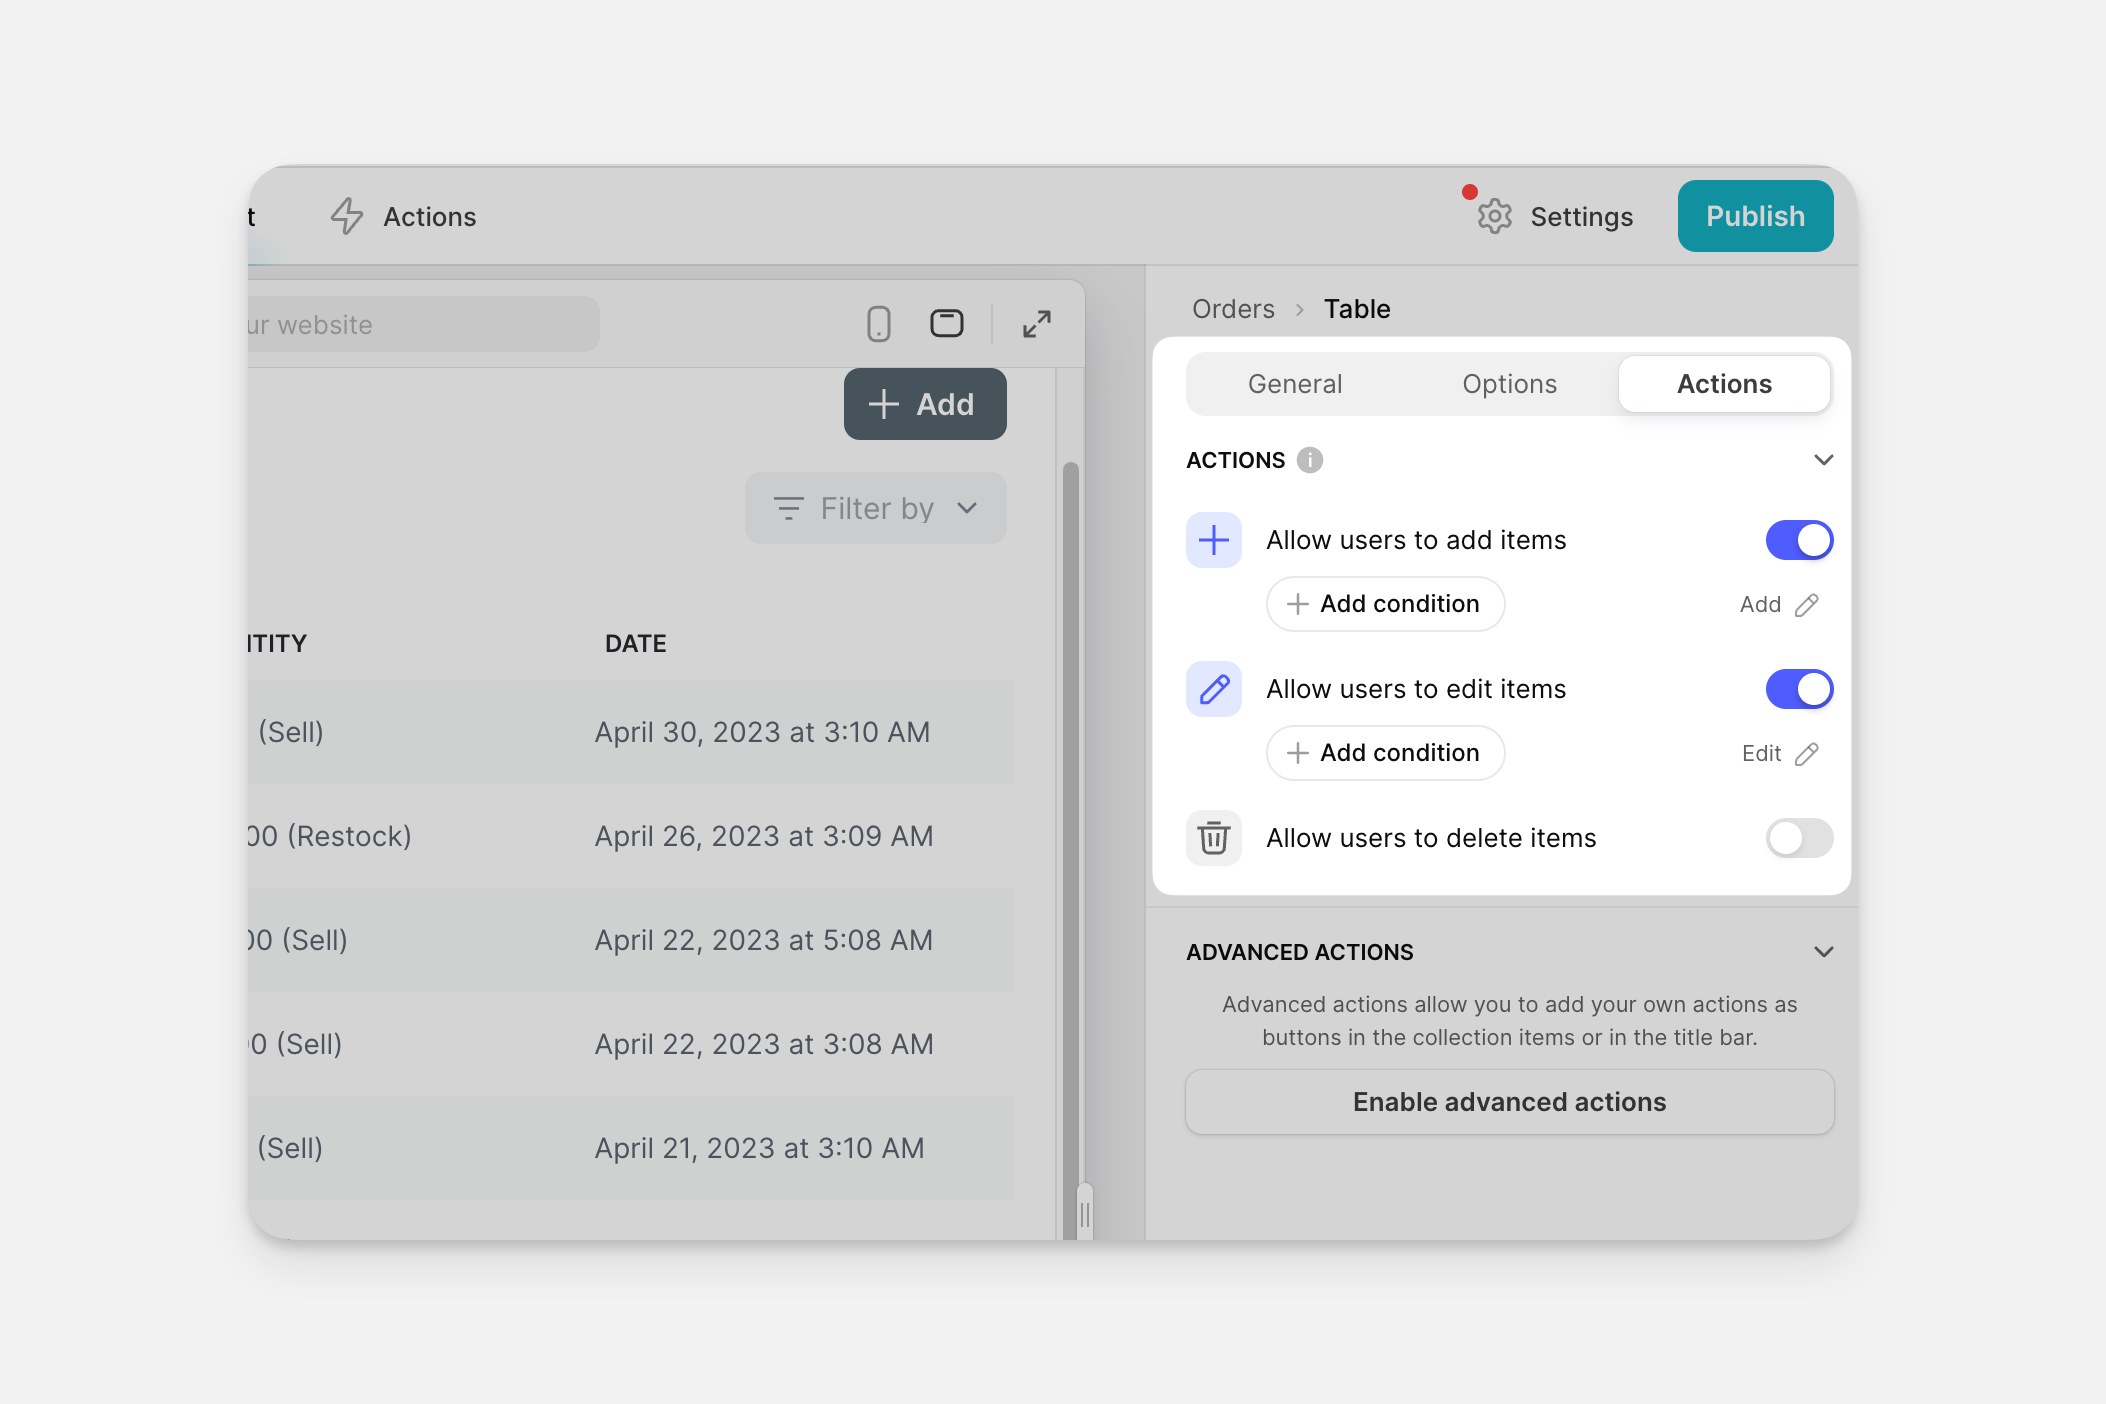
You could set conditions like:
Only allow adding items if the total number of items is below 100
Only allow a user to add items if they are an Admin
Only allow users to add items if they've completed their user profile
What values do you have access to in conditions?
When adding conditions, you can choose from the following list:
is
is not
is empty
is not empty
includes
doesn't include
is included in
is not included in
User Profile
If you've configured a User Profile table for your app, the data related to the user who's currently logged in is available to use for conditions. You can use this in many ways to create a custom experienced based on the User Profile, but particularly when hiding tabs. To set conditions on a tab's visibility, you can only use values in the User Profile.